

![]() The Kingdom of Fredicus is a place that loves its heroes. Unfortunately, Reemus, exterminator extraordinaire and overshadowed brother to the local dragon slayer, is having trouble convincing the populace that he deserves a little undying adulation. Sure, later in life he'll have Several Journeys to prove his bravery against invading death slugs. Right now, though, it's early in his adventure gaming career, and even after his first minimal-property-damaging bug slaying, he's have trouble getting people listen to the glorifying ballads written by his faithful bear companion, Liam. So a-questing he goes, in search of glory, gratitude, and, most importantly, a soft bed. It's The Ballads of Reemus: When the Bed Bites, the first premium downloadable adventure game in the popular Reemus series, produced by Click Shake Games! And while the anticipation may have driven us all a little buggy, it was totally worth it.
The Kingdom of Fredicus is a place that loves its heroes. Unfortunately, Reemus, exterminator extraordinaire and overshadowed brother to the local dragon slayer, is having trouble convincing the populace that he deserves a little undying adulation. Sure, later in life he'll have Several Journeys to prove his bravery against invading death slugs. Right now, though, it's early in his adventure gaming career, and even after his first minimal-property-damaging bug slaying, he's have trouble getting people listen to the glorifying ballads written by his faithful bear companion, Liam. So a-questing he goes, in search of glory, gratitude, and, most importantly, a soft bed. It's The Ballads of Reemus: When the Bed Bites, the first premium downloadable adventure game in the popular Reemus series, produced by Click Shake Games! And while the anticipation may have driven us all a little buggy, it was totally worth it.
 Controls should be familiar to most point-and-click players. Click the screen to interact with objects, talk to other characters, or move Reemus and Liam around. If you wish to use an object in your inventory, click it, and then where you would like to attempt to use it. Occasionally there will be sections where Reemus and Liam split up. You'll switch between the characters by clicking the icon in the top right corner. The gear icon brings up the display and audio options, including whether you like voice acting, word balloons, or both. Your progress is automatically saved. Purchasing The Ballads of Reemus: When the Bed Bites grants you access to both the browser and download versions of the same game. Also available is a Special Edition featuring a signed CD of the game, a T-Shirt, Stickers, and the game's soundtrack.
Analysis: Developers making the leap from free to paid-for often face a hard-sell to the gamers of the internet. Succeeding requires the game to have ambition: ambition in aesthetics, in programming, in presentation, and in scope. Zeebarf and Steve Castro then, must be some heck-of ambitious designers, since The Ballads of Reemus is everything that the fans of the series could hope for. Like a well-made big budget TV show movie adaptation, The Ballads of Reemus has the familiar flavor and humor of the original series, but scaled-up and unafraid to fix what needs to be fixed.
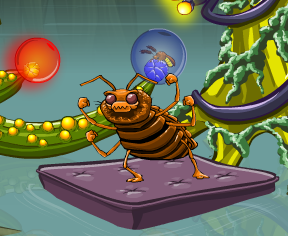
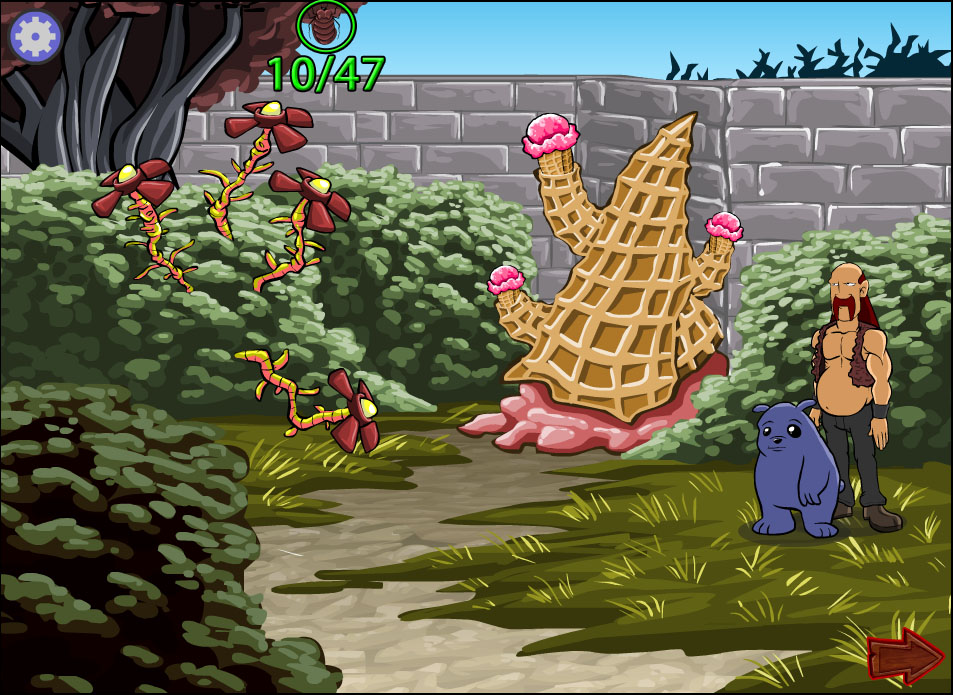
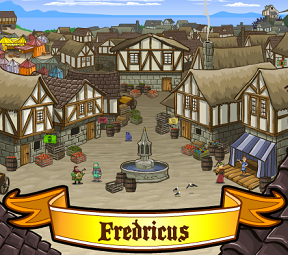 First of all, the art of Reemus's world is absolutely awesome, typical for Zeebarf's work. It should be no surprise that the creator of The Visitor series knows how to design a score of ghoulishly wacky creatures, but it's his flora, not fauna which is the most interesting. Infusing personality into mere plant life cannot be an easy thing, but from the delicious looking Ice Cream Cactus, to the unappealing Halitosis Bush, to the unsettling Swamp Blisters, the world is populated with a forest of wonderful creations. Almost paradoxically, while the plotting tends more to the slice-of-life comedy genre than the epic-adventuring parody flavor of Journeys (at least at first), it makes the world feel bigger, not smaller. We get to see so many locations and meet so many characters that Fredicus becomes the kind of fantasy world that, like Discworld, feels lived-in, if that makes any sense: a place that, while fantastic and peppered with modern pop-culture jokes, makes you forget that it's a recently created place rather than something from a classic goofy fairy tale.
 Of course, the shiniest graphics in the world would be lacking without the writing to back it up. On this point, The Ballads of Reemus, also shines. The dialogue is well-crafted and the characters all sparkle with personality. There is a funny response for nearly everything you would try to do, always a mark of developers that have taken their time to do a job right. The puzzles do have that shade of adventure game illogic to them (though the solutions often make a perfect skewed sense in retrospect, even when you've clicked them out by brute force). That said, the challenge level is low, and even if players get frustrated, its unlikely they'll be seriously stuck.
Another feature worth mentioning is the new inclusion of voice-acting, most of which is very good. Of course, they probably won't be the voices you have for the characters in your head, but they'll grow on you. This reviewer has already mentioned his desire for Josh Tomar to walk around and narrate stuff in his everyday life, but he delivers a manic performance as Reemus that is surprisingly fitting, and helps to keep the quicken the pace when the game needs it. The rest of the cast is no less impressive, especially Zeebarf himself as Liam, and Dave Dunham as Waldorf the Bard. On the other hand, the musical score, though it has a large number of tracks and the right eerie faux-medieval feel, can get repetitive, especially if you remain at a single screen to work on a puzzle for a long period of time.
The Ballads of Remus is the complete package, perfect for both fans and newcomers alike. It's just the right length for a ten dollar game, and with it's optional quests and easter eggs, will keep adventurers entertained for hours. Whatever the form you play it in, its charm will undoubtedly exterminate your boredom.
Play The Ballads of Reemus: Demo
![]() Windows:
Windows:
Get the full version
![]() Mac OS X:
Mac OS X:
Get the full version
![]() Linux:
Linux:
Get the full version


Walkthrough Guide
(Please allow page to fully load for spoiler tags to be functional.)
The Ballads of Reemus: When the Bed Bites Walkthrough
Achievements
The Ballad of Reemus
This achievement is earned upon completing the entire game.
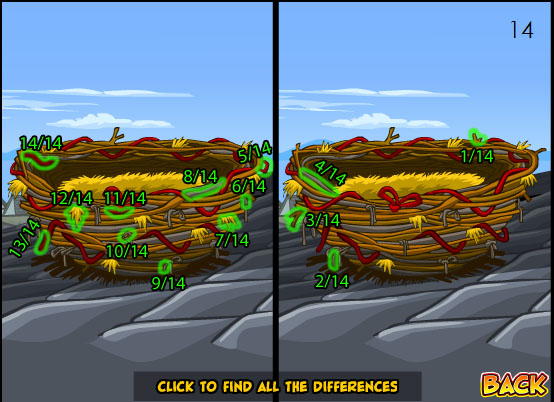
The Ballad of the Lovebirds
This achievement is earned in the Back Home Scene.
Speak with the love birds sitting in the nest on the Rooftop.
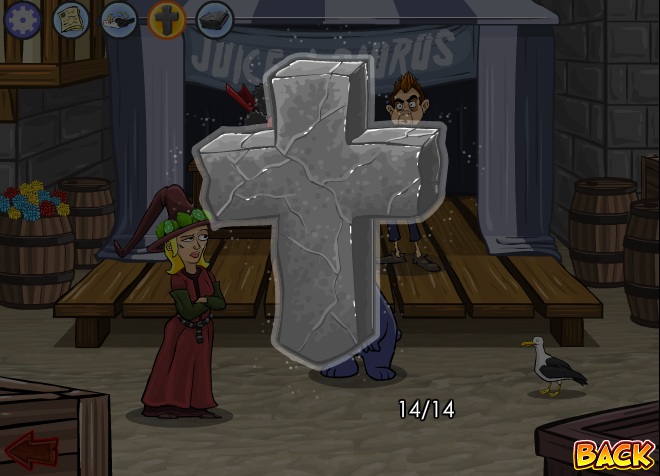
Find all of the 14 differences between the two pictures of the nest.
Solution.
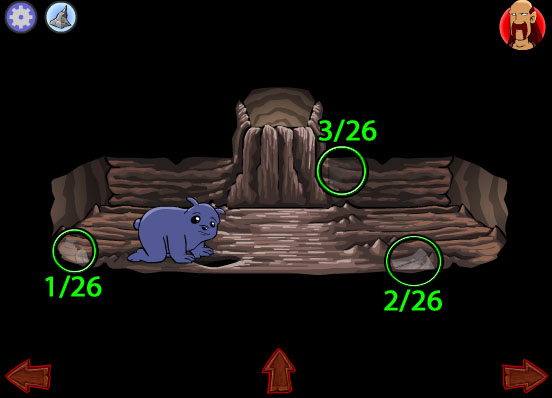
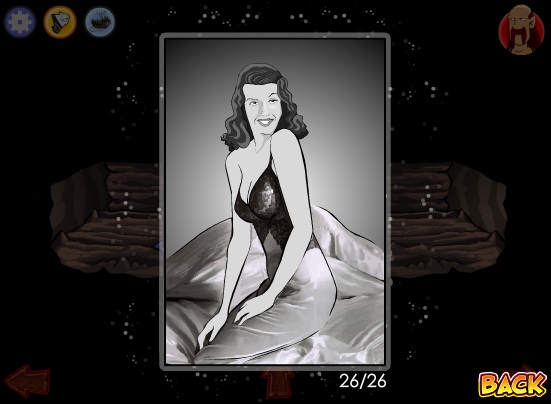
The Ballad of the Moth: Poster Piece Locations
This achievement is earned in the Termite Cells scene.
First speak with the moth imprisoned in the Third Cell. He will ask you to collect the 26 pieces of his ripped up poster. They can be found in the following locations:
Air Duct
Pieces 1-3:
Screenshot.
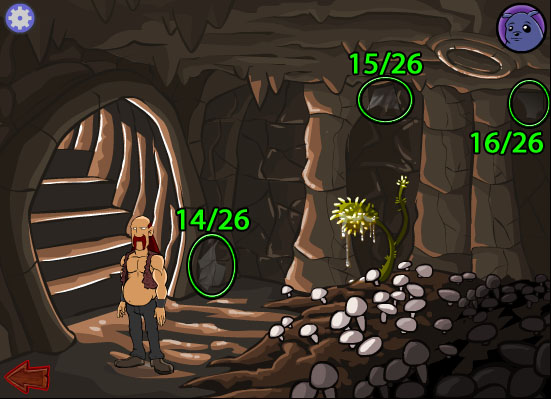
Stalactite Cavern
Pieces 4-9:
Screenshot.
Thermostat Room
Pieces 10-13:
Screenshot.
Fungi Garden
Pieces 14-16:
Screenshot.
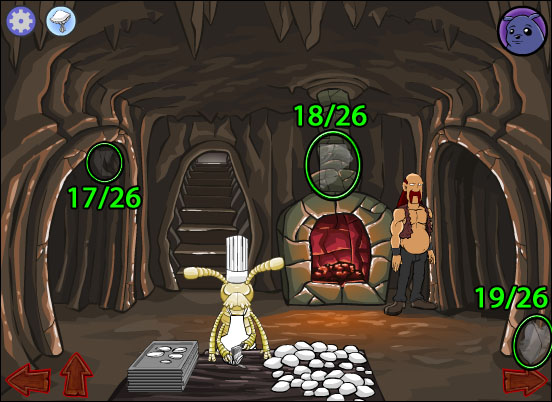
Kitchen
Pieces 17-19:
Screenshot.
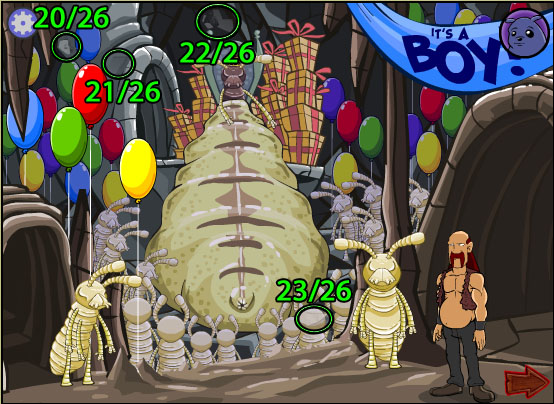
Queen's Baby Shower
Pieces 20-23:
Screenshot.
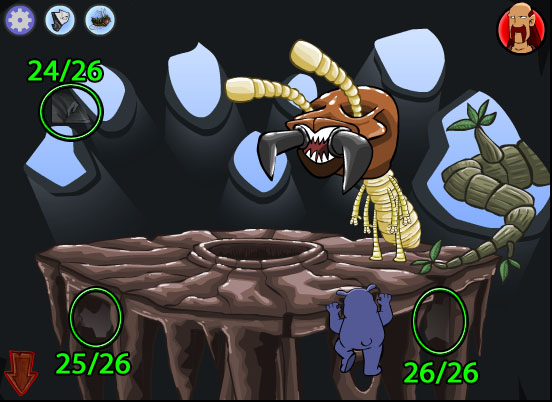
Guarded Platform
Pieces 24-26:
Screenshot.
When you have collected all of the fragments, click the POSTER in Liam's inventory to assemble all of the fragments.
Click and drag a poster piece to move it, or simply click to rotate it. When a poster piece is correctly positioned, it will lock in place.
Solution.
Bring the completed poster back to the moth in Cell 3 to earn the Ballad of the Moth achievement.
The Ballad of The Thieving Bear: Honeycomb Piece Locations
This achievement is earned in the Back Home scene.
Go to the Cellar and speak with the bear hiding inside the barrel. He will ask you to collect the 16 pieces of the honeycomb. They can be found in the following locations:
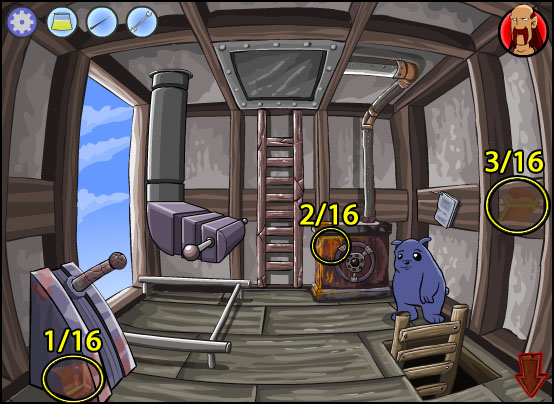
Telescope Room
Pieces 1-3:
Screenshot.
Cellar
Piece 4:
Screenshot.
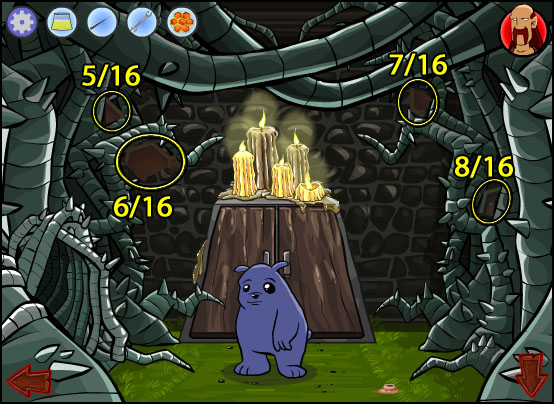
Secret Entrance
Pieces 5-8:
Screenshot.
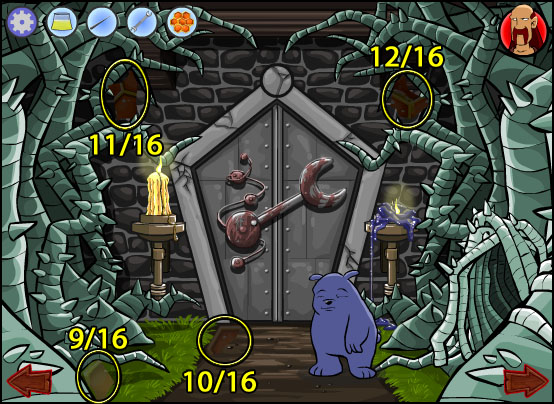
Metal Door
Pieces 9-12:
Screenshot.
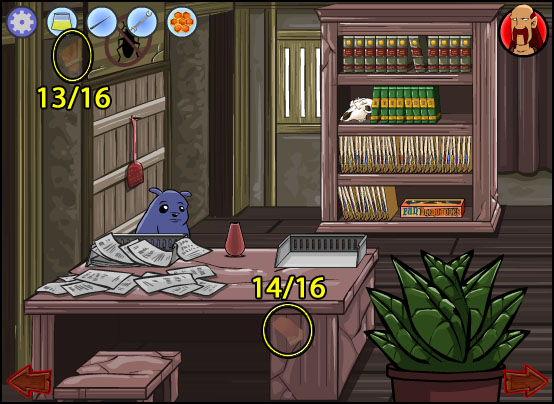
Exterminators' Home (Left Side)
Pieces 13-14:
Screenshot.
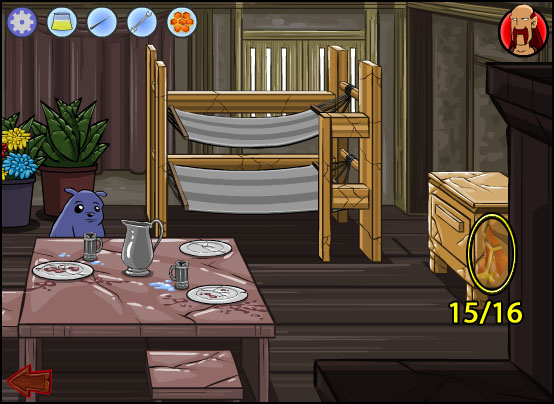
Exterminators' Home (Right Side)
Piece 15:
Screenshot.
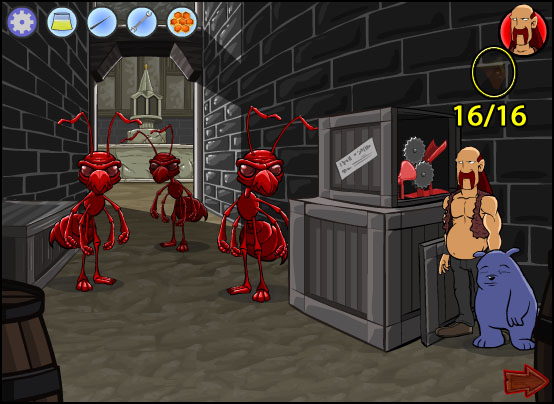
Fire Ant Alley
Piece 16:
Screenshot.
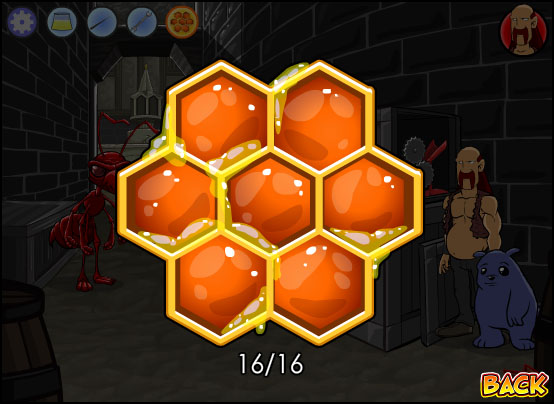
When you have collected all of the fragments, click the HONEYCOMB in Liam's inventory to assemble all of the fragments.
Click and drag a honeycomb piece to move it or simply click to rotate it. When a honeycomb piece is correctly positioned, it will lock in place.
Solution.
Bring the completed honeycomb back to the bear hiding in the barrel at the basement to earn the Ballad of the Thieving Bear achievement.
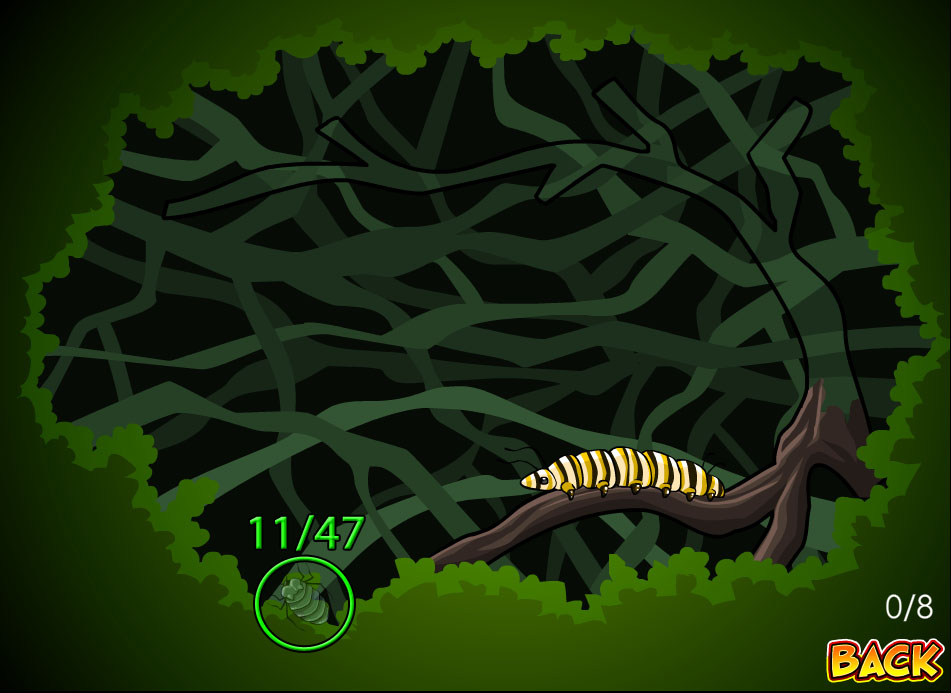
The Ballad of the Caterpillar: Caterpillar Branch Locations
This achievement is earned in the Construction Site scene.
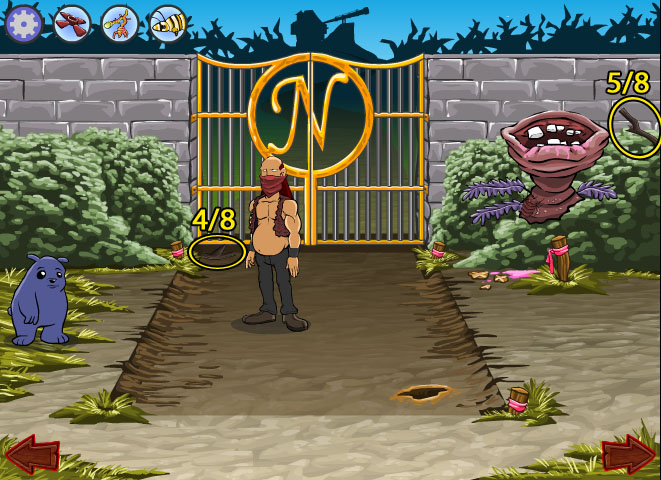
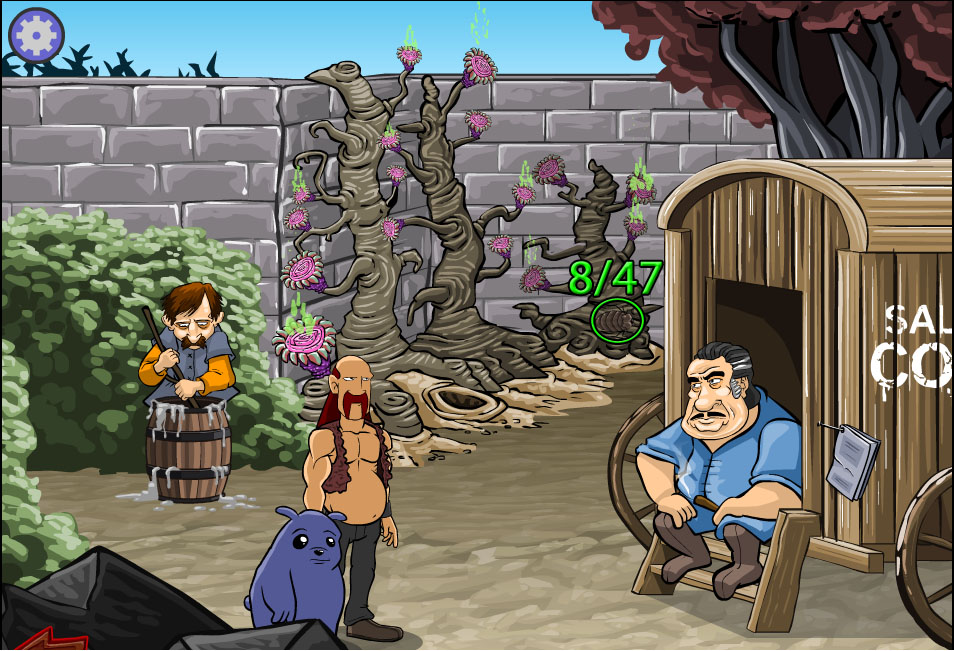
Go to Dr. Nova's Garden and click the right side of the dark green bush in the lower left corner to find the caterpillar. He will ask you to collect the 6 pieces of the branch.
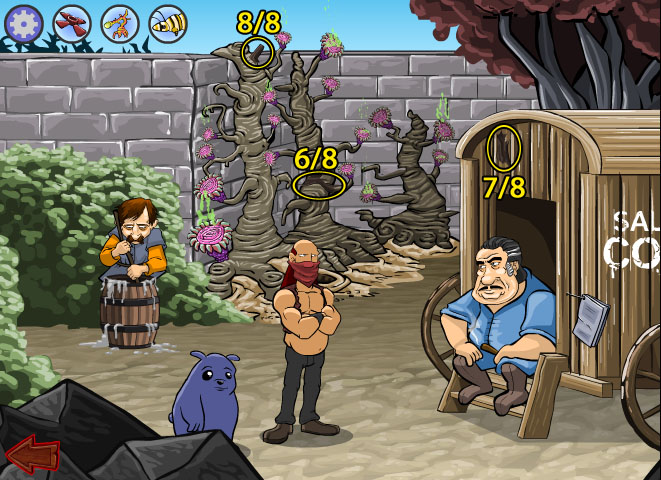
Dr. Nova's Garden
Pieces 1-3:
Screenshot.
Dig Site
Pieces 4-5:
Screenshot.
Sal's Worksite
Pieces 6-8:
Solution.
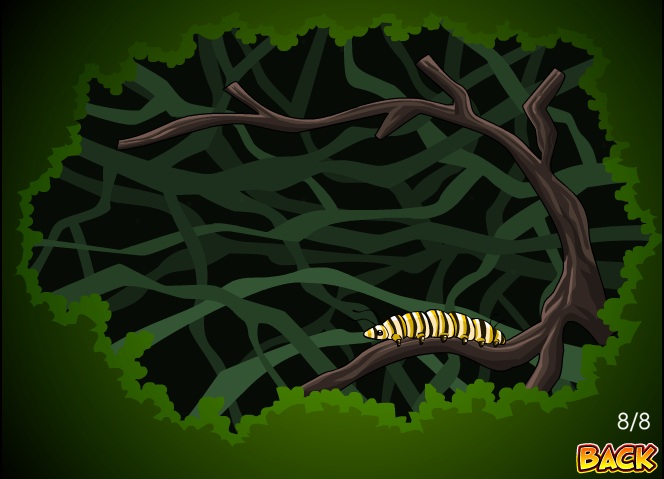
When you have collected all of the fragments, return to the caterpillar in the bush to assemble the twig inside the outline.
Click and drag a twig piece to move it or simply click to rotate it. When a twig piece is correctly positioned, it will lock in place.
Solution.
Once the twig is correctly assembled, you will earn The Ballad of the Caterpillar achievement.
The Ballad of the Butterfly
This achievement is earned in the Fire Ant Hill scene after you have earned the Ballad of the Caterpillar achievement.
The caterpillar is now a butterfly and will fly past you when you reach the Condiment Forest area.
Click the butterfly and it will ask you to find the 10 differences between its left and right wing.
Solution.
The Ballad of the Seagull: Headstone Piece Locations
This achievement is earned in the Fredricus scene.
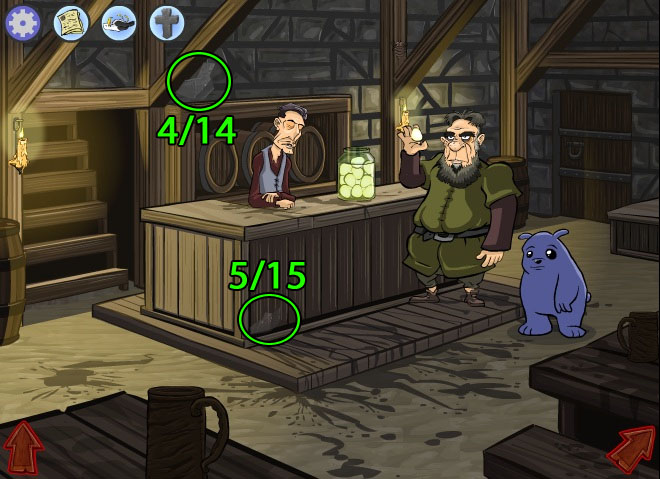
Go to the Imports area and show the DEAD SEAGULL from your inventory to the live seagull. He will ask you to collect the 14 pieces of the headstone. They can be found in the following locations:
Potter
Piece 1:
Screenshot.
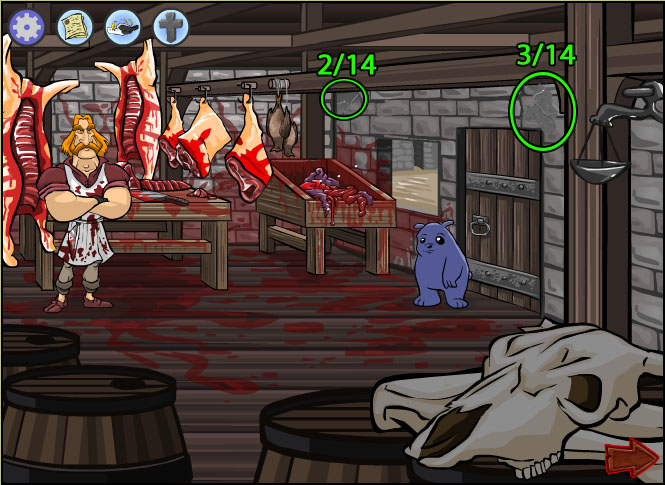
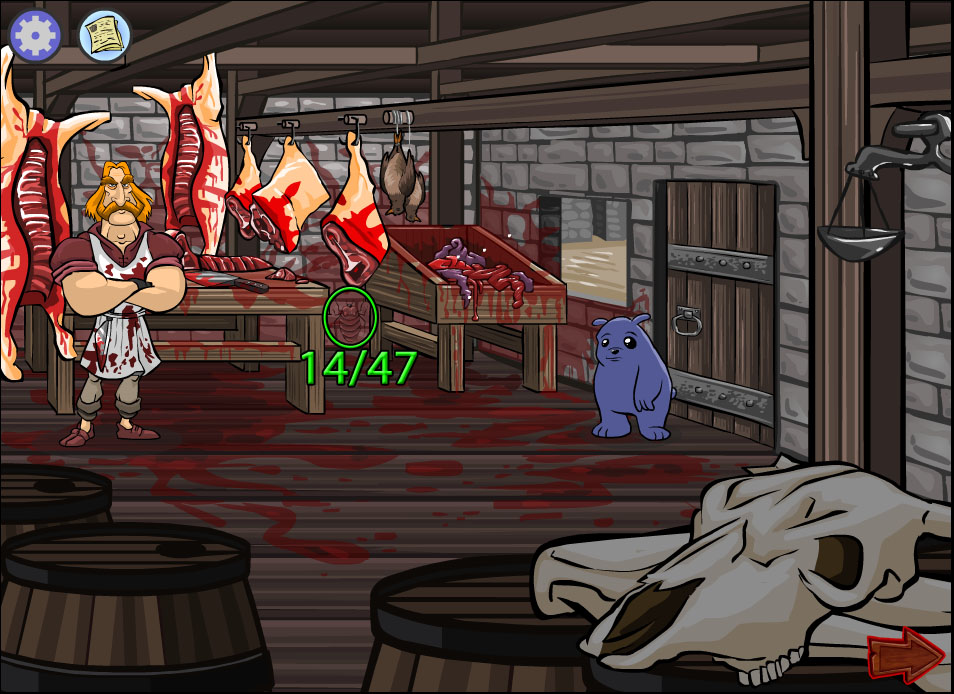
Butcher
Pieces 2-3:
Screenshot.
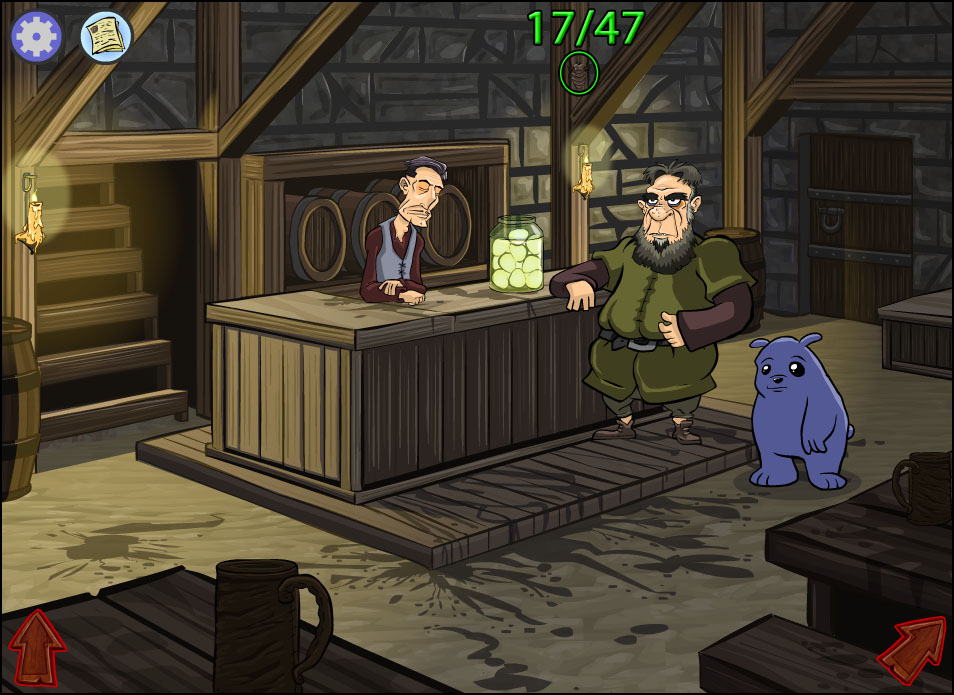
Pub
Pieces 4-5:
Screenshot.
Bedroom (inside the Pub)
Piece 6:
Screenshot.
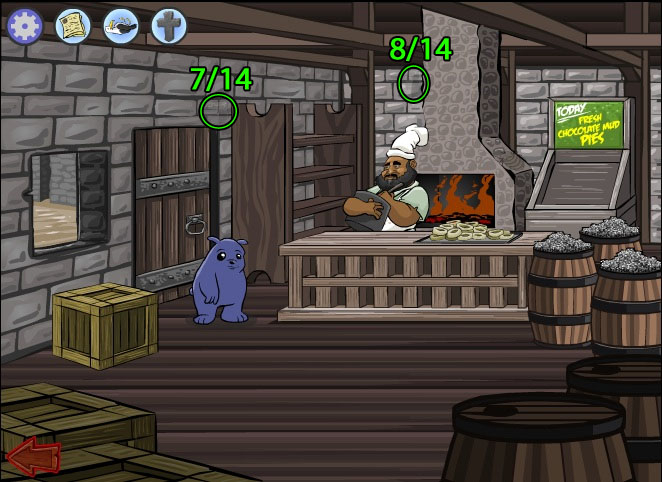
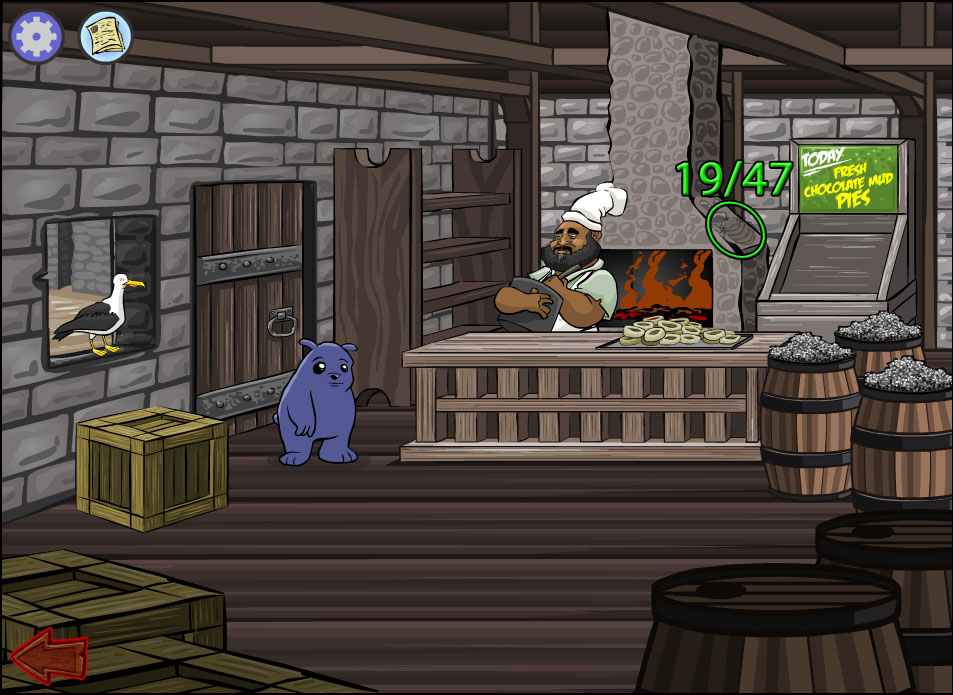
Bakery
Pieces 7-8:
Screenshot.
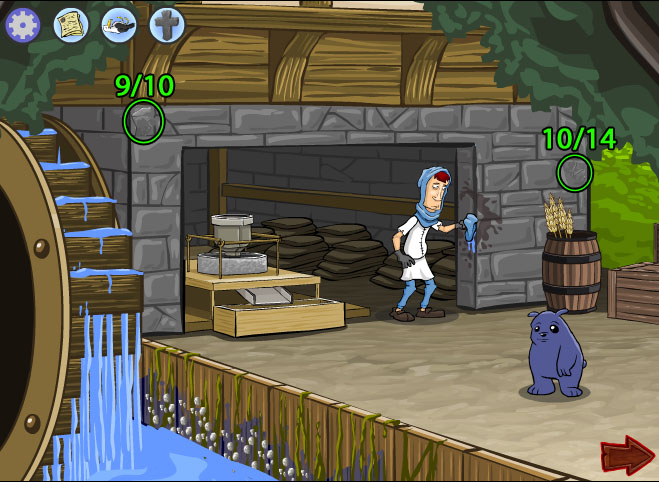
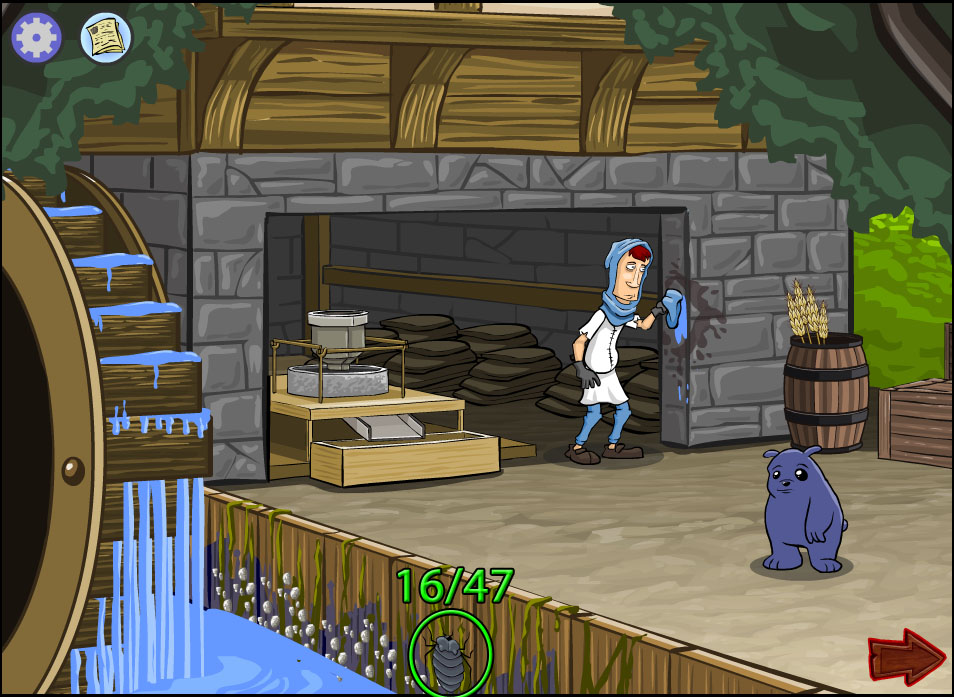
Mill
Pieces 9-10:
Screenshot.
Exterminator
Pieces 11-12:
Screenshot.
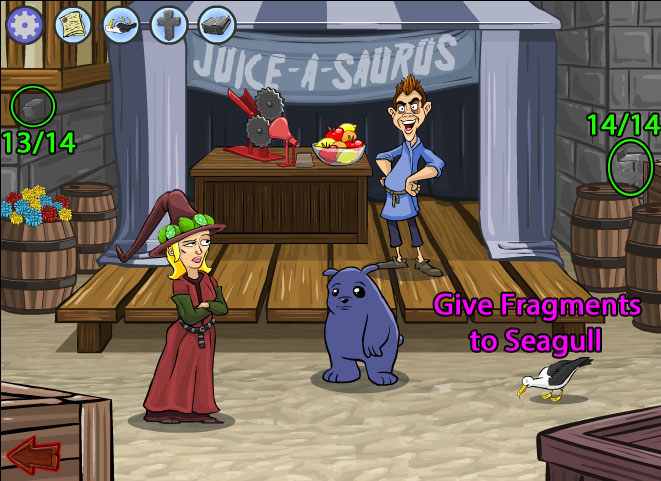
Imports
Pieces 13-14:
Screenshot.
When you have collected all of the fragments, click the HEADSTONE in Liam's inventory to assemble all of the fragments.
Click and drag a headstone piece to move it or simply click to rotate it. When a headstone piece is correctly positioned, it will lock in place.
Solution.
Bring the completed headstone back to the seagull at the Imports area to earn the Ballad of the Seagull achievement.
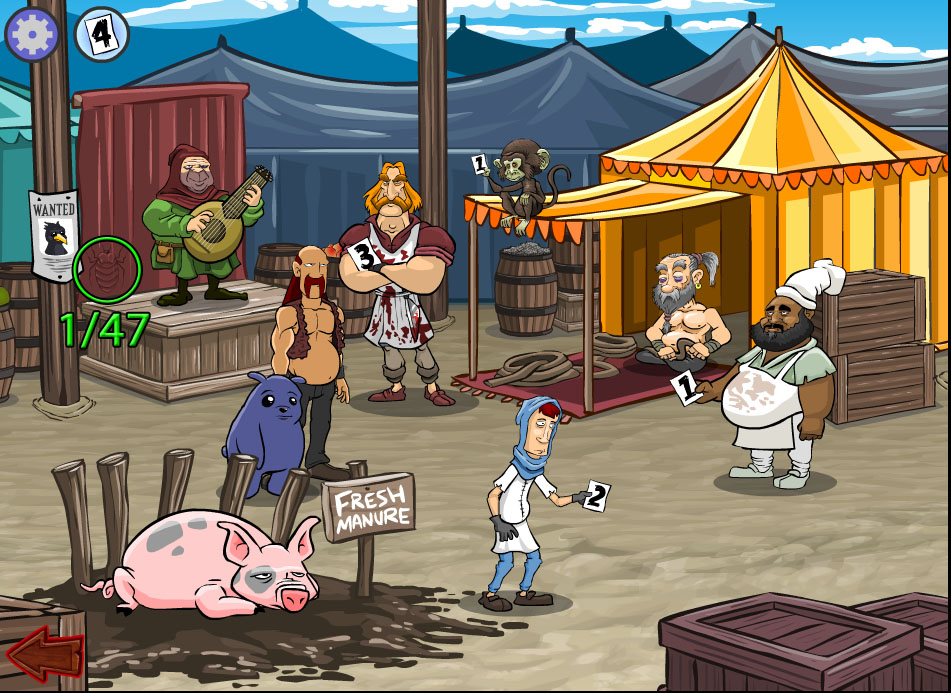
The Ballad of the Crushed Bugs: Hidden Bug Locations
Scene 2: The Market
Rope Maker's Tent - Bug #1:
Screenshot.
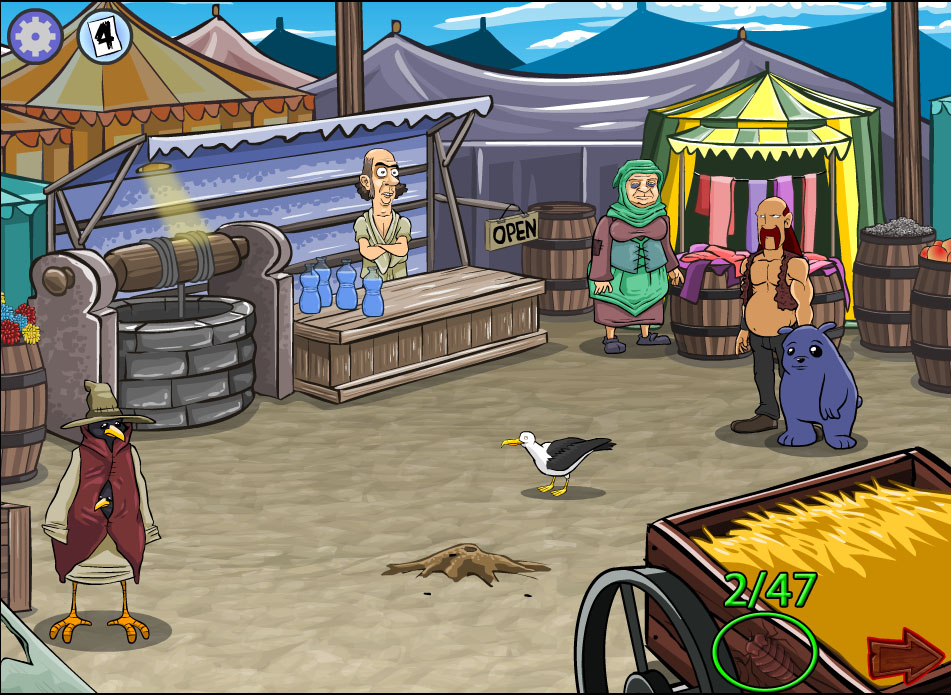
Vendor Booths - Bug #2:
Screenshot.
Scene 3: Apnea Swamps
Liam's View: On Land - Bug #3:
Screenshot.
Liam's View: Lake Bed - Bug #4:
Screenshot.
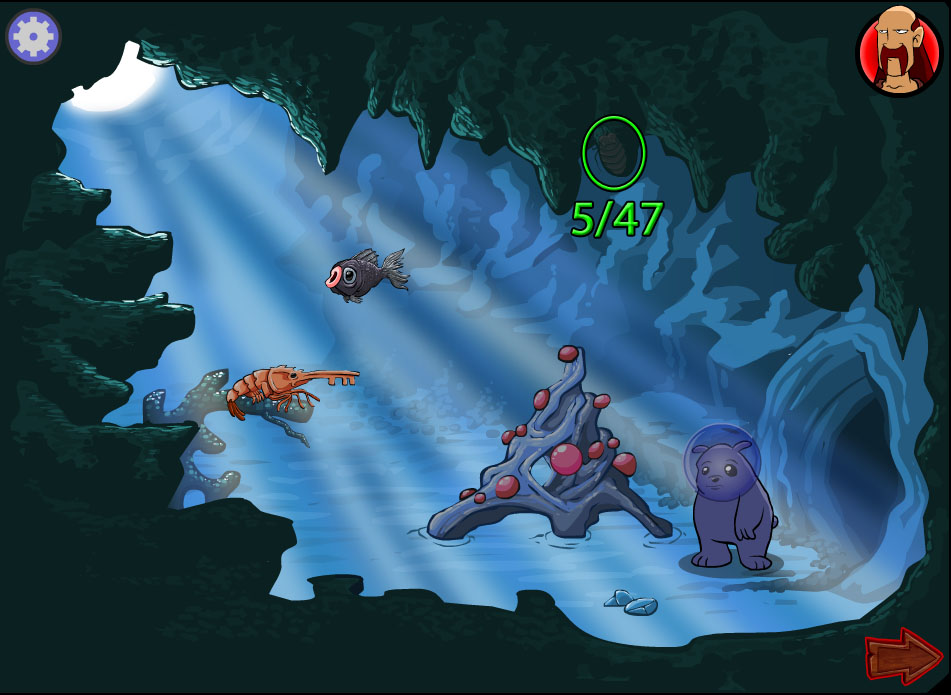
Liam's View: Sea Cavern - Bug #5:
Screenshot.
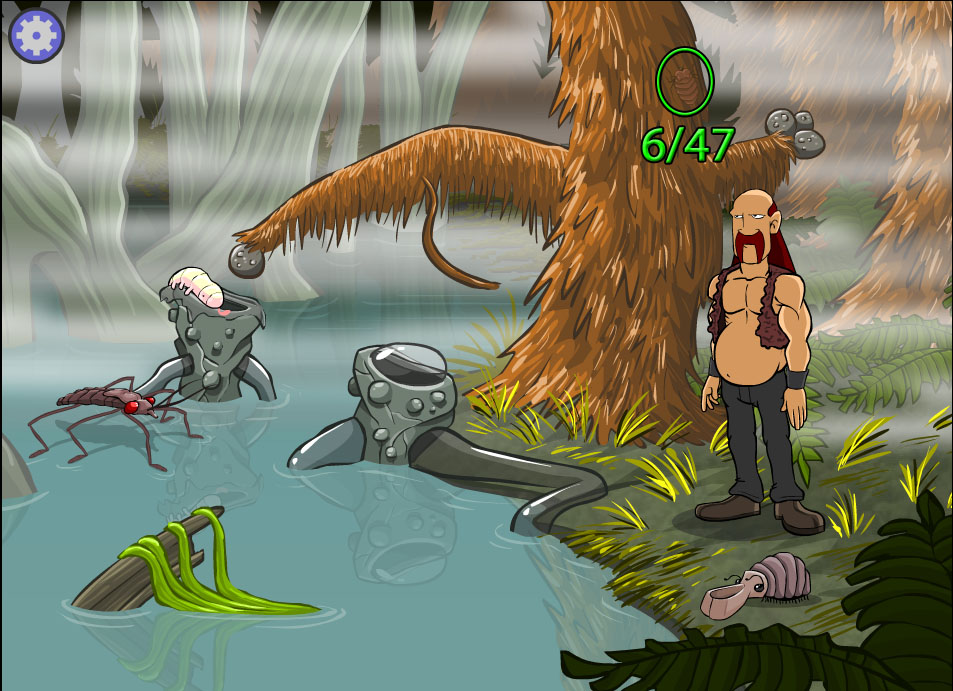
Reemus's View: Lakeside - Bug #6:
Screenshot.
Reemus's View: Witch's Lair - Bug #7:
Screenshot.
Scene 4: Construction Site
Sal's Worksite - Bug #8:
Screenshot.
Dig Site - Bug #9:
Screenshot.
Dr. Nova's Garden - Bug #10:
Screenshot.
Dr. Nova's Garden (inside caterpillar bush) - Bug #11:
Screenshot.
Scene 5: Fredricus
Town View - Bug #12:
Screenshot.
Potter - Bug #13:
Screenshot.
Butcher - Bug #14:
Screenshot.
Market - Bug #15:
Screenshot.
Mill - Bug #16:
Screenshot.
Pub - Bug #17:
Screenshot.
Pub (upstairs bedroom) - Bug #18:
Screenshot.
Bakery - Bug #19:
Screenshot.
Imports - Bug #20:
Screenshot.
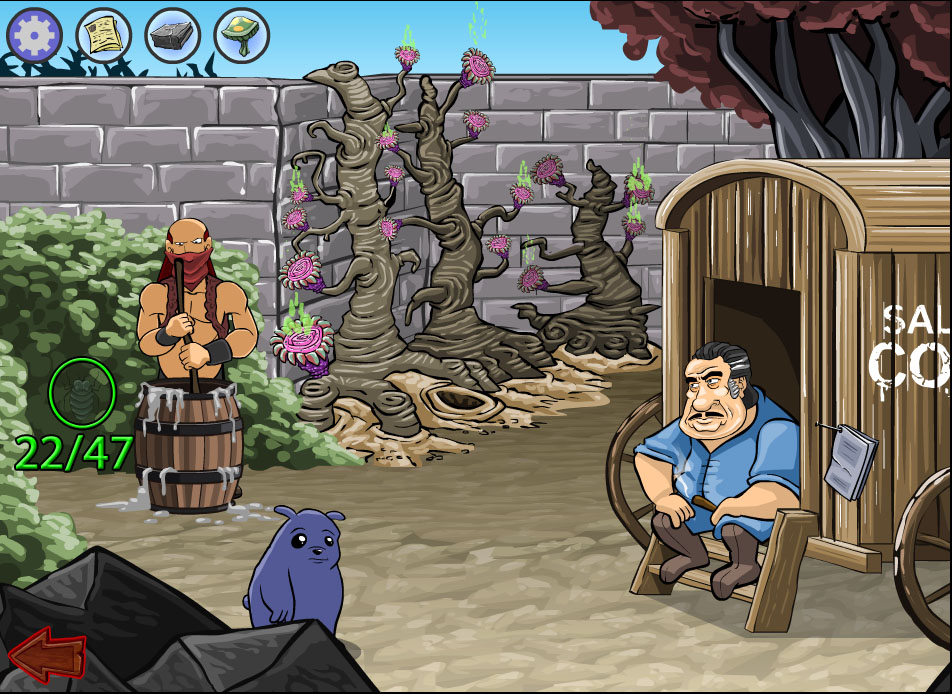
Exterminator - Bug #21:
Screenshot.
Construction - Bug #22:
Screenshot.
Scene 6: Fire Ant Hill
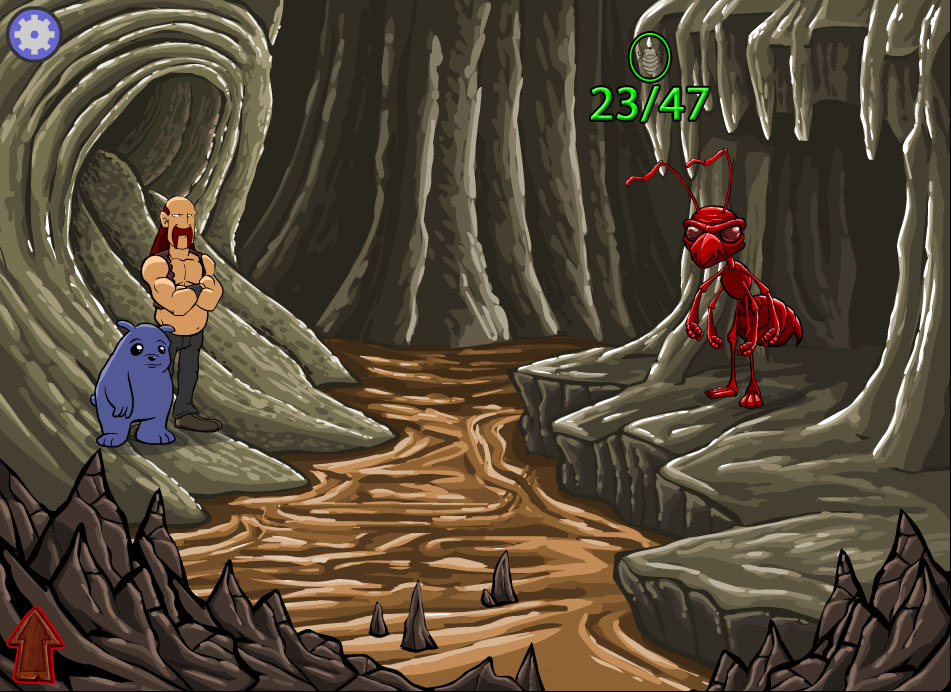
Cave - Bug #23:
Screenshot.
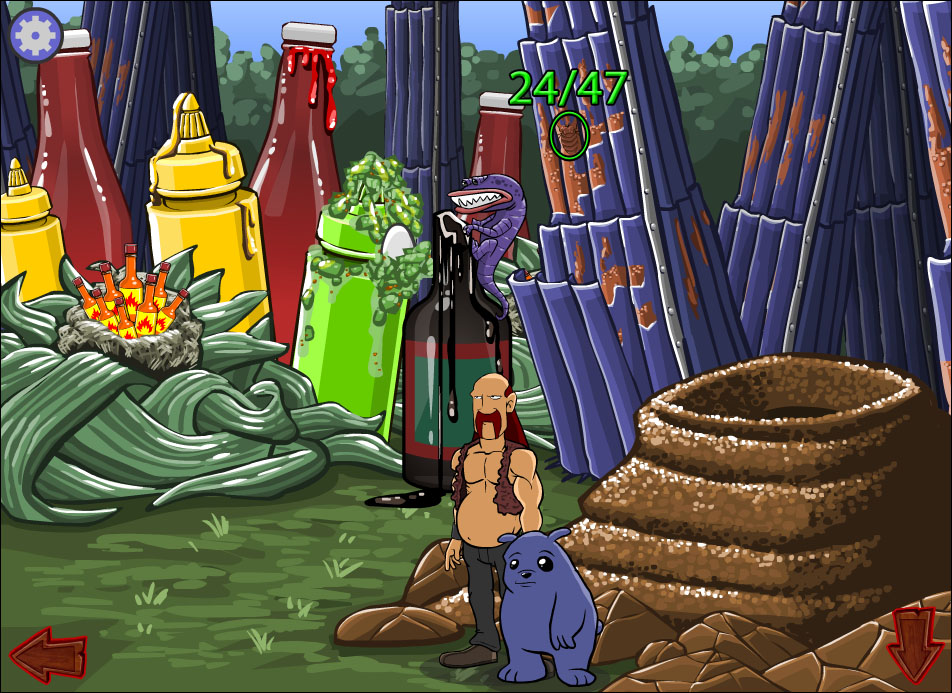
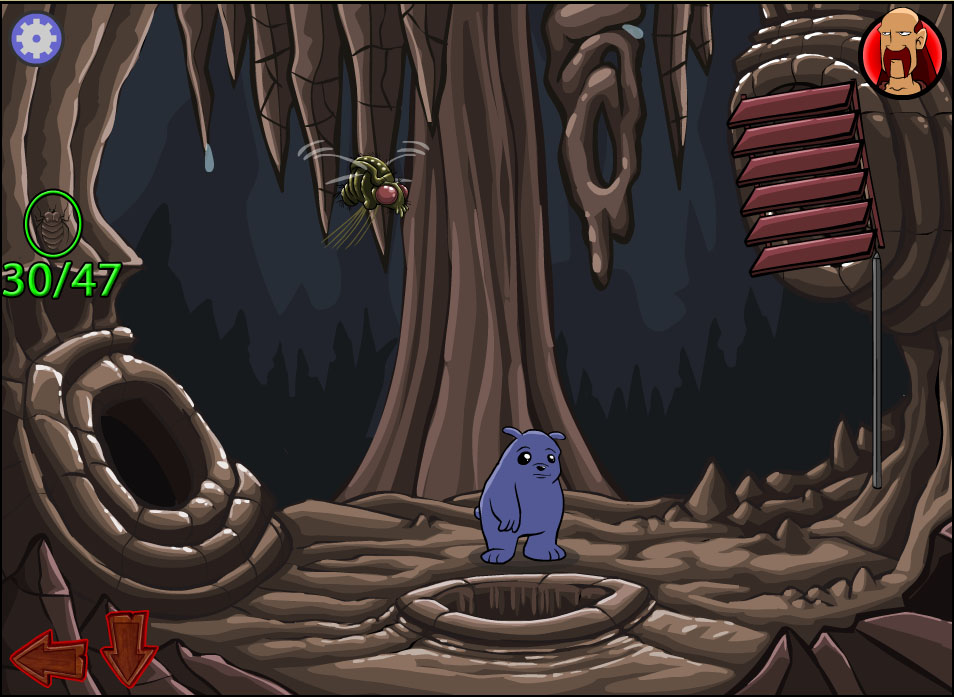
Condiment Forest - Bug #24:
Screenshot.
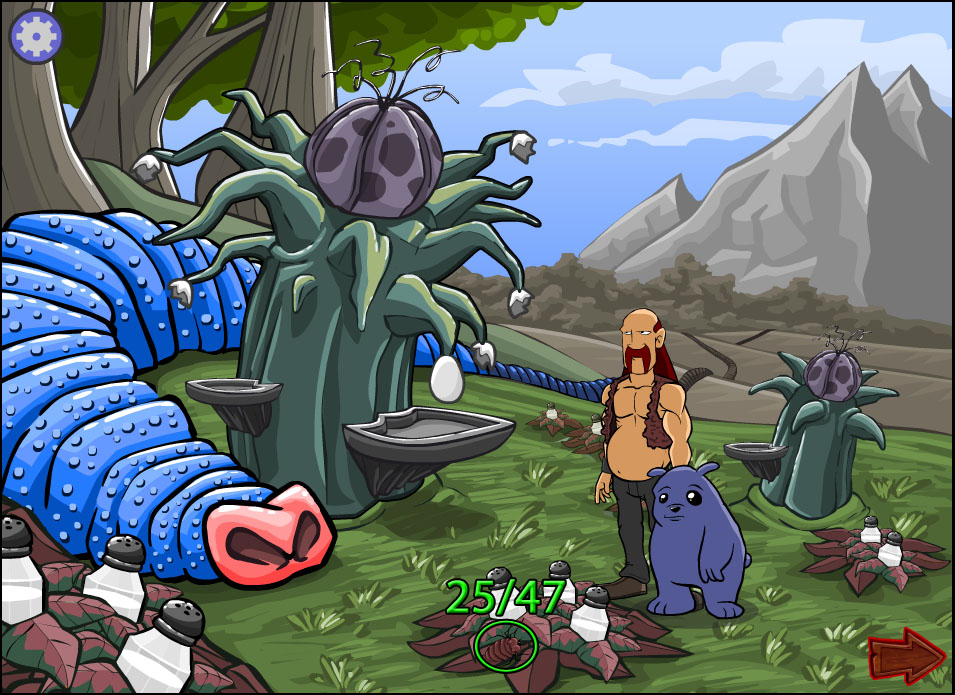
Breakfast Trees - Bug #25:
Screenshot.
Scene 7: Termite Cells
Reemus's View: Inside First Cell - Bug #26:
Screenshot.
Liam's View: Inside Second Cell - Bug #27:
Screenshot.
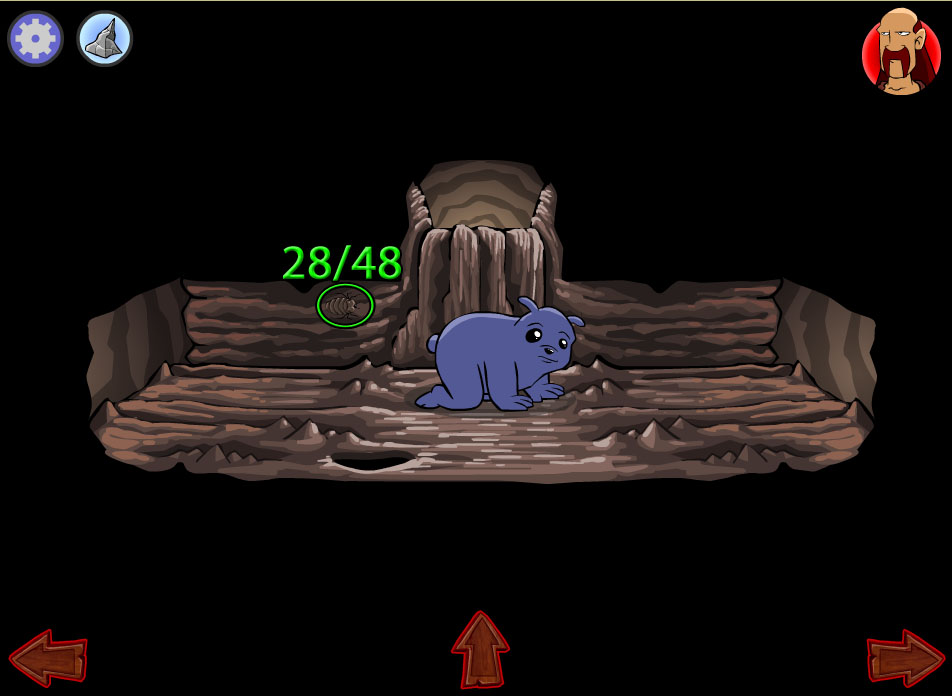
Liam's View: Air Duct - Bug #28:
Screenshot.
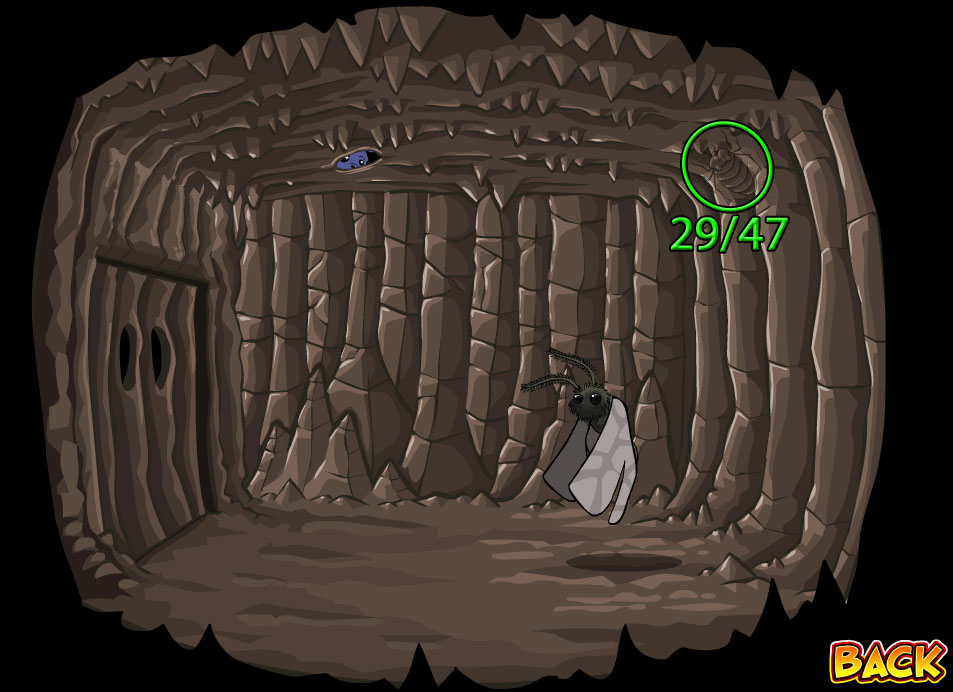
Liam's View: Third Cell - Bug #29:
Screenshot.
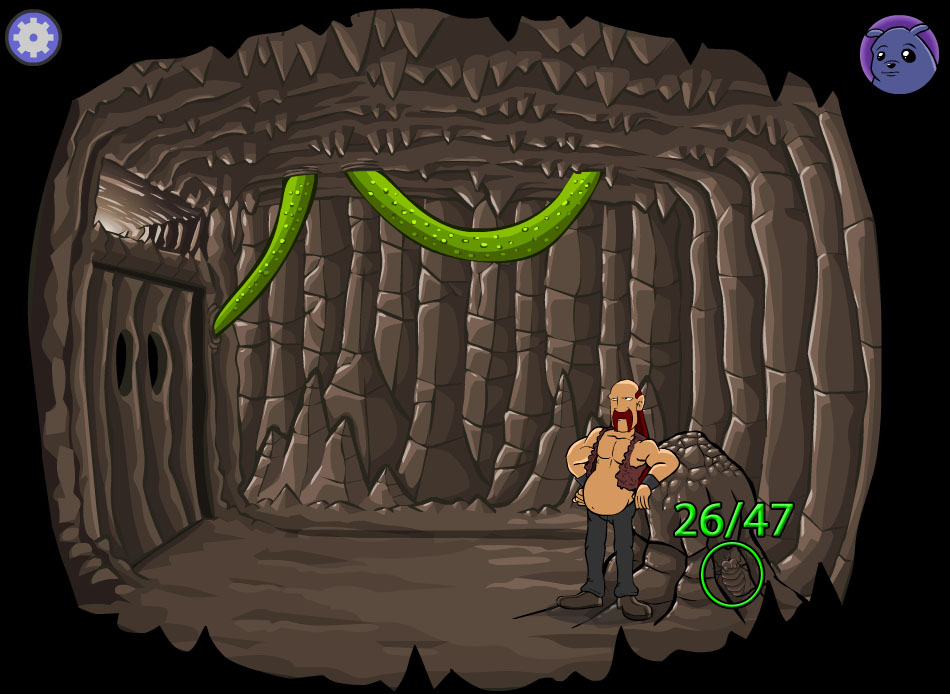
Liam's View: Stalactite Cavern - Bug #30:
Screenshot.
Liam's View: Thermostat Room - Bug #31:
Screenshot.
Reemus's View: Fungi Garden - Bug #32:
Screenshot.
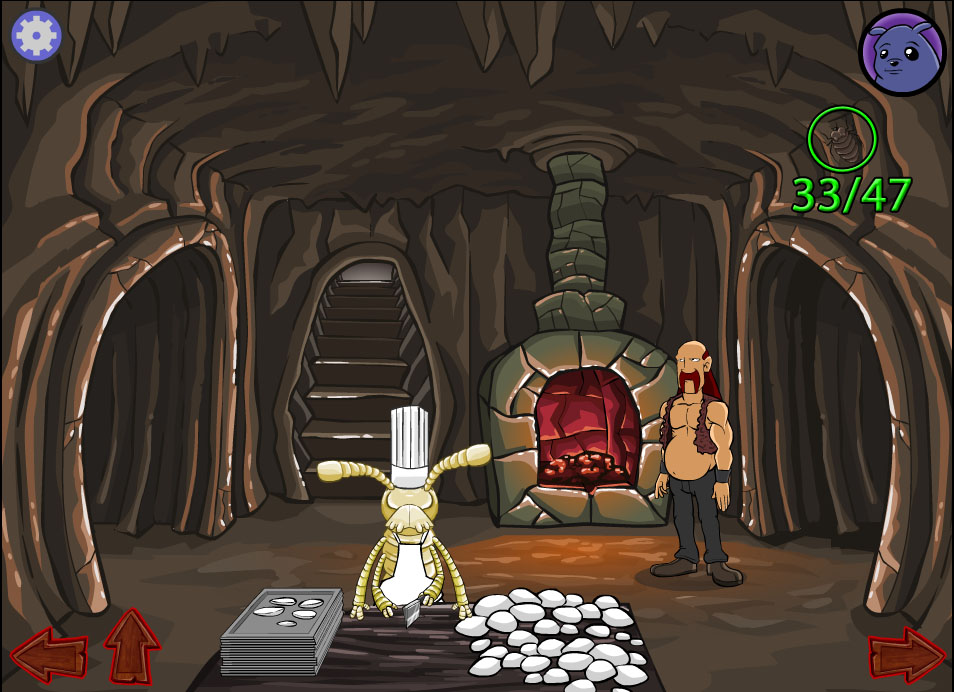
Reemus's View: Kitchen - Bug #33:
Screenshot.
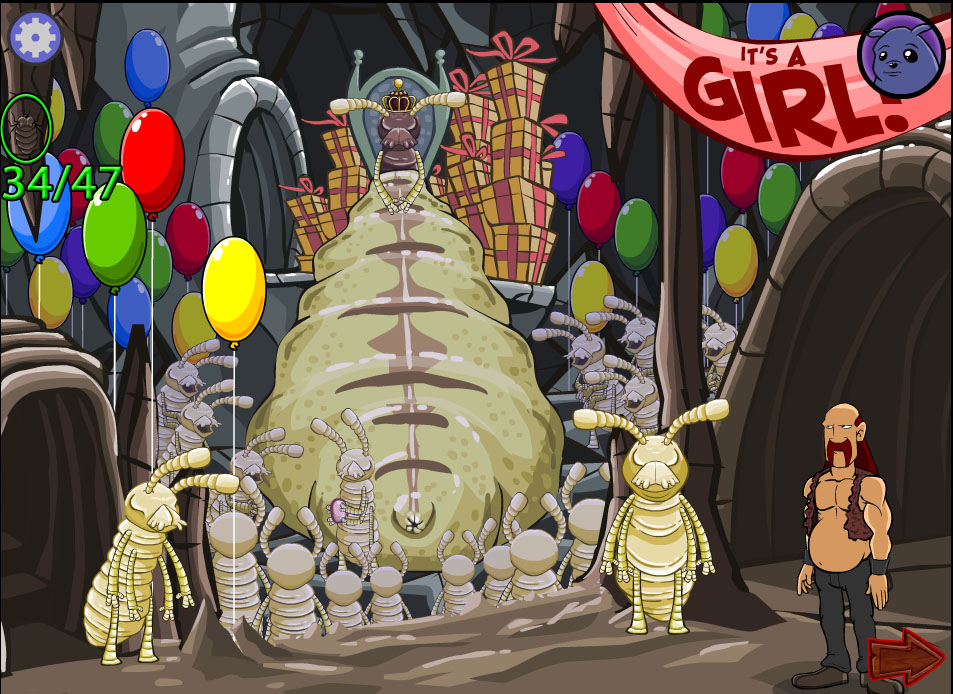
Reemus's View: Queen's Baby Shower - Bug #34:
Screenshot.
Liam's View: Guarded Platform - Bug #35:
Screenshot.
Scene 8: The Peak
Cliffisde - Bug #36:
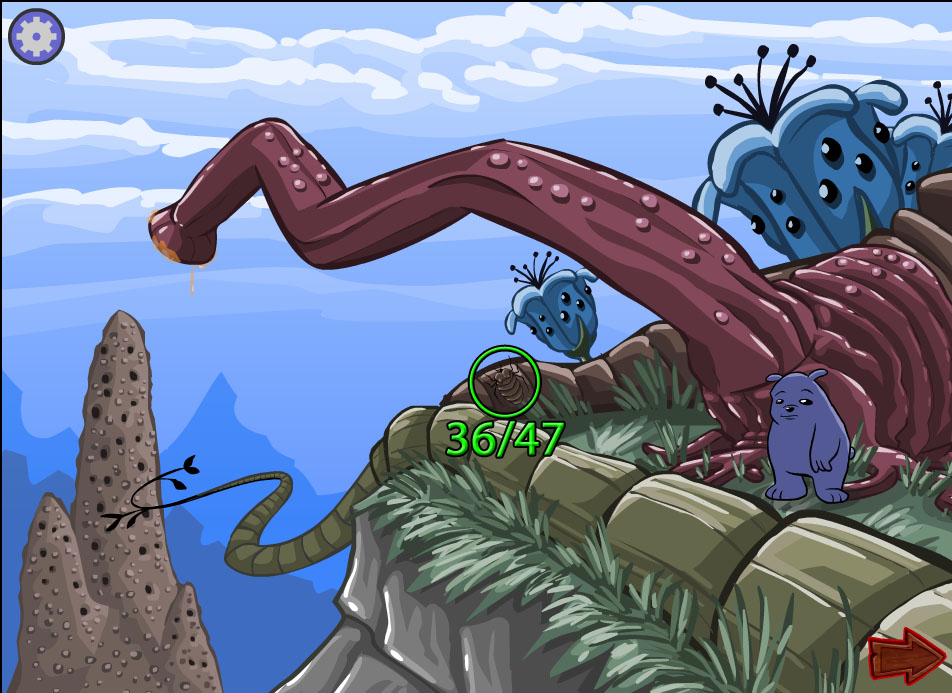
Screenshot.
Magnetic Flowers - Bug #37:
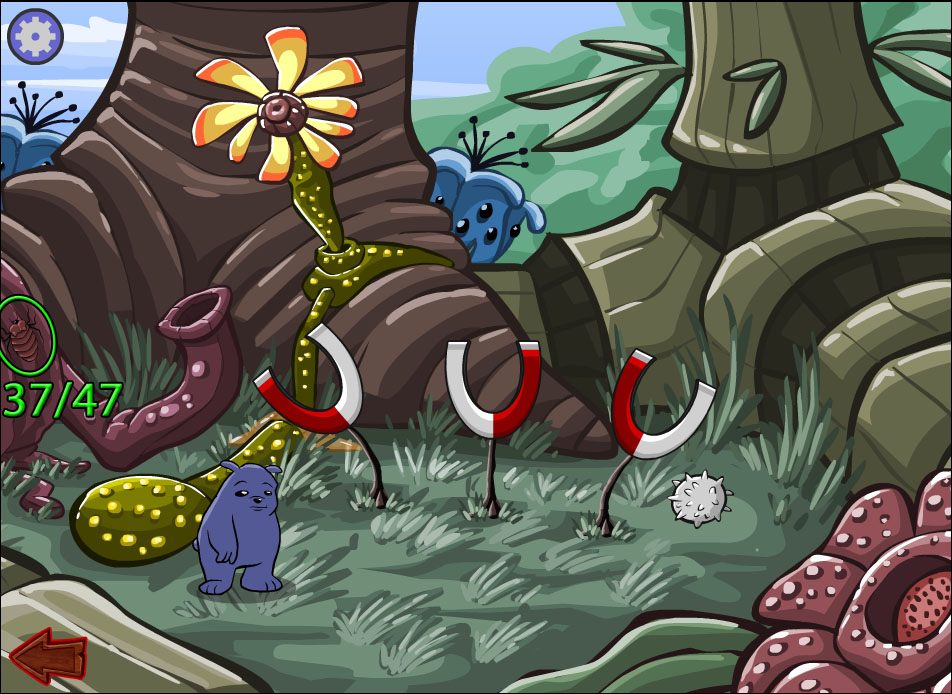
Screenshot.
Scene 9: Back Home
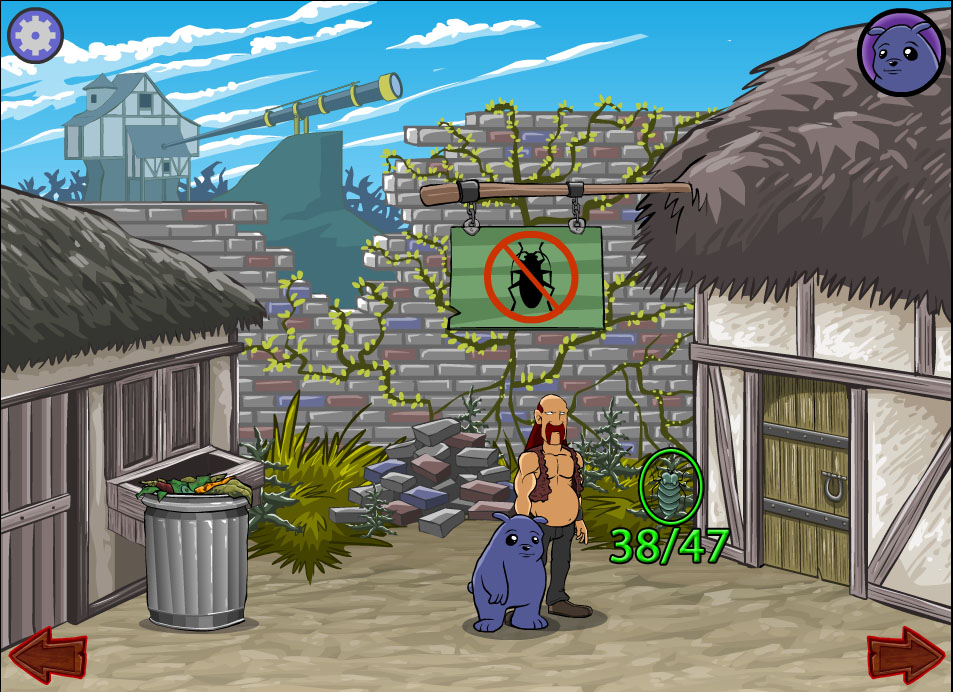
Reemus's View: Outside the Exterminators - Bug #38:
Screenshot.
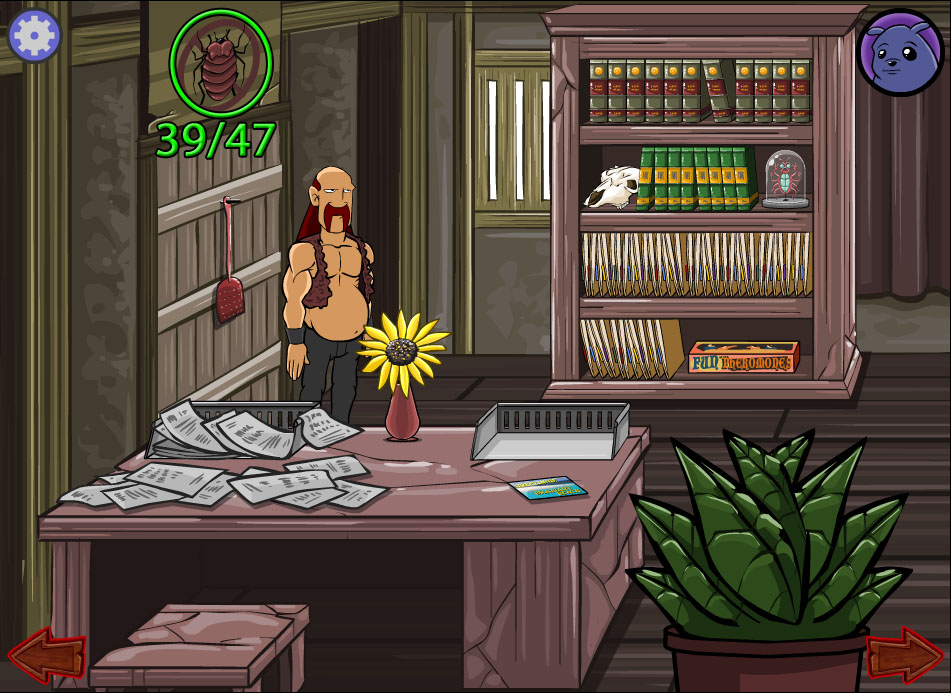
Reemus's View: Exterminators' Home (Left Side) - Bug #39:
Screenshot.
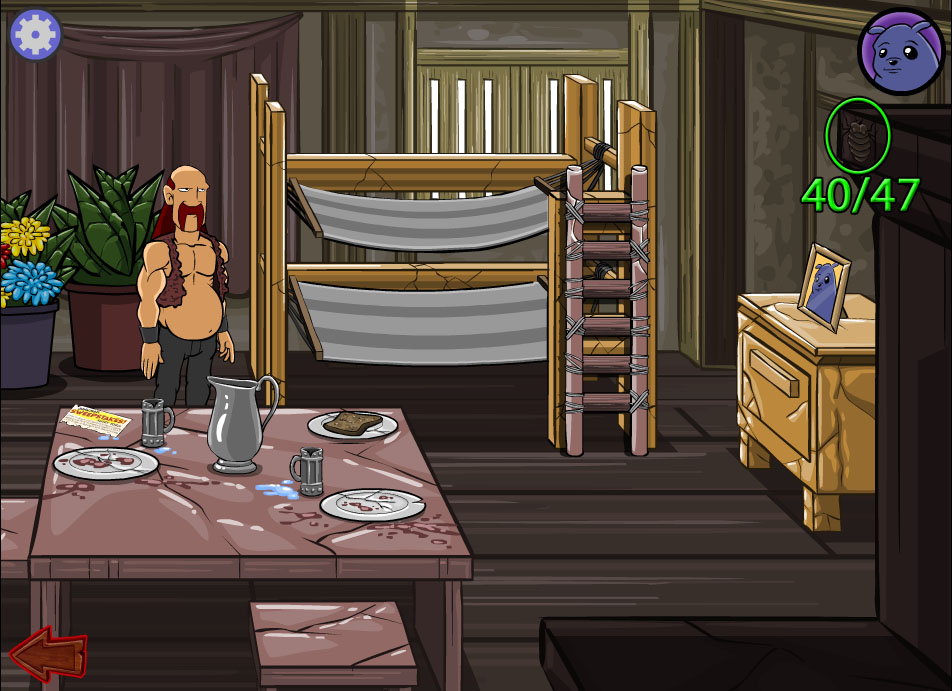
Reemus's View: Exterminators' Home (Right Side) - Bug #40:
Screenshot.
Reemus's View: Fire Ant Alley - Bug #41:
Screenshot.
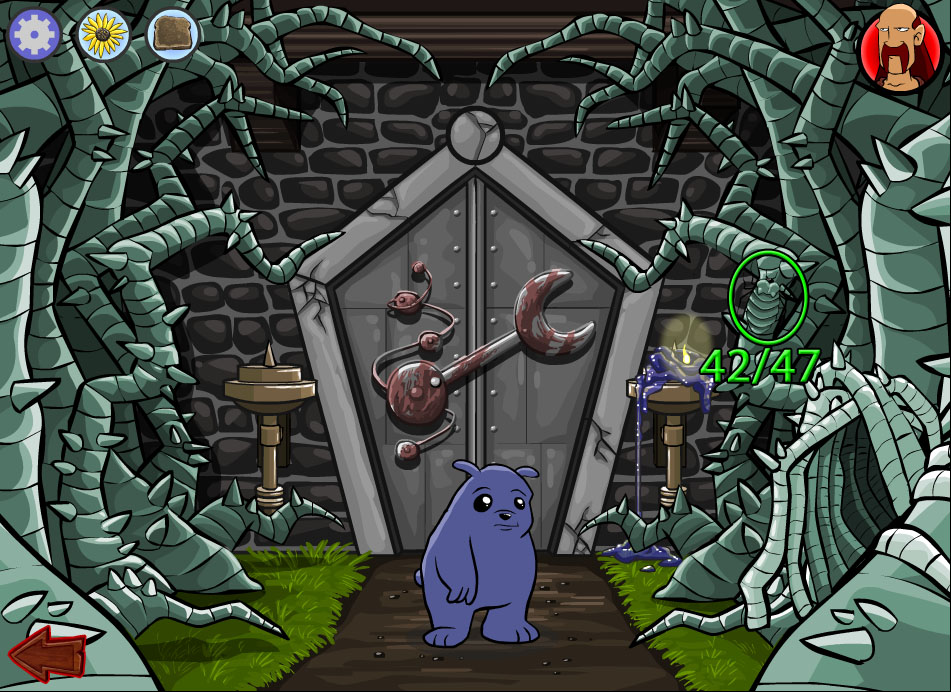
Metal Door - Bug #42:
Screenshot.
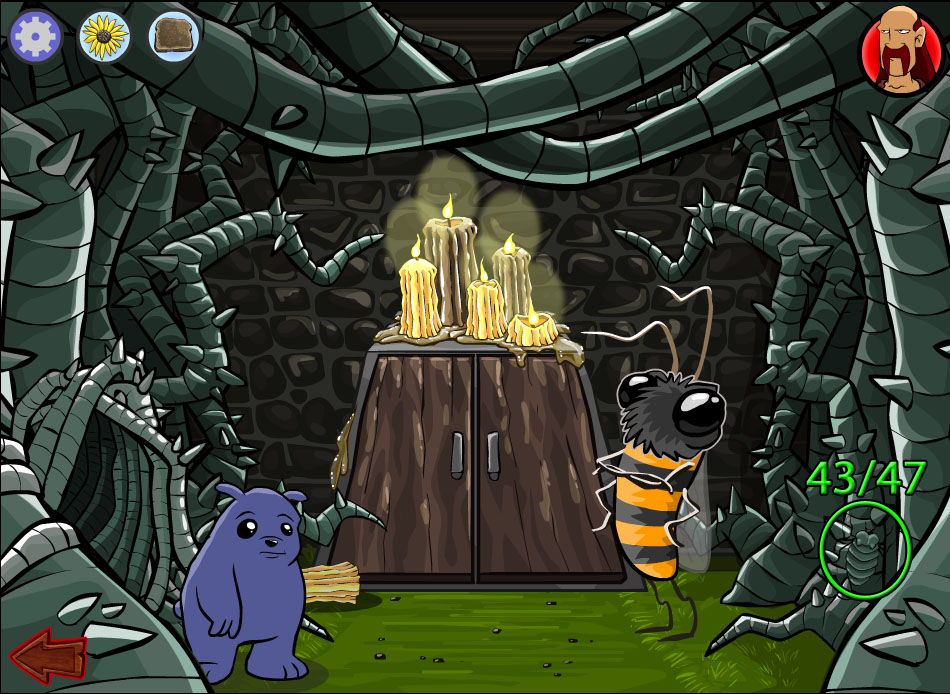
Secret Entrance - Bug #43:
Screenshot.
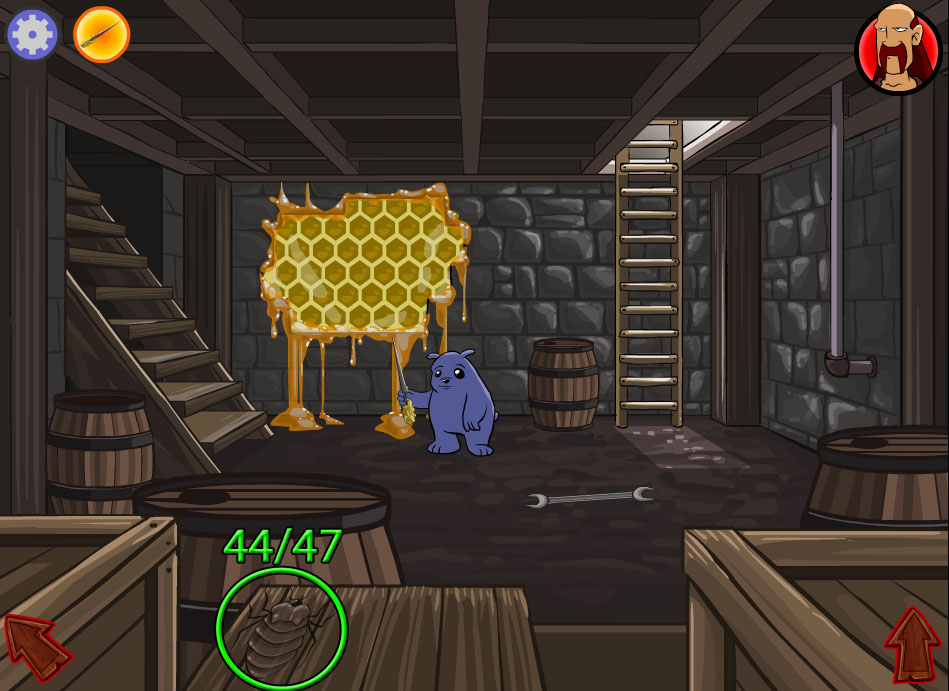
Cellar - Bug #44:
Screenshot.
Telescope Room - Bug #45:
Screenshot.
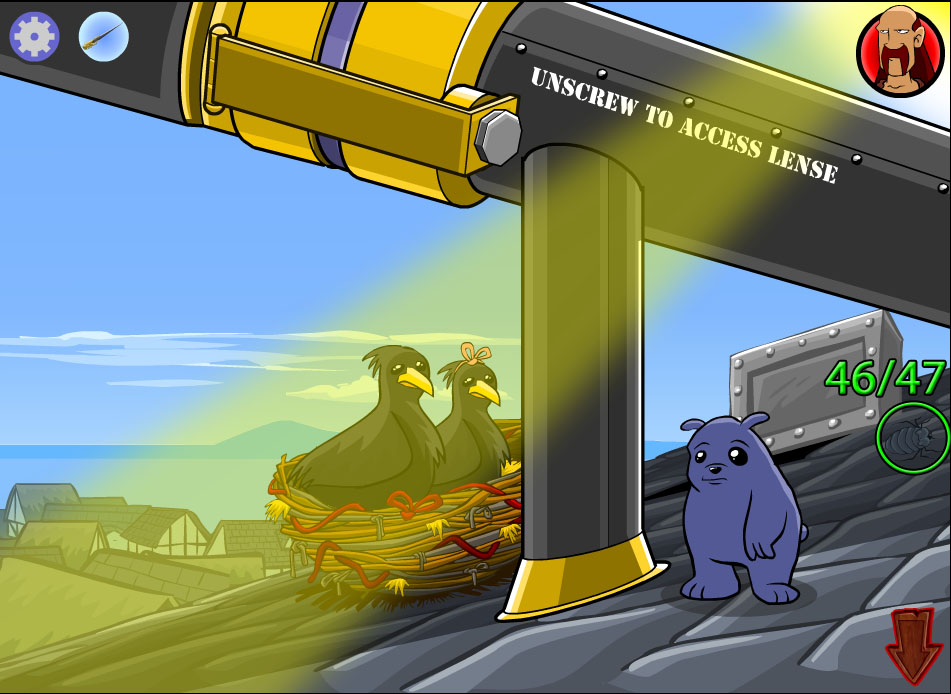
Rooftop - Bug #46:
Screenshot.
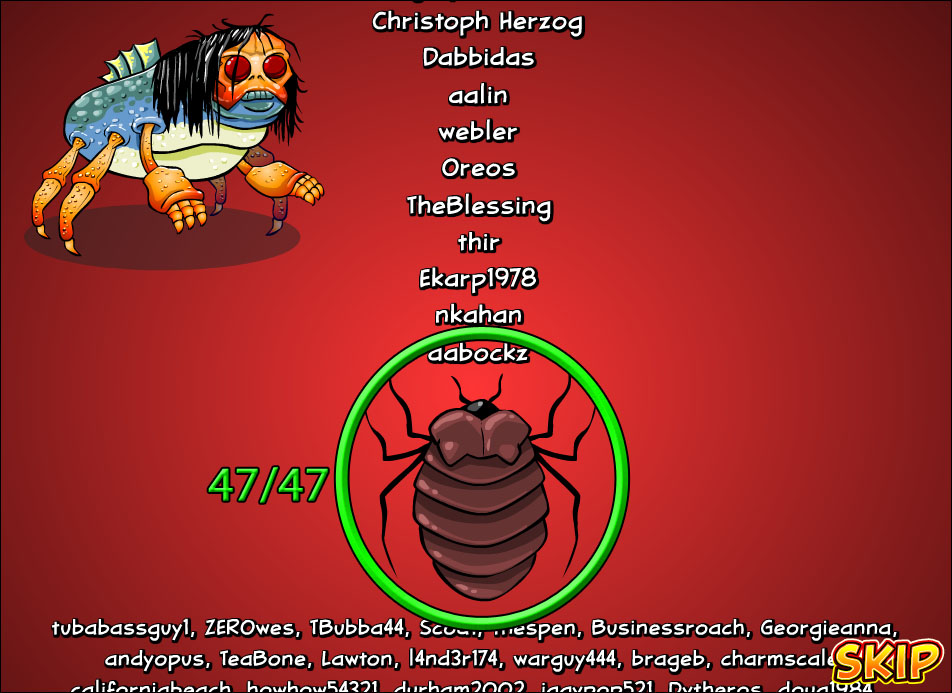
Credits
The last bug #47 is found during the roll of the credits at the end of the game.
Screenshot.
Scene 1: Grappa's Horsefly
Right Side of the Room
Remove the blanket on top of the bed.
Go left to the other side of the room.
Left Side of the Room
Take the STRAIGHT RAZOR on top of the table.
Open the door to the toilet.
Return to the right side of the room.
Right Side of the Room
Use the STRAIGHT RAZOR on the bed rope lining the bed, then click the ROPE to add it to your inventory.
Click the fly on the window to chase it to the other side of the room.
Follow the fly to the left side of the room.
Left Side of the Room
When the fly is distracted by the toilet, use the ROPE on the fly to catch it.
Scene 2: The Market
Rope Maker's Tent
Speak with the rope seller to receive a NUMBER TICKET.
Speak with the bard standing on the stage and ask him to sing about the ticket holders; you will learn that:
Oswald the baker with ticket #1 has a phobia of birds.
Hob the miller with ticket #2 is a germaphobe.
Ludzo the butcher with ticket #3 gets offended easily.
Go left to to the vendor booths.
Vendor Booths
Speak with the lovebirds disguised in the coat and hat to receive the BREAD CRUMBS.
Return to the rope maker's tent.
Rope Maker's Tent
Throw the BREAD CRUMBS on Oswald the baker holding ticket 1.
Take the GOLD COIN he drops on the ground beside the seagull.
Go left again to the vendor booths.
Vendor Booths
Give the GOLD COIN to the water bottle salesman to receive the BOTTLED WATER.
Go right to the rope maker's tent.
Rope Maker's Tent
Use the BOTTLED WATER on the pig lying in the mud (it will become an EMPTY BOTTLE after use).
Click the pig to splash mud on Hob the miller, then take the GOLD COIN he drops on the ground.
Go left to the vendors again.
Vendor Booths
Return the EMPTY BOTTLE to the bottled water salesman to receive your GOLD COIN(x2).
Give the two GOLD COINS to the scarf saleswoman to receive the WOMAN'S SCARF.
Go right to the ropemaker's tent.
Rope Maker's Tent
Give the WOMAN'S SCARF to Ludzo the butcher.
Speak with the bard and ask him to play a song about Ludzo.
After Ludzo lays the smack down, give your NUMBER TICKET to the rope maker.
Scene 3: Apnea Swamps
Liam's View: On Land
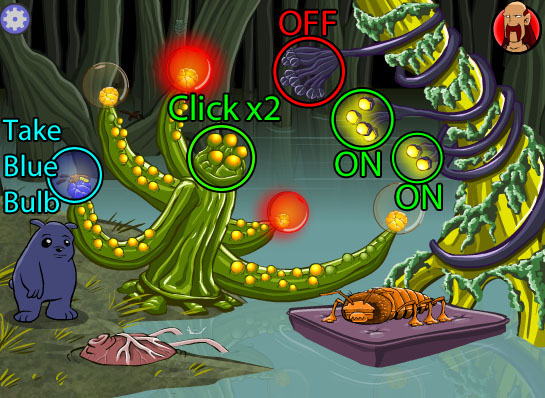
Click the tentacles wrapped around the tree to turn the lights on and off, which raises or lowers the yellow dots on the plant to heat the bulbs.
You can also click the center of the plant to raise or lower the yellow dots.
Your goal is to get the nearest bulb within reach cool enough to pick up:
Click the top tentacle so its lights are turned OFF.
Make sure the middle and bottom tentacle lights are left ON.
Click the center of the plant two times.
Wait for the bug to approach the yellow bulb, then take the now-blue bulb at the end of the branch to put on the helmet.
Solution.
Click the lung plant at the edge of the water to add it to your diving helmet.
Liam's View: Lake Bed
Go left into the Sea Cavern.
Liam's View: Sea Cavern
Take the ROCKS on the ground by Liam's feet.
Go right to return to the Lake Bed.
Liam's View: Lake Bed
Use the ROCKS to block the tubes of the high pressure bubble coral.
Take the ALGAE that falls from the root to the ground.
Go left to the Sea Cavern.
Liam's View: Sea Cavern
Feed the ALGAE to the hungry fish to chase away the key-nose shrimp.
Take the piece of CORAL that the shrimp was resting on.
Use the CORAL to pry off one of the AQUATIC GUMBALL.
Go right to the Lake Bed.
Liam's View: Lake Bed
Feed the AQUATIC GUMBALL to the monster hiding in the right cave.
Take the CHEWED GUM the monster spits back out on the floor.
Put the CHEWED GUM inside the high pressure bubble coral to launch it at the feeding fish.
Take the RAZOR TOOTH on the ground beside the monster's cave.
Use the RAZOR TOOTH to cut through the root attached to the mattress.
Reemus's View: Lakeside
Take the PINCHER BEETLE on the ground by Reemus's feet.
Place the PINCHER BEETLE at the root of the swamp blister.
Click the overhanging branch of the hirsute tree to pop the swamp blister and attract the giant maggot, then click the branch again to fling the maggot into the water.
Click the water strider bug to jump on top of it, then click the seaweed sticking out of the water.
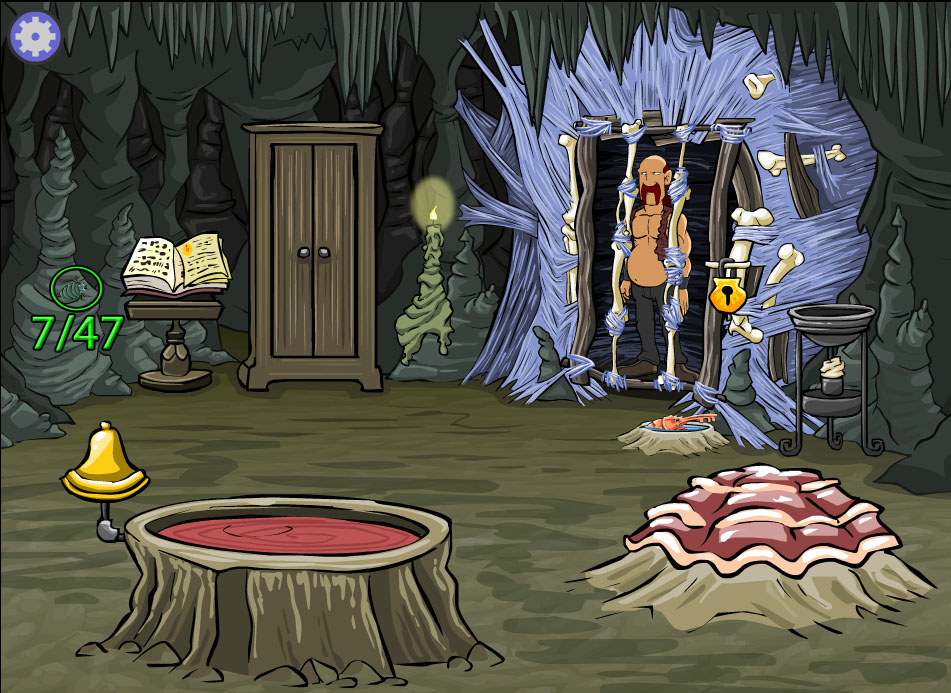
Reemus's View: Witch's Lair
Take the KEY-NOSE SHRIMP in the small pool of water in front of the cage.
Use the KEY-NOSE SHRIMP on the padlock to open the cage.
Take the RECIPES from the book on top of the bookstand.
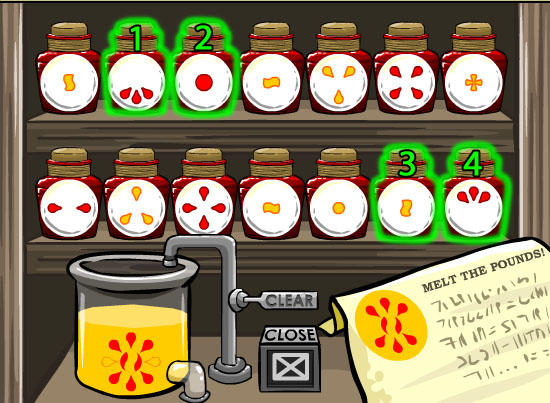
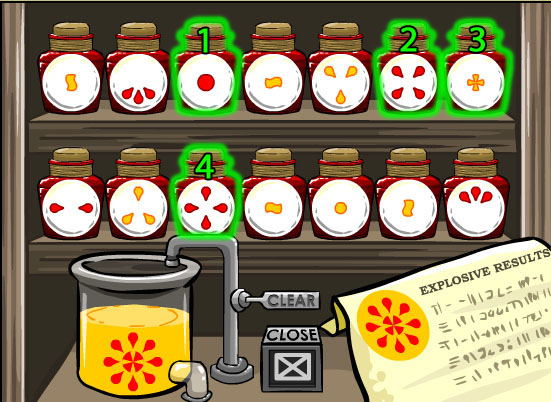
Click the cupboard to open it, then click the jars on the shelves to start potion making.
Click the four jars whose combined symbols match the pattern on the recipe.
Adding a red symbol jar to the potion will fill the matching outline seen at the front of the vat, while adding a yellow symbol jar will remove any overlapping red pattern from the outline.
Pressing the Clear button at the side of the vat will reset the puzzle.
Solution: Melt The Pounds!
Completing this potion gives you the DISSOLVE POTION.
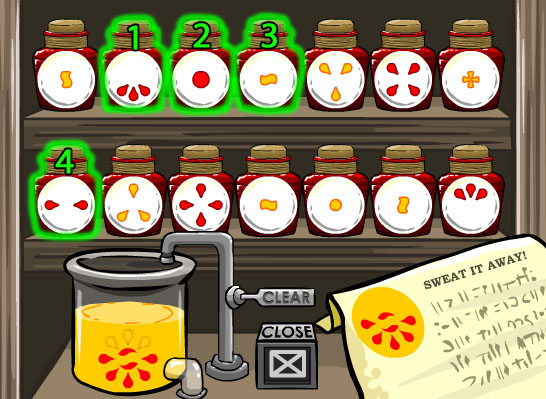
Solution: Sweat it Away!
Completing this potion gives you the LIQUEFY POTION.
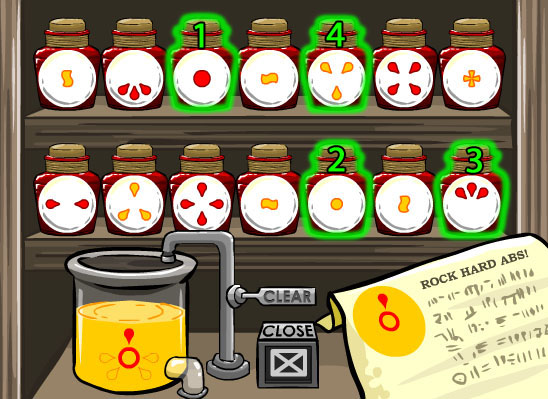
Solution: Rock Hard Abs!
Completing this potion gives you the SOLIDIFY POTION.
Solution: Explosive Results!
Completing this potion gives you the EXPLODE POTION.
Use the DISSOLVE POTION on the locked safe at the bottom shelf.
Take the COOKIE inside the open safe.
Take the CANDLE at the bottom of the scented oil burner.
Place the COOKIE inside the dish above the burner.
Use the LIQUEFY POTION to melt the cookie.
Use the CANDLE from your inventory on the burning beeswax candle to the right of the cupboard to receive a LIT CANDLE.
Put the LIT CANDLE on the scented oil burner to spread the cookie smell around the room.
Pour the SOLIDIFY POTION into the tub of boiling soup.
Ring the bell beside the soup to summon the witch.
Use the DISSOLVE POTION on the witch's solidified head.
Use the EXPLODE POTION on the clam shell covering the escape route, then click the pool of water to leave the scene.
Scene 4: Construction Site
Sal's Worksite
Go left twice to Dr. Nova's Garden.
Dr. Nova's Garden
Take the bottom WINDMILL FLOWER HEAD from the bush of windmill weeds.
Break off the ICE CREAM from a branch of the ice cream cactus.
Go right to the Dig Site
Dig Site
Take the lower left STAKE from the corner of the dig area.
Place the STAKE in the patch of grass in front of the halitosis flower.
When Hank the digger moves in front of the flower, stick the ICE CREAM from your inventory onto his back.
Pick up the mask that falls to the ground by the stake to put it on.
Take the WINDMILL FLOWER STEM growing out of the plot of dirt.
Go right to Sal's Worksite.
Sal's Worksite
Plant the WINDMILL FLOWER STEM in the fresh soil at the bottom of the choking tree.
Add the WINDMILL FLOWER HEAD to the stem to blow the fumes at Frank.
Speak with Sal to receive the CONCRETE RECIPE.
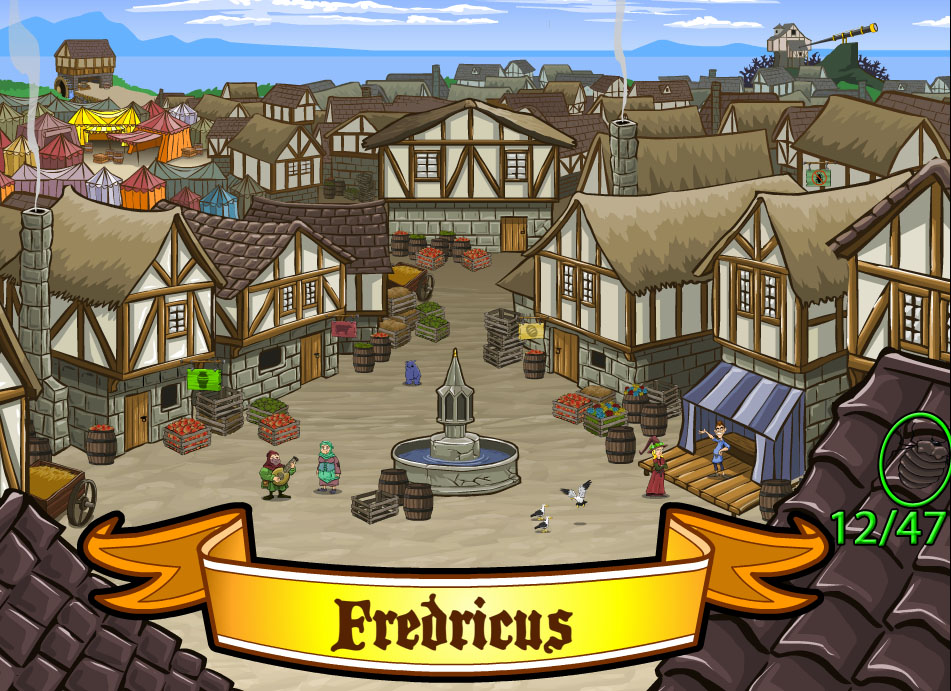
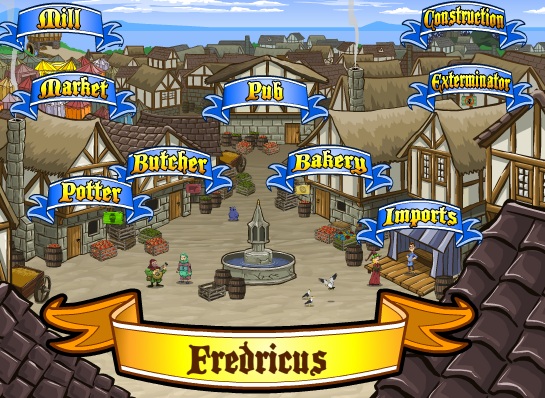
Scene 5: Fredricus
Town View
From the town view you can enter any of the 9 buildings around Fredricus by mousing over and clicking that location.
Screenshot.
Go to the Exterminator building.
Exterminator
Take the POISON MUSHROOM growing out of the planter on the left building.
Grab the STONE from the pile of rubble by the broken wall.
Go back to the Town View, then enter the Bakery.
Bakery
Feed the POISON MUSHROOM to the seagull in the window.
Pick up the DEAD SEAGULL after it falls on the crate.
If you choose to, you can show the DEAD SEAGULL to the living seagull in the Imports area, and it will ask you to find all 14 of the headstone fragments.
Refer to Ballad of the Seagull: Headstone Piece Locations in the Achievements section to find all the fragments.
Take the DOUGHTNUT from the tray on the counter.
Go back to the Town View, then enter the Butcher building.
Butcher
Give the DEAD SEAGULL to the butcher.
In exchange, you will receive FLY INFESTED MEAT from the table.
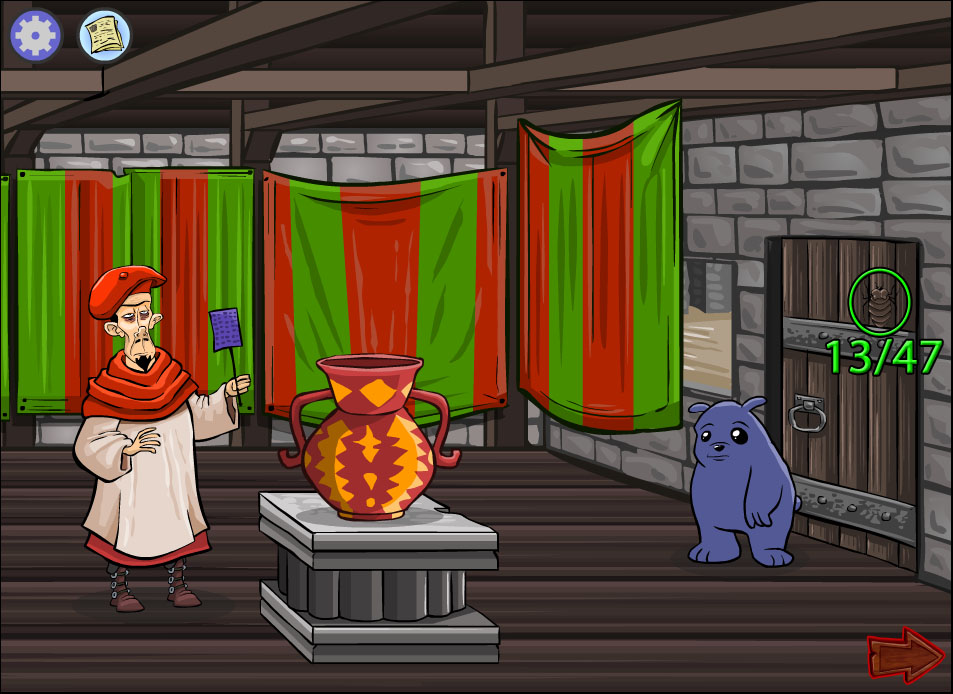
Go back to the Town View, then enter the Potter building.
Potter
Put the FLY INFESTED MEAT inside the pot on the pedestal.
Take the shard of CLAY that lands on the floor next to the pile of meat to check it off the list of ingredients in the CONCRETE RECIPE.
Go back to the Town View, then travel to the Imports building.
Imports
Put the DOUGHNUT on the lady's hat.
Pick up the LIME that falls to the floor.
Go back to the Town View, then travel to the Mill.
Mill
Wait for Hob the Miller to turn to clean the wall, then while he's distracted, toss the STONE into the mill.
After the stone is ground into powder, add the LIME to the mill.
Take the FINELY GROUND LIMESTONE from the trough of the mill to check it off the list of ingredients in the CONCRETE RECIPE.
Pick up the WHEAT sticking out of the barrel.
Go back to the Town View, then travel to the Imports building.
Imports
Speak with Vick the juice-a-saurus salesman on the stage.
Give him the WHEAT to put in the juicer, and you will receive the cup of FLOUR.
Go back to the Town View, then enter the Bakery.
Bakery
Give the FLOUR to the baker.
In exchange you will receive the GRAVEL to check off the list of ingredients in the CONCRETE RECIPE.
Go back to the Town View, then travel to the Market.
Market
Take the WINDCHIMES hanging in front of the striped tent.
Grab the MIXING BUCKET at the base of the well to check it off the list of ingredients in the CONCRETE RECIPE.
Go back to the Town View, then enter the Pub.
Pub
Click the jar of pickled eggs, then speak with Bart the Drunk to challenge him to eat all the eggs.
Give Bart the WINDCHIMES from your inventory to receive the EMPTY JAR.
Go back to the Town View, then travel to the Market.
Market
Give the EMPTY JAR to the little boy leaning over the ant hill in exchange for the MAGNIFYING GLASS.
Place the MAGNIFYING GLASS in the sunny spot over the winch of the well to burn through the rope.
Take the hourglass filled with SAND from the water bottle salesman's counter to check it off the list of ingredients in the CONCRETE RECIPE.
You should now have found all the ingredients which will automatically combine into the CONCRETE.
Go back to the Town View, then enter the Pub.
Pub
Go upstairs to the bedroom.
Use the CONCRETE on the mattress covered in bedbugs.
Scene 6: Fire Ant Hill
Cave
Exit through the left tunnel to the Condiment Forest.
Condiment Forest
Take the HOT SAUCE from the stack of bottles in the burning bush.
Walk to the soy sauce plant to chase the sodium fiend onto the metal tree.
Grab the loose METAL SHEET from the base of the metal tree.
Continue left to the Breakfast Trees.
Breakfast Trees
Take the SALT from the plant with three salt shakers on the ground.
Click the egg hanging from the large breakfast tree to feed the hungry noserpillar.
Go right to the Condiment Forest.
Condiment Forest
Use the SALT on the egg stuck to the relish bottle.
Pick up the EGG when the salt fiend knocks it to the ground.
Go left to return to the Breakfast Trees.
Breakfast Trees
Put the EGG in the frying pan of the small breakfast tree.
Take the raw BACON that sprouts out of the top of the tree.
Go right twice to the Cave
Cave
Place the METAL SHEET on top of the quicksand.
Set the raw BACON on top of the metal sheet.
Pour the HOT SAUCE on the bacon to heat up the metal.
Scene 7: Termite Cells
Reemus's View: Inside First Cell
Click Liam's portrait in the upper right corner to switch to his character.
Liam's View: Inside Second Cell
Take the SHARP ROCK on the ground by Liam's feet.
Use the SHARP ROCK to cut through the vine pinched under the stones on the ground.
Click Reemus's portrait in the upper right corner to switch to his character.
Reemus's View: Inside First Cell
Click the farthest right section of the hanging vine to pull it further down.
Click Liam's portrait in the upper right corner to switch to his character.
Liam's View: Inside Second Cell
Click the window to climb up the vine into the Air Duct.
Liam's View: Air Duct
Click the hole in the floor to look into the Third Cell.
Liam's View: Third Cell
Speak with the moth imprisoned in the cell, and he will ask you to collect the 26 poster fragments scattered around the area.
Refer to Ballad of the Moth: Poster Piece Locations in the Achievements section to find all the fragments.
Click the hole in the ceiling to return to the view of the Air Duct, then go right to find Reemus in the First Cell.
Liam's View: First Cell
Click the SHARP ROCK in your inventory to toss it to Reemus.
Go back to the Air Duct, then climb up to the Stalactite Cavern.
Liam's View: Stalactite Cavern
Click the handle to the shutters to close the vent, causing the termite in the Thermostat room to remove the large rock from the hole.
Click Reemus's portrait in the upper right corner to switch to his character.
Reemus's View: Inside First Cell
Use the SHARP ROCK to break through the hollow rock formation.
Climb down to the Fungi Garden
Reemus's View: Fungi Garden
Pick up a FUNGUS from the dirt around the super glue plant.
Go left to the Kitchen.
Reemus's View: Kitchen
Speak with the termite chef, then go up the stairs to the Thermostat Room.
Reemus's View: Thermostat Room
Take the BIG ROCK the termite left on the floor.
Return to the Fungi Garden
Reemus's View: Fungi Garden
Use the BIG ROCK on the super glue plant to make it a STICKY ROCK.
Go back to the Thermostat Room
Reemus's View: Thermostat Room
Place the STICKY ROCK back in the large hole under the thermostat.
After the termite removes all of the small rocks from the holes, click Liam's portrait in the upper right corner to switch to his character, then travel to Stalactite Cavern.
Liam's View: Stalactite Cavern
Take the dead FLY on the floor.
Climb up the ladder to the Guarded Platform
Liam's View: Guarded Platform
Toss the FLY into the chimney in the center of the platform.
After the view automatically switches to Reemus's character, go down to the Kitchen.
Reemus's View: Kitchen
Pick up the cooked FLY inside the oven.
Give the FLY to the termite chef.
Take the MEAT TRAY from the stack of trays on the table.
Go left to the Queen's Baby Shower
Reemus's View: Queen's Baby Shower
Speak to the termite guarding the left tunnel with the MEAT TRAY in hand.
Scene 8: The Peak
Cliffisde
Go right to the Magnetic Flowers
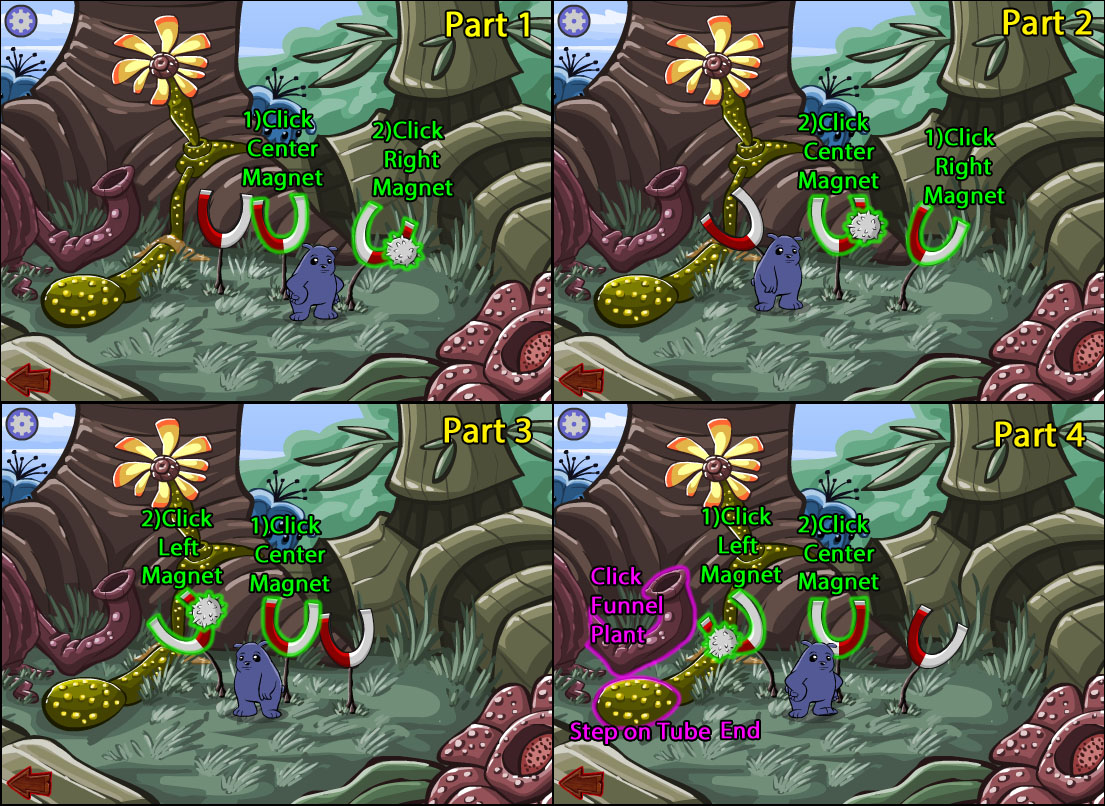
Magnetic Flowers
Rotate the magnetic flowers to move the metal shelled chestnut from the grass to the tube of the hardening sap flower on the left.
Click the center magnet to rotate it, then click the right magnet to pick up the ball on the right magnet (Part 1).
Click the right magnet to rotate it, then click the center magnet to pass the ball to the center (Part 2).
Click the center magnet to rotate it, then click the left magnet to pass the ball to the left (Part 3).
Click the left magnet to rotate it, then click the center magnet to push the left magnet over the green tube (Part 4).
Solution.
Click the tube of the funnel plant to attach it to the magnet and metal ball.
Step on the end of the green tube to spill the hardening sap into the funnel plant.
Scene 9: Back Home
Reemus's View: Outside the Exterminators
Go into the right building.
Reemus's View: Exterminators' Home (Left Side)
Pick up the POSTCARD on top of the table.
Take the TERRIFIED BUG in a jar on the bookshelf.
Grab the DISTRESS PHEROMONE from the pheromone kit on the bottom bookshelf, as well as the empty FEAR BOTTLE, ANGER BOTTLE, JOY BOTTLE, ANTICIPATION BOTTLE, and TRUST BOTTLE.
Continue to the right side of the house.
Reemus's View: Exterminators' Home (Right Side)
Take the SWEEPSTAKES FORM on the table.
Pick up the LIAM PHOTO on top of the cabinet.
Open the cabinet drawer to find the TEDDY BEAR inside.
Go left three times to Fire Ant Alley.
Reemus's View: Fire Ant Alley
Click the right side of the top crate to open it.
Put the TEDDY BEAR inside the juicer to fill the bottle of JOY PHEROMONE.
Put the TERRIFIED BUG in the juicer to fill the bottle of FEAR PHEROMONE.
Put the POSTCARD in the juicer to fill the bottle of ANGER PHEROMONE.
Put the LIAM PHOTO in the juicer to fill the bottle of TRUST PHEROMONE.
Put the SWEEPSTAKES FORM in the juicer to fill the bottle of ANTICIPATION PHEROMONE.
To get rid of the three ants, spray each of them with a unique combination of two pheromones.
Spray the right ant first with the FEAR PHEROMONE and then with the TRUST PHEROMONE to make him submissive.
Spray the left ant first with the JOY PHEROMONE and then with the TRUST PHEROMONE to make him loving.
Spray the middle ant first with the ANGER PHEROMONE and then with the ANTICIPATION PHEROMONE to make him rageful.
Liam's View: Outside the Exterminators
Take the VEGETABLES from the garbage can.
Go left to the Fire Ant Alley.
Liam's View: Fire Ant Alley
Put the VEGETABLES inside the juicer to receive the VEGETABLE OIL
Go right twice to enter the house.
Liam's View: Exterminators' Home (Left Side)
Take the FLOWER from the flower pot on the table.
Continue to the right side of the house.
Liam's View: Exterminators' Home (Right Side)
Pick up the piece of TOAST from the plate on the table.
Take the LADDER from the side of the bunk bed.
Go left twice to return outside.
Liam's View: Outside the Exterminators
Place the LADDER up to the hole in the crumbling brick wall.
Climb up the ladder to travel to the Metal Door, then go through the tunnel on the right to the Secret Entrance.
Secret Entrance
Give the FLOWER to the bee guarding the door.
Take the BEESWAX CANDLE lying on the ground.
Go left to return to the Metal Door.
Metal Door
Use the BEESWAX CANDLE on the melted purple candle on top of the right stand to light it.
Place the lit BEESWAX CANDLE on top of the left stand.
Use the TOAST on the melted wax of the candle to turn it into BEESWAX TOAST.
Go right to the Secret Entrance.
Secret Entrance
Show the BEESWAX TOAST to the bee.
Take the STINGER the bee shoots into the ground.
Go through the doorway into the Cellar.
Cellar
Speak with the bear hiding in the barrel by the stairs and he will ask you to collect the 16 honeycomb fragments scattered around the area.
Refer to Ballad of the Thieving Bear: Honeycomb Piece Locations in the Achievements section to find all the fragments.
Take the WRENCH lying on the floor.
Use the STINGER on the royal honey stash on the wall to make it a STICKY STINGER.
Go left twice to the Metal Door
Metal Door
Use the WRENCH on the crescent moon on the door to remove the METAL SCULPTURE.
Return to the Cellar, then go up the ladder to the Telescope Room.
Telescope Room
Read the telescope operating manual nailed to the beam on the wall.
Click the crumbling lever to the periscope mechanism to destroy it.
Attach the STICKY STINGER to the broken lever, then click the lever to open the periscope.
Click the periscope to focus it on the ants around the fountain.
Use the Vegetable Oil on the rusted wheel, then click the wheel to open the hatch.
Go up the ladder to the Rooftop.
Rooftop
Speak with the two lovebirds sitting in the nest to start the optional spot the difference game for the Ballad of the Lovebirds achievement.
Solution.
Use the METAL SCULPTURE to remove the giant bolt from the safety latch of the telescope.
Click the large lens that drops from the telescope to aim the beam of light at the town square.
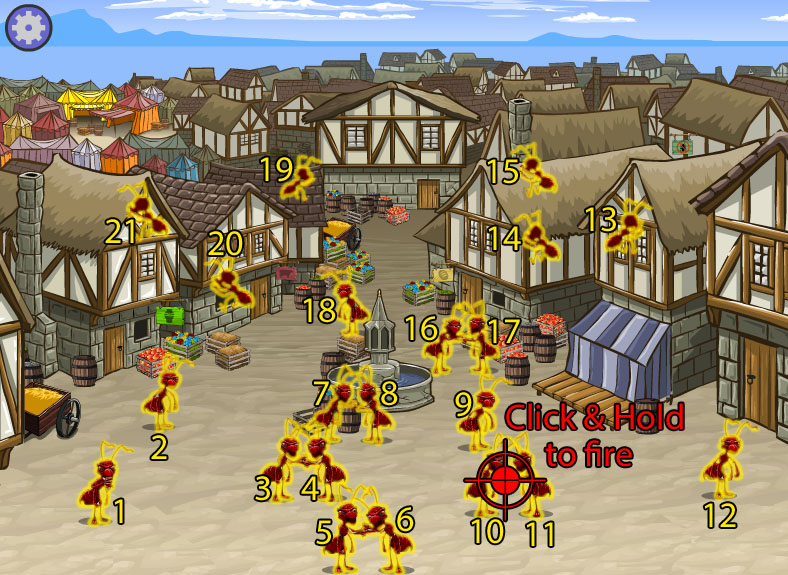
Scene 10: Ant Burning
Click and hold the cursor to focus the circle to a narrow point over an ant, which will burn it to a crisp.
Burn all 21 of the ants around the town square, including the ones on the rooftops.
Solution.
The End
Posted by: Trinn |
January 27, 2012 10:11 PM
|
January 27, 2012 10:11 PM