
![]() It's been a few years, but the Knytt series has finally returned! Knytt Underground pulls in design elements from several of Nifflas' (Nicklas Nygren) other games, including Within a Deep Forest, NightSky, and Saira, and creates a beautifully atmospheric game of exploration. There's a big world to run, climb and bounce through, packed with secrets that can only be found by mastering some unique character switching moves.
It's been a few years, but the Knytt series has finally returned! Knytt Underground pulls in design elements from several of Nifflas' (Nicklas Nygren) other games, including Within a Deep Forest, NightSky, and Saira, and creates a beautifully atmospheric game of exploration. There's a big world to run, climb and bounce through, packed with secrets that can only be found by mastering some unique character switching moves.
 Humans vanished hundreds of years ago after nearly destroying the planet in a large-scale war. The creatures who survived are mostly Sprites, Fairies, and other tiny critters living in underground tunnels (some with cute houses!). They're all curious about what happened above so long ago. Getting herself tangled up in the middle of all this is Mi, a mute Sprite who loves nothing more than exploration. She starts an innocent journey that eventually leads her to the world's last hope for salvation: ringing the six bells of fate. But, really, couldn't all that stuff be an old superstition? Guess there's only one way to find out.
Knytt Underground's gameplay combines standard platforming elements from the Knytt series with the wildly entertaining bouncing mechanics from Within a Deep Forest. The first few chapters kick the story off and let you learn the ins and outs of controlling Mi and "Bob", both of whom encounter characters who need simple tasks completed in exchange for passage forward. Mi can walk, jump, and scale walls, and when she encounters colored flowers she can initiate special abilities that let her fly across the screen with the press of a button. Bob is more rubbery in nature and can bounce both far and high, just like those dodgeballs you got hit with in elementary school. Bob can also hook and swing from certain machines to gain access to out of the way areas. Separately these characters can get quite a bit done, but if you combine their powers you're pretty much an unstoppable exploration machine.
 With the press of a button you can switch between Mi and Bob, instantly changing back and forth whenever you like. This opens up so many new moves it's almost scary to think about. Who needs ability upgrades when you can bounce off a wall, switch characters, climb up a block, drop down, switch again, bounce off an angled floor, switch again, grab a green flower and fly across the stage like a comet, all while lava bubbles below and robots fire at you from all around? It's exciting and satisfying as well, and it forces you to look at each room with an entirely different perspective.
Analysis: If someone asks you "Hey, what's a good indie game to play?", any release from the Knytt series is the correct answer. Knytt Underground has a lot to live up to, but it manages to be both comfortingly familiar and creatively original in the same stroke. The character switching is by far the best feature, turning the game's sprawling world into both a test of reflexes and an exercise in puzzle solving. The level design reflects your new abilities with elegance, and each time you run across familiar territory and suddenly see how it works with each character, you'll smile and feel like the cleverest little detective in the world.
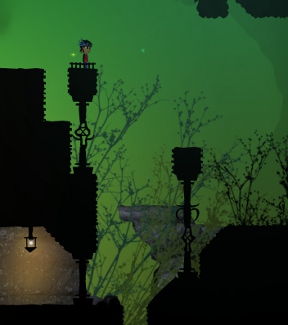 The Knytt series has always been about atmosphere, and Knytt Underground certainly does not disappoint. Gone are the basic pixel graphics, replaced with more intricate artwork and photorealistic images decorating both the background and foreground. The music is soothing and ambient, setting the perfect tone for a quiet underground world of small creatures frightened about their fate but hopeful for the future.
Knytt Underground is much more map friendly than earlier Knytt releases, which could be a good thing or a bad thing depending on how you look at it. For most, having a visual representation of visited rooms is a boon, and the icons that show you save points and quest locations make getting lost a thing of the past. Don't expect it to be a straightforward affair working your way to the next point of interest, as the world is a twisted complex of tunnels.
There's more personality in Knytt Underground, from the humorous writing to the quirky but relatable situations Mi and Bob find themselves in.It's a brilliant culmination of years of atmospheric exploration gaming, and it's got just about everything you could ever want in a game. Not only will Knytt Underground fill you with warm feelings of video game enjoyment, it'll reignite your passion for Nifflas' previous releases.
![]() Windows:
Windows:
Download the demo
Get the full version


Walkthrough Guide
(Please allow page to fully load for spoiler tags to be functional.)
Knytt Underground Walkthrough
General Information
Before you reach the Chapter Selection screen, there will be an introductory level that will teach you the basic mechanics and controls of the game.
In Chapter 1, you will play as Mi, the sprite. In Chapter 2, you will play as a bouncing ball, referred to as Bob by your faerie cohort. In Chapter 3, you will play as Mi, with the power to turn into the bouncing ball at any time by pressing S.
Sprite Controls
Use the arrow keys to move left and right and the up arrow to jump.
You can grab on to any vertical wall. Use the up arrow to climb up, or use it with left or right to jump off.
You will encounter different colored lights that will imbue you with various powers if you use them by pressing A.
Ball Controls
Use the arrow keys to move left and right, the up arrow to bounce higher, and the down arrow to bounce lower.
Some machines that you will encounter have red and white lights on the top and don't shoot. When in ball form, hold A to be pulled toward the nearest machine.
All of the key bindings can be changed as well as the Volume in the Settings menu by pressing ESC.
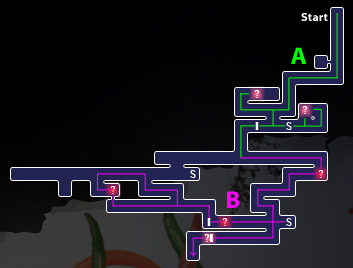
Chapter 1
Zone Map
A
Go to the left one screen and speak to Nicklas to make the wall disappear.
Follow the path up and go toward the green light.
After walking through the green light, your character will glow. Press A and quickly use the arrow keys to fly your ball of light up and around to the house up top. Any contact with a wall will remove the power, so be careful.
Speak with Re and she will give you the mapping device. You can now see a map of where you have been by holding the spacebar.
Walk through the house and go down on the left, and go back to the previous screen.
Follow the path to the left two screens, and then climb up to a Save Point.
Drop down three screens below the Save Point and go left.
Take the white light and keep going to the left.
Use the power to shoot out a ball of white energy that will destroy the electric conductor.
B
Drop down after destroying the conductor, go one screen to the right, speak to Johann, and accept his quest for candlesticks. The locations of the two candlesticks will be marked on your map.
Go three screens to the left of Johann for another Save Point.
To the left of the Save Point is a laser that radially sweeps around the room. You will have to run out at the right time to make it to a safe area.
Go up one screen and you will enter a room with four guns that shoot balls of energy periodically across the screen. Watch them, get the rhythm, and climb past them.
Follow the path to the left and then down to the first Candlestick.
Return to the room with the radial laser and go down, left, and down again.
In this room, there are two different colored lights. The red one will blast you upward a great distance. The blue one will move you horizontally in one direction for as long as you want or until you hit a wall.
Grab the red light and climb up the wall to the right. Use the power at the top to blast up to where the blue light is and grab on to the wall.
Take the blue light and use it when you are standing on the upper platform, facing to the right.
After the blue light takes you as far as it can go, you can jump over and take the second Candlestick.
Return to Johann, and he will let you pass.
C
Go one screen to the right of Johann and speak to Ikatere.
Continue to the right, and keep climbing up on the walls to the far right. They may appear to be closed off but you can climb up or drop down anywhere you see water dripping through.
Go to the right and then up. Here you will find a button to destroy the wall next to it, which leads to a path up to the beginning of the chapter, if you wish to revisit it.
Go to the right two screens and speak to Madhuri.
Continue to the right three screens, drop down, speak to Susanna, and accept her quest. One screen to the right of Susanna is a Save Point.
Go to the left one screen from Susanna and jump on the second platform. The screen will shake and alert you of an earthquake, opening new areas elsewhere.
Continue jumping across the upper level for two screens to the left until you reach the first Green Gemstone.
Go one screen to the left of the gemstone, drop down, and continue to the left once more. Drop down in the tiny hole that the earthquake opened up on the right side of the bottom.
In the next room there is a button and some yellow boxes. Standing on the button will switch the solid yellow boxes and the translucent yellow boxes, and the longer you stand on the button the longer this effect will last.
After standing on the button for a few seconds, you can quickly run down and drop through the hole on the left.
In the next room, stand on the button to give yourself some time, then quickly run down and through the path where the yellow block was, then go down. The robots will jump after you, so run fast.
The button in the next room is protected by a jumping robot, so stand on it as long as you can before you have to run away. Continue down the lower path.
Drop down, outrun the robot, continue to the left and pick up the second Green Gemstone.
Take the gemstones to Susanna and she will let you pass.
D
After falling down the path opened by Susanna, go to the right and speak to Olli. From Olli, go right six screens and then up to find another Save Point.
From the Save Point, go down then left twice, fall down in the middle and speak to Christina. Continue down five screens, as far down as you can go, then go right.
This screen has a stationary robot that will shoot a burst of shots periodically. With careful timing, you can run across and pick up the Robot Centipede.
Go back to the screen Christina is on, and go eight screens to the right. You will come to an area that looks like an upside-down T. From here, go up and then right ro another Save Point.
From the Save Point, go left once, then up, and then right. You will come to a screen with four blue lights and one green one.
Grab the first blue light, jump back up on the ledge, face right, jump again and use the power in the air. Repeat this process with the other blue lights until you can reach the green light. When you get it, use it to fly up one screen and pick up the Poke.
Go back to the screen directly left of the Save Point, go down once, then go left four screens and down the hole.
Go to the right once and speak to Jane. You may accept and complete her quest, but it is optional.
E
From the screen with Jane, go down once and drop down the well at the bottom. The room you will land in has a robot that will shoot in bursts and follow you. This room may take a few tries, but if you move quickly you can run across and pick up the Foam Shooter.
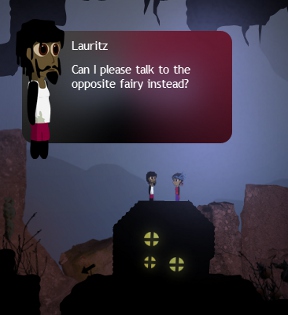
Return to the top of the well, then go right once, down three screens, and right once again to the T on the map. Speak to Lauritz and accept his quest.
Go to the right and then down to the next Save Point.
From the Save Point, go up twice and then left to a room with a blue light. Grab it, quickly climb to the upper path, face to the right and use the power. It will carry you safely to the Unknown Artifact three screens to the right.
Go back the way you came to Lauritz and turn in his quest to receive the Saraswati stone.
Go right twice and speak to Chidi. Give her the stone and she will let you pass.
From where you give Chidi the stone, go right twice, up once, and then right again. Go over to the water and press enter to speak to the faeries.
Return the way you came, then go right. Cilia, one of the faeries, will open the door for you.
Drop down into the tunnel and follow it to the left until you reach the end of the chapter.
Chapter 2
Zone Map
A
You will start in a dark room. Find the hole in the floor and drop down two screens.
Bounce over the walls and down the tube in the middle.
Drop down two levels in the tube and into the room with the robot. Use the down arrow to make sure you don't bounce back up.
Go left three screens and drop down.
Follow the tube down and to the left, then go down and right to the first Save Point.
From the Save Point, go left two screens, up to the hut, and speak to Rob. You can now view the map by holding spacebar.
Go right one screen, up, and left. Jump over the pools of electricty go to the next screen.
Bounce to the ledge on the left, go as high as you can, and bounce over to the ledge on the right. Continue up and to the right.
In this screen, there is a robot in a small pool. To get across, get near the edge, bounce up and down rapidly, then move over to the banked wall. You should ricochet across the gap and be able to go to the left.
Bounce over the pool to the wall on the right, then bounce up to the ledge on the left.
Go left one screen on the upper path and speak to Circle.
Return to the first Save Point.
From the Save Point, go right once and use the machine to get up and over to the next screen. Use the same technique to go up from there.
Go left one screen, land on the lower platform, and look in the nest.
Return to the wall by Rob's hut, which will be clear now. Follow the path to the left and down as far as you can go.
B
Go to the right five screens and drop down the well. Go to the right ledge and speak to Lisa.
Go left two screens and drop down the hole, being careful to avoid the green goo. After dropping down the hole, you will need to bounce from left to right to left to avoid the goo in the next screen.
Proceed to the left two screens and down one. You should hit a banked wall and bounce across the goo in the next screen. Go right, down, and right again to a Save Point.
From the Save Point, go left two screens and use the upper machine to get across the gap.
Contine to the left two screens and check the small underground house for the door tool.
Go left once, hit the button to open the wall and go up.
Go left twice, up once, left twice, and up once. There will be another button to open a wall.
Go left three screens, drop down the hole and go to the right.
Check the hut on the right for the door tool.
Drop down, bounce off the enbankments, and go to the right.
Continue to the right, avoiding the robots, for two more screens and hit the button to open the door.
Go to the right, return to the screen before second Save Point and drop down.
Go left four screens, until you hit the wall, and press Enter.
Go left when the wall disappears, go down, and into the tunnel to end the chapter.
Interlude (No Map)
Jump across the platforms and go to the right.
Jump up to the yellow button, stand on it for a few seconds, and then go up through where yellow block was.
Grab the yellow power, go to the platform on the left, use the power, and cancel it when you are high enough to get up on the ledge. If you go all the way up to the red stripes you will die. Continue to the right.
Go over to the blue power and use it standing on the platform facing right.
Cancel the power when you are over the platform on the right. Jump up, speak to Tova and continue upward.
Take the yellow power, and use it below the blue power. Cancel the yellow near the top, face to the left, and use the blue power.
Go down to the blue power and grab it. Jump up, facing the green power and use the blue. When you get the green power, cancel the blue and use the green to fly up through the hole in the ceiling.
Grab onto the wall on the right and climb up to the first green power. Use the power to fly over and grab the second light, then quickly proceed down and to the left.
If done right, you should still have the second green power from the previous screen. Use it to fly across the gap and to the left.
Walk to the middle of the platform and you will wake up.
Chapter 3
Zone Map
Overview
The main objective of Chapter 3 is to ring six bells.
Four of the bells are behind gates that require 5 of a certain type of item to open.
The gate in (B6) requires five stones.
The gate in (C1) requires five flowers.
The gate in (D6) requires five artifacts.
The gate in (D2) requires five glyphs.
Two coins may be substituted for any one of these items: for example, you could use five stones to get through the gate in (B6), but you could also use four stones and two coins, or three stones and four coins. All types of coins have the same value.
One of the bells (A2) is nestled in the Utopioca, and requires you to find the items to stablize the area before you can reach it.
The final bell (C4) cannot be reached until all of the other bells have been rung. Coins cannot be used to substitute for this one.
Because of the nonlinear nature of this objective and the ability to substitue coins, there are many ways to complete this chapter.
For the purposes of this walkthrough, the map has been divided up into 48 sections of six screens by six screens. Each section is designated by a letter and a number: for example, the Start is in section (C4).
Below is a step by step description of one such solution. Use it as a guide, or use the map to plan your own route.
There are many optional quests and puzzles in this chapter that are not included in the walkthrough. Feel free to explore to see more of the zone and discover more of the story, but the walkthrough will only cover what is necessary to ring the six bells.
Step by Step Walkthrough
Utopioca and the Flower Bell
Start (C4) - Utopioca Entrance (A2)
Talk to Tor on the lower level, then proceed to the left and talk to Loke to open the wall.
Go left two screens and up five screens, as far as you can go.
Go right once and then up two screens. Jump carefully to avoid the water and proceed to the left and down.
Go left once more and pick up the Silver Coin (B4). Drop down to exit.
Go left one screen and use the small platforms and the ball form to bounce up the tunnel. Keep going up two more screens, right five screens, and pick up the Flower (B4).
Return left four screens and drop down to a Save Point if desired.
From the left Save Point in (B4), go up, left, up, and left again. Go down twice, left six screens, and up.
Climb up the wall on the right as high as you can, switch to the ball, bounce up to one of the two walls in the middle, and grab on in sprite form. Again, climb to the top, drop down in ball form, bounce up, and grab on to the wall on the left to get to the Bronze Coin (B2).
Go down, left, up twice, and left. Drop down to the lower level and go back right and down to get to the Flower (B2).
Go back the way you came and return to the upper path. Continue left and up to a Save Point if needed.
A2 - Utopioca Entrance
From the Save Point in (A2), drop down two screens and go through the tunnel on the left.
The machine on the left will shoot a laser horizontally if you stay across from it. Drop down the hole in the floor and use the ball form to bounce back up. On the floor below the middle of the hole is a white light, you will have to grab it as you bounce back up to the upper level and use it to destroy the machine on the left. This might take a few tries. If you don't make the bounce back up, you can go to the right and climb to try again.
Continue to the left six screens, as far as you can go. From there, go up, left, and up five screens.
Go to the edge by the first electrified pool. Bounce up and down in ball form and use the bank to bounce across to the bank on the right, then bounce up to the next level. Use the same technique to get up to the Flower (A1).
Drop down from the room with the Flower, go right two screens, down once, right once, up once, right twice, and up twice.
From there, proceed to the right five screens and drop down the first hole you see to enter Utopioca.
After entering Utopioca, your map will be disabled and you will be unable to leave until you fully explore the area.
Go up, down, right, left, down, up, and then you can exit to the left. Make sure you explore until Cilia says something in each screen.
Utopioca Exit (C6) - Utopioca Entrance (B3)
You will exit Utopioca on the * in (C6). Speak to Professor Flip-Flop and he will give you a quest.
Climb up the inside of the tall tower and go up a screen. Use the green power to get to the Wheel and return to Professor Flip-Flop.
Go left and push the button to go down.
Go left twice, down, left twice, and down again. Speak to Lauritz and accept his quest.
Go down to a Save Point if desired.
From the Save Point in (C5) go up twice, right twice, up once, left twice, and up once again.
In this room there will be two robots with rotating lasers. Wait until the laser from the left robot passes, follow it and run to the wall on the right, climb up near the top, and quickly jump down in ball form to bounce between the two robots.
Bounce up to the tunnel on the left and pick up the Stick (C5).
Return to Lauritz and he will reward you with an artifact, the Poke (B4).
From Lauritz, go left twice, up twice, and left once more. Speak to Tova and accept her quest.
Drop down the well three screens, dodge the robot and go down one more.
Explore the room thoroughly, but it will be empty. Just look around until Cilia says "There's no point searching for something that doesn't exist."
Go back to Tova and return her "invisible friend." She will reward you with an Invisible Artifact (B4). It will not appear in your inventory, but you will be able to use it later.
After speaking to Tova, go up, left, up, left twice, and up twice to a Save Point.
From the Save Point in (B4), go down once and then seven screens to the left. From there, go up twice, left twice, up once, left once, and up once more to reenter the Utopioca.
Once in Utopioca, go up once, right once, up once, left twice, up once, right once, and left once.
If done right, you will come to a room with an odd-looking pink creature known as the Yoga Monster. Speak to it, and it will prompt you to change to your "true form." Switch to ball form and speak to it again.
The Yoga Monster will give you an Owl Mask, which will fully stabilize the Utopioca and allow you to use your map while there.
Utopioca Exit (C6) - E2
From the Yoga Monster in (D2), go down and left, hit the button on the right and proceed to the left.
Go down and right, down and right again, down three screens, left two, and up one.
Speak to Niles and accept his quest.
Go left twice and up once. Find the hidden tunnel directly to the left of the broken statue hand and follow it to the left and up.
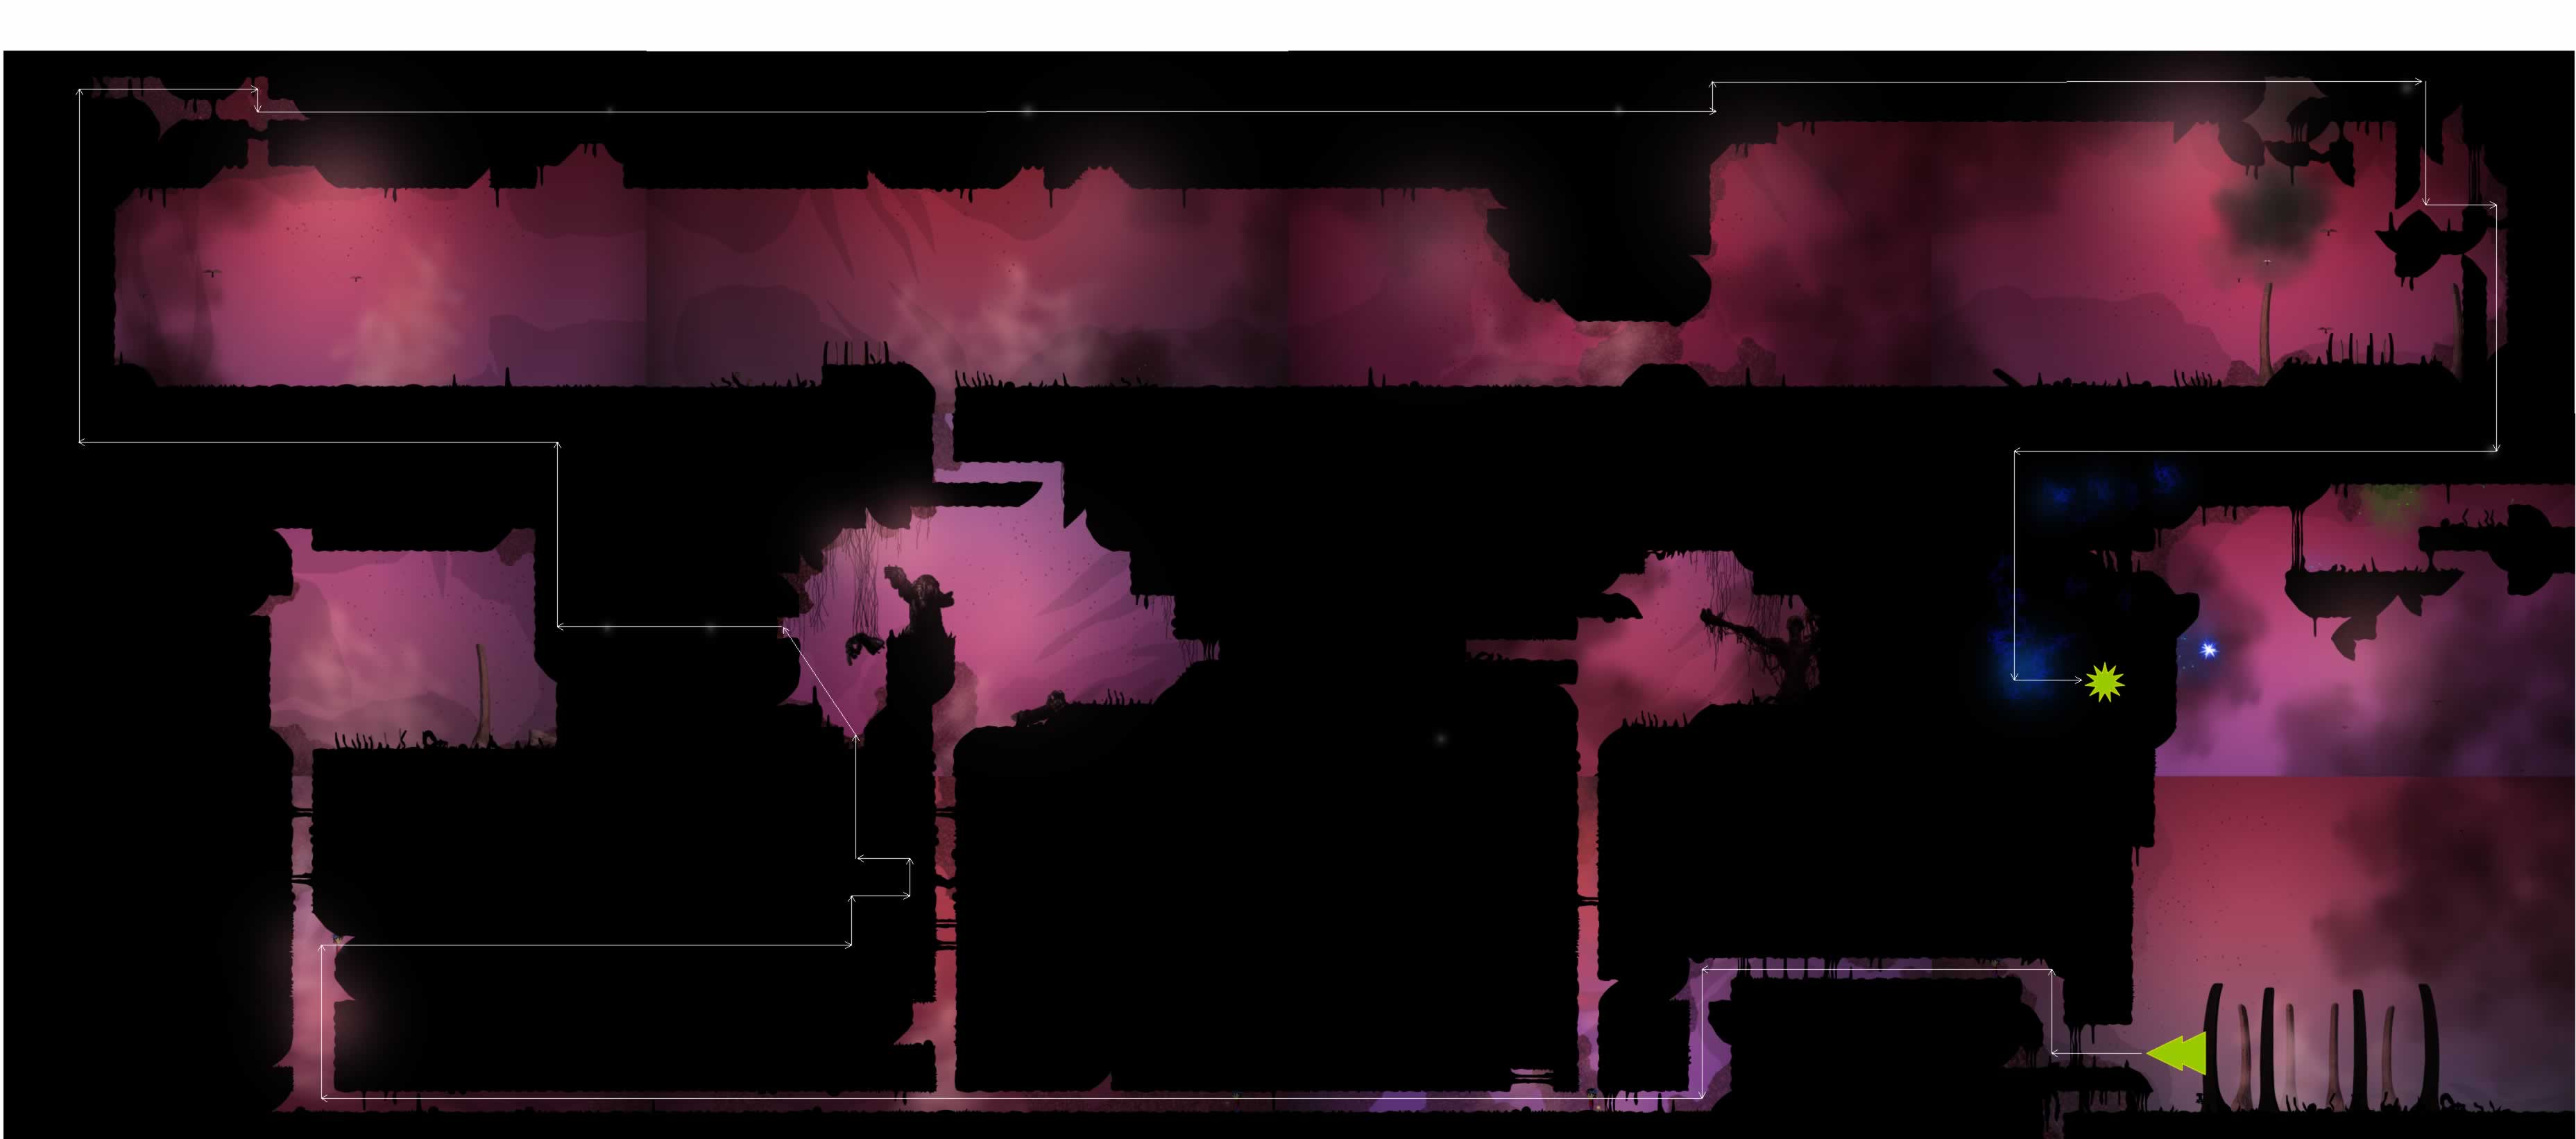
Continue to the right three times and drop down. Once you reach the blue area, Niles will ask you to dig, and you will receive a Bluestone (E1).
Return to Niles' outpost and go down, Dora will rejoin you.
Go eight screens to the right, as far as possible. Then go up, right, down, and to the right five more screens.
Climb up, take the blue light, and use it facing to the left.
When you get the red power, use it to get up to the next blue light. Use the blue power facing to the left directly below the wall.
When you reach the next structure, climb up, get the last blue light, and use it at the very top facing to the left. This will take you safely past an electrified pool and allow you to get a Red Gemstone (E3).
Go left twice and then up twice to a Save Point.
E2 - E3
From the Save Point in (E2), go down once, right twice, up once, left once, and up two more times.
Speak to the lower sprite, Kruder, and accept his quest.
Go right, and use the machine in ball form to go up.
Continue using the machines to carry yourself up three more screens, avoiding the green goo.
Use the last machine to get across the pool of goo and get the other Red Gemstone.
Return to Kruder and exchange the two Red Gemstones for an artifact, the Hard Drive (E3).
Go right and down to a Save Point if desired.
E3 - C1
From the Save Point in (E3), go up four screens and to the left four screens.
Go up one screen and go to the chamber on the left. Bounce to the top and enter the hidden passage so you can continue upward.
Go left twice, up once, and left once more.
Drop down three screens, go to the left once, and climb up.
The robots in the next room will chase you when you are near, but they are very slow. Keep moving to avoid them and proceed to the left.
Use the green power to go straight up to avoid the robots in the next room, making sure you do not hit the ceiling, and then continue to the left.
Pick up the Red Protective Orb (D1) and go down.
Go left, up twice, and to the right four screens.
Climb up the wall three screens, follow the path along the top to the left and pick up the Red Protective Orb (C1).
Drop down two screens, being careful not to go too far. One of the small alcoves will have a gap in the wall that leads to a secret passage to the left.
Climb to the left and pick up the Red Protective Orb (C1).
Continue to the left two screens, up once, and left once more to a Save Point.
C1 - B1
From the lower Save Point in (C1), go right and use the machine in ball form to get past the firing robot and go up.
Speak to Hubert, give him the three Red Protective Orbs, and he will give you a Flower (C1).
Go up, climb to the upper level, and go four screens to the right.
Bounce up the wall one screen and go to the left four screens.
Climb up two screens, go five screens to the right, and pick up the Flower.
Go back five screens to the left, drop down one screen, and go to the left for another Save Point if needed.
From the upper Save Point in (C1), go right once, down, and left.
Speak to Oldboard, give him the 5 Flowers, and proceed to the left.
Take the green light, and use it to go straight up as far as possible. At your peak, you should see a red light to your left, remember where it is.
Change to ball form and grab the green light again as you fall. Bounce as high as possible and use the green power at the peak of your bounce.
Use the green power to go up, get the red light, and get as high as possible. When it runs out, use the red power to continue upward and grab on to the wall on the left.
If possible, climb to the red power and continue up on the left side. If you cannot reach it, use the first blue power to get to the right side, climb to the second blue power, and use it to get to the red power.
Climb up, jump to the yellow light, and use it directly below the white light.
When you hit the ceiling, fall onto the ledge on the right and use the white power to destroy the robot and continue up.
Climb to the top of the wall in the middle of the screen, switch to ball form, and bounce to the wall on the right.
Take the green power, run to the left, and use it to go up one screen.
Step on the button to ring the bell. (B1)
B1 - A2
From the bell in (B1), go down and push the button to exit to the right.
Go up two screens, left once, and up four more screens.
Go right twice, down, right, up, right twice again, and up twice.
Go six screens to the right and go down the hole to Utopioca. Don't forget you can use your map here now.
Go five screens to the left and step on the button to ring the bell.
The Stone Bell and the Artifact Bell
A2 - A6
From the bell in Utopoica, go five screens to the right, down one, and then eight more screens to the right.
Jump onto the red wall in the middle and climb to the top. Press the blue button, jump down and press the red button. Climb back up the red wall and continue to the right.
Go up once, right once, down twice, and four screens to the right.
Climb up two screens and go to the right.
Drop down three screens, go three screens to the right, and climb up two screens.
Find the gap in the wall on the right and go through.
Bounce across the next room to avoid the robots and proceed to the right. Be warned; some of the walls will move when you get close.
Go up and to the left to a Save Point if desired.
A6 - A7
From the Save Point in (A6), go right and down, then speak to the Warrior and accept his quest.
Find the passage in the wall on the right and go through.
Go down and to the right, then bounce on top of the upper row of squares so you can climb up one screen.
Speak to Kaia and she will give you a Vidya Stone (A6).
Go down, right, and then stay along the upper-most path to go up.
Go through the hidden path on the right and then up.
Bounce up in the middle of the room, and a square will come down to meet you. Climb on top of it and jump to the right to get a Kaushiki Stone (A6).
Go down and to the right. This room will have some squares that disappear when you get close, and others that are invisible until you get close.
Climb up to the top and go through the tunnel to the right. Pick up the Half Moon Glyph (A7) and hit the button to get out.
Drop down two screens, go right and then up to a Save Point.
A7 - B8
From the Save Point in (A7), go down once and to the right twice. Continue to the right where the tunnel would be to find a hidden path and drop down.
Go right once and up twice, then take the lower path to go right two screens.
The robots in the next room will move vertically or horizontally if you cross paths with them. Distract them long enough to continue to the right, or use the white light to destroy them and continue.
Drop down two screens and note the banked wall on the left of the lava. Climb up one screen, fall in ball form and hit the banked wall to bounce over to the right side. Switch back to sprite form in flight to avoid bouncing back into the lava.
Go to the right and jump over the gap to get to the Ear Warmers (A8).
Climb up, go left, down, and left again.
Use the floating machine to get across the lava without hitting the robots, then go down two screens to a Save Point.
B8 - B7
From the Save Point in (B8), go up, left, and down twice. Find the gap in the wall on the left and go through the hidden path.
Along the floor near where you enter the room is another secret path: follow it down and then go to the right to pick up the Manasa Stone (B8).
Go back to the left and up the way you came.
Go up the pipe and to the left two screens to get a Silver Coin (B7).
Return to the room with the secret paths and climb up the wall on the left to find the third hidden tunnel.
Go left, down, and left once more to a Save Point.
B7 - A6
From the Save Point in (B7), go left three screens, down one, and one to the right. Hit the button to open the walls.
Drop down two screens and climb up the wall on the left to find the hidden path.
Take the yellow light and quickly climb through the path to the left. Drop down to the lower level, run left, and use the power. When you hit the ceiling, switch to ball form and bounce left to a Holed Coin (B6). It may take a few tries to get the timing right.
Go back, get the yellow light again and use it below the hole in the ceiling to go up two screens.
Take the blue light, fall a bit, and use the power facing to the right as high as possible without hitting the walls on the screen.
One screen to the right is a small block with a green light next to it. Fall on to the block, take the green power, and use it to go up and to the right to get the next blue light.
Use the blue power facing to the right again, as high as possible, and cancel it in time to get the green power in the next screen.
Use the green power to go to the right one screen and up to the ledge. Pick up the Ring (B7).
Fall down one screen, go to the right once and speak to Chico. Give him the Ring, and he will reward you with a second Kaushiki Stone (B7).
Go to the left one screen and speak to the faeries. If you accept their quest, they will pay you with a Silver Coin (B7) up front: the quest does not need to be completed.
Continue to the left five screens and go up.
Speak to Alfred, give him the five stones, and keep going upward two screens.
There are robots in the next room that shoot horizontal lasers on set intervals. Observe the robots to get their rhythm, and proceed carefully.
Step on the button to ring the bell.
A6 - C7
From the bell in (A6), climb up one screen, stand on the green button, then go back down and exit to the right.
Fall down five screens to the bottom, go five screens to the right, and drop down the hole.
Go left two screens, down once, left once, and climb up.
Grab the wall above the white light, switch to ball form and fall down, then bounce to the left and across the green goo. Switch to sprite form and use the white power to destroy the robot. Climb up and get the Golden Coin (C7).
Go down, right, down, and right again to a Save Point.
C7 - D6
From the upper Save Point in (C7), go left, up, and right twice.
Go down, right, down, and left twice.
Go down once, left twice, down twice, speak to Malie and accept her quest.
Go left two screens.
The next room has two robots with rotating lasers. Wait until the laser from the upper robot passes you, and follow it up the wall on the right.
Jump off the wall when the laser from the lower robot is approximately horizontal, land to the left of the robot and go left to the next screen.
The next room has another robot with a rotating laser and a red light. Wait until the laser passes, then enter the room, switch to ball form, and start bouncing.
Grab the red power and bounce as high as possible when the laser passes vertical. Use the power to launch yourself to the wall hanging from the ceiling and grab on.
When it is safe to drop, fall into the tunnel and go left.
Pick up The Bolt of Awakyinsomawan (D6) and bring it back to Malie. She will reward you with the Arrow Glyph (D7).
From Malie, go up twice, left twice, and down once.
Go four screens to the left, down once, and once to the right for a Save Point.
D6
From the Save Point in (D6), go left twice, down four screens, and four screens to the right.
Speak to Laserdisk and give her four artifacts and two coins, and she will let you pass.
Go three screens to the right and climb up three screens.
Bounce across the gap and go left two screens. Jump over to the left side and down two screens.
Grab the yellow light, go down and to the right, and use the power below one of the holes in the ceiling.
After using the power, continue climbing up one screen and push the button to ring the bell.
The Glyph Bell and the Final Bell
D6 - E4
From the bell in (D6), go down two screens and then seven screens to the left. Go up once to a Save Point.
From the Save Point in (D5), go four screens down, left once, and up once.
Go left twice, up once, and right once.
The next room has a green light, a white light, and two robots.
Grab the green light and run to the edge of the pool. Use the green power to go over and grab the white light, then land on the upper platform. Jump up and use the white power to destroy the robot up above before it shoots you.
The next room has a slow moving robot. If you are directly above, below, or to the left or right of the robot it will move toward you until it hits a wall. Use this to direct the robot to the waterfall on the right.
Make the robot go down, then right, up, left, down, and right. When the robot hits the waterfall, the lightning bolt blocks will disappear. Direct the robot away to the left and climb up.
Go to the left. The next room will have more robots and lightning blocks.
Climb up to the top, and the robot will start moving toward you. Run left and jump over the robot when it moves under the divot in the ceiling.
Wait until the robot hits the wall and starts moving back toward you again. Jump over it in the same spot and drop down to the lower level. Quickly move to the left to avoid the laser.
Go left and pick up the Umbrella (D5), then proceed to the left and speak to Hat Man. Give him the Umbrella, and he will reward you with the Hook Glyph (D5).
Drop down three screens, go left, up, and left again.
Go down, left, and down once more to a Save Point.
E4 - D2
From the Save Point in (E4), go up once, left twice, and up once more.
Go four screens to the left, up once, and six screens to the left.
Go down, right, down, left twice, and use the green power to dodge the robots and continue left one more screen.
Go up, left, and up again.
Speak to Joy, give her three glyphs and four coins, and she will let you pass.
Use the green power to get up to the wall on the right, grab on, and climb up.
The next room contains two robots and a white light. Hold on to the wall on the right side of room with the robots. After the laser passes your cover, switch to ball form, bounce off the banked wall on the left, bounce over the robot and grab the white light. Use the white power to destroy the robot on the ground and run to the left.
Climb up two screens and step on the button to ring the bell.
From the bell in (D2), go down and through the hidden passage by the pillar on the left.
Go down, left twice, up, right, up and right again to a Save Point.
D2 - End (C4)
From the Save Point in (D2), go left, up twice, right, up, and right.
Go down, two screens to the right, and down again.
Use the machines to get to the right side and back up.
Go four squares to the right, and bounce off the banked walls in ball form to go up.
Go right once, and use the green power to dodge the lava drops get up to the next ledge, then continue to the right.
Go up, right twice, down, right, and up again.
Go three screens to the right and three screens down.
Go three screens to the right, two screens up, and left once.
Climb up two screens to a Save Point if desired.
From the Save Point in (C4), drop down three screens, speak to Kim, and go left.
Go up to the middle platform and run to the left next to the firing robot. Wait until it fires, then run up to the next level and climb up two screens.
Bounce as high as you can on the platform on the right, fall in hole to the left, bounce the wall hanging from the ceiling, and grab on in sprite form. Quickly climb to the top before the laser catches up with you.
Go grab the white light the platform on the left, bounce in ball form, then switch to sprite form in the air and use the white power to destroy the robot on the right.
Go over to the button to ring the final bell.
Thanks to cheeko for the walkthrough!
Posted by: Mike |
January 2, 2013 4:02 PM
|
January 2, 2013 4:02 PM
Knytt Underground: Bluestone Quest walkthrough
The quest can be found in Chapter 3, in square E,1 of this Map.
Mi and her companions stumble upon a remote outpost where a solitary fairy is desperately searching for the elusive bluestone. Upon sight of Niles the fairy, Dora goes into hiding, leaving Mi with no choice but to rely on Cilia to talk to the fairy. The conversation goes smoothly, and it turns out that the location of the incredibly rare bluestone is a family secret passed down to Niles from his father. The info is a bit vague though, so it's up to Mi and Cilia to guide Niles to the exact spot and reap some of the rewards.
Although the item is right above the place where the quest starts out, you need to navigate a quagmire of hidden pathways to discover the only one that leads to the bluestone in a long roundabout way. The only clue to the right path is held by a mysterious broken statue called the Ortofaktor. You'll have to find this statue and then solve a small puzzle involving a broken hand that would point to the right direction if it was still attached to the arm.
From there on it's a straight follow-the-hidden-tunnel challenge, occasionally interrupted by open-air places where you need to find the next hidden tunnel entry until you reach your goal. The marked map below might help you get around the area:
Map
Once you find the bluestone, Niles lets you keep that first piece you found, and the group heads back to the outpost. Here Niles spots Dora, goes into rage mode and leaves. The ensuing dialog between Dora and Cilia reveals the reason for his sudden anger and gives away some surprising info from Dora's past:
Cilia: Who is he?
Dora: We� had a relationship once.
Cilia: Really? With that asshole? Glad that's over then. When?
Dora: Few years before the fairy springs.
Cilia: Oh? Before or after that Aapo guy?
Dora: Well� It wasn't before�
Dora: �but it was definitely before �after��
Dora: Anyway, Niles didn't know.
Cilia: What the�? Dora?
Cilia: �
Cilia: I take it he wasn't happy to find out.
Dora: No. Not at all.
Cilia: Shit�
Cilia: Still. What an asshole.
Thanks to SiamJai for the walkthrough!
Posted by: Mike |
January 10, 2013 12:18 AM
|
January 10, 2013 12:18 AM