
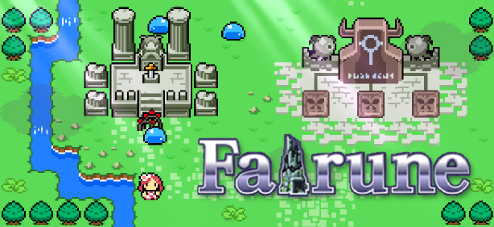
![]() Fairune: a world where illusion is reality. Long ago, three spirit icons sealed away an evil scourge at the center of the realm. One day the icons disappeared and monsters overran the peaceful lands. But hey, a monster wouldn't bother a girl in a dress, right? Your help is needed, o' chosen one, so go over to that pavilion, grab that sword and, in that strange spot there, use a bit of mana to create a healing zone. Now you're ready for an action-puzzle RPG adventure that may look derivative but plays on a level all its own.
Fairune: a world where illusion is reality. Long ago, three spirit icons sealed away an evil scourge at the center of the realm. One day the icons disappeared and monsters overran the peaceful lands. But hey, a monster wouldn't bother a girl in a dress, right? Your help is needed, o' chosen one, so go over to that pavilion, grab that sword and, in that strange spot there, use a bit of mana to create a healing zone. Now you're ready for an action-puzzle RPG adventure that may look derivative but plays on a level all its own.
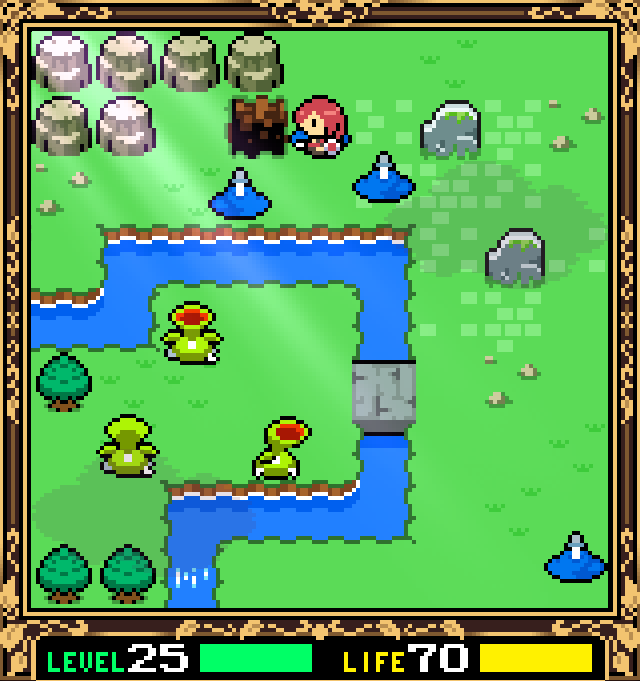
 Urara-Works' programming joins with Skipmore's retro-style artwork and clever game design to create an experience that is equally nostalgic and original, lovingly poking fun at the hack'n'slash of Legend of Zelda-type RPGs. Although navigation using a d-pad is typical, the attack buttons are replaced with an inventory and pause button. Instead of fighting the monsters you encounter, you walk over them, defeating them instantly. If they're at your level, they'll knock down a point or so of your health while delivering an experience point in return. Since there's no hack'n'slash, there is no need nor possibility to "grind" skills beyond your level, putting more emphasis on using your wits to accomplish goals, which makes sense as a large part of this adventure is solving puzzles. Your main task is to find and return all three of the spirit icons, enter the depths of the realm, and conquer the evil scourge that dwells there. Along the way, you'll encounter other puzzles, need to discover and utilize inventory items, and figure out how to open new pathways toward your ultimate goal.
 Because the world of Fairune is large, diverse and extremely maze-like, there is more challenge than just figuring out a few puzzles. You'll have to strategize a bit, keeping track of your health and knowing where your healing zone is at all times. If you do die, the penalty—walking from the grave near the pavilion to wherever you need to be—varies in length but is never game ending. Weaker foes are easily crushed yet you earn no experience from them; stronger enemies will drain your health while remaining impermeable to your walk/attack. In this way, pathways are often blocked because you simply cannot move through until you have advanced in levels. This lends an occasional avoidance aspect to the game, especially when you encounter a maddeningly difficult, perhaps even unfair series of boss battles at the end.
With very little textual explanation and no hint button, playing Fairune is challenging: you'll be teased and tricked, but you can't argue with the logic once all is said and done. While the gameplay is slightly different, Fairune is very similar to Synopsis Quest Deluxe in personality and style. That personality, that sincere humor is what makes it so fun. You will both love and hate Fairune, shaking your mobile device in frustration at some tricky puzzle then, feeling rather accomplished once solved, happily engaged in your next quest, plunging through to the finish but never wanting it to end.
NOTE: This game was played and reviewed on the iPhone 4S. Game was available in the North American market at the time of publication, but may not be available in other territories. Please see individual app market pages for purchasing info.


Walkthrough Guide
(Please allow page to fully load for spoiler tags to be functional.)
Fairune Walkthrough and Strategy Guide
How to Play
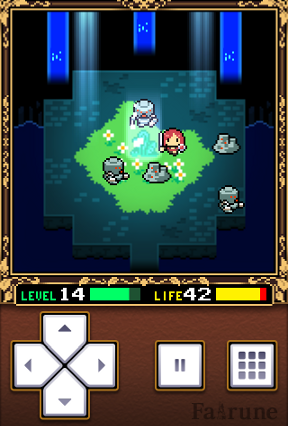
Navigate by tapping and/or holding the arrows on the d-pad in the lower left corner your device's screen.
The button on the far right is your inventory button: use it to access items that will help you in your quests and to view the ancient codex for monster advice.
To use an item in your inventory, tap the inventory button, use the d-pad to select the item, then tap "o" button to use it. If you wish to cancel or close the inventory, tap the "x" button.
The middle button pauses the game, saves the game, and brings up other options such as quitting to the title screen.
On the title screen, tap the gear icon to access up music and sound options as well as a button to "erase data" if you want to restart the game.
Tap the question mark icon to read instructions on how to play.
Drag your finger left or right on the title screen to turn the page and view your collection: items and monsters that you have found and defeated.
Defeat monsters at your level or below by walking over them.
Monsters at your level (as suggested in the ancient codex) will take away a health point while giving you an experience point.
You can defeat monsters one level higher than you, too. You'll earn an experience point but will lose 2 health points in the process.
Weaker monsters won't yield experience but they won't hurt your health, either. So it's good to level up as much as possible before heading into new areas, that way it makes moving around less cumbersome.
Monsters that are more than 2 levels above you are impermeable to your attacks and cannot be defeated until you level up. They'll sap a lot of your health, quickly, depending on how much stronger they are than you.
Use strategy and plan your route in relation to the monsters found there and its proximity to a healing spot.
Keep in mind that everytime you leave and return to an area, the monsters there will regenerate. This is useful for "training" to level up easily, though.
If you get too low in health when you're too far from a healing spot, you will need to avoid matched monsters on your way back to heal.
There is no big penalty for dying but you will have to backtrack.
When your health bar reaches 0, your character dies. Follow the winding path to exit the grave and you'll end up one screen east of the first healing spot.
The further along in the game you get, the further you may need to walk to return to your current quest area.
Your goal throughout the adventure is to find items and solve puzzles to open new pathways, until you've replaced all three spirit icons (flame, water and air) on the seal and have gathered the necessary gear for fighting the evil scourge inside the tomb.
Level 1:
Starting out and gearing up
You begin at the sealed tomb of the evil scourge. From here, walk north 2 screens. Once there, you'll be directed to a PIECE OF MANA. Walk over to it to get it.
Head south 1 screen and follow the arrow to the odd tuft of grass then use the PIECE OF MANA there.
For now on, whenever you find a tuft of grass that looks like that, use your piece of mana on it to create more healing spots.
Go 1 west and 1 south; you'll see a ruined pavilion.
Go up the stairs and get the SWORD OF HOPE.
Now you're ready to fight monsters.
Level 1's suggested monster is slime, so let's wander around a bit looking for those blue blobs, avoiding everything else, until you've reached level 2.
TIP: it's simplest to just level up to level 2 right away, before setting out on any other quests because, well, level 1 is pretty wimpy and you shouldn't get too far from your healing spot.
So, slay the few blobs in the pavilion area then return to the healing spot (east 1 and north 1). Slay all the blobs in this area, heal up, head west to slay those foes, then return to the healing spot, heal up, and repeat the process until you've reached level 2.
Level 2-7:
Tree maze, underground tunnel, pickaxe, oil, and three red gems
Your main goal at level 2 is to open the path that lies southeast of the sealed tomb.
Because the monsters along that new path are above your level, though, it's a good idea to slay enough treants to level up before heading that direction...it's a little ways before the next healing spot can be created.
To open the path, go all the way south from the evil tomb and then head east until you can go no further...
On the top edge of the screen, the third tree from the right has no wood. You can walk through it into the tree maze.
Follow the lower maze north and west until you reach the outer edge. There you'll see a stone button.
Walk over to push the button. This lowers the block that was barring your passage east.
Then, go east again, south, and west back to where the blue slime are.
Get the first RED GEM (1/3):
1 screen west of the tree maze entrance (or southwest from the evil scourge's tomb), you'll find the FIRST RED GEM. Go get it.
Then, go through the tree maze to reach the eastern part of the grasslands.
You should be level 3 before entering the north part of the tree maze (but don't need to be) to defeat the red fungus without losing too much health.
Follow the maze east and south until you come out near two huge tableaus with bird designs on them. (Make a note of the design because it's the clue for an upcoming puzzle).
From the bird tablets, go down the stairs and 1 screen east. Here you'll see a rock in a clearing surrounded by trees:
Stand to the left of the rock and then "push" it aside by walking right.
Before entering the underground tunnel, you should level up to level 5 so you can defeat the Poison Fungus that populates the tunnel.
Go down the stairs and follow the maze as it winds south, then east, then all the way north. Here in the northeast corner of the dungeon is another strange tuft of grass:
Use the PIECE OF MANA to make a healing spot.
Then, keep along the top each of the map and head west. This section of the tunnel ends in the northwest corner...
get the PICKAXE.
Leave that area, go south a little ways, then follow the tunnel west and south until you find some stairs. Go up the stairs to end up in an area just west of the place you entered.
Head north and east, making note of that leafless tree as you pass (maybe something to chop it down can be found?), then turn south until you reach an area with Wasp and Dramos monsters.
Go south 1 and you'll find another tuft of grass...
use a PIECE OF MANA here to create another healing spot.
TIP: move around the general vicinity, hunting monsters, until you've leveled up to level 7.
Continue east all the way until you reach the west bank of the river.
Push the stone block over to create a bridge between this and the bird tableau area.
Cross the newly made bridge and head south until you reach a sandy area surrounded by water.
Use the PICKAXE on the "x" in the ground and oil will sprout up from it.
Walk over it and you'll get OIL.
Go north and back over the bridge to the west. From there, go south and you'll find stairs leading to another underground tunnel. Go down.
Wind your way through the tunnel, being mindful of the Ooze monsters you find there.
When you reach the end, you'll be in a room full of Ooze monsters, all of which you must defeat.
After defeating the room full of Ooze monsters, the gate at the top of the room opens up:
Get the second RED GEM (2/3).
Return to the surface and go all the way west until you see an area with a ruined dark tower surrounded by a river. The way further west is blocked off by a forest of trees...or is it?
Look closely at the row of trees four up from the bottom: they have no wood so you can walk right through.
Screenshot: passage through the trees
On the other side, you'll reach a tree-shrouded area you thought impossible to reach. Walk to the southwest corner of the river bank and...
Pick up the last RED GEM (3/3).
Now go east, returning to the lawn area with a bird design in it.
Level 8-11:
Teleporters activation, lava world, hatchet and green gems
To activate the teleporter to the lava world, you need to place the RED GEMS around the bird icon on the lawn just as shown on the tableau:
Stand at the tail of the bird and then use a RED GEM. Move to a wing tip to place a red gem there then do the same on the the other wing.
Screenshot: red gems on bird icon/teleporter
Step into the beam of light that appears there to be teleported into the lava world.
Once in the lava world, you'll notice another bird icon on the ground; this one will need three green gems. There's also a bridge over the lava heading north that's blocked off.
Go west and use the MANA here to create another healing spot.
TIP: if you want, now is a good time to hunt Red Slime and Ash Dramos monsters, training up easily to level 10 before moving on to your next quest.
Return to the lava world's bird icon and then move south. On the left side of the screen you'll see a button surrounded by stone. One stone looks cracked, with lava oozing in its center.
Use your PICKAXE on it and then walk over the button to activate it, causing the block to move away from the bridge north.
Go further south and you'll find a GREEN GEM (1/3). Grab it!
Now go north 1, west 2x, and south to the entrance of a stone maze filled with Skeleton (level 10).
Wind your way down, right, down, and left to find a HATCHET.
Go back up to the beginning then take the northeast pathway up, to the right, down through an archway then all the way to the end of the maze where you'll find GREEN GEM (2/3).
In this same area at the end of the maze, you'll notice another lava-oozing stone (4 from the right). Use your PICKAXE there to remove it and go through.
Now you're on a narrow winding path across lava. At the end is the SILVER KEY. Go get it.
Return to the start of the maze and continue north to an area full of Phantoms and Skeletons. The lone tree at the very top middle of the stage seems to stand out...
Use the HATCHET here.
You'll get a LOG (1/3) and will open a new path.
Continue up into the newly opened area where you'll find the third GREEN GEM (3/3).
Return to the lava world's bird icon, which is east of the healing plant:
Place the three GREEN GEMS the same way you did on the grasslands' bird icon.
There are two areas here in the lava world that you'll need to return to, after getting some more supplies. So in the meantime...
Step through the new teleporter and return to the regular world.
Level 11-12:
Log gathering, warrior statue, seedling, flame icon and spirit lamp
After getting the hatchet in the lava world and returning to the surface, go all the way west to where you see the dark tower. At the bottom of the screen is another leafless tree.
Use the HATCHET here to get another LOG (2/3) and open a new pathway.
Go through the new opening and head south x2 and west 1 to the end of a peninsula.
Here you'll find a SEEDLING. Walk over to it to get it.
Go east and north.
Push the block over the water to create a new bridge, but don't go over it yet.
Go back to the bird icon and, from there, go north and west. Here you'll see another leafless tree.
Use the HATCHET on it to get your third LOG (3/3) and open another path.
Go through the new opening and then east. Here you'll see a dais with a statue on it.
Walk up to it to get the WARRIOR STATUE.
Now return to the teleporter and go back to the lava world. Go west then move north past the healing plant. Here you'll see a building with a locked door.
Use the SILVER KEY.
Go through the door and continue north to another room. Now there are two buttons to push, yet you are only one girl. What to do?
Use the WARRIOR STATUE on one button while you stand on the other. The door will open.
Before continuing, take back the WARRIOR STATUE in case you need to use it again.
Go north through the opened doorway...
and get the FLAME ICON.
Head out back to the teleporter area and go north. Follow the winding pathway north until you come to a darkened room. There's a lantern on the podium.
Go up to the podium and use the OIL on the empty lantern.
Then use the FLAME ICON.
The SPIRIT LAMP is now glowing; take it.
Leave and take the teleporter back up to the surface world.
Level 12:
New path, ID card, and sage tablet
Once you return from the lava world with the flame icon, head back to the tomb of the dark scourge.
Use the FLAME ICON on the middle stone in front of the evil tomb.
There'll be an earthquake and you'll be shown a hole forming in the ground somewhere else.
Take back the FLAME ICON.
Go south, east through the tree maze, then down to where the two large bird tableaus are. Continue south past the teleporter and you'll find the hole between two old tombstones.
Go down the hole to a new underground tunnel that's filled with Zombie Dramos (for level 12).
Follow the tunnel to its end and you'll reach a new room filled with six tombstones, Zombie Dramos and a Metal Slime (level 14).
Go to the upper lefthand corner of the room and get the SAGE TABLET (1/7).
Then, go through the opening in the upper righthand corner of the room to another room with two pathways, one is blocked off. In the top right corner of this room is a stone surrounded by two glowing blue tiles and there is something on the floor in front of it:
Get the ID CARD.
TIP: hunt monsters in this area a while, until you've reached level 13
Level 13-15:
Dark tunnel, watery ruins, gold key
Starting at the evil tomb, go east. Here is a dark tunnel that you previously couldn't explore...Climb down the stairs.
Since you have the special SPIRIT LAMP, use it. Now, you can now move around freely through the dark tunnel.
Continue through the tunnel until you reach the end. There you'll see a colonnade.
Notice that if you move up the stairs and walk to the right, you can move behind the columns. Continue all the way right into a hidden room.
Defeat all the Wraith monsters here to remove a door at the top of the room....
Get the GOLD KEY.
Go back to the colonnade entrance.
Continue up the path to the west. Then go south past a depiction of the three spirit icons until you reach a raft. Ride the raft and then walk further south. Here's more water, but no raft...
Use the LOGS 3x to create your own raft.
Ride the newly made raft south.
Go east to another building. Again, this building has a bunch of columns in front of it.
Just as you did to before to find the gold key, move behind the columns to find a hidden doorway leading east.
At this time, though, unless you're at least level 15, there's no point of continuing through, so go back to the building front.
Go north past the column-fronted building entrance into a room with a tuft of grass.
Use the mana to make a healing spot here. Then, continue defeating Wraith and Golem until you reach level 16 (there's a way to level up more quickly, a hidden secret item in a nearby area.*)
Return to the front of the building and move behind the columns to the right. Follow that winding pathway northward. Then, in the next room, three blocks stop you from continuing north.
Push forward the blocks on the left and the right, then push the middle block to the side.
Continue heading north along the pathway until you come to a gold door.
Use the GOLD KEY here.
Climb up the stairs to a new area of the grassy lands.
*Hidden Bonus Item:
Instead of climbing up the stairs, first go past the stairs northeast, around the waterfall to a secret room. Avoid all the monsters in the area and get the "E" item in the upper right corner. Then, in your inventory, select the item. You'll now earn double experience!
Level 16-19:
Shadow monsters, water icon, growing seedling and path to the sky tower
Once you climb up the stairs past the gold door onto the new grassy area, you'll see a bunch of Maneaters in the area (you'll need to avoid them if you're not at least lvl 16). Move north on a faint path over the water.
Go into the middle of the room filled with Shadow monsters (lvl 16). There's a path to the left (behind a column): take it to go west.
Now move downwards along this path to the tiny island at the end:
Get the WATER ICON.
Go back the way you came until you reach the grassy Maneater area. Continue heading south.
Head east and you'll see a patch of soil on the ground next to a ledge leading north...
Put the SEEDLING in this patch of soil.
Use the WATER ICON to grow the seedling.
Climb the newly grown beanstalk to go north.
Continue north past an area of Maneater and Rock Face monsters. Then go east and you'll come to the riverbank
Push the stone over the river to form a bridge.
Go east and south, back to the evil tomb.
Use the WATER ICON on the right side of the tomb.
Another hole will open near the bridge you just crossed.
Go north and east, then go down into the new hole. Here's a stone tunnel way filled with Metallic Ooze. Wind your way north.
Now you're at a locked, electronic looking door...
Use the ID CARD to unlock it.
Climb the stairs and go west. There you'll see the entrance to the sky tower.
TIP: continue in the Metallic Ooze area until you reach lvl 19, then go back to the first healing spot and defeat Rock Face until you reach level 20.
Level 20-21:
Sky tower to the cloud temple, sage tablet #2
As you enter the sky tower, you'll come to a room with grey warrior portrait and two buttons, one on each side of the room.
Walk over to one of the buttons and use the WARRIOR STATUE.
Then go over to the other button and stand on it.
The warrior portrait will light up and stairs will appear.
Notice that there's a slot in front of the warrior portrait?
Use your SWORD OF HOPE there and it will be upgraded to a MAMONO SLAYER.
Take back the WARRIOR STATUE then head up the stairs.
Now you'll need to work your way up the tower along a designated path. There will be Blue Knights and Red Knights in your way, so you should be at least lvl 20.
Halfway up, you'll come to a room with Red Knights and three staircases...
Take the lower right staircase to reach a room with a button. Press it to make stairs appear in the upper left corner room.
Go down and then take the staircase in the upper right corner. Now just walk seemingly through the wall to the left to reach the next staircase.
Go up into a room full of Red Knights and spikes. Move to the staircase in the bottom left corner and go up.
You'll reach a room that's apparently empty but, you'll learn, if you walk in the wrong direction, the floor crumbles and you'll fall to the room below.
The safe pathway here is the same as in the spikes room: 3x east, 2x north, 1x east, 2x north, go up the stairs then back down, 2x west, 1x south, 2x west.
Get the SAGE TABLET (2/7)
TIP: at this point, travel up and down the lower part of the tower until you reach at least level 21.
Continue upwards, through a winding hallway of spikes, and further up the tower. The higher you get, you'll encounter Dark Knights (lvl 22). Keep going until you reach top.
At the very top of the tower, your view is a bit obscured by the passing clouds, but you should see a locked door on the south wall of the room.
Use the ID CARD to unlock it.
Go through the newly opened doorway to enter the cloud world.
Level 21-22:
Cloud temple, sage tablets #3-5, and the crystal key
After reaching the top of the air tower and opening the door with the id card, go south along the cloudy pathway.
Avoid the holes in the "cloud floor" or you'll fall through to the surface world below and have to climb back up the tower.
Continue south until you reach a tuft of grass where you can make a healing spot.
Now you can go battle more Red Knights and Dark Knights until you reach level 22.
From the healing spot, go west to a room with 6 pillars.
Push the top middle pillar upwards to make a new path northwards.
Screenshot: six pillars room
Go up the stairs and follow the "pillar path" to another room...
Get the CRYSTAL KEY.
Screenshot: crystal key location
Go south, passing through the room with the pillars until you reach another area where you can see a sage tablet at the end of a curling pathway. It appears there's no way to reach it but...
Go halfway down the outside path and then turn right. There's an unseen doorway that will put you on the curling pathway toward the sage tablet at the center.
Get SAGE'S TABLET (3/7).
Return to the cloud zone's healing plant and continue east. Go through the first room and all the way south until you reach a button.
Press the button and red dots will appear on three squares in the room. Make a note of their pattern.
Go back to the northern room to see the three squares in this room are also lit up with dots.
Walk over each of these squares until their pattern matches those in the other room. Done correctly and the door here will open.
Get another SAGE'S TABLET (4/7).
Then, walk over the button between the two statues to activate it. That will cause the squares in this room to light up with a red dot pattern.
Go back into the southern room...
and repeat the dot pattern from the squares in the northern room to unlock the door to the south.
Go south and along the winding path until you reach another SAGE'S TABLET (5/7).
Return to the healing plant.
Level 22-23:
Aerial maze puzzle, the wind icon and sage tablet #6
TIP: level up to lvl 23 before leaving the sky tower/cloud area.
From the cloud world's healing plant, go south to a room with six warrior statues.
Notice how the statues are facing different directions? Also notice that, at their feet, a series of dots for each.
Go out the south door of the statue room and you'll be in a maze puzzle.
Use the clues from the statue room to make you way to the end of it.
SOLUTION:
The number of dots at the foot of each statue tells you which is first, second, third and so on... The direction the statue faces tells you which way you should turn/leave from the first room, second room, etc.. So, to get through the maze, follow these directions:
EAST-SOUTH-WEST-SOUTH-SOUTH-WEST
When you complete the maze puzzle, you'll end up at the platform with the wind icon.
Use the CRYSTAL KEY to unlock the door.
Get the WIND ICON.
Now return to the cloudy pathway by going north through the maze and past the statue room.
From the healing plant, continue north once then go east to an apparent dead end.
Use the WIND ICON on the swirly spot here to create a new pathway.
Go north on the newly formed path to get the sixth SAGE'S TABLET (6/7).
Then, just drop through one of the holes in the cloud path and go back to the evil tomb.
Level 23-25:
Sage tablet #7 and dragon scale
Use the WIND ICON on the left side of the evil scourge's tomb to open a new hole to a new tunnel.
Go north, east, and cross over the bridge to the Maneater area. Continue east then south to the new hole. Go inside.
Here you're in another part of the same tunnel where you found the ID CARD. It's filled with Mecha Dramos (lvl 23) and Guardians (lvl 24). So, if you haven't reached level 23 yet, go back to the top of the sky tower and defeat more Dark Knights.
Wind your way through this tunnel to the northeast corner and into the next room where you'll find the last SAGE'S TABLET (7/7).
Then, return to the door in the first room...
use your ID CARD here to open it.
Walk north into a lovely chapel area where you'll see seven tableaus (or gravetones?)
Look at the 7 sage tablets in your inventory to read them.
Then, walk around the room placing a SAGE TABLET at each of the seven tableus.
A button will appear to the left of the angel statue here. Press it.
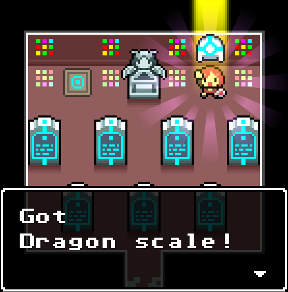
With the button pressed, a bright beam of sunlight pours down into the northeast corner of the room. Go over to it:
pick up the DRAGON SCALE.
Return to the tomb of the evil scourge.
TIP: level up to 25 before leaving this area.
Level 25:
"Only the evil scourge remains"...open the tomb and battle bosses
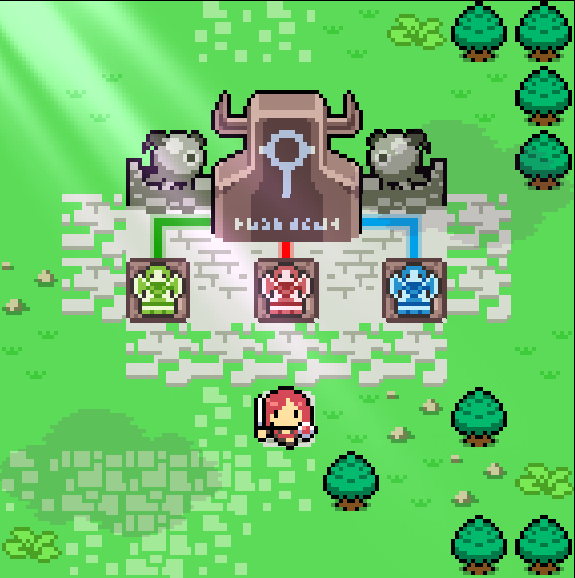
Open up the evil scourge's tomb by first placing all three spirit icons on the seal...
Then, step on the stone below that to activate them.
screenshot: spirit icons placement
The tomb will glow with pretty colors and open up.
Go inside the new doorway into the depths of Fairune and go all the way north until you reach a tile etched with the image of the "Chosen Maiden."
Use the DRAGON SCALE on this tile; it will glow with the image of a large sword.
Now, use the MAMONO SLAYER (the sword you upgraded in the sky tower) on this spot.
With this tasks done, a beam of light shines down and gives you wings. You'll fly up to meet face-to-face with the evil scourge.
Defeat three waves of boss battles by avoiding and shooting (much as you'd do in the old arcade classic, Alien Invaders!)
Each round is significantly more difficult than the next.
To help your cause, seek out the secret items that will boost your powers.
Once you defeat the Terra Dark, you're in a strange room:
Tap the screen in the middle to press the button.
Go east, taking the path in the upper right corner past the spirit icons.
Walk to the edge of the cliff and use the ANCIENT CODEX.
Congratulations, you have beat the game!
The 7 Sage's Tablets:
Inside the tunnel that's opened with the flame icon, in the room with 6 gravestones.
In the air tower, in the crumbly floor room.
East of the cloud temple's healing plant.
South twice from the cloud temple's healing plant.
From the room with six pillars (of the cloud temple), go south and then walk behind a wall through a hidden passage.
Head northeast from the cloud's healing plant; use the wind icon to access.
Inside the tunnel that's opened with the wind icon.
Suggested Monsters:
In order of level:
Slime
Treant
Fungus
Poison Fungus
Wasp
Dramos
Ooze
Red Slime
Ash Dramos
Skeleton
Phantom
Zombie Dramos
Giant Medusa
Wraith
Golem
Shadow
Maneater
Metallic Ooze
Rock Face
Blue Knight
Red Knight
Dark Knight
Mecha Dramos
Guardian
"Only the evil scourge remains" (boss battles)
Rare Monster Appearances:
These monsters randomly appear in certain rooms.
Orc Prince...found by the first healing spot, north of the evil scourge's tomb.
Gold Dramos...by the red gem bird teleporter.
Blood Ball...found in the lava world on the same screen as the healing plant.
Gold Skeleton....in dungeon where ID Card was found, in the room with 6 tombstones, Zombie Dramos and a Metallic Ooze.
Gold Knight...at the base of the sky tower.
These monsters are the final three bosses:
Mega Dark...boss battle, stage 1.
Giga Dark...boss battle, stage 2.
Terra Dark...final boss battle.
If you have questions, comments or need help, please post in the comments section below.
Secret Items
There is a special item hidden in the lava world, a Shield Boost:
(Thank you to agg85 for this tip!)
North of the healing plant, at the building with the locked gate, go behind the pillar to the left. Avoid the monsters as they will kill you instantaneously, and obtain the item in the top right corner. You will be rewarded with the Shield Boost which reduces damage from monsters at the same level as your character to zero!
There's a similar hidden item. It's an XP Boost:
(Thank you to Carbunkel for sharing this!)
From the Sword Pavilion go east and go into the tunnel. Follow that tunnel all the way through the temples, the two raft crossings, the next temple, and when you get to the other end, the hidden area is in the upper right corner of the room with the exit stairs in it. Go in it, avoiding the monsters, to get the XP Boost. With the Experience Boost, you'll earn twice as much experience when defeating monsters.
Rare Boost:
Up in the clouds, go north from the healing plant, then east, then north over the path opened with the wind icon. Drop through the hole to the left of the pavilion. With the rare boost, you'll be more likely to encounter rare monsters.
Posted by: elle |
April 8, 2013 3:01 PM
|
April 8, 2013 3:01 PM