
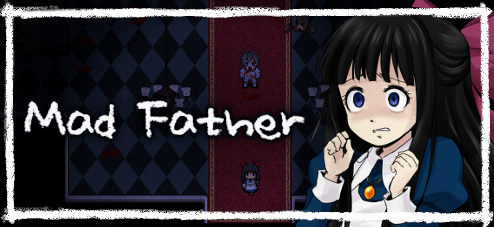
![]() Little Aya Drevis loves stories, playing outside, and her pet rabbit; but like many children her age, she loves her daddy more than anything else in the world. It's a real shame that he's not the most deserving person— the man is an honest-to-goodness mad scientist, who spends his days experimenting in the basement while the rest of the family tries to ignore the terrible sounds. When a tragic anniversary arrives and the dead come back for revenge, it's up to Aya to seek out and rescue her Mad Father— even if she, you know, probably shouldn't. Guess you can't pick your relatives.
Little Aya Drevis loves stories, playing outside, and her pet rabbit; but like many children her age, she loves her daddy more than anything else in the world. It's a real shame that he's not the most deserving person— the man is an honest-to-goodness mad scientist, who spends his days experimenting in the basement while the rest of the family tries to ignore the terrible sounds. When a tragic anniversary arrives and the dead come back for revenge, it's up to Aya to seek out and rescue her Mad Father— even if she, you know, probably shouldn't. Guess you can't pick your relatives.
 Made by Sen and translated by Vgperson, Mad Father is a free horror adventure with personality by the truckload and more variety than you'll know what to do with. One moment, you'll be helping Aya fend off zombie bites, the next, you'll be solving an item puzzle (or mashing Z to thrash your way free from a grabby monster, or sneaking past a guard of living dolls, or leading a decapitated corpse to his head, or deciding whether it's a good idea to uproot a mandrake...) It's a strange trip, and one that fits together only in the sense that it's consistently a jumble of tropes, but fortunately there aren't too many gameplay tricks to keep track of, and they're all pretty well explained when they come up.
 If Mad Father sounds like a ridiculous game so far, that's because it really, really is. But its goofiness is what sets it apart from the pack— imagine watching a cheesy horror movie from decades gone by, one that's fun because it's impossible to take seriously. Mad Father is pretty much the game of that movie, a gleefully absurd romp that's not exactly thoughtful or terrifying, but definitely isn't dull. Approaching Mad Father as a serious story might leave you disappointed, but take it for what it is, and chances are you'll have a blast. From the big creepy mansion to Aya's cute talk sprites to the wonderfully over-the-top awfulness of the Drevis family, there's plenty here to enjoy.
![]() Windows:
Windows:
Download the free full version
![]() Mac OS X:
Mac OS X:
Download the free full version


Walkthrough Guide
(Please allow page to fully load for spoiler tags to be functional.)
Mad Father Walkthrough Guide
Notes on the guide:
Hints and spoilered puzzle solutions were used when possible, but in Mad Father, the lines between regular gameplay and puzzles got sort of blurry. The guide isn't as spoilery as it could be, but it's still a better idea not to read ahead, and to only consult the walkthrough if you're stuck. Some later sections also contain story spoilers, but if you don't read ahead, you won't be spoiled.
Locations are bolded and items are italicized, for easier reference.
The main walkthrough doesn't cover gem collection, and while endings are mentioned, the main walkthrough doesn't describe how to get the one you want. See the Endings Guide and Gem Collection Guide for help with gems and endings (though note that the former has strong story spoilers. If you're having trouble with chainsawing, button-mashing, or other gameplay aspects, see the Game Mechanics section of the walkthrough. If you're new to this sort of game and you want some basic guidance without a walkthrough, see the Tips section.
There's one color-based puzzle, but I've provided a note so that players who have difficulty distinguishing colors can bypass it.
Game Mechanics:
You can reach your inventory by pressing [Esc]. Use the arrow keys to switch back and forth between regular items and key items. When an item's name is displayed in white text, the item is usable (except for gems, which are displayed in white text but not usable). Some items are only usable in certain locations; those are still always displayed in white text.
Aya's health bar is sometimes displayed at the top right corner of the screen. Being attacked by weaker monsters will make it go down (stronger monsters can instantly kill you), and it will always go down as a sort of timer in the button-mashing events. If it empties completely, Aya will die. Fortunately, the health bar resets from area to area.
Save points are represented by crows, usually sitting on something. Crows can move from place to place, but you'll very rarely lose a save point, and you'll almost always have one that's safely accessible. Later in the game, one save point is represented by a red crystal. There are 5 available save slots.
Some events will require you to mash buttons to escape from a monster. It should be obvious when it's time for one of these events-- they're marked by a certain song, and an image of a finger, the Z-key, and the word "Push!". Z isn't the only key that works, however. You can mash Space or Enter for the same results.
During the game, Aya will collect a Chainsaw. It can't be used to attack monsters, only to destroy weak inanimate objects, like barrels and certain crates. Press C to take out the Chainsaw, or to put it away. Pressing Z/Space/Enter will make Aya use the chainsaw, but not every object can be destroyed, and while the chainsaw is out, Aya can't examine objects or talk to other characters.
Some events will require you to stealthily avoid a monster. The monsters' lines of sight aren't always obvious, but are almost always blocked by hiding behind something or taking a different path out of the monster's way.
Collecting 21 gems will unlock the gallery (and play an extra scene after the True End). From the gallery, you can look at the game's art and play the game's music.
Tips:
Save frequently-- you will probably die a lot. Remember that Mad Father is just one of those games with a lot of silly deaths, and you're not doing it wrong if you keep getting killed. Experiment, and see what works and what doesn't.
Examine everything! Some items are movable, and some shelves look normal enough, but contain items. If you don't have anything useful and there's something you obviously need, there might be another item around that you're missing.
Take another look at the items you have, and try everything that might work. Mad Father requires some backtracking, but not very much. If you've got an item with no obvious use, it's much more likely that it goes somewhere nearby.
If you keep trying and failing at something that seems impossible... well, it might actually be impossible. Is there something else you haven't tried, or an easier way to accomplish what you're attempting to do? Some problems can't always be solved right away.
It might help to take notes as you play, especially about places that seem potentially significant, and objects that might be involved in an item puzzle later-- especially if you're collecting gems.
Walkthrough
Getting into the basement:
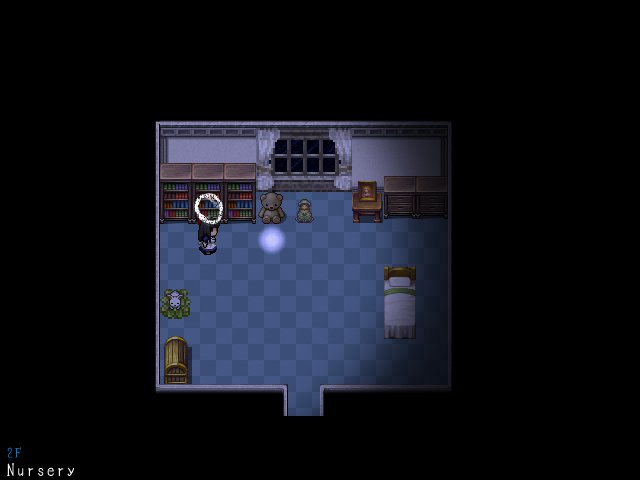
After the intro, you'll be in the Nursery. Examine the doll, the picture on the nightstand, and the rabbit, then go to bed. Leave the room, and watch the scene. Run right and up until you meet the mysterious boy.
After another scene, you'll be at the East Hall (2F). On the left is the Bedroom, and on the right is the Nursery. Down the hall to the right is the Attic.
Go inside the Bedroom, and when you're kicked out, go back in. Examine the sparkle in the pool of blood to get the Archives Key. There's a safe, but you don't know the combination yet (and even if you know it from a walkthrough or previous playthrough, the game won't let you use it yet). You also might want to read your mother's diary.
Go inside the Nursery, and examine Snowball, then choose to take him along. You also might want to examine the drawers.
There's nothing you can do in the Attic for now, because the ladder is missing a section.
Go left, through the Entrance Hall, to the West Passage (2F). Be careful in the Entrance Hall-- there are two zombies that will chase and attack you. Fortunately, they won't follow you to the West Passage or East Hall. Don't worry about the zombie in the West Passage, because it runs away instead of attacking you. Once in the West Passage, an unlabelled room is on the left, and the Archives are on the right. To the far left and up the hall is the Doll Room.
There's nothing you can do in the unlabelled room, because the door is locked.
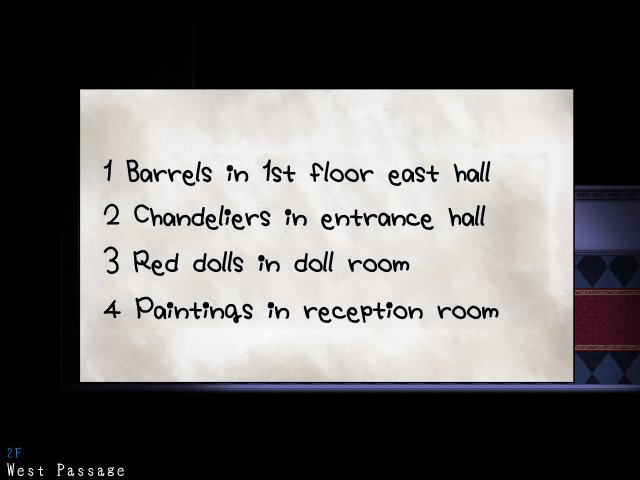
Examine the Archives door to unlock it with the Archive Key (from the Bedroom) and go inside. There's an unknown door in the upper left corner of the room, but for now it's locked. Examine the rightmost bookshelf in the middle cluster on the bottom row. Then, examine the second bookshelf on the left in the left cluster in the upper row to get the Code Memo and a scene. Go to your inventory, and take a look at the code memo. You also might want to examine the other shelves and books lying around.
This image shows the Code Memo, for easier reference.
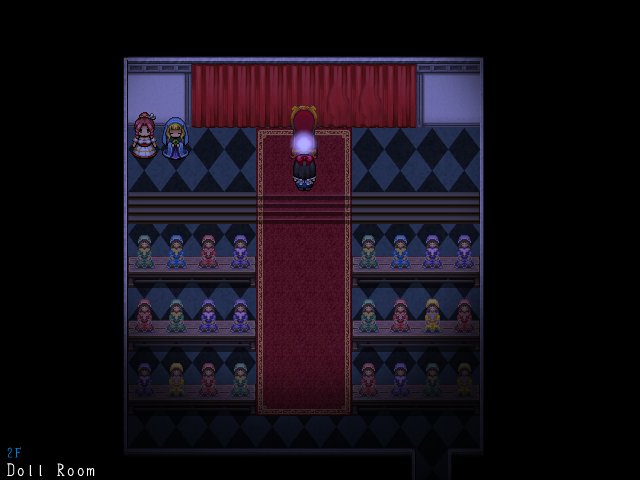
Go inside the Doll Room and solve the third clue from the Code Memo. Note that the right curtain on the back wall can be examined and pulled to the side, and that may affect the solution you get.
Color note:
There are 8 red dolls.
It's time to go downstairs to the Entrance Hall. While you're there, solve the second clue from the Code Memo. Be careful of the zombies-- they don't do much damage, but you can easily become trapped between them. On the left is the West Hall (1F), on the right is the East Hall (1F), and in the center is the Cafeteria (currently locked.)
Go to the West Hall. On the left is the Bathroom, and on the right is the Reception Room.
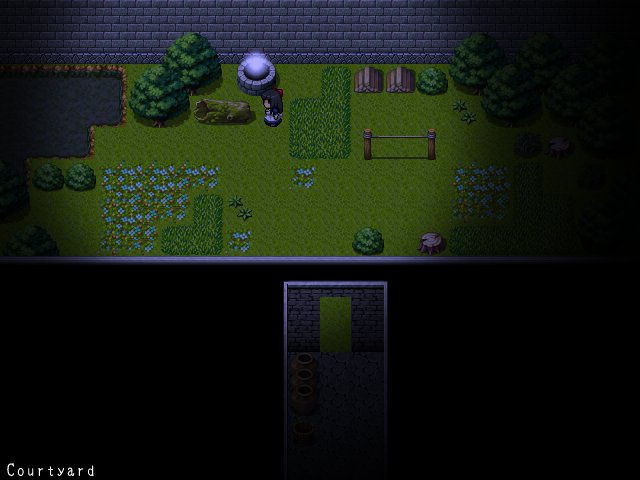
Go inside the Reception Room, and solve the fourth clue from the Code Memo (without examining the left painting). You might want to examine the bookshelf. Save, then go ahead and examine the left painting. After the button-mashing event, go back into the Reception Room and examine the left painting again. Move it out of the way. Now you can go through to the Courtyard. You might want to explore this new area, though there's nothing to do there yet in terms of progressing through the game.
Back in the Reception Room, push the stool in front of the drawers. Climb up and examine the drawers to get the Cutting Knife.
Go inside the Bathroom. There's a door to the toilet, but you can't go inside. First, examine the cardboard box, then go to your inventory and use the Cutting Knife. You'll get the Empty Lighter. After you've done that, examine the sparkle at the top left corner of the room to get the Cafeteria Key. When you go to leave, the bloody bathtub zombie will come to life. You'll already be near the door, so just try to be quick about getting out of there.
Go to the East Hall (1F). On the left is an unknown door, but it's locked. The bottom right exit leads to the Stairs to Basement. While you're here, solve the first clue from the Code Memo.
Go to the Stairs to Basement. After the scene, attempt to move past the monster one more time.
You're now ready to unlock the safe. Return to the East Hall (2F) and go inside the Bedroom. Examine the safe.
Solution:
There are 7 barrels in the 1st floor East Hall, 3 chandeliers in the Entrance Hall, 8 red dolls in the Doll Room, and 2 paintings in the Reception Room.
The combination is 7482.
After entering the correct combination, you'll get the Lamp and Mom's Perfume.
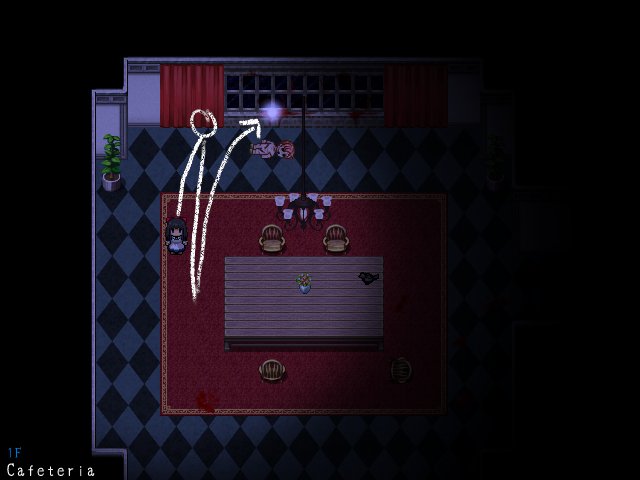
Go back to the Entrance Hall. Run to the Cafeteria door, and examine it to unlock it with the Cafeteria Key. Once inside, go right to reach the Kitchen. Examine the rug to move it, revealing a trapdoor.
Go down. It's dark, but with the Lamp, you'll be able to go down to the Storehouse Entrance. The door to the Storehouse itself is locked, but there's a hole in the wall just to the right of it. Examine the hole in the wall, then go to your inventory and use Snowball.
As Snowball, go to the upper right corner of the Storehouse and examine the sparkle to get some Lighter Oil. Go back to the hole in the wall and to Aya.
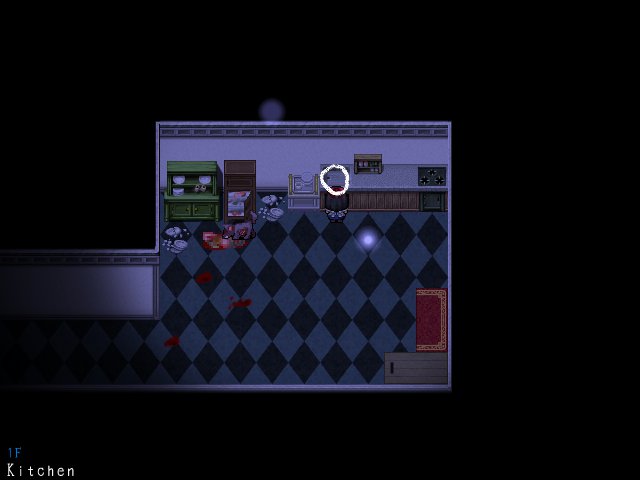
Head back up to the Kitchen. Examine the counter on the upper right side to get some Oil. Leave quickly, because the dog will chase you. The Cafeteria is now full of zombies, so watch out. They won't chase you, but you'll still get hurt if you touch them.
You're now ready to enter the basement. Return to the East Hall (1F) and go down to the Stairs to Basement. Use the Lighter Oil from your inventory to fill the Empty Lighter. Approach the monster again, and choose to use the Oil and Lighter. After the scene, go down the stairs. You can now cross the floor where the monster used to be.
Basement, first floor:
Go right to the area Outside Laboratory. The door up goes to the Laboratory, the door down goes to the Taxidermy Room.
Go inside the Taxidermy Room. Examine the Wooden Bucket just to the left of the entrance to pick it up. Go down to the shelves on the bottom left side of the room, and examine the left shelf. Walk away until you hear a sound and Aya stops and notices something, then go back and examine the sparkle to get the Eyeball Bottle.
Go inside the Laboratory and watch the scene.
Endings Note:
At this point in the game, you're able to take an action that will determine whether you're able to get the True End. You have a limited amount of time to do this because when you progress to a certain point later in the game, this action is no longer available (I'll provide warning before you reach that point.) For more information, read the Endings Guide section of the walkthrough.
Exit the Laboratory through the top left door to the Cultivation Room for another scene. Take the top door to the Corpse Room, then take the upper door to the Passage (B1F). The hallway to the left leads to the Hidden Passage, and the exit on the bottom right leads to the Open Room.
Go inside the Open Room. On the right side of the room, below the large group of barrels, is a Ladder. Examine it to pick it up. You may also want to examine the sparkle to the left of the door.
Go to the Hidden Passage. Climb up the ladder and go left and around. Take the exit. You're back in the East Hall (1F). Now that you've unlocked the door, you have a more convenient way to travel between floors.
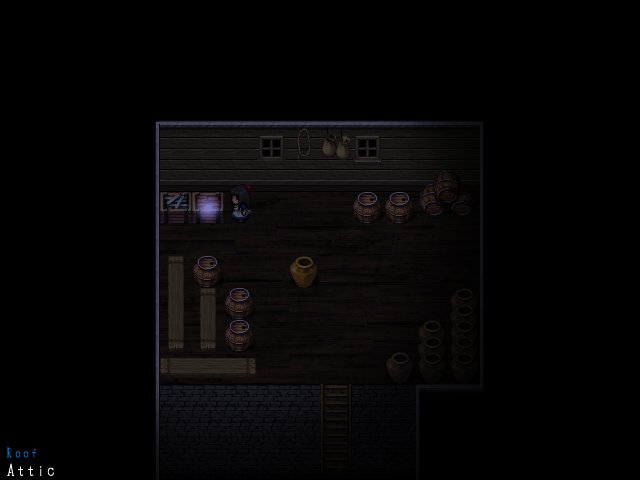
Go back to the East Hall (2F) and go inside the Attic. Use the Ladder (from the Open Room) from your inventory on the ladder with the missing section. Climb up. The pot in the center of the upstairs area is movable-- push it off the ledge to break it. Climb back down and examine the sparkle to get the Mini Chainsaw and a scene. Practice your chainsawing on the barrels if you want, then make your way back to the Open Room. Save at the East Hall (2F) crow, because there's a button-mashing event when you try to go out to the Main Entrance. Get away, and keep going.
Back in the Open Room, chainsaw the barrels on the right side of the room and go through the door to a second Passage (B1F). Talk to the old man if you'd like, then keep going through the door to the Corridor. From the Corridor, go left and down to the Hall.
In the Hall, there's a large door that you can't open quite yet. Instead, examine the barred door on the left side of the room (that leads to the closed-off part of the room with a switch and a blonde girl.) You should have the Eyeball Bottle in your inventory. If not, go to the Taxidermy Room and grab it, then come back and examine that door. After, take the bottom exit. You'll come out in the Storehouse. Take the bottom exit to unlock it-- you'll now have another more convenient way to travel between floors. Go up, back to the Kitchen.
From the Kitchen, return to the West Hall (1F) and go inside the Reception Room. Examine the fire, then go out to the Courtyard. Use the Wooden Bucket (from the Taxidermy Room) to collect the water from the lake, then waddle back to the Reception Room and examine the fire. Put it out. Go inside the fireplace, move the logs out of the way, and examine the hole. Use the Eyeball Bottle (from the Taxidermy Room) on the hole.
Go back to the Hall (B1F) (through the Kitchen is the easiest path), and examine the barred door again. After the scene, go back inside and pull the switch. Now that the big door is open, go through to the Stairs to B2F.
From the Stairs to B2F, go to the right and down the stairs. You'll come out back where you came in. Keep going down the stairs until a woman appears in the top left corner of the room. Talk to her. Go back out to the Hall, then to the Corridor. When the woman disappears, return to the hall. You'll briefly be the woman in a scene-- all you need to do is attempt to go through the bottom exit. As Aya again, go back to the Stairs to B2F. You can now go down.
Basement, second floor:
You'll arrive in the Passage (B2F). Near the top left corner is a locked exit facing left. Near the bottom right corner is an exit to the Toilet, facing right. In the center of the room is an old man, pointing to the right.
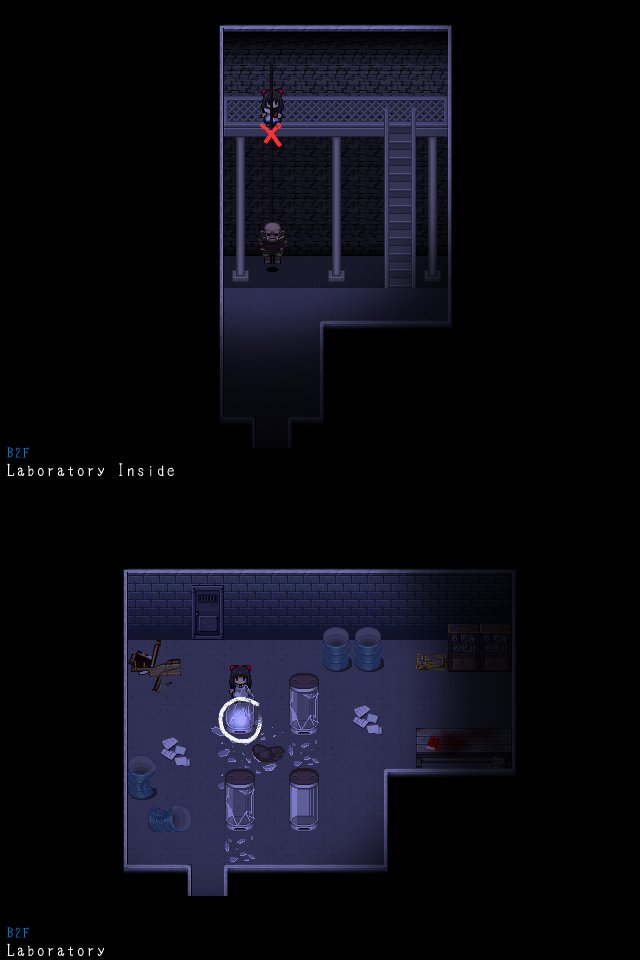
Go directly right from the old man. You should find yourself in a secret passage, then once you reach the end of the passage, at the Laboratory (B2F). Use the chainsaw to break the crate next to the shelves, then examine the sparkle to get the Forceps. You may want to examine the shelves and the red book on the desk. You also may want to take the upper door to the Laboratory Inside, though it's not necessary for completing the game.
Go to the Toilet. On the very right is a stall with a toilet. Examine the toilet and try to take the key. Use the Forceps (from the Laboratory (B2F)), and get the Rusty Key. Examine the bucket at the bottom left corner of the room, then clean the key.
Go to the locked exit, and examine it to unlock it with the Rusty Key.
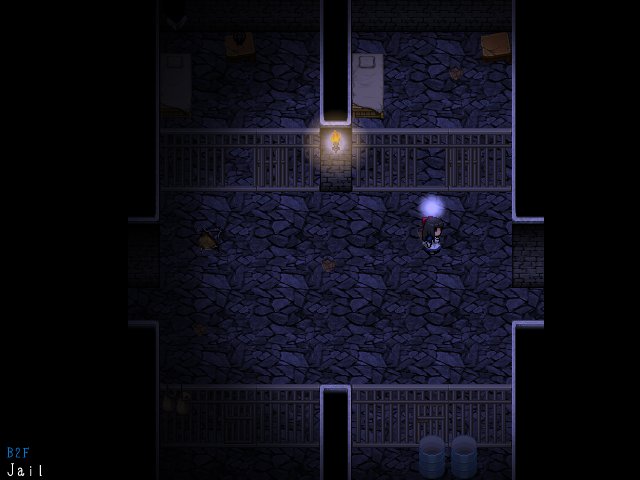
You'll come out in the Jail. Take the left exit, to the second Passage, and the top left exit to the Shrine. The top left exit is locked, and the top right exit goes to the Cafeteria (B2F).
Endings Note:
Taking the next step ends your window of opportunity to complete the action that affects your ending. Again, see the Endings Guide for more detail.
Take the upper right exit to the Cafeteria (B2F). Go all the way up, save, and then go right. Survive the button-mashing event, and watch the scene.
Go back inside the Cafeteria, and talk to the child seated at the table. Use the chainsaw on the hanging meat, and get the Raw Ham. Examine the stove, and fry the Raw Ham. Take it back to the table and talk to the child again to get the Napkin.
Go through the door at the top right corner of the Cafeteria, to the T-Corridor. The door will lock behind you. Go up until the ghost appears, then run back to the door for a button-mashing event.
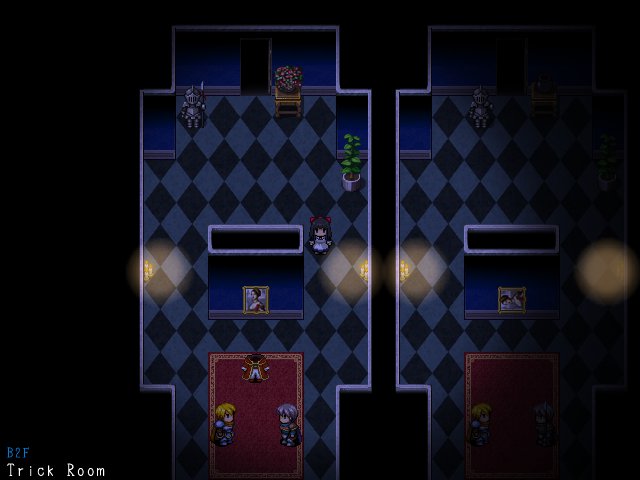
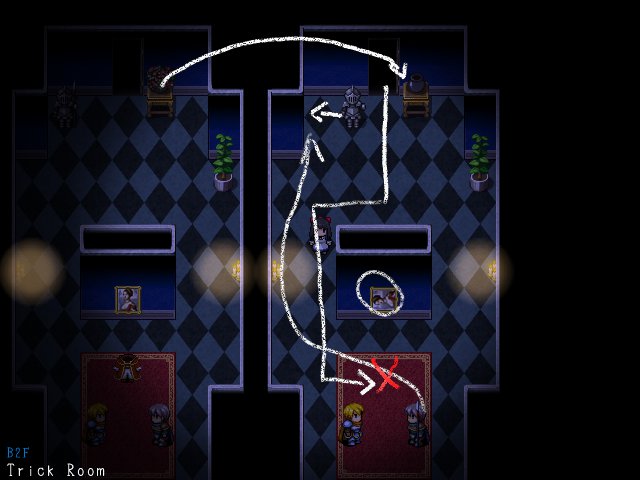
Go back to the T-Corridor. There are two doors and Ogre-- talk to Ogre if you'd like, but it isn't necessary. Go through the door on the left, to the left side of the Trick Room. Examine everything and take careful note of your surroundings, then go through the upper exit to the Stairs to B3F. The door is locked, but again, you can talk to Ogre if you'd like. Then, go through the door on the right. Take careful note of your surroundings here, too. You're now ready to solve the trick room puzzle.
Hint:
Some items on the right side of the room can be moved.
Solution:
Make the right side of the room the same as the left side of the room.
This image shows the left side of the room, which you're trying to match over on the right.
Move the suit of armor left, then take the spear from the soldier on the right, and give it to the suit of armor. Examine the painting until it stands upright. Examine the flowers on the left side to get the Bouquet, then use it on the vase on the right side. From the Stairs to B3F, push the king statue right and down to the right side of the room, then move him into position in front of the knights. Use the chainsaw to cut off his head.
This image shows the changes you'll need to make.
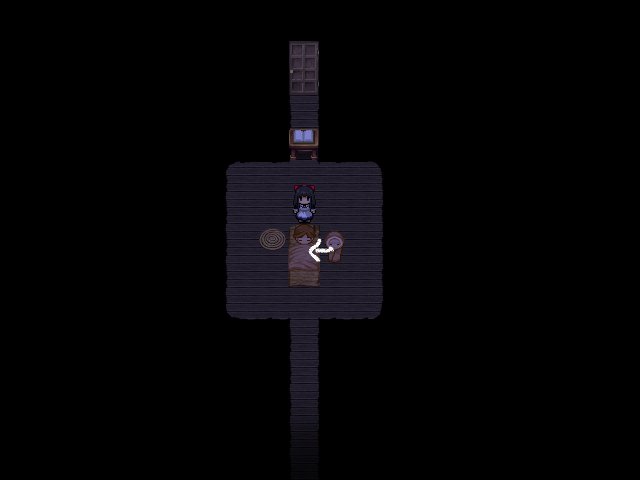
Go to the Stairs to B3F, and go through the door to the Private Room. From the Private Room, go through the top door. Read the book and go up, then read the second book.
Solution:
Push the baby statue toward the mother statue.
This image shows the changes you'll need to make.
Go through the door, and read the third book.
Solution:
Push the mother statue out through the door. Move the dead bird and the dead cat to the dresser.
This image shows the changes you'll need to make.
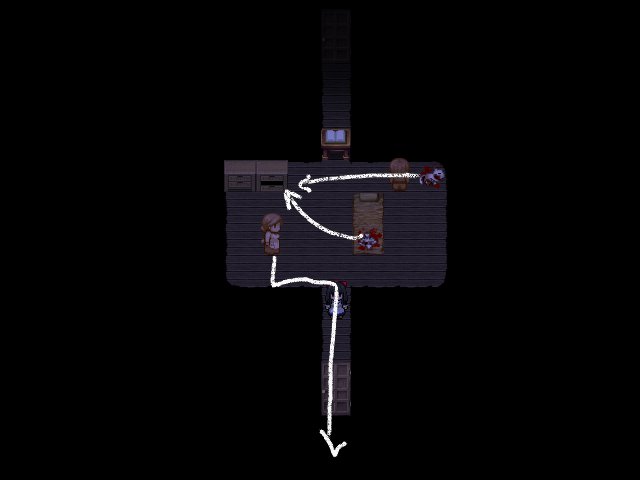
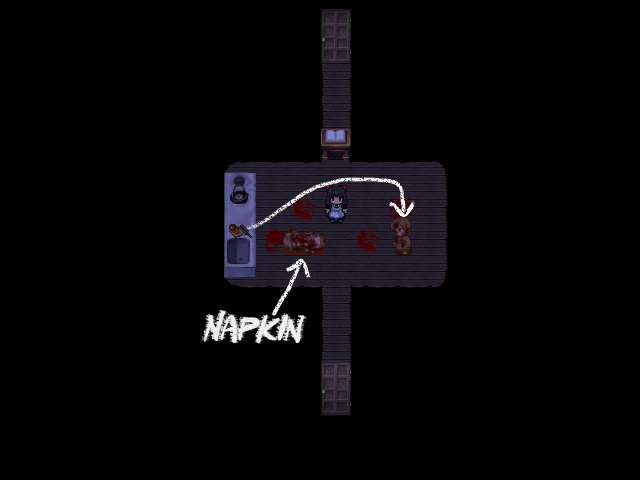
Go through the door, and read the fourth book.
Solution:
Take the Kitchen Knife from the counter and give it to the boy statue. Use the Napkin on the mother statue.
This image shows the changes you'll need to make.
Go through the door, and read the fifth book.
Solution:
Use the chainsaw on the girl statue.
This image shows the changes you'll need to make.
You'll arrive at a second Stairs to B3F area. Go down.
Basement, third floor:
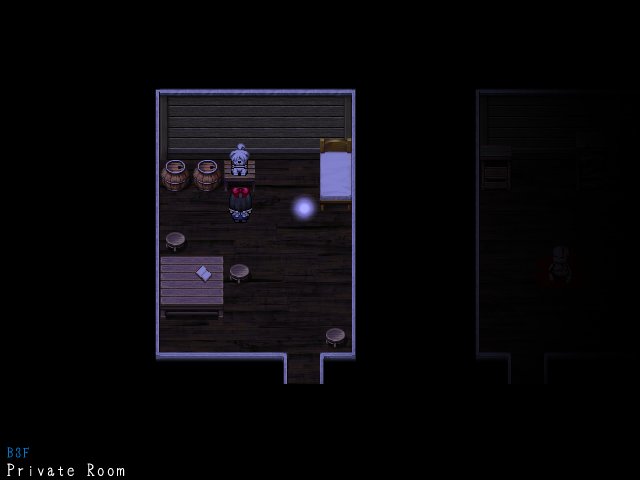
After the scene, you'll wake up in the Private Room (B3F). You may want to examine the stuffed dog and the diary. After, go outside.
In the Curved Passage (3F), there's a locked door next to the Private Room, and a hallway on the bottom right side that leads to the Straight Room.
Take the hallway to the Straight Room. Go down and examine the sparkle to get the Door Key. Then, immediately turn around. The rats will start to swarm and attack-- you can make it back to the Curved Passage before you run out of health, but you can't make it all the way down the Straight Room.
Unlock the locked door from the Curved Passage with the Door Key. You'll come out on the other side of the Private Room. After the scene, you might want to examine the shelf on the left. Then, use the chainsaw to destroy the barrels. Move to the right of the shelf on the right, and push it to the side. Use the chainsaw on the crack in the wall, and go inside the Hidden Passage (3F).
In the Hidden Passage, examine the sparkle to reclaim your Mom's Perfume, then when the zombie appears, run back out to the Private Room as quickly as you can. The zombie will follow you to the Private Room, so keep going until you reach the Curved Passage. This zombie is faster than average, so make a mad dash of it.
Use Mom's Perfume, then go back to the Straight Room. You can now safely proceed down the hall to the Passage (3F).
The lower door in the Passage is locked, so take the upper door to the Guest Rooms. As you go down the hall, the door to the fourth room will shut. Open it again. Save your game in the third room. Keep going until Aya hears something coming. Turn around and run into the fourth room--this zombie is faster than you, so it might take a few tries.
Examine the bed to rest in it. Stay there until the bed jolts and moves, revealing a crack in the wall. Save your game again. Go through the crack to the second Hidden Passage, and through the Hidden Passage to the fifth Guest Room (pushing the pot out of the way.)
Open the door, then run back into the Hidden Passage. Examine the pot to move it and block the zombie's way. Again, you'll need to be very, very quick, and it may take more than one try.
Go back out to the fourth Guest Room. Run to the door of the fifth Guest Room, and you'll lock the zombie in. You're now free to leave the Guest Rooms through the upper right door, to the area Outside Laboratory.
From Outside Laboratory, try to go through the large doors, then examine the Creepy Doll to take it with you. Go back to the Passage. The formerly locked lower door is now open. Go inside, to the Entrance to the tunnels.
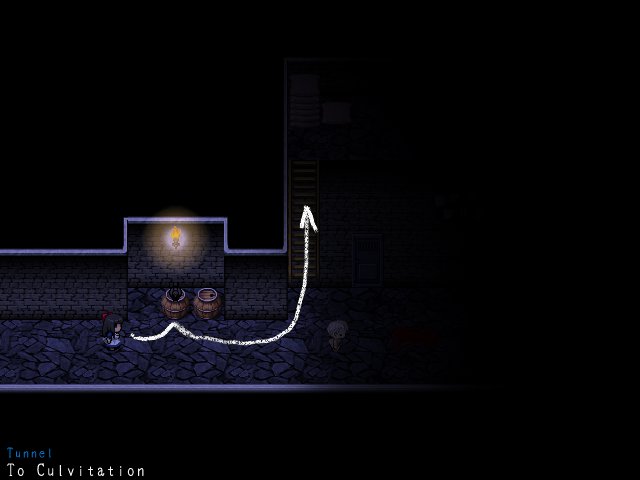
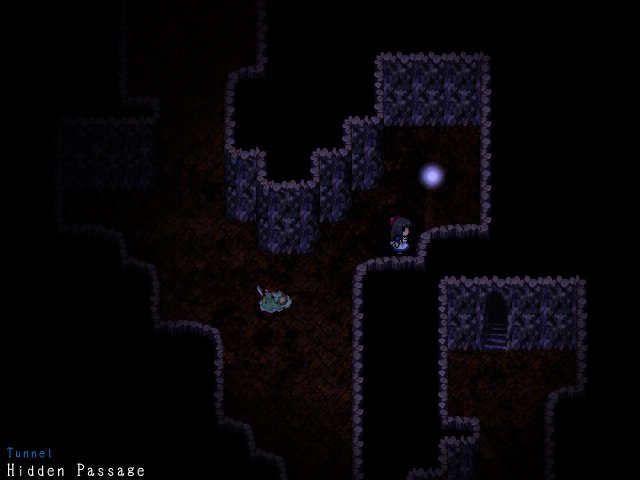
Tunnels:
From the Entrance, go around and to the left. You'll come out at the Abyss. Go left, save your game, and enter the Big Passage.
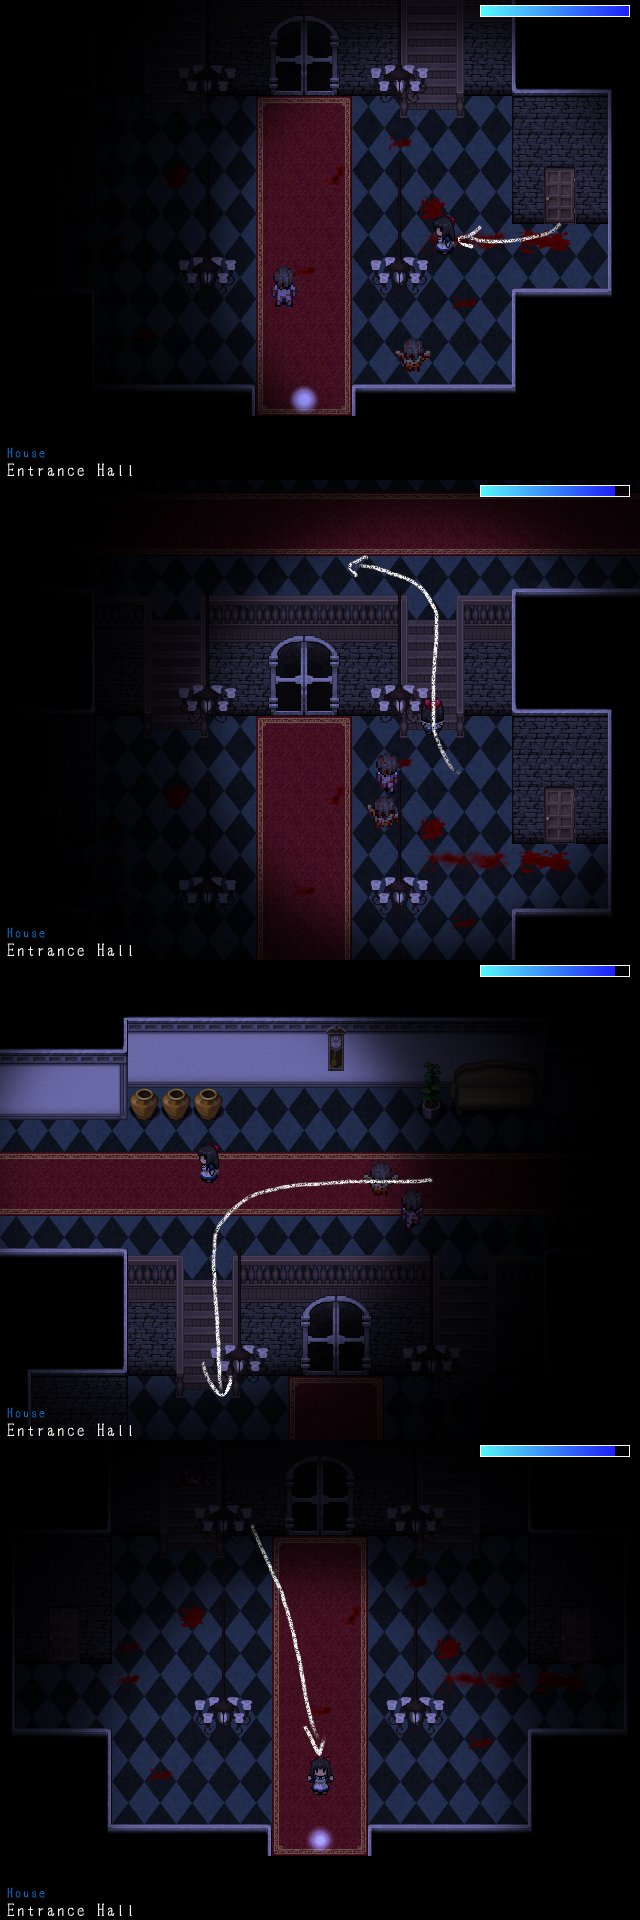
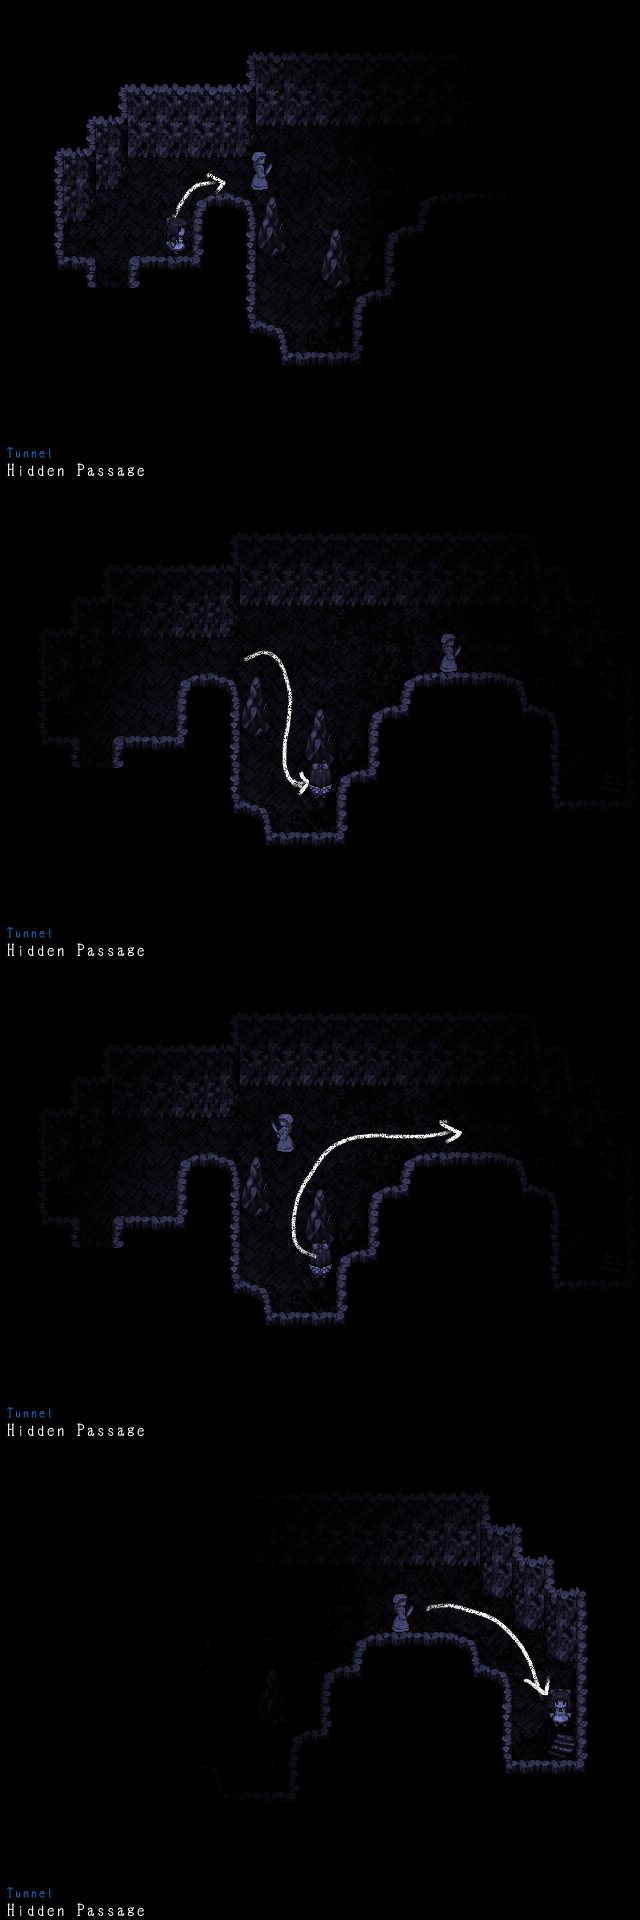
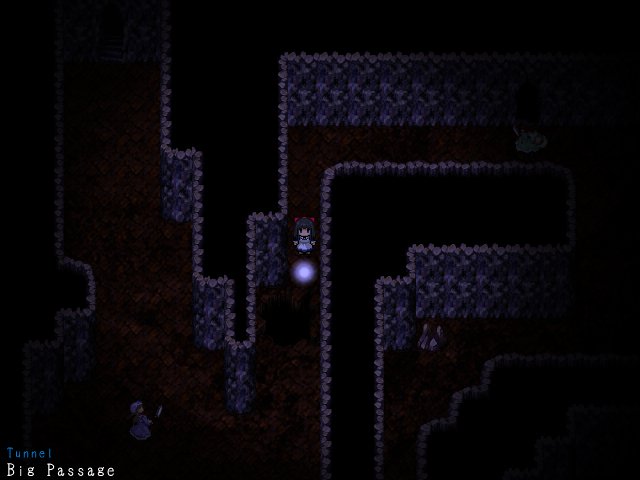
In the Big Passage, several living dolls patrol the area, and if they see you, you're dead. It's a tricky area, so be prepared to try it more than once. If you're searching for gems, don't bother with them for now. You'll be able to come back and get them later, and it'll be much less risky.
To get past the first doll, wait until she starts to go left, then go up and around the little side route. Wait until she's facing right to run back down. Keep going left until you can see the tunnel curve up.
This image shows how to do it.
To get past the second doll, hide behind the rock and wait for her to get close and look down the passage at you. When she turns right, run up and right until you reach the dark cave. Hide in the cave, wait for her to pass, and then go back out and follow the tunnel to the right. Go up, and slightly around.
This image shows how to do it.
To get past the third doll, get out of her way when she bursts out of the wall. Then, from a safe distance, wait for her to head back up the passage and to the left. Run down the passage, and keep going past the bend.
This image shows how to do it.
To get past the fourth doll, stay back toward the bottom of the passage and wait for her to turn left. Then, run clockwise around her-- first below her, then left of her, then above her. Once you're at the top side of the left protrusion, hug the left wall. When she's facing right, run to the upper door and go through.
This image shows how to do it.
You'll come out at the area To Incinerator. Don't worry about the zombie, because as soon as you go near it, it'll run away. Save your game, and go up.
After the scene, go through the upper door to the Incinerator Room. Examine the corpse and pull out the knife to get the Scalpel. The upper door leads to a second area of the Incinerator Room, but for now, it's locked. Examine it anyway.
Go back out to the To Incinerator area, and go through the opening on the right side of the room to the Passage (Tunnel). Examine the sparkle. After the scene, go back to the To Incinerator area and save, then return to the Passage and go right to the area To Cultivation.
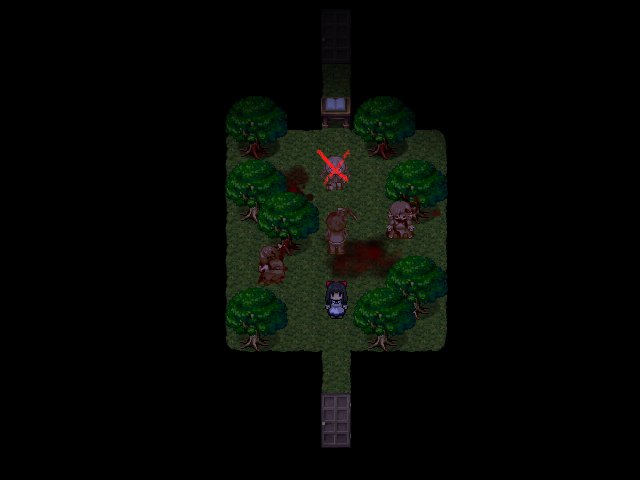
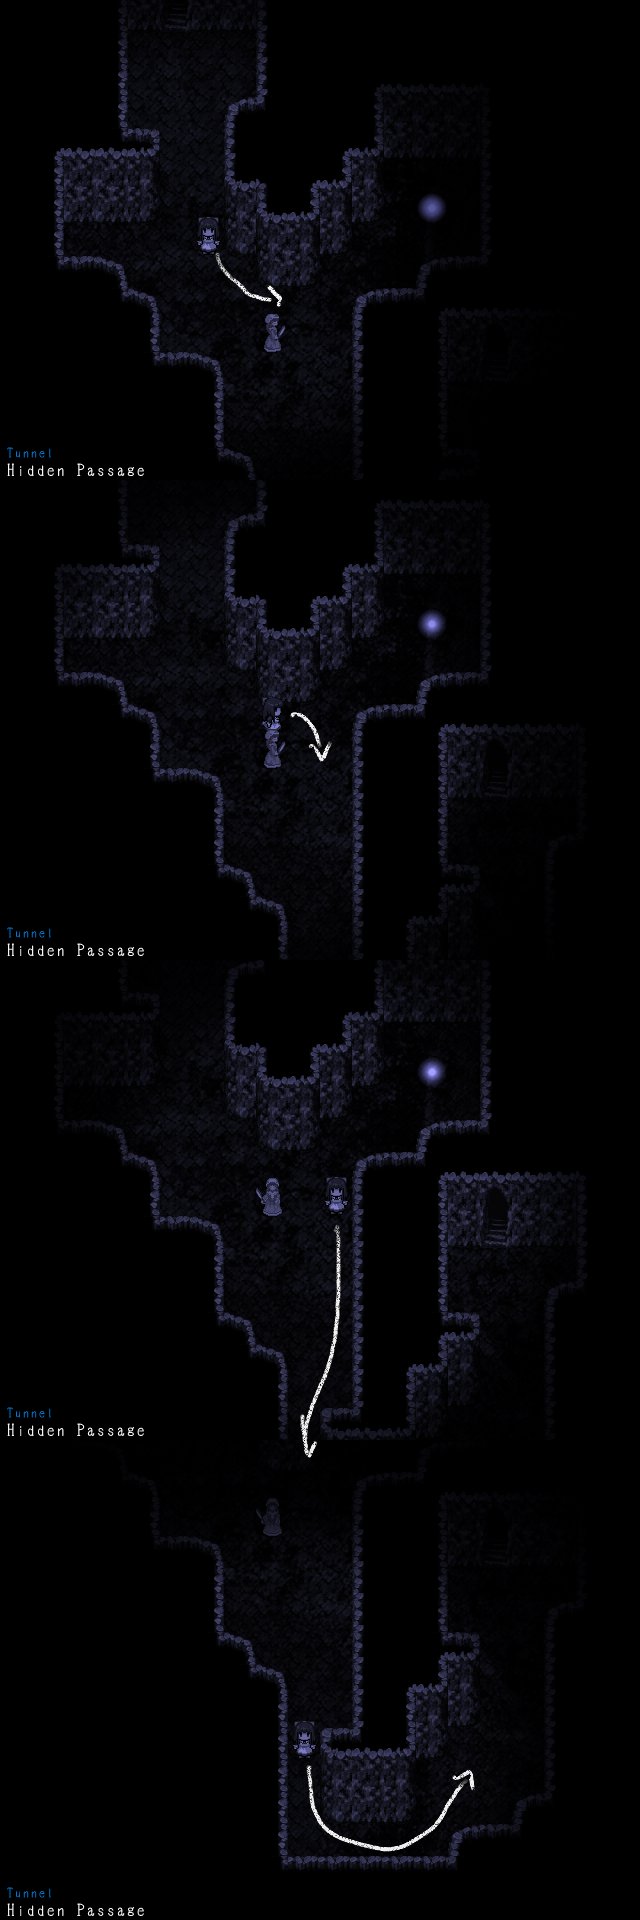
Watch out--there's a zombie in the area To Cultivation. Don't go for the save crow yet. Instead, stand back and wait for the zombie to turn right, then run for the ladder. If you can, save on your way up.
This image shows a safe place to stand, and when to run.
After Aya comments on the chandelier, examine the wooden plank and move it. Then, examine the sandbag and move it. Cross the wooden plank and use the chainsaw on the chandelier cord to drop the chandelier on the zombie. Timing is important here-try to cut the cord while the zombie is one step away from being directly underneath the chandelier. It might take a few tries and some luck.
This image shows when I cut the cord.
After the zombie is smashed, save the game. The door on the right leads to the Cultivation Room, and down the hall and to the right is a Dead End.
Go to the Dead End, but again, be careful. If you go out into the main area to the right, the dog will attack and you will die. Instead, move up to the smaller area to the left and examine the sparkle to get the Hammer.
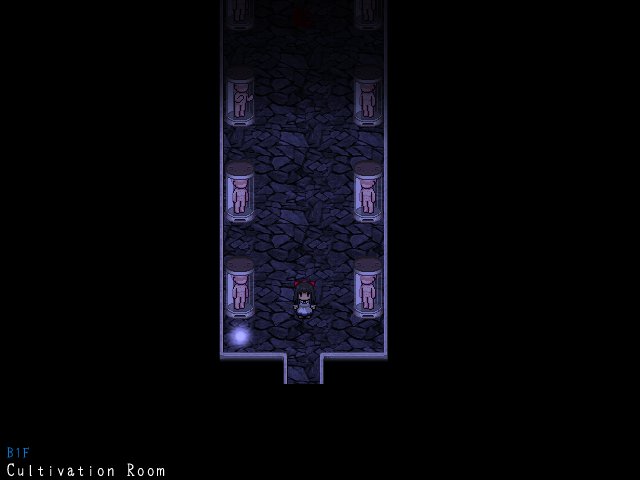
Go to the Cultivation Room. The door to the main area is locked, so go right from the save crow, and use the chainsaw to destroy the barrels at the end of the hall. Go up into the small room and examine the table. On a repeat playthrough, you can skip the puzzle by choosing "solve quickly." Otherwise, put it together manually to unlock the door to the main area.
Hint:
The completed puzzle shows a drawing of Aya.
Solution:
This image shows the completed puzzle.
Go into the main area of the Cultivation Room. Examine the left bookshelf, then examine the pot next to the pair of mandrakes near the bottom right. Use the hammer on the pot to get the Earplugs. Then, examine the leafy plant near the top of the room. Choose not to uproot it, then choose to take it with you to get the Mandrake Pot.
Go back to the Dead End. From the safe area on the left and with the Earplugs in your inventory, use the Mandrake Pot. Examine the dog, then use the Scalpel on it to get the Incinerator Key.
Go back to the Incinerator Room, unlock the door, and go through to the second area. Go to the end of the ledge, then use the Creepy Doll.
Finishing Up:
Now that the doll is destroyed, go back through the tunnels to the third floor of the basement. You can push the barrel in the Big Passage to shorten your trip slightly. From the Passage (B3F), go inside the Guest Rooms and then to the Outside Laboratory area. You can now pass through the door to the Laboratory (B3F).
After the scene, you'll get the Magic Water. You can also talk to Ogre, and he'll take you back to your room if you'd like. Very few gems ever become unattainable, so if you're collecting them and you've missed any, you'll be able to go back and try to finish up. Once you're done, examine the dark portal, and choose to jump in.
You're now in the Darkness. Save your game with the red crystal if you'd like, then go up the path and through the portal. During the scene, you'll be able to make a choice that affects which ending you get.
If you choose to "Save father":
After the scene, you'll arrive in the Hidden Lab Out area. Save your game at the crow, then attempt to open the door. When Father breaks through, examine the door to start a button-mashing event. When you survive, you'll exit the room. Run down the screen. Go down a bit, hugging the right side of the screen, then run past Father and press the switch on the upper left side of the room. If there's enough distance between you and Father, he'll lunge at you, but not quite get close enough. Take advantage of the pause to run for the door at the bottom of the screen.
This image shows how to get past Father.
After another scene, you'll come out in the Hidden Hall. Save if you'd like. Then, examine the door, and then examine the one cot with no corpse on it. If you're on a certain ending path, you can talk to Maria, and then examine the shelves and get some Bandages for her. Choose whether to help her or not. Then, go out the top exit, and go to the right. Go down, then down again. Watch the scene, and enjoy your ending.
If you choose to "Grant mom's wish":
You'll arrive in the Hidden Lab. Go down to the Hidden Lab Out area, and examine the save crow. Save or don't, then attempt to open the door. You'll have a button-mashing event, but with no real danger. Once through the door, go down one more screen. In the next screen, flip the switch to unlock the bottom door. Go down again. Watch the scene, and enjoy your ending.
Congratulations, you've beaten the game. You might want to go back and try for a different ending, or to collect all of the gems if you haven't already.
Endings Guide
Ending Branches:
There are two ending branches in Mad Father, and three endings. One ending branch is whether you complete a certain event around the middle of the game; the other is the decision you make at the end of the game in the Other World.
To complete the midgame ending branch event:
After you meet Maria in the Laboratory (B1F), but before Maria shoots the mysterious boy in the Shrine, examine Maria in the Laboratory twice to get the Room Key.
Go to the Archives on the second floor, and examine the mystery door at the upper left corner of the room to unlock it with the Room Key.
In Maria's Room, examine the shelf and read Maria's diary. Watch the scene. Congratulations, you've completed the midgame ending branch event!
Ending Requirements and Summaries:
Bad End 1:
Requirements:
In the Other World, decide to "Grant mom's wish."
Summary:
Aya returns to the mansion and finds herself alone. With both parents dead, she goes to the shrine with Maria and thinks about her future plans. On the way out, Maria attacks her. Down in the laboratory, Maria conducts some mad science on Aya, wanting to carry on the doctor's work.
Bad End 2:
Requirements:
In the Other World, decide to "Save Father."
End the game without completing the midgame ending branch event, OR leave the Hidden Hall without helping Maria.
Summary:
Aya returns to the mansion with her father... but her mother's ghost appears one last time, revealing that the doctor plans to make Aya into a doll and murdered his wife when she wouldn't allow it. Aya runs from her father, but in the end, he catches her. She becomes a doll, and while she's not at all "there" anymore, her father does appear to take very good care of her.
True End:
Requirements:
In the Other World, decide to "Save Father."
Complete the midgame ending branch event.
Leave the Hidden Hall with Maria.
Summary:
Aya returns to the mansion with her father... but her mother's ghost appears one last time, revealing that the doctor plans to make Aya into a doll and murdered his wife when she wouldn't allow it. Aya runs from her father, saving Maria along the way. Aya's father catches her, but Maria attacks him to save Aya. The mansion burns down, and the mysterious boy says goodbye to Aya, and asks her not to forget what happened to the victims. Ogre saves the doctor, and Aya and Maria leave. On the way out, Aya finds her father's anatomy book. Years later, Aya is a doctor herself-- and has a very suspicious collection of creepy dolls, just outside her examination room...
Gem Collection Guide
Gems on the second floor:
In the Nursery, examine the middle bookshelf, and a gem will fall out.
This image shows how to get the gem.
In the West Passage, there's a Hidden Passage with a gem, accessible by moving through one of the walls. Watch the zombie for a clue to its location.
At the bottom wall, one step right from the far left wall, go down.
This image shows how to get the gem.
In the Doll Room, the gem is sitting on the fancy chair.
This image shows where to find the gem.
In the Attic, the gem is sitting in the upper part of the room at the top left corner. You can get up there after fixing the ladder.
This image shows where to find the gem.
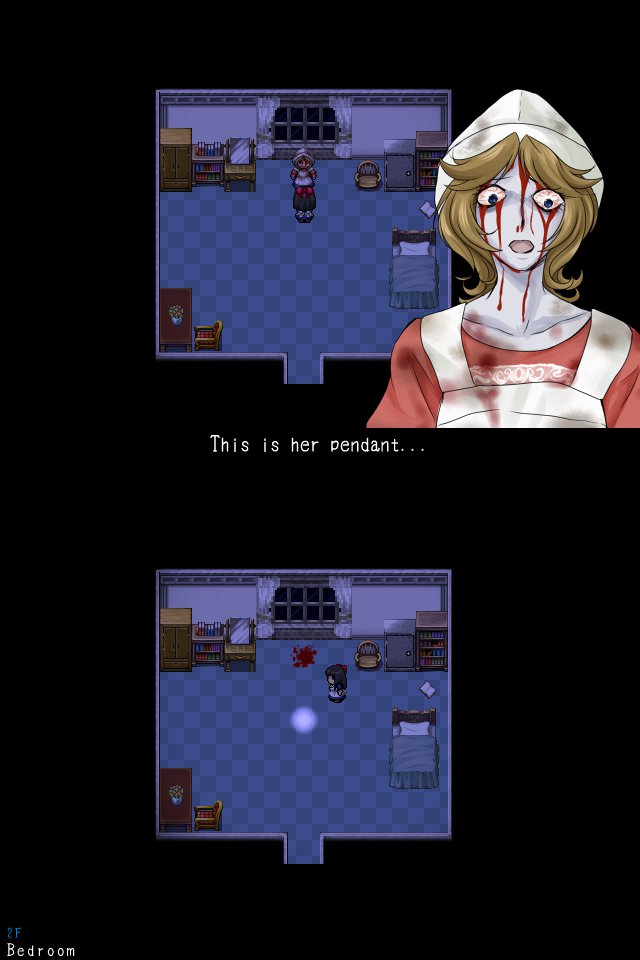
In the Bedroom, you can help one of your father's victims for a gem.
After completing the midgame ending branch event, examine the sparkle in the Archives to get the Pendant. Go back to the Bedroom, and use the Pendant while standing on the blood spot.
This image shows how to get the gem.
Gems on the first floor:
In the Main Entrance, there's a gem by the doors at the bottom of the room. If you're having trouble with the zombies, lead them up the stairs on one side, go down the stairs on the other side, and run to collect the gem.
This image shows how to get the gem.
In the Courtyard, the gem is sitting in the well.
This image shows where to find the gem.
In the Cafeteria, pull back the curtains and examine the corpse. When you walk away, a gem will fall out.
This image shows how to get the gem.
In the Kitchen, examine the sink, and a gem will fall out.
This image shows how to get the gem.
Gems on the basement first floor:
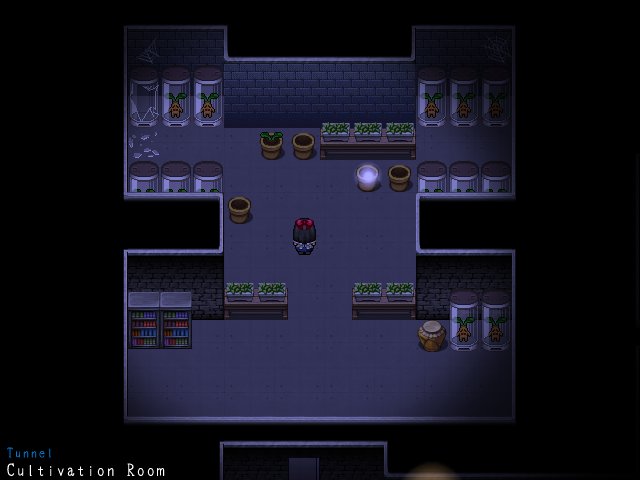
In the Cultivation Room, the gem is sitting at the lower left corner.
This image shows where to find the gem.
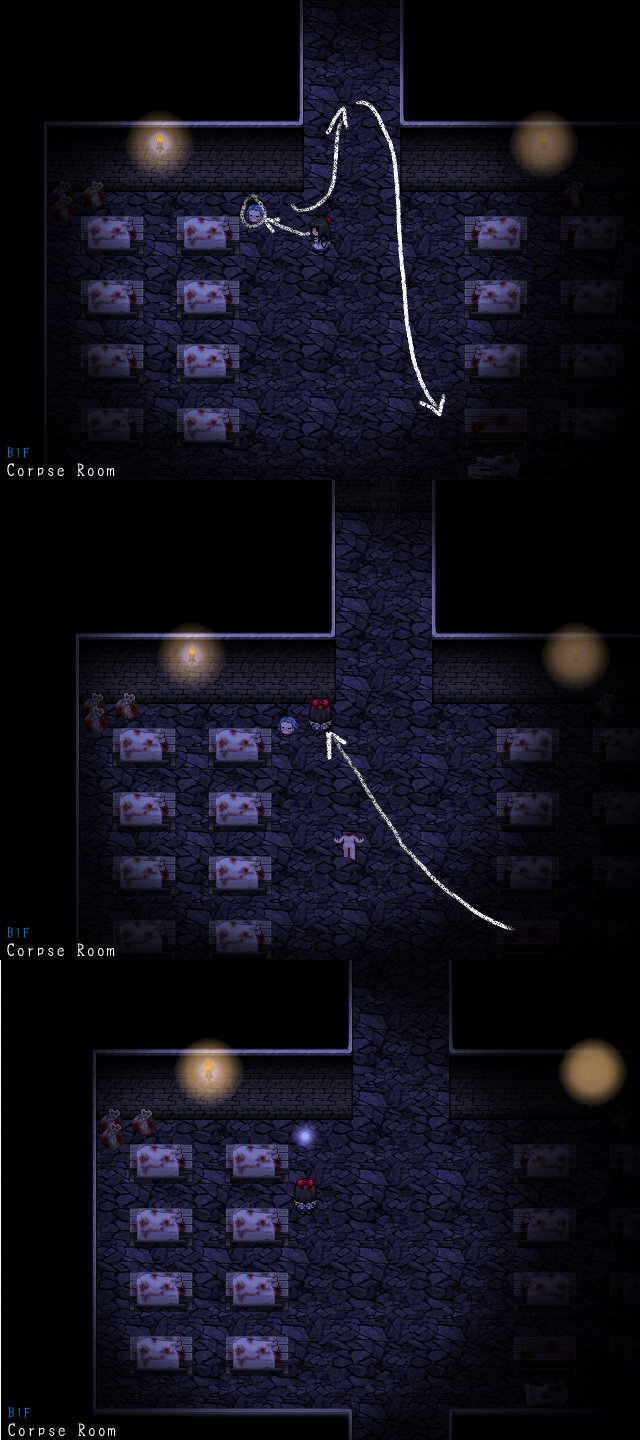
In the Corpse Room, you can help one of your father's victims for a gem.
Examine the severed head, approach the door on the top side of the room, then go down until you see an uncovered headless corpse. Lead the body back to the head.
This image shows how to get the gem.
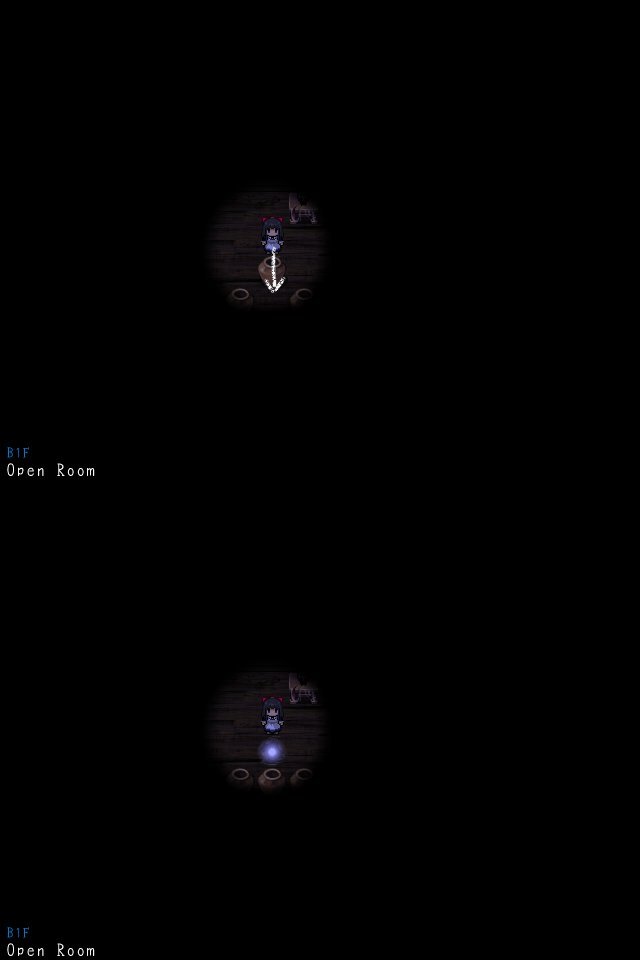
In the Open Room, one of the pots can be pushed down to reveal a gem.
This image shows how to get the gem.
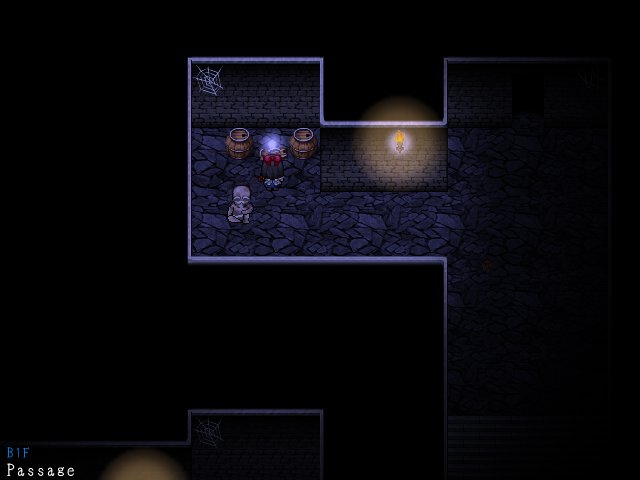
In the Passage (the one reached through the door behind the barrels in the Open Room), one of the barrels behind the old man can be destroyed to reveal a gem.
This image shows how to get the gem.
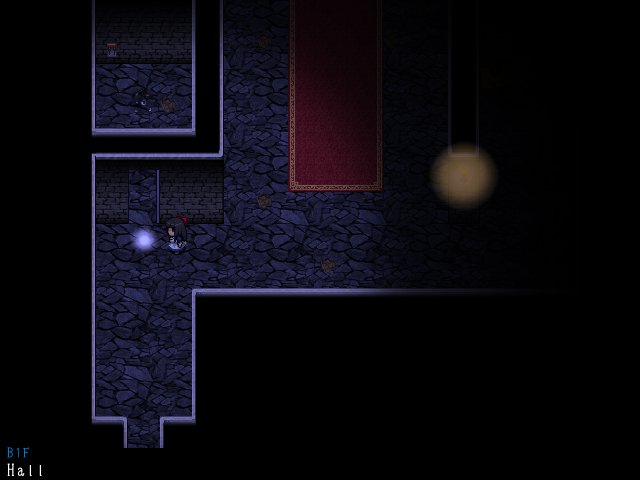
In the Hall, you can help one of your father's victims for a gem.
When you give the eyeless girl her eyes (to progress in the main game), she'll leave it behind.
This image shows how to get the gem.
Gems on the basement second floor:
In the Passage, (the first room in the second floor of the basement, with the old man), one of the barrels on the left side of the room can be destroyed to reveal a gem.
This image shows how to get the gem.
In the Laboratory, you can help one of your father's victims for a gem.
Use the chainsaw to cut the prisoner free in the Laboratory Inside. Go back to the Laboratory and take the gem from the smashed tube.
This image shows how to get the gem.
In the Jail, you can help one of your father's victims for a gem.
The top left jail cell opens up into a cave, similar to the Big Passage in the tunnels. Like the Big Passage, it's full of dolls that you'll need to avoid.
To get past the first doll, hide behind the ledge while she approaches. When she turns right, run to the middle gap and hide behind the rocks. When she goes left again and passes you, run out from behind the rocks and follow the tunnel right and down.
This image shows how to do it.
To get past the second doll, go down to the opening and wait for her to face right. As long as you stand before the right wall opens up, you're safe. When she faces right, run out and start moving clockwise around her-- first above her, then right of her, then below her. Run down and follow the tunnel around and up. Ignore the gem for now. It'll become much easier to collect it a little later on.
This image shows how to do it.
To get past the third doll and fourth dolls, wait until one of the dolls finishes going down and turns left. Run up behind the doll, and follow her right, then up, then left. On your way down, turn right and head for the upper right exit.
This image shows how to do it.
Examine the sparkle on the bed to get the Jail Key, go back through the tunnels, and unlock the prisoner's door.
This image shows where to find the gem.
In the Hidden Passage (in the Tunnels accessible from the jail), the gem is sitting in a cave in the second area.
Leave the gem until you've picked up the Jail Key, because the dolls are no longer dangerous at that point.
This image shows where to find the gem.
Gems on the basement third floor:
In the left Private Room, you can help the dog for a gem.
Examine the shelf in the right Private room to see a picture of the dog with a bone. Examine any skeleton in the Tunnels to get a Bone, then give it to the dog.
This image shows where to find the gem.
Gems in the tunnels:
In the Big Passage, the gem is sitting down the passage to the left of the third doll.
Leave the gem until you've burned the Creepy Doll, because the dolls are no longer dangerous at that point.
This image shows where to find the gem.
In the Cultivation Room, the gem is sitting in one of the pots on the upper side of the room.
This image shows where to find the gem.
Posted by: Alice |
April 21, 2013 9:50 AM
|
April 21, 2013 9:50 AM