
![]() That little prickle on the back of your neck... it's a combination of wonder and apprehension, and nobody mixes a feeling of awe and the ominous better than Mateusz Skutnik, especially when it comes to his beloved Submachine games. The series has a deep mythology and positively rabid fanbase rife with theories as to the meaning of it all, but now that Submachine 9: The Temple has finally arrived, will we get more answers than questions? This time, you awaken in what looks like the ruins of a strange civilization, only some seemingly busted electronics and a hammer to your name.
That little prickle on the back of your neck... it's a combination of wonder and apprehension, and nobody mixes a feeling of awe and the ominous better than Mateusz Skutnik, especially when it comes to his beloved Submachine games. The series has a deep mythology and positively rabid fanbase rife with theories as to the meaning of it all, but now that Submachine 9: The Temple has finally arrived, will we get more answers than questions? This time, you awaken in what looks like the ruins of a strange civilization, only some seemingly busted electronics and a hammer to your name.
 As usual, click to interact. Items you can use will appear in your inventory at the bottom of the screen, where you can click once to pick them up, and then again in the game wherever you'd like to try to use them. The cursor will change to highlight interactive zones or area transitions, but that's all the help you're going to get. You're on your own. For many fans, that lack of direction is exactly what they crave. It adds to the air of mystery and the feeling of genuine discovery as you explore. Every bit of progress feels like solving a piece of that mystery, and it's not the sort of atmosphere many other games have even come close to achieving. Of course, that also means when you're stuck, you're stuck, since the game isn't going to offer you a whole lot help. It's up to you to pay close attention to your surroundings and learn how to both spot clues as well as interpret them.
Play the entire Submachine series:
 Analysis: Come on, guys. It's a Submachine game. Of course you should play it. The Temple, like its predecessors, marries the otherworldly with the mechanical in its design, encouraging you to poke and prod at everything you see. What often looks baffling in its construction always reveals its own logical use when you start putting the pieces together and learning the way your new realm works. The Temple's construction feels a lot more linear in terms of the way its laid out compared to locations in other games, which makes finding your way around a lot easier. Solving the puzzles? Not so much, but not in any fashion that makes them obstinate or unreasonable. You may not be given a whole lot of clear direction or obvious hints, sure, but the "ah-ha!" moments are always there if you look hard enough, drawing you onward. Each time I thought I was stuck I would notice something new to try, and as a result, I never felt frustrated. Just, y'know. A little dumb.
Though it starts out comparatively easy, the deeper you go into The Temple, the more complex it gets, and mercifully this installment is lighter on backtracking than others have been. You'll still have to do a fair amount of wandering, since it won't always be apparent that something you've interacted with has changed something elsewhere. The visual design makes it fairly easy to pick out items of interest from the backgrounds, but you might still have to use the ol' hot-spot-cursor-wiggle-waggle to find a thing or two. It's also a big game, with a substantial amount of areas to explore that seem to just sprawl out more and more, especially later on. There are hidden doors, secret mechanisms, and, yes, some plot payoff as well. It really is one of those rare games that will have you going "WHAT DO YOU WANT FROM ME" one moment, and feeling like a magnificent clever pants the next when you finally figure it out. Beautiful, creative, and sneaky in the best possible way, Submachine 9: The Temple isn't just a great Submachine game... it's a great game, period.


Walkthrough Guide
(Please allow page to fully load for spoiler tags to be functional.)
Submachine 9: The Temple Walkthrough
General Information
Area names are completely my own.
Don't forget to put down items once you are done using them. If you still have an item in your hand, you cannot travel or activate other things.
It helps to have played Submachine 8 since you begin right where that one left off.
Once you go through the tunnel, pay close attention to the shape of the structure you are inside. Yes, it is a pyramid.
There are 5 secrets in the game.
Note: Your inventory is limited, so use items as soon as you can to keep from overloading and being unable to pick up needed items.
The Balcony
You begin on a wooden structure on what appears to be a balcony. You should have the hammer and the controller from Submachine 8 in your inventory.
Go left.
There is a plinth here. When you click on it you get some text, "The light of Shiva drawn Murtaugh to live in the lighthouse."
Hit exit and go left.
This is the end of the balcony. To your left is a wall. Note the strange symbol on one block of the pyramid-like wall.
Go right twice to the wooden structure, then right once more.
Here is another plinth. This one says, "The light of Shiva drawn Elizabeth to leave the lighthouse."
Hit exit and go right.
You are now facing what looks like a fountain filled with glowing green water.
Look at the right side of the fountain, there is a spigot which is sending the glowing green water into a crack on the balcony.
Go right.
You are now facing a wooden door surrounded by tree roots.
Go right.
This appears to be the right edge of the balcony. There are two stone elephants here, as well as a brass rod and a small brass box to the left of the elephants.
Take the brass rod.
Use the brass rod on the brass rectangle to the left of the elephant. Once the rod is inserted, click it to move it to the right.
Go left. Notice that the door is now open.
Go forward into the door.
You are now inside the structure. The way out is to the left. This room has two brass pipes going from the floor upwards.
Go right.
You are now facing a room with a door. If you go through the door you will find a room that is mostly in shadow. On a low structure is a brass bowl.
Click on the left side of the screen to exit. You should now be back at the room with the door.
Go right.
This room has a small structure with another brass bowl on it. Go right.
This is the farthest you can go in the structure right now. In this room is a window with a brass jug in it. Take the jug.
Go left four times until you are back on the balcony, then go left once to the fountain.
Use the brass jug on the spigot on the right side of the fountain to get some karmic water.
Once you have the karmic water, go right to the door, then through the door.
Once through the door go right twice to the room with the brass bowl. Use the karmic water on the bowl.
The karmic water will cause a strange structure to grow. Put the brass jug back in your inventory then click on the glowing structure in the top middle to get a green cog wheel.
Go left to the room with the door, then go through the door.
Now use the karmic water on the brass bowl in the shadowy room.
This time the structure is very different. Look closely.
Notice the three squares at the bottom? The middle one has a symbol like the stone on the pyramid wall.
Place the green cog into the horse-shoe like structure and it will form a key.
Click on the bottom of the key and it will swing, causing one of the squares to move and showing a new path in the structure to the left (this represents the pyramid-like wall on the left side of the balcony).
Go left three times to the balcony, then left five times to the pyramid wall.
Note the opening in the wall where the strange symbol used to be.
Inside the Pyramid (Red and Blue)
Go left into the opening in the pyramid wall.
You are now in a tunnel. Go left three times and you emerge in a room with two brass pipes.
Go left.
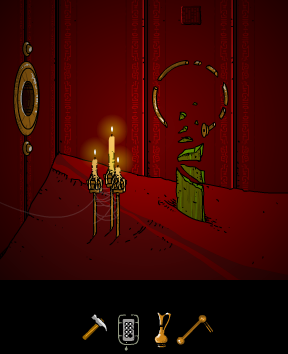
You are now in a room with a strange structure, it looks like a fire hydrant with a giant hoop through the top. Note that all of the rooms are red.
Go left.
This room has three candles, a pipe on the wall, and another pipe with a ring in it on the left.
You can go no further left right now. Click on the ring in the left pipe and it will come down, forming a ladder.
Go up the ladder.
Go right and you are in a room with a sharply sloping ceiling. There is a brass scarab on the floor, take it.
To the right is a small square of light on the dark sloped ceiling, click on it.
This is a shaft that goes up and to the right, but at this point we can't go any further. Click on the left side of the shaft to go back to the room.
Click left to go back to the top of the ladder, then left again.
There is another brass bowl here, along with shards of blue stuff on the floor.
The pipe on the wall looks like another ladder structure, but there is no obvious control to open it.
Use the karmic water on the brass bowl. It will form another pipe with a ring like the one downstairs.
Click on the ring to activate the ladder, then go up.
You are now in a blue space at the top of a ladder.
Go left.
This is the top of another ladder, but there is a grating over the hole going down.
There is a porthole on the left wall, and a part of a stone key on the ground. Take the part and go right.
Once you are back at the top of the ladder you came up, go right again.
There is a sharply sloping roof here, and a small brass chest.
There's nothing you can do here at this point, so go left to the top of the ladder.
Go down to the red area, then go right.
You should be back at the top of the red ladder. Go down.
Go right and you are back at the thing that looks like a fire hydrant with a hoop through it.
Note the small circle on the post of the hydrant thing.
Place the brass scarab on that small circle and the ring will close, giving you part of a stone ring.
Place one of the stone key pieces on the other to form a complete key.
Go left to the ladder, then up. Then go left and up again to get to the blue area.
Go left to the ladder with the grate. Remember that porthole on the left wall?
Use the stone key on the porthole and the grate will lift up, allowing you to travel down.
Inside the Pyramid (Red)
Go down the now open ladder.
You are back in a red area. Note that the ladder is broken and you can't get back up.
There is a ladder rung on the floor, take it.
Also note the small device like the others that held brass bowls. This one is bare.
Go left.
This area has another one of those hydrant things with a ring. There is a porthole on the left wall and three candles as well.
Look closely at the wall above the hydrant thing, there is a small square patch near the ceiling.
Hover your cursor over this patch and you will see llllOll.
Now hover your cursor over the controller in your inventory. If you haven't been pushing buttons you should see Ollllll.
If you remember from Submachine 8, the O stands for the active button on the controller.
What you want to do is push the button on the controller so that it matches the pattern of the square on the wall.
That means pushing the left, third from the top button,
If you pushed the correct button the hydrant will disappear.
In its place will be a pole with a brass key on top. Take the brass key.
Now place the brass key in the porthole on the left wall.
The left wall will lift up. Go left.
You are now in an area with the ceiling sloping in from the right. There is a small opening in the sloped ceiling on the left, click on it to look inside.
This is another shaft, going up and to the left. Click on the square on the right to go back to the room.
On the floor of the room is a brass bowl, take it.
Also in the floor is a hole, click on it to go down.
You are now below the room with the slanted ceiling. There are three brass blocks here which form stairs up to the slanted ceiling room.
Go back up.
Go right twice to the room with the broken ladder.
Place the brass bowl on the block and use the karmic water on it.
This fills in the ladder so that you can go back up. But let's explore further instead.
Go left twice to the room with the hole in the floor, then go down.
In the room with the brass blocks, go right.
There are three candles here, white drapes, and a ladder going down. Go right.
There are more draperies here, and a pedestal with a covered brass bowl. Click on the cover to open it and take the brass sphere.
Once you've taken the sphere, fill the bowl with karmic water. Once the device grows click on the center to take the karmic seal.
Go right.
This is as far right as you can go. On the floor is a chest key, take it.
There's another of those mysterious squares on the wall below the candle, hover your cursor to see lllllll.
We can't reproduce that for the moment, so let's explore some more.
Go left twice to the room with the candles.
Click on the ladder on the back wall (to the left of the candles) to go down to the next level.
Inside the Pyramid (Gray)
You are now in a gray area. Notice the wire going across the top of the scene. Go left.
You are in a room with a hole in the floor. The hole is covered by a cage which is attached to a wire that goes to a pulley near the ceiling and goes right (into the next scene).
Go left.
This room has two pyramid shaped heaps on the floor. There is also a brass plate of some sort on the wall Go left.
This is as far left as you can go. You are now in a room with a sloped ceiling. Notice the small hole in the sloped ceiling on the left.
Click on the hole to see yet another shaft going up and to the left. Inside the shaft is a brass tile, take it.
Leave the shaft, then go right three times back to the ladder.
Go right.
The wire continues across the top of the scene. However, you appear to be unable to move any further right, as the way is blocked by what looks like a ceiling of tiles and a statue.
You actually can move further right, just click on the far right of the scene above the tile roof.
You are now on the other side of the tile roof. There is another statue here, and the wire above keeps going to the right.
Go right.
Here is where that wire ends, above a blue figure. To the right of the blue figure is a lever which doesn't appear to do anything.
To the left of the blue figurine is a small gray stone. Hover your cursor over the stone and you will see OllOllO.
Note: if you push the buttons indicated by the gray stone, the blue figurine changes.
Go right.
This is as far right as you can go. There is a brass statue here.
Look closely at the base of the statue, there is another brass tile leaning against the base. Take the tile.
Go left.
Let's get back to the blue figurine. If you push the second from the top left button on your device, the figurine becomes a brass pole with a bowl on top. If you push the left bottom button, it becomes a stone pillar. Push the button that changes the device to a brass pole with a bowl.
Use the karmic water on the bowl and a green device will appear.
The lever is still useless, however. Push the button that changes the device to a stone pillar (left bottom button) and use the karmic water on the stone bowl at the top of the pillar. A second green device will appear.
Now push the button that makes the blue device come back (top left button) and push the lever.
Go left four times to the room with the cage. The cage is now up and the hole in the floor is open.
Go down.
You are now at the bottom of a brass ladder/shaft, still in the gray area.
Go left.
This room has debris and three candles. Go left.
This room has what looks like a door on the back wall. On the door is another of those squares.
Hover your cursor over the square and you see lllllOl.
Hit the button on your device that matches this, the third down on the right, and a brass wheel of some sort appears on the wall.
Go left.
This room has a sloping ceiling. On a brass plinth is a lever handle, take it.
Go right three times to the ladder, then go right.
There is another one of those strange statues here. Leaning against the right side of the statue is a stone tablet, take it.
Go right.
You are at what looks like a window into the tiled roof of a temple. Click on the window.
Inside this temple is a curved brass pipe. There's nothing more to do here, so click on the open window on the left to leave the temple.
Go left four times until you reach the room with the brass wheel.
You should have two brass tiles at this point. Notice that each one is a segment of a circle.
You can try to fit your two tiles into the wheel and they lock into place. Looks like we need to find the other two tiles.
The Brass Wheel and the Brass Tiles
Go right twice to the ladder and then up.
Go right to the ladder, then up.
You are now back in the red zone. Go left.
This is the room with the brass blocks, go up.
Once you are up, go right twice to the room with the ladder. The karmic water should be forming the ladder.
Go up.
You are back in the blue area. Go right twice to the room with the sloped ceiling and the brass chest.
Use the chest key to open the chest and get another brass tile.
Go left twice to the ladder and then down.
Go left twice and then down through the hole.
Go right once and down the ladder to the gray area.
Go left twice until you are at the room with the red pyramids and the brass plate on the wall.
Does the shape of that plate look familiar?
Use the stone tablet on the brass plate.
A small ladder appears, use it to go up.
You are in a room with a sloped ceiling. There are three candles here and the last brass tile. Take it and go back down.
Go right to the cage, then down through the hole.
Go left to the room with the brass wheel.
Place the last two brass tiles in the wheel.
The floor will drop into stairs going down.
The Lower Levels
Go down the stairs.
You are at the base of a set of stairs.
Go left.
There is a stone bust on a brass stand. Click on the bust to get a stone eye.
Go left.
You are in a room with a sloping ceiling. You can see the faint light of another one of those shafts on the sloping ceiling.
Click on the shaft to see inside.
Doesn't appear to be anything there. Go right back to the room, then right twice to the base of the stairs.
Go right.
There is a stone plinth here. Click on the top to get some of Murtaugh's story.
Go right.
This room has three candles, and a wooden window to the right. Click on the window to go right.
You now appear to be in a bell tower. There are stairs going down, go down.
The spiral staircase continues down. Go down.
At the base of the staircase is a brass bowl, take it.
There is a hole in the wall to the left of the stairs, go left.
We can't go any further here, so go right to the stairs.
Go up the stairs twice to the bell tower.
Go left through the window.
Go left to the stairs, then up.
Go right four times to the window into the temple.
Go into the temple window and you will once again see the curved pipe.
Place the brass bowl at the end of the pipe, then use the karmic water on it.
The karmic water will create a walkway going right. Go right.
Go right again and you will come out a window on the other side of the temple roof.
Go right. There is another statue here.
Go right. There are wall panels here and debris. Go right.
There is a small opening in the back wall that appears to go down. Go right.
There is a brass circle on the wall with an Egyptian eye. Go right.
This is as far right as you can go as indicated by the sloping wall. There is a brass base here.
Go left twice to the place with the opening in the back wall. Go through the opening to go down.
You are in an area with a brass pole. There is a hole in the wall with the ladder leading back up.
Go right.
There is a candle here, and another of those squares. When you hover the cursor it says, "Broken beyond readability."
Play with the device and see that when certain buttons are pushed some brass devices appear.
Push the right top button and a brass device appears that is bent to the left. Notice the large circle at the end.
Place the karmic seal in the large circle and the device will stand up.
Go right.
There are more candles here, and a stone wheel on the floor. Go right.
This is a room with a sloping roof. There is another one of those Egyptian eyes on the wall. There is a strange device on the floor that goes into a shaft in the roof and down into a hole in the floor.
Place the brass lever on the device. Once the lever is on click again to activate the device.
Go left three times to the hole in the wall.
Go left.
More candles, and a window on the left wall. Go left through the window.
We've hit another bell tower. Did you notice that you can ring the bell with the hammer?
The Bell Tower Levels
Go down four times from the bell tower until you finally reach the bottom.
Go left and you will find a statue with some brass machine parts around the base.
Go left and you will find another statue.
Go left and you will find a large red landslide that fills up a doorway.
Go left again and you will find another plinth with yet another bit of Murtaugh's story.
Go left and you will find a grate in the landslide that goes down. Ignore that and go left.
Buried in the landslide is another brass bowl, take it.
Go right six times to the staircase, then up four times to the top of the bell tower.
Go right four times until you are at the scene with the stone wheel.
Place the brass bowl in the stone wheel.
Use the karmic water on the bowl.
This produces a lever that can either be to the left or right. Move it to the right. Note: this lever works an intersection of pipe way down in the Bell Tower levels.
Go left twice to the hole in the wall, then go up.
Go right and you will see a rope hanging from the ceiling in the space that has the Egyptian eye. Click on the rope to go up.
You are in a room with a sloping ceiling. This rope and pulley system connects to the one where you placed the lever.
Go left.
There's a strange stone figurine here on a brass base. Click on the stone figurine to get a stone eye.
Go right to the hole, then down.
Go left four times until you hit the temple window.
Go left through the temple and out the other side. Keep going left until you hit the brass ladder/cage thing.
Go up.
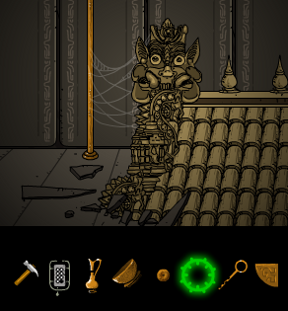
Go right five times until you hit the gold statue.
Note that the statue now has green earrings. There is a small circle in the middle of the statue's "forehead", click on it to get a secret.
Go left five times to the hole, then go down.
Go right and keep going right through the temple until you come to the hole in the wall.
Go down, go left until you get into the bell tower, and then go all the way down.
Go right. There is a device here, it looks like it needs two small circular items and there are two handles, but it doesn't work.
Go right.
There is a grating on the floor here. Go right.
Progress halts here as there are bars to the right. Looks like we need a key.
Go left eight times until you hit that area with the red debris and the grating going down.
The Tombs
Click on the grating to go down. Go down again.
At the bottom of the pipe go left twice.
You are now at an intersection. Note: If you pulled that green lever to the right the intersection goes up. If you pulled it to the left, it goes down into nothing.
If the intersection is going up, go up.
Go up again and you are in a secret room. There is a small secret on the floor to the left of the pipe opening.
Go back down twice and go left twice.
Go up twice and you are finally out of the pipe.
There is an opening in the wall ahead of you. Above the opening is a plaque, hover your cursor over it to discover that this is Murtaugh's tomb.
Go forward.
Here in the opening, you can go right. Do so and you will find a gold statue of Ganesh (it's a god that looks like an elephant).
Notice that Ganesh is holding a brass bowl. Use the karmic water on the bowl.
The karmic water creates a clickable portal. Click on it to find a secret blue room.
In the blue room there is a small device that looks like a mantel clock, click on it to open it and get a brass key.
Click on the brass circle to get back to Ganesh.
Go left from Ganesh and left again. Here is another plinth with more details about Murtaugh.
Go right, then go forward to look at Murtaugh's tomb.
Use one of the stone eyes on the large circle above the head of the figure on the tomb. This will cause the tomb to open.
Inside find the golden seal of Murtaugh, take it.
Back up twice until you are in front of the pipe where you came in.
If you go left twice there is a statue of a calf. There is something funny about the base, but there is nothing you can do about it right now.
Go right twice back to the pipe and the tomb, then go right again.
The way is blocked by red debris, but there is a brass bottle sticking out. Click on the bottle to open it.
Use the karmic water on the open bottle and a green device will grow. Click on the upper right of the device to get a karmic seal.
Go left, then down the pipe twice to the bottom. Go right four times then up twice to get out of the pipe system.
Go right five times to the stairs, then right again to that odd device.
Place Murtaugh's gold seal in one of the prongs on top of the device, and pull the lever.
Go right twice until you hit the bars.
Use the brass key on the brass circle on the wall to open the bars.
Go right.
You are in an empty hall. Go right twice more to find the tomb of Elizabeth.
Go right from the tomb to find another plinth and another part of the story.
Go right again and you will find another stone statue. There is a button on the base of the statue, push it.
Go left twice to the tomb.
Go forward into the tomb. To the right is a gold statue. We can't do anything here yet.
Go left twice to a brass circular object. Notice the smaller, open circle halfway down the object's base.
Place the brass sphere in that open circle and the larger circle opens up, revealing another clickable device.
Click on the larger circle to find another set of secret blue rooms. Go right.
Here you will find a climbing rope and a circle, take them.
Go left and click on the circle to go back to the tomb.
Go right.
Go forward, then use the other stone eye to open this tomb as well.
When the tomb is open get the golden seal of Elizabeth.
Back up twice and go left five times to the device with the two prongs.
Place Elizabeth's seal in the device and pull the lever.
Go left twice and you will see that the statue of the woman now has an open base. You can go in and down to another area.
Go left four more times to the red debris and the pipe opening.
Go down twice, left four times, then up twice.
Go left to the statue of the calf and you will see that the base is open, revealing a secret. Take it.
Go right twice, down the pipe, right four times, and up again.
Go right to the bell tower stairs, then go up.
Go right four times to where you placed the karmic seal. It may be floating in mid-air depending on what position your device buttons are in.
Pull up your device, then push the third down from the top left button to reveal another brass device, this one leaning to the right.
Place the karmic seal in the device and it will straighten up, merging the two seals.
Now pull up your device again and push the third from the top right button to bring out another device. This one has an opening in the base with a wheel, click on it (valve).
Go left to the bell tower, then all the way down.
Go left to the statue, and click on its base.
Go down four times until you emerge out the bottom.
The End
You are now in a sort of open cage balcony.
There is a brass pole on the left with a small circle on top, place the valve wheel on it.
Click on the valve wheel to turn it and a hook emerges.
Place the climbing rope on the hook. Once the rope is in place go down.
Enjoy the long trip down the goddess. When you reach the end of the rope, go down again to hit the bottom.
Go left from the base twice to find another plinth with another part of the story.
Go right twice back to the base of the statue, then go right again.
There is a device here with a glowing green circle. Go right.
There is a device here that arches to the right. Go right.
The other end of the device is here. On the base is a square. Hover the cursor to see lOlOlOl.
Go right. There is a small stone base here, with another square. Hover the cursor to see llOllll.
Use your device to push the proper button (left side, second from the top) to match the stone base.
A wedge of scenery appears with a portal in it. Click the portal.
You are now in a secret room. Click on the device on the right to open another device on the top.
Inside are three glowing blue gems (wisdom gems). Take them.
Hover your cursor to the left to find the portal and click it.
Go left to the brass device that had the code lOlOlOl on it.
Pull up your controller and hit the top right button, then place one of the wisdom gems on top of the device.
The gem will disappear.
Pull up the controller and push the second from the top right button. Place the second gem.
Push the third from the top right button, then place the third gem.
Go left.
The dome on the left device has now opened, take the button sitting on top.
Use the button with your controller to fill the last slot.
Pull up the controller and hit the new button (right, bottom).
Follow the energy trails left nine times until you find the beginning, a circle.
Click the circle.
See you at Submachine 10: The Exit!
Posted by: grinnyp |
March 14, 2014 9:38 AM
|
March 14, 2014 9:38 AM