
 A fanfare please! I'm so happy to welcome back Robamimi, who returns in fertile collaboration with Rinnogogo!
It's an excellent return, we get three full games - today is a feast for all escapists, after several years of silence, such a gift! The games are very different though; the first seems like typical georgeous and romantic (and perfectly logical) Robamimi with polished graphic. The second seems like Rinnogogo as we know them from recent two games - joining animated movie style with puzzles. Finally, the third one is visually also in Rinnogogo's style - however, smart puzzles seem more Robamimi-like.
 Each game represents crucial moment in one's life, from its very beginning to its ending, and the story behind is soft, tender and lovely. You start in beautiful spacious flat with modern kitchenette, move to a small country house and then to a dreamy land somewhere between earth and heaven, much closer to the moon, stars and miracles than we are in our lives; the journey leads from living in desirable apartment to walking on clouds and it's joyful and varied. Enjoy!
Have a good time with another great escape game!


Does anyone know the translation for the
video tape
?
You don't need to know it. Just wait for a while until the text stops scrolling...
Thank ya
One note about the final puzzle in the first part:
If you find the calendar clue confusing, that's because it's supposed to have fewer days circled in the English version, but that doesn't seem to have been changed in translation.
If it still stumps you, the code for the English version is included in Robamimi's walkthrough under the game.
PART ONE:
The tape:
As chrpa mentions, you don't need to read the text. Just sit on the screen until the text stops scrolling.
Final calendar clue: English version
The calendar is wrong.
Only the days from the 18 - 25 should be circled in the English version.
NOW you can solve it...
99 Roses
Each game in the series is hosted on both Robamimi and Rinnogogo's pages. The versions there are identical, but they don't share save data. Each page has a Japanese walkthrough linked under the game written by them, and I'll try to follow the same order of puzzles in these walkthroughs.
Story 1: Today Is His Birthday
Your husband proposed with 99 roses 3 years ago, how sweet! For his birthday, you've decided to buy him that gift he always wanted, but you've misplaced the winning lottery ticket!
Exploration
This chapter was produced by Robamimi, and the art style shows it.
You start off facing a shoe cabinet where you can hover each pair of shoes to look at it. Beside the rose atop, there's a box with six numbered buttons which show pictures of shoes.
As you might expect from a Japanese house, this means you're standing in the genkan (entryway), the exit door is on the right and the toilet (nothing of interest inside) is on the left.
Clicking the door beyond the shoe cabinet puts you in a small corridor where you can click the right arrow to examine a shelf with a lamp robot (missing a battery), a round box with a small round button and a thin elongated one, a bunch of similar-looking books and a drawer whose lock has six vertical sliders.
From the corridor, you can enter the laundry/changing room. Looking in the washing machine, you find an unintentionally washed card that simply says "Men's Club" with a number beneath.
Enter the bathroom. The pattern on the mirror directs your gaze upward, so look up at the ceiling. The ceiling panel can be lifted, but the space above is too dark to see anything in. (You can also see it through the doorway from the previous room.)
Make your way back to the first screen, turn left, and open the door beside the toilet to enter the living room.
The first thing you see in the living room is a simple couch with wooden arms, on which lies a football/soccer ball which has some of its panels marked with dots. The table in the middle holds an ad for a new bicycle, a box with a three-digit lock and a plate of three-colored hanami dango skewers. (You can check under the table but there's nothing there.) The air-conditioning is off.
Turn left to look at the kitchen area. There's a sink and stove you can't do anything with, and an unfinished cup of noodles in between. The label on the noodles reads MenClub ("noodles" 麺 is read as "men") with a +100 beneath. The cupboard under the sink is locked with a card reader, while the one under the stove is unlocked and contains some pots and pans. The fridge is completely empty except for two cans of soda.
Turn left to find the door you entered from. There's an trolley holding a TV set and a video cassette player.
Turn left, allowing you to see the small cabinet from the previous screen which holds white-and-gold dishware. Before you cross the partition to the bedroom, you can close it to find a pattern of rectangular blocks on its panels.
Click the bedroom to move towards it. You're now facing a wardrobe with several clothes hung up. The safe in the wardrobe has letter buttons that let you enter a code as long as you want until it goes off the display. Beside it, there's a device with a soccer ball mounted on the rack, where six of the ball's panels are buttons that can be clicked.
Turn right to face the bed. The calendar on the wall has several consecutive days circled.
Look under the bed to find an air-con remote that has its battery in.
You can turn right and close the partition from this side but there's no point, so turn right again and open the balcony door so you can go outside. You can walk back and forth along the balcony, but even the air-conditioning unit on the floor is uninteresting.
Triplet
Unlock the three-digit box using the clues on the same table.
The numbers written on the flyer are connected in columns, almost as if they were skewered by the lines.
Which reminds you of the plate of dango sitting right there.
The plate's green outline tells you to look at the positions of the green dango, which correspond to the digits 5, 5, 9.
Enter 559 in the box and open it to find a losing scratch card for Wednesday.
(If you're looking at the scratch cards in English and scroll too far up or down, the examine screen can fail to close. One workaround is to examine another item and then close that screen.)
White and Black
Use the clue from the soccer ball with dots to unlock the soccer ball device.
Simply note the order of panels with increasing number of dots, and push the buttons in the same order: top right, top left, bottom, bottom left, bottom right, middle.
The device dispenses another losing scratch card, this one for Friday.
Swipe
Use the Men's Club card on the card reader under the sink.
This gives an error and then you need to input a number instead. Where can you find the code?
The number on the card (571) doesn't work, but looking at the card reminds you of the similarly-named cup noodles.
The cup on the counter had a label touting its 100 extra grams, so add 100 to 571 to get 671.
Enter 671 into the keypad, and after pushing E the lock is now open.
The cupboard is full of noodle cups, and you can see the losing scratch card for Thursday in the lower right.
Paired
Use the clue from the shoe cabinet to unlock the box on top of it.
Isn't it such a coincidence how the shoe cabinet looks exactly like the dishware cupboard?
The number of items in the latter increases from 1 to 6 as you go down the shelves on the left side and then on the right side, which tells you which shelves to look at to find the correct shoe for each of the six squares of the safe.
The only shoes available on the buttons are tan-colored, so you only need to look at those shoes.
Click the buttons 0, 4, 1, 2, 3, 5 times to show the correct shoes, then open the box to get the losing scratch card for Sunday.
Slider
Use the clue from the closed partition to unlock the bookshelf drawer.
Click the sliders in the bottom, middle, top, upper-middle, lower-middle, upper-middle positions to match the light-colored areas of the partition.
Now you can open the drawer to find a video tape labeled "Osakan Holiday".
Vacation
Use the tape in the video player, and watch its contents on the TV. This will take a couple of minutes.
Since the monologue is extremely heavy with Osaka dialect, I'll provide the (hopefully) exact text before my best effort at translation.
いやぁ~~~! あんた、久しぶりやないのぉ~~~
どないしとったん? 生きとったん?
え?うち? 今日な、お父ちゃん休みやねん。
せやねん。
でな、朝からたこ焼き食べる~言うさかい、そこで買うできたこやねん。
いや、もう~ そんなん、作らへんて。
このクソ暑いのに。 ほんまやで。 アハハハ!
そや、このシャツ、ええやろ? ヒョウ柄やねん。
虎ちゃん。 100円! ぐフフフ⋯ ほんまやで。
そや、アメちゃん、食べる? いらん?
そう? 美味しいで? ようけあるから持っていき。
べっこう、嫌い? 好き? ほな、持っていき!
(ガザガザ、ゴンゴン)
え? 邪魔? 誰か? うち? お兄さん、そのカメラ、撮ってんの?
え? 今も? いやぁ~、 早よ言うてぇやぁ~~~!!
そら、堪忍やで。 あ、アメちゃん出てきたわ。
お兄さんもいる? アメちゃん上げ⋯ あ、ごめんやで。
あかん!たこ焼き、冷めてもうだわ。
Ahh! Long time no see! What are you up to? How's life?
Me? Dad's resting today. That's right.
Since he's been asking to eat takoyaki since morning, I bought it here.
Nah, I can't make that myself.
The weather's so dang hot, really. Ahahaha!
Anyway, how's this shirt? Leopard prints, like a tiger, only 100 yen! Gufufufu… indeed.
Want some candy? No?
How's it? Delicious? I have lots. Do you hate tortoiseshell candy, or like it? I have more!
(Rustle, knock)
Huh? Who's blocking? Me? Onii-san, are you recording with this camera?
What, right now? Oh, you should have said earlier!
Forgive me. Ah, the sweets fell out. You want some too? I'll give- oh, sorry.
Oh no! The takoyaki have gone cold.
After the old lady disappears, you spot something that isn't an Osaka landmark: the vertical sign right in front of the tower which has dots and dashes running down it.
Dashed
Use the clue from the TV to unlock the round box on the bookshelf.
The Morse code-like clue on the sign reads (from top down)
·−··-·-·or dot, dash, dot, dot, dash, dot, dash, dot.So click the LRLLRLRL buttons on the box, which opens up to give you the losing scratch card for Monday.
Chill
Push the ON button on the remote control. Other than turning the AC unit on, this doesn't have any visible effect on the room.
But if you walk outside, you'll find the losing scratch card for Saturday.
Lamp
Remove the battery from the remote and use it to power the lamp robot.
Climbing up to the ceiling of the bathroom, you can use the lamp robot in the darkness to reveal the losing scratch card for Tuesday.
Daily
Each losing ticket has an unusual clue with an arrow passing between Day and Alphabet.
So use the clue from the calendar to unlock the safe in the wardrobe.
(As warned in the comments, this puzzle is different depending on your language setting, and the calendar clue points to the Japanese code.)
The circled days from the calendar start from Thursday.
So read through the codes on each scratch card starting from Thursday, taking one letter from each (starting from the left, and moving on to the second letter when you get to the second Thursday).
For English, this puts the eight letters in the order HATTRICK. So click those buttons on the safe to unlock it. Take the winning ticket to end the game.
And so, you got your husband that bike and dinner. But there's another birthday present: a baby.
Story 2: Gnaphilium Affine
(Gnaphilium affine's Japanese name 母子草 is literally Mother-child-grass, and it can be used in the green-colored kusa-mochi.)
Some bullies stole your bicycle and you couldn't get it back. Nope, that's just a lie you told to get a new bike. But you came home from school and the key for the new bicycle is missing!
Exploration
As you can tell from the art style, this chapter was produced by Rinnogogo.
You start off facing some comfy-looking blue cushions. The paintings on the wall spin around when you click them. There's also a projector that you can flip over and a power socket on the wall to the left. Hovering over the ladder on the right makes an upward-pointing arrow appear.
So climb up the ladder to find a mattress surrounded by some junk, a poster of Hatsune Miku and a photo with the word CLEAR written across it.
Click the top-right corner of the left poster to fold it down and find a pink card with a squarish 6 on it
Climb back down, and turn right to face some closets. The lock has two red buttons marked with bicycles, one upright and the other inverted.
Turn right to face the exit door, with a light switch beside it. Your bag is on the ground here. On the right side, there's a keypad that's blocked by a clear cover with three colored buttons.
Turn right to face a bookcase and desk. You can't do anything with the soccer ball there, and the only other thing of interest is a photo of you and your dad, which you can turn around to find a folded blue card with a circle. The clock doesn't seem to do anything either. The top drawer of the desk requires a key, the middle one has a lock with two blue buttons, and the bottom one is unlocked but empty.
Check the photo on the bookshelf again. You can remove the stand from the back of the frame to find a scratch card with its front crossed out. Flip the card over to find a clue with three colored digits and an arrow.
Click the right side of the table to find a yellow card marked II behind the drawers.
Path
Rotate the paintings into place to find another clue.
You need to make the paths on the paintings line up, so start by clicking the right painting twice to put the arrow on the right end, then the middle painting once to make the path aligned with the right painting.
The two horizontal orientations for the left painting are very similar, but you may notice that it's not entirely symmetrical: the initial position has the front of both bikes pointing up, as you can see from the baskets.
This means you need to click the left painting just once so the bikes face the right.
Nothing interesting happens, but looking at the bikes also gives you the clue for the closet.
With the paintings aligned, the bikes along the arrow are on the top, bottom, bottom, top, top, top sides.
So click those buttons to open the closet up. One of this shirts is definitely not yours! The left one belongs to your father, and it has a cut card in the pocket. Pick up the umbrella under the shirts.
The right side of the closet is also unlocked, and it holds some more clothes, but the safe in the middle has a text input box and a clue with colored rectangles.
Concatenate
Use the clue from the color and cut cards to get the password for the safe in the closet.
Look at the clue on the safe again. The rectangles on the right are thinner than the ones on the left.
Along with the cut card, this hints that you need to cut each of the colored cards in half.
Discarding the right halves, you find that the remaining markings on the left halves spell the letters I, C, E.
So type
ICEin the safe, and open it to find a light blue popsicle among a bunch of ice.Unwrap the popsicle and eat it. Some lines and dots are marked on the stick.
Three buttons
Use the clue with digits and an arrow (from the back of the scratch card) to unlock the cover of the keypad.
The colored digits tell you to click the red (top) button twice, the blue (left) one twice and then the yellow (right) one thrice.
Doing so unlocks the keypad, which gains an additional clue on the side.
Time
Use the clue beside the keypad to unlock it.
The time shown on the clock is 5:45, and looking out the window confirms that it's afternoon. So in the 24-hour time format, it's 17:45.
Underneath the hint text, the asterisks are shown in an area with a wood-grain pattern that matches the popsicle stick. So each digit in the time corresponds to a set of lines on the stick. In the order of increasing number of lines, the digits are 7, 4, 5, 1.
So enter 7451 in the keypad and press E, which makes a rolled-up projector screen appear.
Liquid
Check back in the safe in the closet, where the ice has melted. Take the golden key.
While you're at it, take the magnetic card that also appeared on the left side.
Then use the key to unlock the top drawer and find a power cable.
Shine
Use the umbrella to pull the projector screen down. (This step is actually optional.)
Attach the cable to the projector (you can find the cable slot by flipping it over), then click it to turn it on.
It's still to bright to see anything on screen, so turn off the lights. Then look at the projector image to see two photorealistic diagrams separated by a diagonal line with CREAL written above.
Perspective
The projected images show the side view of the desk, so open the top drawer to match the top image.
Then look at the desk from the side again to find a clue with Rs and Ls and an arrow.
So use that clue to unlock the middle drawer.
The code RRLRL doesn't work by itself, so you have to consider the red CREAL that was also on the projector screen, which is an anagram of CLEAR which was on the photo upstairs, just the L and R are swapped.
So swap the roles of L and R in the code by clicking the LLRLR buttons. The drawer opens and you can take the bicycle key! But you're not done.
Just as the projector image shows, you should now have the middle drawer open.
So look at the side of the desk once more to find a blue button behind the middle drawer. Pressing it makes a weird sound above you.
Escape
Climb the ladder again, and you'll find a new metallic door which has a card slot beside it.
So insert the card you got from the closet safe, and the door opens into an elevator.
Push the 1 button on the elevator, which doesn't move. Instead, it opens up a trapdoor and descending through it ends the game. Well, not quite.
The red bike has mysteriously reappeared! After kicking it down in a fit of rage, look closer to find the charm hidden under the bike seat.
The bike, as a representation of mother's love, is irreplaceable. After you owned up and apologized, she just smiled in a lonely way. Knowing that she never rode the bike but had to walk it back from the mountains drove you to remorse, and you decided to paint yours a matching shade of red.
Story 3 Finale: Everlasting Love
A man who's passed away for a year is preparing to meet his wife in heaven on the night of the new moon.
Exploration
Rinnogogo's page for this game has a link to the production notes, which mentions that the art is by Rinnogogo, the programming by Robamimi, and the story by both.
You start off in front of a pavilion which has a clock and a locked birdcage containing a white rose. The canister on the table has a lock whose four buttons have circles in different sizes.
The support nearest to you looks different from the others. Pick up the extra short stick from it.
Turn right to face the full moon. On the left, a basin of clear water has a picture of a blue bottle and a marking reading 0/4. The flowers next to it are tinged blue. On the right side, a lighthouse in the distance shoot out four narrow rays of light that end at golden arcs in the sky.
Turn right. Looking out at the ocean, you find a circle of colored letters and a floating blue bottle out of your reach. A single star twinkles in the sky.
Turn right. The bench on the floating disc island has a box on it. A button on a nearby table has three color buttons labeled with roman numerals.
Turn right. A light-colored safe lets you "input alphabets", and a telescope rests on a platform suspended by stars. There's also a path here passing through a heart-shaped passage formed by two trees.
Going forward along the path, you come to a gate with a red bicycle in front. An angel tells you to bring a blue rose.
Go back and then turn right, where you see a waterfall from the Milky Way. A small marble tablet rises out of the mist on the right side, and it has four sliders beside a lighthouse diagram.
Three colors
Use the clue from the colored letters to activate the button in front of the floating bench.
The only other place that roman numerals appear is on the face of the clock, which suggests that you should treat the ring of colored letters as a clock face on which the roman numerals Ⅰ, Ⅳ, Ⅷ (1, 4, 8) correspond to the letters B, A, O.
Those letters are orange, red, yellow, so click the buttons 3, 5, 2 times to activate it.
A bridge slowly appears so you can walk up to the bench. The box on the bench has a crescent-shaped cage holding a key, and its puzzle also involves colored square buttons, these ones connected by arrows. Pick up the screwdriver in the lower-right corner.
Eight squares
Use clues from throughout the game to unlock the crescent cage on the bench.
Hint: one of the squares is not like the others. What do the squares represent and how is that one different?
Notice that the layout and connections of the squares match those of the screens in the game: six of them connected horizontally in a loop, and you can go forward from two of those six.
All the buttons should be white or black except for the first one, which can be yellow. How do you know which ones are white?
The clue is in something that appears on every screen: the arrows on the sides! Each screen has either black or white arrows, with the exception of the bench screen itself which has a yellow arrow.
So click the left button on the top row to turn it yellow and the 3rd, 4th, 6th buttons on the bottom row to turn them black. Then open the cage to get a key.
The open cage can now be picked up: it's a net!
Reach
You can use the stick you found to reach the floating bottle, but you can't pull it over.
So attach the net to the stick, which allows you to pull the blue solution towards you.
Vision
Use the telescope on the twinkling star, and all you see is a blue blurry mess. Perhaps you can fix that.
Use the screwdriver to dismantle the telescope, and take the bottle of blue solution from inside.
Now you can use the telescope on the twinkling star again. Surprisingly, it's not a star but four planets with orange spots.
Circular
Use the clue from the planets to unlock the can on the first screen.
The planets with 1, 2, 3, 4 spots are the 1st, 4th, 2nd, 3rd largest.
So click the 1st, 4th, 2nd, 3rd buttons from the left, then open the can to find another blue solution bottle.
Projected
Use the clue from the lighthouse to unlock the tablet on the waterfall screen.
From left to right, the intersections of the light rays with the yellow arcs are 4th, 3rd, 1st, 2nd from the top.
So click the sliders 3, 2, 0, 1 times to move them to the corresponding positions. The waterfall vanishes and is replaced by a colored digit clue.
Password
Use the clue from the colored digits to get the password for the box in front of the heart passage.
Take the 1st letter of
pink(p), 2nd ofblue(l), and so on.All six letters spell out
planet, so type that (lowercase) in the box and open it to find another blue solution bottle.Potion
Add all four bottles of solution to the bowl. As the water turns a deep blue, the moon wanes down to nothing, and eventually the bowl emits some blue sparks of its own.
It's almost time, but you just need one more thing.
Use the key to unlock the bird cage on the first screen, take the white rose from it, and dip it in the blue solution to turn it blue.
Then give it to the angel to end the game.
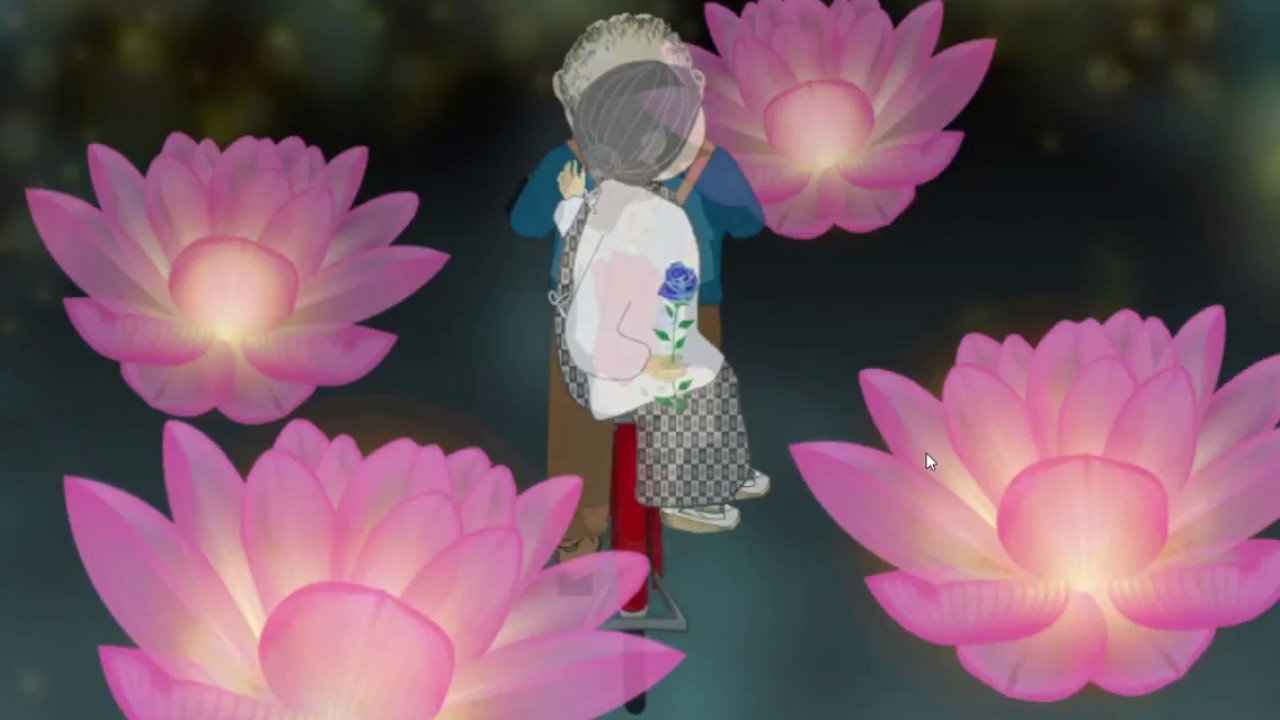
The blue rose of miracles, the red bicycle of love, the couple who stayed together throughout… the image fades away into a peaceful ending, leaving only memories of the language of flowers.
Update