
![]()
 Presented for your code-breaking pleasure, Box 19, a neatly packaged little escape-the-room by Tateita. Although the name sounds more like a trendy new nightclub down by the pier and the exact number of boxes is not verified, it does have something we love to find in an escape game—fun, logical puzzles. Also a plus, its stark, clean design means pixel-hunting is nonexistent.
With five walls and no furniture, gameplay is stripped down to the basics: click either on the edges of the screen to navigate or on a box to inspect it. Then, ponder clues and employ deductive reasoning to open locks and obtain the exit key. It's disappointingly short yet enjoyable while it lasts. So, if you have a moment to spare, open up Box 19 to see what's inside.


Walkthrough Guide
(Please allow page to fully load for spoiler tags to be functional.)
Well, this is the first "escape the room" that I'VE completed without consulting a walkthrough, but since we all get stuck on something silly now and again, I thought I'd go ahead and make one (my first!).
To start off, look around:
What's that lying on the floor? Why don't you pick it up...
Does it seem to correspond to something else?
click on the blue key in your inventory, and then click on the blue padlock to open the grill covering the blue safe
That locking mechanism looks familiar...
the shape of the buttons corresponds to the shape of the room... and each wall has a color associated with it. Using the short, angled wall to get your orientation, key in the appropriate color for each side.
Oh look, two goodies inside!
The first item is incomplete, we'll find the rest of it soon, I'd assume. Why don't you examine that piece of paper?
Click on the paper in your inventory, and then click "About Item" to bring up a zoomed in view. Click on the image to flip it over, and click on the yellow key to retrieve it. Looks like there's some sort of code on the back side of that card as well...
On to the next wall...
Use the yellow key on the yellow padlock, same as the blue
Hmmm... there's a note on the side there...
There's a color key that matches the shapes of the yellow locking mechanism... where have we seen those colors before?
Take a look at the number sequence on the note in your inventory. It looks like those colors need to be applied in order, and apparently, colors correspond to directions...
the color key was pointing in, but the lock is pointing out... direction is more important than position.
Well, what's this?
looks like the other half of our incomplete item... examine the handle, and while the window is open, click on the screwdriver head and then click on the socket in the handle.
Well, I wonder what I can use this on...
turn to the left again, and use the screwdriver on the screws holding the red grate in place.
Now what?
A combination lock, now where is the combination?
Perhaps we should take a look at the grate we pulled off?
Flipping the grate reveals a note, clicking on the note reveals an image. What does that grid of squares resemble?
The square pattern represents a phone keypad, and the numbers indicate the order in which the keys need to be entered to form the combination.
Oh look, two MORE goodies...
A green key... you should know what to do with this by now...
a cryptic note... a math problem? Simple enough, but what are these variables?
Looking at the keypad, that sequence of letters seems familiar...
Turns out they're not variables, but the first letter of the written word for the numbers one through nine
Well... do the math!
In this case... "E" is for "Enter"
Hey a staircase! I wonder what's outside...
Well, I hope this helps... probably not necessary, but maybe someone will find it useful! Now I can check off that "Wrote a JIG walkthrough" item on the ol' bucket list...
Cheers!
Posted by: NazZ |
May 13, 2012 1:31 PM
|
May 13, 2012 1:31 PM
Box 19 Walkthrough
To Begin, the Blue Box
You begin facing the door.
You can check it but, I promise, it's locked. And so begins your journey to find the key.
Turn right.Now you see in front of you a hole-ridden steel panel, behind which you glimpse a bit of red.
See that tiny object the floor? Pick it up. It's a:
BLUE KEY.
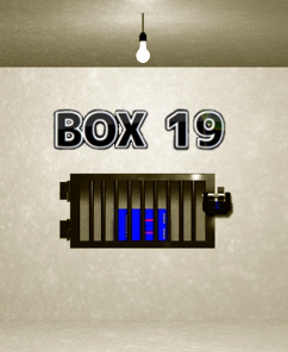
Turn right two more times to see a blue box behind black iron bars...
Click it to zoom closer.
Use the BLUE KEY to unlock the bars.
Now, examine the BLUE BOX more closely...
Mild Hint:
Each of the four rectangular buttons can be changed in color:
red to blue to yellow to green and then back to red.
There's a 5-sided outline around those color buttons.
Using this shape, you'll know where to find the required color for each button.
Strong Hint:
The 5-sided shape outlining the buttons represents the shape of the room you're in.
Look at each wall in the room to determine the colors needed.
Open the BLUE BOX by changing the color on each button.
Solution:
(with colorblind directions in parentheses)
top = red (no clicks)
right side = yellow (click twice)
bottom = blue (click once)
left = green (click three times)
When all the buttons are colored correctly, the box pops open. From inside the blue box, get:
SCREWDRIVER HANDLE
A PIECE of PAPER (clue).
Next, the Yellow Box
In your inventory, select the paper you found in the blue box and click "about item" to examine it; on it you'll find:
Numbers 1-6 in different colors
A YELLOW KEY.
Take the Yellow Key from the paper.
Back up from the blue box then turn left. Here the YELLOW BOX is also behind black bars. You know what to do...
Use the YELLOW KEY to open the lock.
This box has four arrows. To open it, just press them in the right order.
Mild Hint:
To the left of the yellow box is a pretty design. Give it a looksee.
Now note what's in your inventory and put it all together.
Strong Hint:
The colors on the design tell you which arrow lines up with which color.
Remember to go by the exact shape of the arrow, not where it's located on the design.
Match up the colors of the arrows to the colored numbers on the paper; then you'll know which button to push when.
Solution:
Push the buttons on the yellow box in this order:
top
bottom
bottom
right
left
right
Open the yellow box and from inside you'll get:
SCREWDRIVER BIT
Almost last, the Red Box
In your inventory, open up the HANDLE you got from the blue box then add the SCREWDRIVER BIT you took from the yellow box. Now you have a fully functional...
...SCREWDRIVER.
Back up from the yellow box and turn left to stare into the shiny depths of the polished steel, hole-punched panel.
Click on the panel to get a little closer.
Use your screwdriver on any corner to remove the screws that secure the panel to the wall.
Now you can reach the RED BOX. Look it over to see a four-digit code is needed to open it.
Mild Hint:
Take a closer look at the STEEL PANEL that's now in your inventory after removing it from the wall.
On the steel panel you'll find a PIECE OF PAPER containing another clue.
Stronger Hint:
On that piece of paper that you found on the steel panel is a grid.
Combine the information on the paper with something else you can see in the room.
Use the numbers on the paper to help designate 1st digit, 2nd digit, and so on.
Solution:
The grid on the paper represents the number grid on the green panel by the door. Look the green panel and combine it with the paper to get this code:
2867
Enter the correct code on the red box, open it up, and take out...
a GREEN KEY
another PIECE OF PAPER.
End with the Green Panel
After you get the green key and piece of paper from the red box, back up and turn left.
Zoom in on the green panel next to the door and use the green key to unlock the glass door protecting it.
Click on it to get even closer.
The makers of this game wanted to make sure there was no ambiguity about what you need to do here, hence the additional hints on this panel.
Mild Hint:
If you can do a little math and know how to spell, everything you need to find the exit code is right in front of you.
Stronger Hint:
The clue on the piece of paper is a math problem. Pay no attention to order of operations. Just start at the left end and work your way to the right.
The numbers needed can be found by looking at the green panel:
start with the first number hinted at...the same clue never applies to the same number twice.
Complete the math problem (a calculator comes in handy) to get the four digit code.
Solution:
The letters on the paper refer to the first letter of each number, as it's spelled out.
The first "T" means "two" while the next "T" means "three," and so on through the numbers.
Don't bother with multiplying before adding or any of that. Start at the left end and complete each mathematical function as indicated.
By completing the math correctly, you'll get this code:
5670
Input that code (see above spoilers) and click "E" for enter.
The door will unlock.
Back up, click the door to open it then click the stairs to walk out.
Ahhh, freedom! I was beginning to feel so boxed in!
(P.S. Congratulations on your escape!)
Posted by: elle |
May 13, 2012 3:12 PM
|
May 13, 2012 3:12 PM