

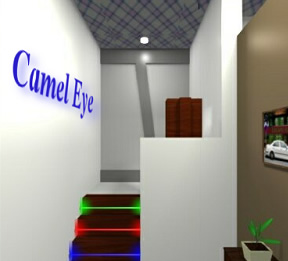
![]() Escaping a locked room is a fabulous thing, or at least we think so here at Weekday Escape. Sometimes, though, it can be fun to play an escape game that is not actually an escape. Camel Eye, by HILG, is one of those games, a wacky crime caper in which you play Camel Eye, famous thief, attempting to relieve some rich man of his valuables. Why? Are you trying to help him into heaven? And what's with the nickname Camel Eye, anyway? Who knows and who cares, let's steal some gold!
Escaping a locked room is a fabulous thing, or at least we think so here at Weekday Escape. Sometimes, though, it can be fun to play an escape game that is not actually an escape. Camel Eye, by HILG, is one of those games, a wacky crime caper in which you play Camel Eye, famous thief, attempting to relieve some rich man of his valuables. Why? Are you trying to help him into heaven? And what's with the nickname Camel Eye, anyway? Who knows and who cares, let's steal some gold!
 You begin the game as master thief Camel Eye, looking to steal some gold. There is indeed a locked door that you are trying to get through, but this locked door leads to untold riches, not the great outdoors. Pity the door is protected by so many security measures, including lasers and dolls. Yes, dolls. The security in Camel Eye is set up like it was designed by a schizophrenic Rube Goldberg, with secret doors, mysterious machines, key cards, lasers, and dolls. What, you don't entrust your valuables to your dollies? You will find yourself navigating through a series of rooms, searching for the aforementioned loot with the help of whatever items you happen to find. Open everything, look inside and around everything, be nice to the dolls and perhaps you will come away tons richer.
Camel Eye is available in both English and Japanese. As with all HILG games, simply wait for the opening to finish and you will find three small buttons on the bottom of the screen to the left of a dialogue box. The far left (yellow) button will take you to the system controls where you can switch to English and also, if you choose to, switch on the handy-dandy built-in hint system. The middle button controls sound (when the music loop get annoying) and the right button is a save feature, nice if you want to walk away and come back later. Navigation through the space is pretty easy with the use of directional arrows. Brace yourself for some pixel hunting, though, due to the lack of a changing cursor. Examine items in your inventory by clicking on the button next to the item or click on the item itself to use it.
Camel Eye is one of HILG's denser efforts. There are a lot of items to find and use and a ton of puzzles to crack before you can become a very wealthy person. This is what constitutes a really good room escape: tricky original puzzles, lots of objects to find and use, easy controls, and interesting scenery. Pity about the changing cursor.
So if you feel like bringing out your inner Raffles, or you just like solving tricky room escapes, come and give Camel Eye a try. Fun, tricky, challenging, a good time will be had by all. Besides, who wouldn't like a chance to get rich? Even if it's just a game.


Walkthrough Guide
(Please allow page to fully load for spoiler tags to be functional.)
My Walkthrough:
Once you've entered, click on the chairs. Pick up the GREEN CARD on the red chair.
Back up and turn around until you're facing the wall clock. Pick up the SIX and the NINE from the clock.
Turn right and look down. Pick up the CREEPY DOOR HOLDER DOLL and the TRANSPARENCY at the bottom of the closet.
Open the closet door and click on the mirror. Place the TRANSPARENCY on the mirror.
Back out the mirror and look at the top of the closet, here you'll find the GREEN KEY. Grab it.
Turn back around until you're facing the chairs and the displays on the right. Click on the far display and use the GREEN CARD to open it. Pick up the BOOKS and the BLUE CARD.
Click back and then on the closest display. Use the BLUE CARD to open this and take the MUSTACHE GUY PUZZLE BOX.
Now back out, and then click on the orange/blue/green puzzle on the wall. Make a note of where the blue lines are. We'll come back to this.
Click the button to the left of your BOOKS in the inventory, this will bring up the info screen. Click on the BOOKS and read about the Japanese traffic signs. You'll need to remember the "No Parking" sign.
Click on the door at the far end of the room to open it. Place the CREEPY DOOR HOLDER DOLL at it's base to keep it open.
Go into the next room.
Turn to the right and click on the bureau with the plant. Open the drawers and pick up a RED MARKER (click on the info button in inventory and open the marker), ORNATE BOX (click on the info button to open the box and take out the THREE BLUE KEYS), and a PAPER (click on the info button to open the paper and see a "6" and a "9" and arrows depicting "switch".)
Back out and click on the painting above the bureau. See the sign? It should read "No Parking". Use the RED MARKER here.
Whoa! Something just fell out of the painting. It's the RED KEY. It's near the plant. Pick it up.
Check the painting again, we've got our first number clue - it reads 5231, in red. We'll use this at the RED CHAIR later.
Now, back to the first room. Click on the wall clock again and put the SIX in the NINE spot and vice versa. Hear that sound, it's a clue/puzzle chime. Yay!
Let's go to the RED CHAIR and enter our code (5231) Ooh, a keyhole. Let's put the RED KEY in there. Now you've deactivated the Red Laser.
Let's go back to the mirror inside the cabinet. You'll see the TRANSPARENCY line up with the green lines on the far wall. You can just make out the numbers 3791. Take that over to the GREEN CHAIR and enter it. Use the GREEN KEY on the keyhole. We're almost there!
Now let's take a closer look at MUSTACHE GUY PUZZLE BOX. If you spin him around he has a series of orange key holes and one green key hole. Sound familiar. Use the picture on the far wall to guide you where to put each of the THREE BLUE KEYS. The box will open and give you the BLUE KEY.
Check the wall again and you'll see number where the blue markers were. The code for the BLUE CHAIR is 536. Use the BLUE KEY on the keyhole and you've turned off all the lasers. But we still have a little ways to go.
Go up the stair, turn to the right. Ignore the LOCK and PUSH signs for now and turn right again into the bookcase. If you place your BOOKS here, you'll see that it opens up a secret compartment under the stairs, but you can't get to it. Remove the BOOKS and place what's left of the MUSTACHE GUY PUZZLE BOX in the top of the bookcase. This will spin the top around letting you place the books from the other side.
There's not too much to do here, so I'll go through it quick. Click on the left control panel and get the COMPASS. Back out and click on the RIGHT CONTROL PANEL and see the keyhole. Back out again and turn to the left. On the right hand side in the railing there is a click-spot. Find it and find the METAL KEY on the railing. Go back tot he RIGHT CONTROL PANEL and use the METAL KEY on the keyhole. Take out the BATTERY. Use the info button in the inventory to bring up the BATTERY and click it to FLIP IT. Put the BATTERY back in the box on the control panel and hear the puzzle chime. Take a look at the white screen on the top of the board and make a note. It reads:
NXEXSXWXN
You're done down here go back up stairs (take your books back to lower the stairs), to the first room and back to the wall clock.
Look at the hands on the clock, then look closely at the COMPASS. It appears that North = 8, East = 11, South = 2 and West = 5. Now plug those number into the formula from the screen:
8x11x2x5x8 = 7040. You've got another CODE!
Back up the stairs, this time the sign on the right says UNLOCK. Hit PUSH and a vault opens. Enter 7040 into the lock and the GOLD HAND is yours. But wait, it has a name on the back "Major Nyaa"
Back into the first room and to the door on the right that we've been ignoring. Zoom in on the names listed and click the button next to MAJOR NYAA. Use the GOLD HAND on the scanner and open the door.
AND YOU GET....nothing. Just a colorful Thank You and a few minutes of fun. Enjoy!
Posted by: HBFlyte |
September 22, 2010 2:41 AM
|
September 22, 2010 2:41 AM
Camel Eye Walkthrough
General Information
Once you've gotten through the intro, use the yellow button (bottom left of the screen) to change the game to English if you'd like.
You can also use the yellow button to turn on the hint feature.
Examine items in your inventory by using the buttons next to the item cells.
To use an item simply click on it then click where you'd like it to go.
Examine everything you pick up, some items conceal secrets.
There will be directions for the colorblind.
Good luck!
Exploration
You begin by facing a wall that has a green door, with a painting of some sort hanging to the right.
In front of you are 3 desks, each with a different colored chair. Click on the desks for a close up.
Notice that each desk has a keypad. Looks like we need 3 codes.
On the seat of the red chair (the chair on the far right) you will see a green key card, take it and back up.
On the wall behind the chairs is a low table with two glass cases, one with a green front on the table and one with a blue. Click on the green case for a close up.
In front of the case is a card reader. Use the green card on the reader (the light will change colors) and then click on the case to open it.
Take the books from the case. Once the books are gone you will notice a blue key card, take that as well.
Back up.
Now click on the case over the blue area of the table. Use the blue key card to open the case and take the odd looking doll.
Back up until you are facing the green door again.
Pull up the books from your inventory. Once they are in close up click on them to open and read one of the books.
I'm sure the information on Japanese traffic signs will be very helpful.
Close down the books and pull up the odd looking doll from your inventory.
Notice the arrows on either side of the doll? You can rotate the doll 1/4 turn with these arrows.
As you rotate the doll you will notice orange slots running down the doll. Well, mostly orange and one green.
Close down the doll and turn right.
This is the door to get out. Notice the panel on the right of the door? Click on the panel for a close up.
Looks like we need a palm print of some sort. Back up and turn right.
There is a clock on the wall, click on it for a close up.
Okay, the blue hand is on the 12 and the red hand is on the 3, but otherwise the clock doesn't work.
Back up and turn right.
Now you are facing an orange locker which won't open.
Click on the bottom of the locker door (below the handle) to look down.
There's a paper of some sort between the locker and the wall, take it.
Examine the paper and you will see some green lines on a transparent sheet. I'm sure that will come in handy.
Pick up the doll that is holding the locker closed and back up.
Now click on the handle to open the locker.
Click on the top shelf of the locker for a close up and take the green key there.
Back up and click on the mirror on the locker door. Looks like it reflects the green door.
Back up and turn right.
Click on the green door for a close up and click on it again to open it.
Before you go through the door, notice the green lines on the wall.
Go forward through the door.
Turn right.
Okay, there are stairs, but they are protected by 3 colored lasers, green, red, and blue.
To the right of the stairs on the upstairs landing is a wooden object that you can click on for a close up.
However, it just appears to be some wooden something, so back up.
To the right is a small chest of drawers with a plant on top and a picture above it. Click on the chest for a close up.
Open the top drawer and take the red marker.
You can pull up the marker in your inventory and remove the cap.
Open the middle drawer and take the decorative box.
Pull up the decorative box and click on it to open it. Take the blue plastic toy swords from inside.
Open the bottom drawer and take the piece of paper.
Pull up the piece of paper from your inventory and click on it to unfold it. A clue!
Back up and click on the picture above the chest.
Well, it's a picture of a car, with some sort of traffic sign beside it. Does that sign look like one in the book?
Back up. Time to solve some puzzles!
The Red Desk (and Laser)
Click on the picture above the chest again.
The sign looks like the "no parking" sign in the book, but it is missing a red line.
Use the red marker on the traffic sign (remember to uncap it first) to create a no parking sign.
When you do this something falls from the picture. Back up.
Click on the top of the chest for a close up and take the red key that is peeking out from behind the plant. Back up.
Click on the picture again and lo and behold, the car is gone! Now you can see the number 5231 in red.
Back up.
Back up 3 times until you are back in the main room (where the desks are).
Click on the desks for a close up and click on the red chair desk (far right) to see the keypad.
Enter the code you got from the picture and click "set".
The desk will slide open revealing a keyhole. Use the red key to disable the red laser (in your inventory, the red key is in the right column, 4th down from the top).
Back up twice.
The Green Desk (and Laser)
Click on the green door for a close up and click on the door again to open it.
Instead of going through the door, click on the lower part of the door (below the handle) to look down.
Place the doll that was holding the locker closed against the door to prop it open and back up twice.
Turn left to face the locker and open the locker.
Click on the mirror in the locker door and notice that you can now see the reflection of the open door in the mirror. Notice the green lines on the wall?
use the transparent sheet from your inventory (the one with the green lines) on the mirror and you will see that a shape has formed.
If you look at the new shape, you will notice that it is actually 4 numbers stacked on top of each other.
From top to bottom the numbers read 3791. That is the green code.
Back up and turn right.
Click on the desks for a close up then click on the green desk (middle desk) to see the keypad.
Enter the code from the locker and click "set".
Use the green key from your inventory (right column, 3rd cell down) to disable the green laser.
Back up twice.
The Blue Desk (and Laser)
You should now be back in the long view, seeing the green door and the desks.
On the wall to the right of the green door is a picture, click on it for a close up.
This is a mysterious picture, mostly orange.
Notice that it is divided up into 4 rows and 4 columns, and that the upper left corner is green instead of orange.
There are also 2 blue lines in the middle, the left blue line in the 3rd cell down from the top and the right blue line in the 2nd and 3rd cells down from the top.
Back up.
Pull up the odd doll from your inventory, the one with the orange slots.
Once the doll is facing you, click on the right arrow once to turn it 1/4 in a clockwise direction.
Now there's a green slot at the top left.
Does that remind you of something?
Imagine the orange picture on the wall wrapped around the doll.
There are 16 slots on the doll, just like there are 16 squares in the picture, 4 rows and 4 columns.
The green slot is in the upper left, just like in the picture.
Now you have to place the 3 blue toy swords in the slots to make the doll resemble the picture.
In the right column (with the green slot in the upper left) place one blue arrow in the 3rd cell down from the top.
Now use the left arrow once to turn the doll 1/4 turn in a counterclockwise direction. The doll should now be facing you, and you should see the one blue sword in the left column.
In the right column place the other 2 swords, in the 2nd and 3rd slots from the top.
If you do everything correctly, the doll's head will fly off.
Click on the head to pick it up.
You now just have the head, with a rectangular gray protrusion beneath it. Click on the gray area to open it and take the blue key.
Close down the doll head and click on the orange picture on the wall for a close up. Notice that it has changed.
You now have 3 numbers with arrows, indicating the direction the numbers should read.
Following the arrows you will get the code 536.
Back up and then click on the desks for a close up.
Click on the blue chair desk (the one on the left) to see the keypad.
Enter the code you got from the doll, click "set", and then use the blue key (left column, 4th from the top in your inventory) to disable the laser.
Back up twice.
Finding and Opening the Basement
Click on the open green door twice to go through, then turn right.
Notice that all of the lasers on the stairs are disabled. Click on the stairs to go up.
Notice the small keypad on the right wall of the landing. Click on the keypad twice for a close up. Yes, it's locked.
Back up once and then turn right.
Now you know what that wooden thing on the landing was, it's a bookcase.
Click on the top of the bookcase for a close up.
At the back of the bookcase is an odd square hole. Looks like the doll head would fit in there real well. Place the doll head in the square opening at the back of the bookcase and back up.
Looks like the top shelf has rotated around.
Go down the stairs and you will see that the top shelf is empty.
Click on the bookcase for a close up and place the books from your inventory on that top shelf.
Back up once to see the entrance to the secret basement.
Getting the Gold
Click on the passage beneath the stairs (twice) to enter the secret basement.
Once you are in the basement, turn left.
There are some big machines back there. Click on the railing in the middle for a close up.
Look closely, part of the railing looks like a gray key. Click on the key to take it and back up twice.
Now click on the machinery in front of you for a close up.
These look like control panels of some sort.
Click in the corner where the panels meet for a close up.
Sitting on the panel is a small compass, take it.
Examine the compass in close up and notice that the large part of the needle pointing north is blue, and the small part pointing south is red.
Close down the compass and back up once.
On the right panel, near the edge, is a blue area with a big button. Click on that area for a close up.
Use the gray key to open the panel and take the battery.
Pull the battery up from your inventory and click on it once to turn it around.
Now place the battery back into the panel (reverse the polarity!) and back up.
There should now be letters at the top of the panel: NXEXSXWXN.
Back up 6 times until you are back in the main room, facing the green door.
Turn right twice to face the clock.
Click on the clock for a close up.
Notice that the clock hands are the same color as the needle on the compass?
Pull up the folded note from your inventory.
Click on the folded note to open it and note the numbers.
The six is on the left and the 9 is on the right.
Close down the note.
Take the 6 and 9 numbers off of the clock, then reverse their positions so that the 6 is on the left and the 9 is on the bottom where the 6 usually is.
Once you do this, the clock hands will move (or "movied" as the game will tell you).
The large blue hand is now pointing to the 8, the small red hand is pointing to the 2.
Pull up the compass from your inventory and note again that north is the large blue hand and south is the small red hand.
Using the hands of the clock as a compass needle, the large blue hand pointing to the 8 would be north, and the small red hand pointing to the 2 would be south.
By logic, that means that east is 11 and west is 5.
Using the code from the machinery in the hidden basement, you need to do a little math.
The code is actually a math problem: N x E x S x W x N, or 8 x 11 x 2 x 5 x 8 which equals 7040.
Back up from the clock and turn left twice.
Go through the open green door and turn right.
You need to get back up the stairs, but they are raised at the moment.
Click on the bookcase for a close up and remove the books from the top shelf.
Back up from the bookcase and go up the stairs.
Click on the panel on the right wall twice for a close up and push the "push" button.
Back up and turn left and you will see the prize, a gold hand.
Click on the hand twice for a close up of the code underneath.
Enter the code you got from the clock and back up once.
Click on the glass to raise it and take the gold hand.
Back up 5 times to the main room view.
Time to get out!
Getting Out
Turn right to face the door with the palm recognition pad.
Click on the panel to the right for a close up.
Now you just need to choose which person's button to click on to use the palm pad.
Perhaps the gold hand has a clue?
Pull up the gold hand from your inventory, then click on it to turn it around.
The gold hand says "Major Nyaa". Click on it again to turn it back around so that the text is no longer visible.
Close down the gold hand.
Click on the button next to Major Nyaa, then use the hand on the palm pad.
Back up, click on the door to open it, and click on the open door to escape.
You're rich!
Posted by: grinnyp |
September 22, 2010 3:19 AM
|
September 22, 2010 3:19 AM