
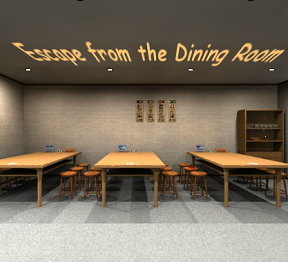
Escape from the Dining Room

![]() So it's happened to all of us at one time or another, the munchies have hit and it's time to trot down to the local diner and see what's on tap to slake your hunger. Pity the owner would rather lock you in than serve you. Yes, that intro can only mean one thing, Tesshi-e is here with yet another instance of being locked into a food service establishment in the fanciful Escape from the Dining Room.
So it's happened to all of us at one time or another, the munchies have hit and it's time to trot down to the local diner and see what's on tap to slake your hunger. Pity the owner would rather lock you in than serve you. Yes, that intro can only mean one thing, Tesshi-e is here with yet another instance of being locked into a food service establishment in the fanciful Escape from the Dining Room.
 Contrary to the title, this game should more properly be called "Escape from the Diner", because it's a diner you find yourself, once again, locked into and those hunger pangs will continue until you can find your way out using only your wits and the large amount of clues scattered about the place. Navigation bars, an easy to use inventory, a soothing little jazz tune, two different endings, and the handy save feature means that Escape from the Dining Room includes everything we expect from Tesshi-e escapes and more. Gorgeous graphics, logical puzzles, what more can a person ask for?
Tesshi-e has included the ability to float the cursor over a colored object to determine its exact hue, making the game quite accessible for those who have problems seeing colors. The English translation (thanks to idahhh) is spot on, the puzzles are tough but not too much, all Tesshi-e needs to do is add a changing cursor and quite frankly they will probably end up at the top of the heap of Japanese room escape designers. Escape from the Dining Room is Tesshi-e at their best, so pull up a chair, unfold a napkin, and dig in!


Walkthrough Guide
(Please allow page to fully load for spoiler tags to be functional.)
Escape from the Dining Room Walkthrough
General Information
Remember to switch languages before you begin the opening.
Examine everything you pick up, objects may hide things of interest.
Don't forget to try and combine items, you never know what you can create.
Colors in the game are revealed by hovering the cursor over an item.
There are two endings to the game.
Let's eat!
Exploration
You begin facing a wall with a window looking into another room. Click on the window for a close up.
Apparently this is the window into the kitchen. There is a small white object on one of the pot shelves, but you can't reach it. There is also a glowing red button that you cannot reach.
Note the heart and club logos on the pots. Back up.
To the right of the window is a bookcase. Click on the bookcase for a close up.
On the top shelf are two devices. Click on the right device for a close up.
This appears to be a covered bowl. There are six small levers in front with up, middle, and down positions. Back up.
Click on the left device for a close up.
This device requires a four digit code also associated with colors, red, green, white, and blue. Back up.
On the middle shelf are some books. Click on the books on the left for a close up.
If you click on the books they move, revealing a heart, diamond, spade, and a club. Back up once.
Click on the outside of the left side of the bookcase. Here you will find a heart, a club, and a spade. Back up.
On the bottom shelf is our friend the wooden hippo. Click on the hippo for a close up.
The mouth on the hippo has four positions, and there is a four digit code for the hippo as well. If you experiment with opening the mouth you will find that with each position you can alter one of the numbers.
Back up twice.
Look closely near the floor between the window and the bookcase. There is an electrical outlet there.
To the left of the window is a device on a table, click on it for a close up.
Looks like a drink machine of some sort. The button on the machine is red.
There is a drawer on the table the drink machine is sitting on, it is locked.
There is also a panel on the wall to the left of the machine, also locked.
Note the heart and diamond on the machine and back up.
Turn left.
You are now facing a wall with three tables, each table having several stools.
To the right of the tables is a cabinet, click on it for a close up.
The upper part of the cabinet has glass doors. The middle shelf of the cabinet is open. The bottom part of the cabinet has wooden doors which are locked.
Click on the middle shelf to take the bowl.
Click on the glass doors for a close up.
Click on the doors to open them. You see some glasses, some cups, and another wooden hippo.
Click on the glasses to take a glass.
The hippo has the word "clover" on it. Click on it and notice that its mouth opens to the widest extent.
Back up twice.
On the back wall are some wooden menu boards, click on them for a close up.
The boards have numbers and colors on each, along with three blocks at the top. Of the three blocks on each board, only one block has color.
Back up.
Click on the table on the right.
Note the Roman Numeral I on the table. On the left side of the table is a stool with a heart on it.
Notice the items at the far end of the table, a picture and another hippo.
Click on the picture for a close up. It's Mr. Birdy, and he's sitting in the upper left of the picture. Back up.
Click on the hippo for a close up.
This hippo says "diamond". Notice that the mouth opens wide, but not as wide as the clover hippo. Back up twice.
Click on the middle table for a close up.
This table has the Roman numeral II. Click on the picture on the far side of the table for a close up.
Mr. Birdy again, this time in the lower left corner of the picture. Back up once.
Click underneath the table and you will see something there, take it (slingshot). Back up twice.
Click on the table on the left for a close up.
Yup, it's table number III. At the far side of the table is another picture and another hippo. Click on the picture for a close up.
Mr. Birdy is in the upper right corner of this picture. Back up once.
Click on the hippo for a close up.
This hippo is labeled "heart". Again, the mouth opens, but not as wide as the diamond hippo. Back up twice.
Turn left.
You are now facing the door out. Click on the door for a close up.
Yes, it's locked. Notice the small spade on the wall near the floor. Back up.
To the right of the door is a small shelving unit. Click on the shelves for a close up.
There are soba noodle bowls on the shelves. The top bowl has an ampersand symbol. The middle bowl has the zodiac symbol for Pisces (looks like an H). The bottom bowl has the zodiac symbol for Scorpio (looks like an M).
Back up and turn left.
You are now facing a raised area with three more tables, these with traditional Japanese seating. There are more wooden menu boards on the wall as well as a large picture of Mr. Birdy.
Click on the menu boards for a close up.
There are six menus here. Notice that each one has a symbol at the top, either an ampersand, a Pisces symbol, or a Scorpio symbol. Back up.
Click on the picture of Mr. Birdy for a close up.
Yep, it's the classic wobbly picture puzzle. Back up.
Click on the table on the left for a close up.
This is table number IV. Notice the heart on one of the floor cushions.
Click on the small picture of Mr. Birdy on the table for a close up.
In this picture he's in the lower left. Back up twice.
Click on the middle table for a close up. Yes, this is table V.
Click on the Mr. Birdy picture to see that he is in the lower right corner this time. Back up twice.
Click on the table on the right. This is table VI.
Click on the Mr. Birdy picture to see him in the lower right corner again. Back up once.
Click on the left cushion nearest your position. The cushion moves to reveal a panel. Looks like we need a screwdriver!
Back up twice.
Look carefully at the raised area. There appears to be a door of some sort in the small rise. Click on it for a close up.
According to the game it is like a door, but it is closed. Back up.
Turn left and you are back where you started. Time to solve some puzzles!
The Mr. Birdy Picture
Turn right to face the Mr. Birdy picture. Click on the picture for a close up.
Yes, this is the wobbly picture puzzle which is in EVERY SINGLE TESSHI-E GAME.
Do we know the solution?
Yes, we do. The clues are the smaller Mr. Birdy pictures scattered on the tables.
Each smaller picture had Mr. Birdy in a different corner, and each table was numbered.
The pattern is upper left, lower left, upper right, lower left, lower right, lower right.
Click the corners of the puzzle in the order determined. If you do it correctly the picture will slide up.
Inside is a picture of a heart. There is also a rubber hose, take it.
The last item in the alcove is another wooden hippo, this one labeled spade. Notice that its mouth opens, but just barely.
Back up twice.
The Closed Bowl Puzzle
Turn left to face the wall with the window.
Click on the bookcase for a close up.
Click on the bowl on the right of the top shelf for a close up.
You should have all you need to solve this puzzle.
There are two clues to this puzzle, the Soba menus on the wall and the shelves with the soba bowls.
Both the bowls and the menus had the same symbols, an ampersand, the Pisces symbol, and the Scorpio symbol.
The bowls on the three shelves were either top (ampersand), middle (Pisces), or bottom (Scorpio).
Combined with the menus that gives you the answer: top, middle, middle, bottom, top, bottom.
Change the levers on the front of the bowl puzzle to match the puzzle you just solved. Then click on the large lever on the right.
If done correctly, the bowl will open. Click on the open bowl for a close up.
Inside you will find a triangle key, take it.
Back up twice, so you still have the bookcase in close up.
The Color/Number Puzzle
Now click on the item on the left of the top shelf, the color/number puzzle.
This is a four digit code, and a four color code (red, green, white, and blue).
Where have we seen those colors before?
We've seen them on the lunch menus on the wall. The menus had the colors in a three block pattern.
The menus also had three digit prices on them.
So the solution is simple: the color block indicates which of the three numbers to use.
For instance, the menu with the blue block, the block was colored on the left, and the number was 980, so the number used is 9.
For the white it is the center block with a number of 720, so the number is 2.
For the red it is the right block with the number 850, so the number is 0.
For the green the block is in the middle with the number 610, so the number is 1.
The order of the numbers is that of the puzzle, red, green, white, and blue, so the code is 0129.
Enter the numbers correctly and you get a spade key.
Back up twice.
The Water Machine and the Panel
Click on the water machine to the left of the window for a close up.
Use the triangle key on the drawer below the machine to open the drawer.
Take the object (bag of flour) and notice the club inside the drawer. Inspect the bag of flour and click on it to turn it around. Notice the diamond on the back.
Now use the spade key on the panel to the left of the machine.
Inside the panel is a lever, pull it.
Notice that the light on the water machine is now green.
Place the glass in the water machine and it will fill with water. Take the now full glass back.
Back up.
The Hippo Puzzle
Click on the bookshelves for a close up, then click on the wooden hippo for a close up.
We now have all the clues to solve this one.
Each of the hippos found around the room had a card suite associated with it. Each one also had a mouth that opened to a different position.
The spade opened the narrowest, then the heart, then the diamond, then the clover (club).
The number associated with each suit is the number of them you found in the room.
So there were 7 hearts, 3 diamonds, 3 spades, and 4 clubs in the room.
The number would then be 3734.
Enter each number as follows: open the mouth once, then enter the first number. Open the mouth one wider, then enter the second number, etc. until all four numbers are entered.
If you entered the numbers correctly you will get a club key.
Take the key and back up twice.
The Vacuum
Turn left to face the wall where the cabinet is.
Click on the cabinet for a close up, then click on the lower wooden doors for a close up.
Use the club key on the doors to open them and get a vacuum. Back up twice.
Turn right to face the window.
Click on the power outlet between the bookcase and the window for a close up.
Use the vacuum on the power outlet to plug it in.
Click on the end of the hose to turn the vacuum on.
Click on the top of the vacuum to open it. Hey, a screwdriver!
Take the screwdriver and back up.
The Floor Panel
Turn right to face the wall with the raised seating platform.
Click on the right table for a close up.
Click on the left cushion nearest you to remove the cushion.
Click on the panel for a close up, then use the screwdriver to open it.
Take the sticky tape and back up twice.
The Window
Turn left to face the window.
Click on the window for a close up.
There's that red button, mocking us.
We need to throw something at the button to turn it on.
But what?
Well, we have the makings of...something in our inventory.
Pull up the bowl.
Put the water (from the full glass) into the bowl.
Now add the flour.
You now have a dough ball. Pull up the slingshot from your inventory and place the dough ball in it.
Use the slingshot/dough ball on the red button.
The button should turn green. Back up.
Notice the slot in the raised floor area has opened up.
Click on the slot for a close up.
Click on the slot to get a long wooden stick. Back up.
Getting Out (Regular Escape)
Pull up the wooden stick from your inventory.
Place the rubber hose on the stick.
Use the tape on the hose/stick combination.
Click on the window for a close up.
Use the hose/stick on the little ball above and to the right of the club pot.
Click on the stick again to pull the ball back, then take the ball.
Click on the ball to retrieve the heart key.
Back up.
Turn right (or left) twice to face the door.
Click on the door for a close up.
Use the heart key to unlock the door.
Open the unlocked door and enjoy the bacon and tomato udon noodles!
Happy Coin Escape
Follow the regular escape until you unlock the door.
Once the door is unlocked, back up and turn left (or right) twice to face the window.
Click on the vacuum for a close up.
Click on the top of the vacuum to open it and take the note inside.
Read the note. It says ESCAPE, with the letters at different levels.
Back up twice.
Click on the bookcase for a close up, then click on the bowl puzzle (top shelf, right) for a close up.
Set the levers according to the note clue: top, middle, bottom, top, top, bottom (the position of the letters in ESCAPE).
Pull the right lever and the bowl will tip up, revealing the happy coin.
Take the happy coin and back up twice.
Turn left (or right) twice to face the door.
Now click on the door and leave.
Enjoy the Kitsune Soba and the fireworks!
Happy Coin will bring happiness to you!!
Posted by: grinnyp |
September 5, 2012 1:14 AM
|
September 5, 2012 1:14 AM