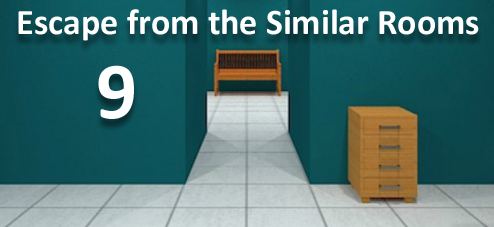
JayisGames.com is now available ad-free!
Jay is Games recommends Cheat Happens with 8,000+ games and 35,000+ trainers!

Escape from the Similar Rooms 9


  • Currently 4.1/5
  • 1
  • 2
  • 3
  • 4
  • 5
Rating: 4.1/5 (93 votes)
Comments (3) | Views (5,958)

Escape from the Similar Rooms 9

elleEscape from the Similar Rooms 9 continues Hottategoya's minimalist approach to the escape game genre with another triad of logical albeit somewhat simple puzzles centered around one goal: collect three keys to unlock the door and leave the room. Like always, you play by pointing and clicking around the rooms, decoding encountered clues to open a series of boxes wielding the coveted keys. The layout itself is part of the challenge involved, although it's not fully original as an escape-game architectural plan, as anyone who has played through the JIG archives can tell you. Even so, it's a bit of fun for those who don't mind the extra navigational confuddling. Along with Hottategoya's smoothly polished graphics and surreally calm environment, it makes for a very pleasant puzzling respite any time you have 15 minutes to spare.

Play Escape from the Similar Rooms 9

Walkthrough Guide


(Please allow page to fully load for spoiler tags to be functional.)

Escaping from the 9th Similar Rooms

GENERAL NAVIGATIONAL TIP: exploring is a lot easier if you keep turning right rather than left; most those benches look alike but at least the boxes on the tables have different puzzles on them.

Follow this walkthrough for direct routes toward each puzzle and its clues. I include some doubling-back to the door to make starting points easier to explain.

KEY I

  1. From the door, turn right twice until you're facing the hallway directly across from the door.

  2. You can see a bench in the next room. Go forward toward that bench.

  3. Now, to your right you'll see a box with four directional arrow buttons on it (if you don't see it, you're in the wrong room).

  4. To the left of the bench, on the other side of the room from the four-arrow box, is a chest with four drawers.

    • Open the top drawer first. Note the letter "R" written inside. (To close the drawer, click the grey bar that appears when you hover your cursor at the bottom of the screen).

    • Now, open the second drawer: a letter "T."

    • Then, look inside the other two drawers as well.

  5. Back up from the chest and go forward into the next room.

  6. Turn left and go forward again, toward a bench with missing slats.

  7. From here, turn right. Now you're facing a grey box with a 3 on it. It also has four buttons stacked from top to bottom...

    • Using the clues you found earlier (inside the chest in the room with the four-arrows box), press these buttons in the proper sequence.

    • SOLUTION:

      You have all the letters to spell "three," just coordinate the buttons to the letters inside each drawer. Numbering the drawers from top to bottom, press them in this order...
      2, 4, 1, 3, 3

    • You'll hear the sound of the box unlocking when correct.

    • Open the box and get KEY I.

  8. Return to the door:

    • Back up from key I's box. Turn right and go forward into the room with the I,II,III buttons. From there, turn right again and go forward toward the four-arrows box. Turn right and head toward the door.

KEY II

  1. From the door where you begin, turn right and you'll see a hallway to another room.

  2. Go into the new room where you'll see the first box, the one with four stacked buttons and a 3 on it (if you haven't opened it yet, just ignore it for now).

  3. Turn left and you'll see a bench with missing slats:

    • Make a note of the pattern the remaining slats form.

  4. Turn right twice to see yet another hallway. Go through it to a third room.

  5. Here you'll see a box with three buttons: I, II, and III. A black arrow points from left to right.

    • Using the clue you saw earlier, press the three buttons in the proper sequence to unlock the box.

    • SOLUTION:

      Just like the slats on the gappy bench...

      II, III, I, III, I, II

    • Open the box and take out KEY II.

  6. Back up from the box. Return to the starting point by turning right, going forward into the next room, turning right and going forward again.

KEY III

  1. Starting at the door, turn right. On the wall, to the left of the hallway, is a framed picture. Zoom in on it to study the information it contains:

    • A 5x8 grid of dots, some shaded black.

  2. Go through the hallway into the room with the "3" box.

  3. Turn right and go forward toward the box with the "I,II,III" buttons.

  4. From this "I,II,III" box, turn left twice to face the way you came in and you'll see a chest of four drawers...

    • Open the third drawer to find a SLIP OF PAPER.

    • Pick up the paper and see: a 5x8 grid of letters.

  5. From the chest where you found the slip of paper, turn left and go down the hallway.

  6. As you enter the new room, you'll be facing a box with four arrow buttons on it:

    • Combining the clues you just found, press the arrow buttons in the proper sequence to unlock the box.

    • SOLUTION:

      Correspond the black dots in the first picture to the letters on the paper, and highlight those letters. Then, read the paper from left to right, top to bottom...
      UP
      LEFT
      DOWN
      UP
      RIGHT

    • Open the box and remove KEY III.

EXITING

  1. From the box where you got the third key, turn right, go through the hallway to the first room, and zoom in on the door.

  2. Use each of the three keys on their corresponding locks.

  3. Back up, open the door, and escape.

  4. Congratulations!

Walkthrough by elle!

3 Comments

Escaping from the 9th Similar Rooms

GENERAL NAVIGATIONAL TIP: exploring is a lot easier if you keep turning right rather than left; most those benches look alike but at least the boxes on the tables have different puzzles on them.

Follow this walkthrough for direct routes toward each puzzle and its clues. I include some doubling-back to the door to make starting points easier to explain.

KEY I

  1. From the door, turn right twice until you're facing the hallway directly across from the door.

  2. You can see a bench in the next room. Go forward toward that bench.

  3. Now, to your right you'll see a box with four directional arrow buttons on it (if you don't see it, you're in the wrong room).

  4. To the left of the bench, on the other side of the room from the four-arrow box, is a chest with four drawers.

    • Open the top drawer first. Note the letter "R" written inside. (To close the drawer, click the grey bar that appears when you hover your cursor at the bottom of the screen).

    • Now, open the second drawer: a letter "T."

    • Then, look inside the other two drawers as well.

  5. Back up from the chest and go forward into the next room.

  6. Turn left and go forward again, toward a bench with missing slats.

  7. From here, turn right. Now you're facing a grey box with a 3 on it. It also has four buttons stacked from top to bottom...

    • Using the clues you found earlier (inside the chest in the room with the four-arrows box), press these buttons in the proper sequence.

    • SOLUTION:

      You have all the letters to spell "three," just coordinate the buttons to the letters inside each drawer. Numbering the drawers from top to bottom, press them in this order...
      2, 4, 1, 3, 3

    • You'll hear the sound of the box unlocking when correct.

    • Open the box and get KEY I.

  8. Return to the door:

    • Back up from key I's box. Turn right and go forward into the room with the I,II,III buttons. From there, turn right again and go forward toward the four-arrows box. Turn right and head toward the door.

KEY II

  1. From the door where you begin, turn right and you'll see a hallway to another room.

  2. Go into the new room where you'll see the first box, the one with four stacked buttons and a 3 on it (if you haven't opened it yet, just ignore it for now).

  3. Turn left and you'll see a bench with missing slats:

    • Make a note of the pattern the remaining slats form.

  4. Turn right twice to see yet another hallway. Go through it to a third room.

  5. Here you'll see a box with three buttons: I, II, and III. A black arrow points from left to right.

    • Using the clue you saw earlier, press the three buttons in the proper sequence to unlock the box.

    • SOLUTION:

      Just like the slats on the gappy bench...

      II, III, I, III, I, II

    • Open the box and take out KEY II.

  6. Back up from the box. Return to the starting point by turning right, going forward into the next room, turning right and going forward again.

KEY III

  1. Starting at the door, turn right. On the wall, to the left of the hallway, is a framed picture. Zoom in on it to study the information it contains:

    • A 5x8 grid of dots, some shaded black.

  2. Go through the hallway into the room with the "3" box.

  3. Turn right and go forward toward the box with the "I,II,III" buttons.

  4. From this "I,II,III" box, turn left twice to face the way you came in and you'll see a chest of four drawers...

    • Open the third drawer to find a SLIP OF PAPER.

    • Pick up the paper and see: a 5x8 grid of letters.

  5. From the chest where you found the slip of paper, turn left and go down the hallway.

  6. As you enter the new room, you'll be facing a box with four arrow buttons on it:

    • Combining the clues you just found, press the arrow buttons in the proper sequence to unlock the box.

    • SOLUTION:

      Correspond the black dots in the first picture to the letters on the paper, and highlight those letters. Then, read the paper from left to right, top to bottom...
      UP
      LEFT
      DOWN
      UP
      RIGHT

    • Open the box and remove KEY III.

EXITING

  1. From the box where you got the third key, turn right, go through the hallway to the first room, and zoom in on the door.

  2. Use each of the three keys on their corresponding locks.

  3. Back up, open the door, and escape.

  4. Congratulations!

Walkthrough by elle!

Reply

Could anyone explain how

the arrows combination was arrived at for key 3

?

I get that

grid on wall is used with piece of paper from drawer

but I couldn't figure out how to get from there.

Reply

^ Scroll Up | Homepage >

Leave a comment [top of page]

Please consider creating a Casual Gameplay account if you're a regular visitor here, as it will allow us to create an even better experience for you. Sign-up here!
  • PLEASE UNDERSTAND SITE POLICIES BEFORE POSTING COMMENTS
  • You may use limited HTML tags for style:
    (a href, b, br/, strong, em, ul, ol, li, code, spoiler)
    HTML tags begin with a less-than sign: < and end with a greater-than sign: >. Always. No exceptions.
  • To post spoilers, please use spoiler tags: <spoiler> example </spoiler>
    If you need help understanding spoiler tags, read the spoiler help.
  • Please Preview your comment before posting, especially when using spoilers!
  • No link dropping, no domains as names; do not spam, and do not advertise! (rel="nofollow" in use)
chrpa Jayisgames needs your help to continue providing quality content. Click for details Hi! Weekday Escape and Weekday Puzzle are here! First we have two new cans from tomoLaSiDo and then two small rooms from isotronic. That's all for this...  ...
6,365 Views
0 Comments
chrpa Jayisgames needs your help to continue providing quality content. Click for details Welcome to Mobile Monday! We have another beautiful game from Nicolet and it's a winter game as it should be. Tasuku Yahiro have released another of their...  ...
6,161 Views
2 Comments
chrpa Jayisgames needs your help to continue providing quality content. Click for details We've got a new game from Rinnogogo's magical world and this time it really is magical.. Not only do you get to meet cute animals that express themselves...  ...
chrpa Jayisgames needs your help to continue providing quality content. Click for details After a few weeks of patient waiting, we have been rewarded - the new game from Ichima Coffeedo is here. We got a wonderful new game - it's...  ...

HELP Jayisgames.com

Recent Comments


Display 5 more comments
Limit to the last 5 comments

Game of the week


Dark Romance: Vampire Origins Collector's Edition

Your Favorite Games edit

add
Save links to your favorite games here. Use the Favorites editor.

Monthly Archives