
Haunted Room 2
Platform: iOS
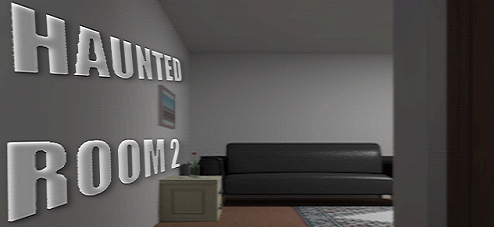
![]() You know, it's one thing when a person (or persons) unknown locks you into a room and expects you to escape, it's quite another when they not only throw away the key but the doorknob as well, especially when that person is...breathing challenged. Yes, the undead (or differently living?) are back and crankier than ever in Haunted Room 2, a mobile follow-up to Noprops' creepy room escape Escape from the Haunted Room. Featuring some challenging puzzles, a cranky ghost, and the scariest Captain America knock-off action figure ever seen, Haunted Room 2 brings the room escaping fun along with more than a few chills. There's a small amount of pixel hunting to be had as you search for the one way to escape this sparse space (living, that is, because while there is one way to get out vertically there are two ways to freedom that involve a more grisly fate). Fire up Haunted Room 2 and get ready for some fun! Just, you know, not in the dark or by yourself. Seriously.
You know, it's one thing when a person (or persons) unknown locks you into a room and expects you to escape, it's quite another when they not only throw away the key but the doorknob as well, especially when that person is...breathing challenged. Yes, the undead (or differently living?) are back and crankier than ever in Haunted Room 2, a mobile follow-up to Noprops' creepy room escape Escape from the Haunted Room. Featuring some challenging puzzles, a cranky ghost, and the scariest Captain America knock-off action figure ever seen, Haunted Room 2 brings the room escaping fun along with more than a few chills. There's a small amount of pixel hunting to be had as you search for the one way to escape this sparse space (living, that is, because while there is one way to get out vertically there are two ways to freedom that involve a more grisly fate). Fire up Haunted Room 2 and get ready for some fun! Just, you know, not in the dark or by yourself. Seriously.


Walkthrough Guide
(Please allow page to fully load for spoiler tags to be functional.)
Haunted Room 2 Walkthrough
General Information
Examine everything you pick up; you can do this by double-tapping anything in your inventory. Items may be hiding clues.
There will be directions for the color-blind in this walkthrough.
There is one way to get out of the room alive, and at least three ways to die.
The game auto-saves, so you can continue from where you left off, from just before you died, or you can start from scratch.
Don't play in the dark and/or by yourself.
Good luck!
Exploration
You begin facing the foyer of a Japanese apartment. In front of you is a cabinet. On top of the cabinet is a cactus plant. Tap on the cabinet for a close up, then tap on the doors to open them.
Inside the cabinet are two black balls, and a space for a third. Back up twice.
Turn right.
You are now facing the door out. The door is missing a handle. Turn right.
Yeah, that's creepy. Whoever (or whatever) is spying on you is rather shy at this point. You should be facing down the hall to see a sofa and a small table. Turn right.
You are facing another door. This one has a handle but will not open.
Turn left to face the sofa, then go forward.
You are now in the main room of the apartment. There is a sofa in front of you. To the right of the sofa are some double doors.
Turn left.
You are now facing a small table with two drawers. On top of the table is a vase with a single flower. Tap on the table for a close up.
You cannot open the top drawer, but you can open the bottom drawer. Inside is a blue and silver object, take it (robot leg).
Tap on the flower (and vase) twice for a close up.
Back up and turn right.
Tap on the double doors for a close up.
There's a lock on the doors that involves colors and the four card suits (spades, diamonds, clubs, and hearts). Back up.
Tap on the sofa for a close up.
There's something underneath the sofa, but you can't reach it. Back up.
Turn right.
You are now facing a wall with nine alcoves in a 3 x 3 pattern. Tap on the alcoves for a close up.
The top row of alcoves, from left to right, contain a blue figurine, a yellow bear, and a violin.
The middle row of alcoves, from left to right, contain a green vase and plant, some sort of white clock (missing its hands), and a blue car.
The bottom row of alcoves, from left to right, contain a white set of bowls, a red mini-grill, and the last (far right bottom) space has been covered and the cover is screwed down. Back up.
You are now facing a wall with large bookshelves to the left. To the right you can see the hallway back to the door out.
Tap on the bookshelves for a close up.
Tap to the right of the bookshelves and you will see that it is bolted to the wall. Back up.
Tap on the top shelf for a close up.
There is a picture here laying face down, tap on it.
This appears to be a picture of a Captain America knock-off figurine. The head looks rather strange, and the action figure is holding a sword rather than the Captain's shield. Back up.
Look closely at the middle shelf, there is a sliding door on the right. When you tap on it you will see a circular spot where something can be place. Back up.
Turn right.
Looks like someone is a cranky fellow, since the flower and vase have been pushed off of the little table. Tap on the table for a close up, then tap on the debris for a close up.
Tap around in the broken glass and eventually you will find a 10 yen coin.
Back up twice.
Tap on the table (top) two or three times until you are in extreme close-up on the top of the table. Now that the vase is gone you can see the double notches. Looks like you can place two somethings that are square on one end and round on the other.
Back up four times and turn left. You should be facing the hallway to the exit door.
Time to solve some puzzles!
I, Robot
Tap on the hallway to go back to the exit door.
Tap on the cabinet for a close up, then tap on the cactus to take it.
Note that with the cactus gone you cannot open the cabinet.
If you look at the bottom of the cactus you can see that it is round. Also notice the round notch on the cabinet where the plant once stood.
Back up, turn right (or left) twice to face the sofa, then go forward.
Turn right (or left) twice to face the bookshelves. Tap on the middle shelf for a close up.
Place the cactus in the circular notch and back up once.
Tap on the sliding door to move it.
Tap on the new alcove for a close up and take the object inside (robot leg).
Notice that the leg was sitting in a single notch that is square on one end and round on the other.
Back up. You now cannot move the sliding door in the bookshelves.
Back up again and turn left to face the 3 x 3 alcoves.
Tap on the alcoves for a close up, then tap on the lower right alcove, the one that is blocked off.
Use the coin on the screws to open the alcove.
Take the object inside (robot body and head) and back up twice.
Pull up the robot body from your inventory by double-tapping.
Tap around the robot body and you will see that it is missing an arm (with a circular hole), and missing two legs (one hole circular, one square).
While the robot is in close up, use each leg on it.
Close down the robot.
What Time is It?
Now that you have the mostly assembled robot (it should still be missing an arm), you can open that top drawer of the table.
Turn left (or right) twice to face the table.
Tap on the top of the table three times until you can see the notches.
Place the robot on the notches and back up once.
Tap on the top drawer to open it and try not to squeal when the hand shoots out.
Tap on the partially open drawer to open it all the way.
Take the object inside (clock hands) and back up three times.
Turn right (or left) twice to face the 3 x 3 alcoves.
Tap on the alcoves for a close up, then tap on the center alcove (the white clock) for a close up.
Use the hands on the clock and watch them go around.
Once the hands stop you will see the heart pointing to 3 o'clock (right), the club at 6 o'clock (down), the diamond at nine o'clock (left), and the spade at 12 o'clock (up).
Back up twice.
Now what?
Note that the symbols are the same as the symbols on the lock on the double doors.
We just need to figure out what color to turn the symbols on the lock.
The hint is in the objects in the alcoves.
Each hand on the clock is pointing in a direction that contains a colored object.
The heart is pointing to the right, where there is a blue car. The club is pointing down, where there is a red mini-grill, the diamond is pointing to the left, where there is a green vase, and the spade is pointing up, where there is a yellow bear.
Thus the clue is heart/blue, club/red, diamond/green, and spade/yellow.
Back up and turn left.
Tap on the double doors for a close up.
Tap on each symbol to turn it the proper color.
For the colorblind: Tap the spade three times, the diamond twice, don't touch the club, and tap on the heart once.
The double doors should open. Inside is a closet.
Tap on the coat hanging in the closet. As it moves an object will fall to the ground.
Tap on the object for a close up and ignore the feet if you can. Take the object quickly and back up (robot arm). Do not linger, or touch the feet or the ghost will attack and kill you.
Back up and turn left to face the table.
Tap on the table for a close up and take back the robot. Now we can fix it!
Pull up the robot from your inventory and add the new arm. Hey, wait, now the other arm broke! Take the other arm and back up three times.
Now what?
The Secret Room
Pull up the detached robot arm from your inventory. Once it is in close up, tap it to turn it around. Hey, it's a hex wrench!
Turn left to face the bookshelves. Tap once for a close up, then tap to the right of the bookshelves to see the bolts holding them to the wall.
Use the robot arm on the bolt and back up once.
Tap on the bookshelves and they move, revealing a hidden door.
Tap on the door and go in. We've found what looks like a kid�s room!
You should be facing a desk on the left and a crib/bed on the right. Tap on the desk for a close up.
Note by the light that the door closes behind you. Yep, you're locked in.
Tap on the desk drawer to open it. Inside is a scroll, take it.
Examine the scroll in close up and tap it to open it up. Looks like part of a drawing of trees.
Close down the scroll and tap on the action figure on the desk. Yep, it looks like the knock-off Captain America figure picture out in the main room, but it appears to be missing a sword and a head. Back up twice.
On the wall between the desk and the bed is a drawing, tap on it.
Tap on the close up drawing for yet another jump-scare.
Turn right.
To the right of the bed is a door that has been boarded up. What do you want to bet that this is the door in the foyer that we can't open?
Tap on the bed for a close up.
There appears to be something underneath there, but we can't reach it. Back up and turn right.
You are now facing the door you came in. There is a picture on the wall and a small chest on the floor.
Tap on the picture for a close up.
It's a picture of the night sky, but something is obscuring a lot of the picture. Back up.
Tap on the chest for a close up.
There are four buttons here. Tap on them to see what happens. Notice that at first they look like random black rectangles, but look closely at the white areas. These are number buttons and this requires a four digit code. There is also an object on the floor on the left of the chest, take it (eraser). Back up twice and turn right.
There's a scrap of a picture on this wall, tap on it for a close up.
Use the scroll you just got from the drawer on the scrap. You now have a complete picture of trees.
Look at the picture, not at the trees but at the negative space between.
Yes, the negative space between the trees forms numbers. 5923 to be precise.
Back up and turn left.
Tap on the chest for a close up and then enter the code you just discovered.
The chest will open and you will find a butterfly net. Take it and back up.
Pull up the butterfly net from your inventory. Tap on it and the handle extends. Looks like we can get things we couldn't reach before!
Turn left to face the boarded up door.
Tap on the bed for a close up and use the butterfly net to get the object from underneath. Yay, we have a ball!
Pull the ball into close up. Tap on it to open it and...yikes, that is the creepiest thing I've seen yet! Captain America would be rolling in his grave!
Back up and turn left.
Tap on the desk for a close up, then tap on the figurine.
Give the poor, creepy thing its head back.
Note that the door has opened behind you. No, that's not creepy at all. Back up twice.
Turn left (or right) twice to face the now open door. Hey, now that we have an eraser, let's look at that obscured picture above the chest.
Tap on the picture for a close up. Use the eraser on the sky part and you see a picture of a left quarter moon, a full moon, and a right half moon.
Pull up the eraser from your inventory. Note the shape, doesn't it look like the robot feet?
Back up and tap on the doorway once, and once only. You can see an object on the floor outside. But there is also a shadow. This won't end well.
Do not, under any circumstances, go out the door. Seriously, the ghost is lurking to the left and he will kill you if you go out and try to pick up the object. Don't do it.
Or, do it once or twice for the entertainment value, then get back to the puzzle solving.
So how do we get the object?
Use the butterfly net on the object and back up. You have a hammer!
Turn left to face the boarded up door.
Tap on the door for a close up and use the hammer on the boards. You can now go through the door.
Tap on the door to open it and again to go through. Yep, back in the foyer.
Now what?
Appeasing the Ghost and Getting Out in One Piece
Turn right (or left) twice to face the sofa, then go forward.
Tap on the sofa for a close up, then use the butterfly net to get the object from underneath.
We now have a door handle! It can't be that easy, can it?
Nope, it's not. If you use the handle now, the angry ghost will charge up the hallway and kill you before you can get out. We need to appease him somehow.
Remember that cabinet in the foyer? The one that had two balls and a notch for a third?
We now have a ball that can fit in that third notch, but we can't open the cabinet without getting the cactus back.
And the cactus is in the bookshelves, but we need one of the robot legs to put in that notch and open the sliding door. Problem is, we can't remove the robot legs.
But we do have this eraser which is conveniently shaped like the robot's foot...
Back up and turn left (or right) twice to face the bookshelves.
Tap on the bookshelves for a close up, then tap on that open area to the right of the sliding door.
Use the eraser on that notch on the shelf and back up.
Tap on the sliding door to open it, then tap for a close up and take the cactus. Back up twice.
Go down the hall towards the foyer. Tap on the cabinet for a close up and place the cactus in the circle. Once it is in place tap on the cabinet doors to open them.
Place the ball in the third empty slot. We now have three black balls.
Tap on the left ball and you will see that it turns. You now have a left quarter moon shape.
Remember the picture in the bedroom? Left quarter moon, full moon, right half moon?
Tap on the center ball four times until the white side is fully exposed.
Tap on the right ball six times until you get the right half moon shape.
A secret compartment will open up, revealing a sword, take it and back up twice.
What do we do with a sword? You can't kill a ghost with a sword!
Remember the knock-off action figure picture? That picture showed the action figure holding a sword.
Turn left to face the dark wooden door. Tap on it to open and enter the bedroom.
Turn right to face the desk, then tap twice for a close up of the creepy Captain America clone.
Give the figurine the sword and back up twice.
Tap on the door to go through to the foyer.
Turn right to face the out door.
Use the handle on the door. You will see the ghost peeking at you again, but he won't charge up the hall and kill you.
Congratulations, you got out!
Thanks to grinnyp for the walkthrough!
Posted by: Dora Breckinridge |
December 11, 2013 3:39 PM
|
December 11, 2013 3:39 PM