
Monkey GO Happy Roundup 10
 We've now reached double digits of monkey madness! And you know what that means - this batch takes us through four more to make a total of forty! Without further ado, here are the latest additions:
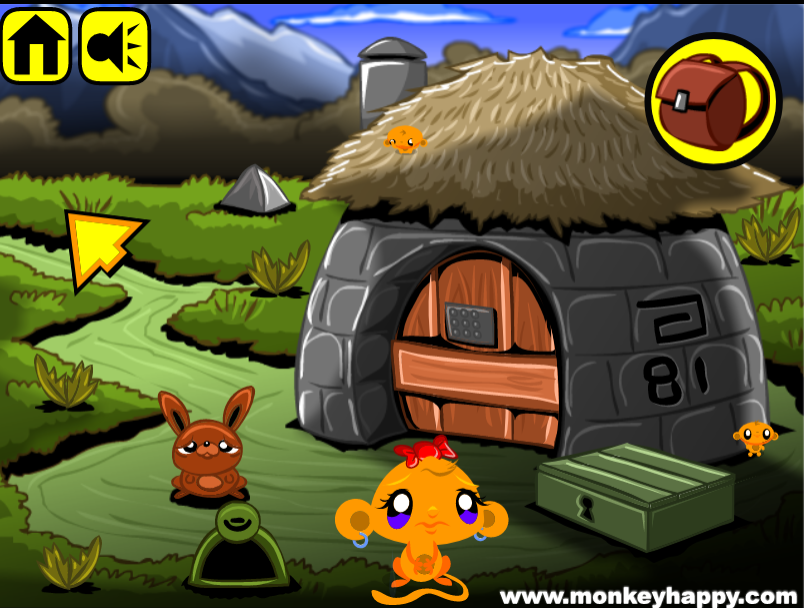
A bunny looks for lettuce leaves, a warrior needs a sword, and a locked chest lays nearby...help the monkey complete all these errands!
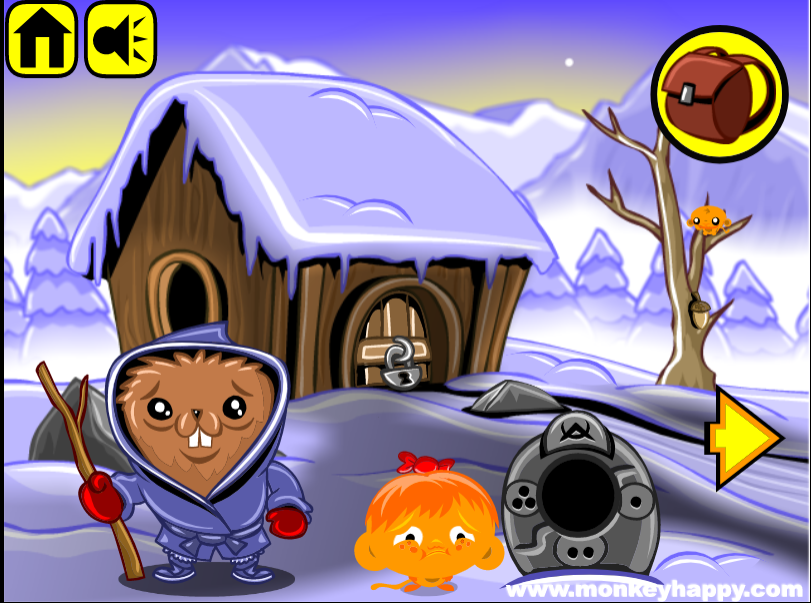
Had enough snow recently? The monkey is in another wintry scene and it's time to help a...beaver? squirrel? ...with some acorns, anyway.
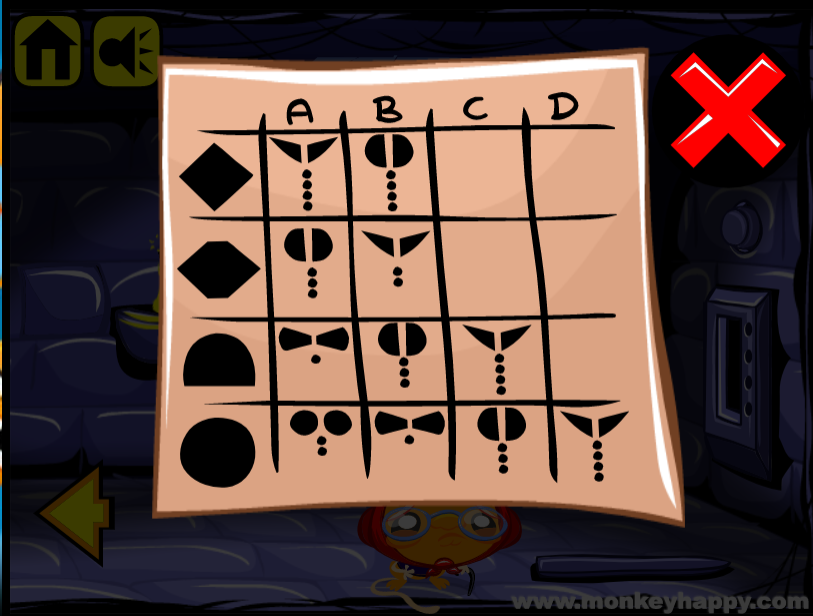
Now you'll find yourself in a dungeon with different rooms, labelled by letters. Help find a way to navigate through it!
Last but not least, a monkey is stuck outside an ornate castle of sorts in the pouring rain. Find a way in for him, then solve the strange puzzle inside...something to do with bones?


Monkey GO Happy Roundup 10 (Stage 161–164)
Stage 161: Puzzling Greens
Exploration
The screen looks like a mess of green, but you notice symbols carved on the large rock and tree, and symbols indicated on the semicircular devices. The warrior asks for a sword but you see none here. Instead, pick up the olive-colored leaves, which turn out to be 3 lettuce leaves. Click the bushes and small pyramidal rocks to find another 2 lettuce leaves, then pick up the 3 Mini Monkeys around the screen.
Go to the (lower) right, where the path ends in a locked stone cabin with a math puzzle on its door. A crate sitting just beside is locked, and a brown bunny just outside asks for 10 lettuce leaves. There's also another semicircular device here. Push aside the rock in the background, then pick up 4 lettuce leaves and 3 Mini Monkeys.
Math
Let's dive right into the numbers. Use the numeric clues around the game to unlock the door.
The symbols on the right of the equals signs occur next to the numbers 81, 70, 3, which can only be formed from the following calculations:
9 × 9

14 × 5

90 − 87
Set the buttons accordingly, and push the big button. The door opens.
Exploration 2
Inside the hut, a blacksmith with an iron rod on his anvil points expectantly at his furnace, which has a pair of tongs on it. Look at the symbols on the ceiling and floor and the large button on the back wall, then pick up the 2 Mini Monkeys at the near corners of the room.
Heat
Combine the tongs with the rod (using the Combine Item button in your inventory) and use it in the furnace.
Then use it again on the anvil to place the hot iron on it. The blacksmith now asks for a hammer.
Symbolic
Use the clues in the blacksmith's hut to set the semicircular devices correctly.
The devices has the same symbols marked on them as the floor, and so they should be set to display the corresponding symbols on the ceiling.
Exit the hut and click the device outside twice to show a zigzag.
Go left and click the devices there once and thrice to show a U shape and a curl.
Then go back into the hut and push the button on the back wall. It's not a button, it's a shutter that hides a key!
Unlock
Use the key to unlock the crate outside, and take the hammer.
Satisfy
Give the hammer to the blacksmith, which begins forging a weapon.
Leave and re-enter the hut, and the sword is done.
Give the sword to the warrior. As he leaves, you can pick up the last lettuce leaf and a Mini Monkey.
Give all the lettuce to the bunny. As little bunnies hop by to grab from its pile, pick up the last Mini Monkey sitting there.
Your bonus clue from this stage is (S with vertical strokes) = 1.
Stage 162: Acorn Collector
Exploration
The cute creature on the first screen asks for 35 acorns, which is quite a lot. So look at the padlocked house and the complicated round device in front, then pick up 3 acorns and 2 Mini Monkeys just lying around. That's not all! There are some bumps in the snow: two on the roof, one beside the house and one in the lower-right corner. Clicking each bump and the rock on the ground gets you another 5 acorns.
Go right to another screen filled with snow, but this time the sky is dark. There's another round device and a fallen tree bridge with loose branches you can't remove yet. Pick up the ornament piece and dial from the ground as well as the 3 acorns and 2 Mini Monkeys in plain sight, then click the rock and three snow mounds to get 4 acorns.
Go right again. The sky is still dark, and you face a large cave wall with another round device in front. There's also a tree with an axe resting at its base, and two acorns trapped in the ice at the lower-left corner. As before, pick up 3 acorns and 2 Mini Monkeys in plain sight, then move two rocks and four snow mounds to find 6 acorns.
(Current total: 24 acorns, 6 monkeys.)
Hack
Use your axe to free the 2 acorns trapped in the ice.
Then use it to chop off two branches on the fallen tree to get another 2 acorns.
And finally, use the axe on the padlock of the house to break in.
There are even more puzzles in this house. On the back wall, there's a giant panel with a round hole, and three small buttons beneath. On the ceiling, there's a clue with symbols and faces. On the floor, there's some loose floorboards you can't remove. Pick up the dial, 3 acorns and 2 Mini Monkeys.
Then use the axe to remove the loose floorboards too. Beneath, there's another dial, ornament piece and 2 acorns.
Emoticon
Combine both ornament pieces to get a round ornament, and place that in the back wall of the house.
Then use the clue from the ceiling of the house to unlock it.
The clue tells you that the devices on the first, second, third screens should hold the dials with the angry, confused, happy faces (in the 4th, 3rd, 5th inventory slots).
So place the dials, and push the round ornament button without hitting any other buttons first.
The wall opens up to reveal the last 2 acorns and Mini Monkey in front of a clue with more symbols, faces and roman numerals.
Collection
Give all 35 acorns to the creature, who leaves behind a key.
Face
Place the key in the slot on the cave wall, and use the newly found clue to unlock it.
As the clue suggests, the happy and angry dials should now be swapped. So pick them up and swap them.
Then push the buttons in the hut 3, 2, 1 times (as shown by the roman numerals over their symbols), so that the dials point to the correct number of dots.
Pull the key down to open the cave wall. Inside, the last Mini Monkey stands in front of a shiny golden idol.
Bonus clue from this stage: (two overlapping Us with one rotated) = 2.
Stage 163: Skull Dungeon
Exploration
This creepy dungeon with no windows has fancy archways around its doors. The one you see on this screen has a diamond-shaped hole and a letter A painted above it on the ceiling. There's a lever slot and button on the left which don't work yet, as well as a loose brick on the right side that you can't remove. Pick up the skull handle with pointed eyes, as well as 2 Mini Monkeys.
Go right to a similar screen. This door has a hexagonal hole and the letter B painted above, and there's another lever slot and button just like before. Read the note on the wall and notice the loose brick to the left of the torch, then pick up the skull handle with semicircular eyes, as well as a sharp metal bar and 2 Mini Monkeys.
Compartment
Use the metal bar to pry off the loose bricks on both screens to get diamond and hexagonal keys.
Unlock
Use clues from the note to unlock the doors.
The key for door A is diamond-shaped, so you need to read the first row, which says that the pointy-eyed skull should be under A and set to the 4th position from the top, and the other one should be under B and also set to the 4th position.
So place the key and skulls accordingly, using the buttons to set their vertical positions, then push the diamond key to unlock the door.
Inside, you see a gate with a round keyhole and D on the ceiling. There's another lever slot on the right wall. Pick up 2 Mini Monkeys, then use the metal bar to pry off the loose brick on the left wall to get a semicircular key.
Do the same for door B, swapping the skulls and pushing the buttons 2 and 1 times. Push the hexagonal key to unlock door B.
Inside, a huge creature asks for a chicken drumstick dripping with sauce. As usual, there's a lever slot on the left wall and a letter C painted on the ceiling, but the semicircular keyhole is on the shutter on the right wall. There's no loose brick to be found, but you can still pick up the skull handle with squinted eyes and 2 Mini Monkeys.
Unlock(C)
Continue to use clues from the note to unlock the shutter in room C.
Pick up all three skulls and place them according to the note: the newest skull should be in the slot in A, the semicircular-eyed one in slot B (push button twice), and the pointy-eyed one in slot C (push button thrice).
Push the semicircular key to open the shutter to find a round-eyed skull handle and a round key.
Unlock(D)
Use the remaining clues from the note to unlock the shutter in room D.
Put the round-eyed skull in A (push button once), the squinty skull in B, the big-eyed skull in C (push twice), and the pointy-eyed skull in D (push thrice).
Place the circular key in the gate and push it. Behind, there's a bottle of tomato sauce, a Mini Monkey and a whole roast chicken.
Serving
The chicken is too large to move, so use the metal bar to slice off a drumstick.
Combine it with the tomato sauce and give it to the creature. The last Mini Monkey appears at his feet.
Bonus clue from this stage: (bent paperclip) = 3.
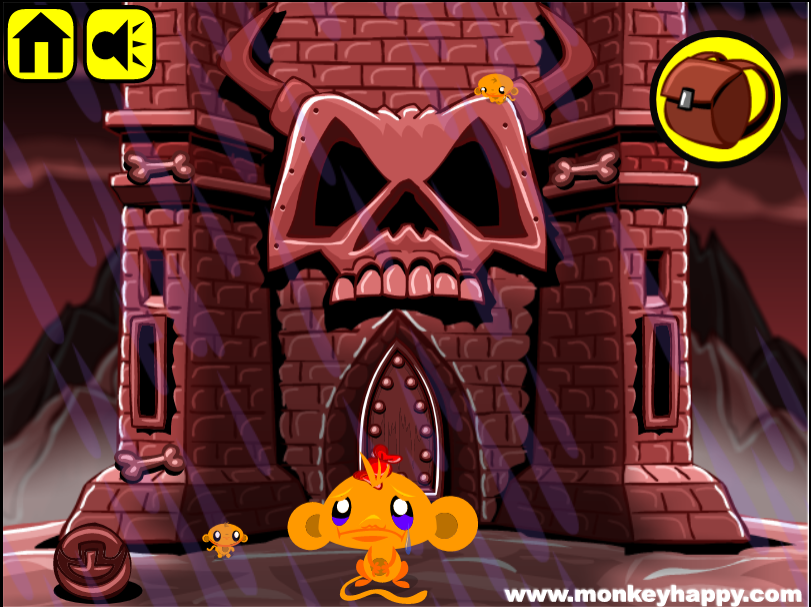
Stage 164: Bone Tower
Exploration
You're trapped in the rain outside the tower with an ominous looking giant skull above its gate. There are devices on the side that count up to six dots. Pick up the round ornament on the left and the staff part on the right, as well as 4 bones and 2 Mini Monkeys.
There seems to be one rather important clue we haven't looked at yet…
Entry
The skull has tiny holes on its left and right sides.
So match them on the devices by clicking the left one five times and the right one thrice.
Now you can just slide the gate open.
Exploration 2
A mysterious figure asks for 20 bones. There's a display attached to the left wall that cycles various bone-based symbols, and a clue etched into the back wall with various letters and symbols. There's also a weird dome on the floor with a hole in its top. Pick up the 4 bones and Mini Monkey on this screen.
Climb up. There are more displays here, as well as rectangular bars with round buttons and small grabber devices adjacent to them, and a tombstone-shaped device on the left. Pick up another 4 bones and 2 Mini Monkeys.
Climb up again. There are two more displays here. Some letters appear above bone symbols near the ceiling, and there's a large round dial beneath that, controlled by buttons on both sides. Pick up another staff part, 4 bones and 2 Mini Monkeys.
Crack
Use the power of trial and error to crack the safe at the top of the tower.
The safe will reset whenever the wrong button is pressed. So after a few tries, you find that the correct combination is 4 Right, 1 Left, 3 Right, 2 Left, 4 Right.
Inside the safe, you find a bone and a Mini Monkey.
Grabber
Place the ornament in the stone on the middle level of the tower.
Then use your excellent grasp of timing to play the minigame on the back wall.
Push each round button to move the small sliders on the bars, then click the grabbers at the right time to hold the sliders in place.
Now you can push the ornament to get a bone.
Magic
Combine the staff parts to get a complete staff that fits in the dome on the bottom floor of the tower.
Then use the clue from the back wall to activate it.
The down arrow indicates that the displays, from the top of the tower to the bottom, should show symbols matching DOORS (4, 3, 3, 2, 5 clicks).
There are two pairs of lines below that which indicate that the devices on each side of the tower gate should show two dots.
Push the staff down to open up the panel. Behind, there are 2 bones and a Mini Monkey.
Ending
Give all 20 bones to the hooded figure, who walks away and leaves nothing behind.
Or did he? You can now pick up the torch from the right wall, and use it to light up the skul outside.
As you do so, the last Mini Monkey appears on its nose.
Bonus clue from this stage: (bent turned U) = 1.
Bonus Stage 41
The digit clues from the previous stages were 1, 2, 3, 1. Doing a little math, you find that the first three lines work out to
3×2=6
1+1=2
2+6=8
so that the remaining boxes work out to
8÷2=4
8−6=2
2+3=5
8−3=5
Enter 4255 in the box to open it!
on 164
I assumed it was
Top: D O
Middle: O R
Bottom: S
but it is in facts
Top: D O
Middle: R O
Bottom: S
It didn't indicate this order in the walkthrough so I had to find a vvideo walkthrough to point this out.
@Paul: The order being that way makes sense when you consider that
on the middle level the right display is higher than the left, so it gets O and the left one gets R.
Just a little extra detail you have to notice.
Update