
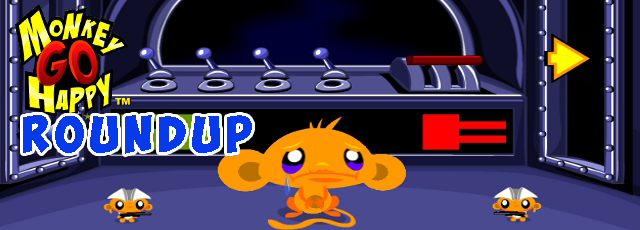
Monkey GO Happy Roundup 12
By Arceus
|
April 3, 2018
Comments (2) | Views (6,710)
 Time to make it an even dozen of monkey updates! Enjoy this set.
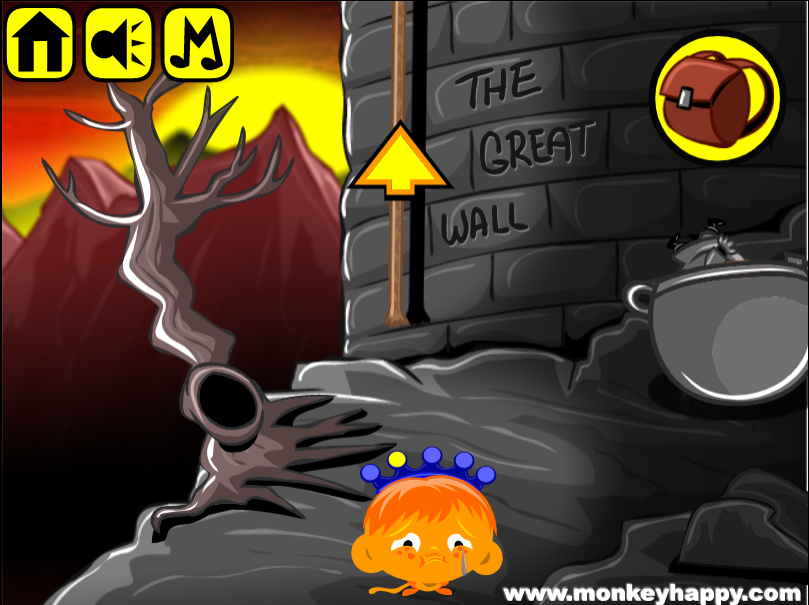
You're making a visit to enhance your cultural knowledge at the Great Wall of China! But that pesky soldier is blocking the way and shouting in a strange language at you.
Monkey next find himself in an underwater environment, and his submarine appears to have broken down. Can you fix it?
Even though it's April, it's back to another wintry scene! The monkey's going to need to satisfy a hunter before he lets you leave safely.
Our final scene will be a more sunny one: at least, on the surface of things. Soon though, you'll venture underground to help some strange beings solve a puzzle!


Arceus/Jeff: looks like you'll need to fix the pictures on this roundup and the text in the previous one (again).
Monkey GO Happy Roundup 12 (Stage 169–172)
Stage 169: Great Wall
Exploration
Your path across the Great Wall is blocked by a soldier, who's obviously not doing a great job as you can pick up the items behind him. Take the hook, rope and 2 Mini Monkeys, then move the brick on the wall (top-left corner) to find another Mini Monkey. With all those out of the way, you can take a closer look at the lock on the right, which requires a key, and also
the seemingly loose bricks on the left side, closest to you.
Rappel
Combine the hook and rope (using the Combine Item button in your inventory) and hang it off the left side of the wall. Now you can climb down!
Exploration 2
The base of the wall is marked with a carving reading The Great Wall (in English!). A tree here has an unusually large hole in its trunk. Push aside the large rock at the lower right, then pick up an inverted pot, a smaller rock and 3 Mini Monkeys.
Bucket Trick
Climb up and place the pot on the guard's head. It takes just 5 seconds for him to figure out how to get it off and toss it back over the wall.
You need to toss the rock at the guard right after you cover him with the pot. Do so, and he stumbles off the edge.
You can now proceed- wait, is he alright?
Climb back down, where you find the guard now trapped and flailing around in the pot. Pick up his sword.
Exploration 3
Proceed into the watchtower, where you find puzzles on the back and right walls, as well as some numbers on the left wall and a large featureless panel in the floor. There's a device with a hole next to the floor panel, and a rope tied to a loop embedded in the right wall. Pick up 2 Mini Monkeys.
Wedges
You don't seem to have a clue for the spinner puzzle in the watchtower, but you can indeed solve it right now.
Clicking the button on the puzzle lights up a bunch of peanut shapes that each circle two symbols on different discs. The top one also includes symbols that match.
Click the top-left and top-right dials 6 and 5 times to match the symbols shown.
Now you can work on the next highlighted pair, which connects to the middle dial. The middle dial is controlled by every other one and should therefore be adjusted last, so just imagine turning it once.
With a little bit of visualization, you find that the left and right dials must be clicked 3 and 7 times.
Now for the remaining dials. The bottom-left one should be clicked 2 times, and then the bottom-right one should be clicked 5 times.
The center dial should now be correct too. If not, you can fix it by clicking it until it fits.
Click the button to solve the puzzle and get the box and Mini Monkey behind.
Slice
Use the sword on the rope, and a tied bag falls from the ceiling.
Slice that open with the sword too. It seems to be full of green seeds.
Organic
Go back to the base of the wall and place the bag of seeds in the tree. A crow flies down to eat the seeds, and drops a metal key.
Unlock
Use the key in the locked spot on the first screen. Inside, there's a triangular key.
So use the triangular key to open the box you got from the spinner puzzle.
Inside, there's an amulet that fits in the hole in the watchtower.
Codeword
Use the clue from both sets of wall carvings to solve the four-letter puzzle in the watchtower.
The numbers 2, 6, 7, 11 are written in three rows, just like THE GREAT WALL.
The 2nd, 6th, 7th, 11th letters in "The Great Wall" are H, E, A, L.
So enter HEAL in the puzzle, and push the amulet. The floor opens up and a statue rises up with a Mini Monkey on top.
Your bonus clue from this stage is (three-line asterisk) = 4.
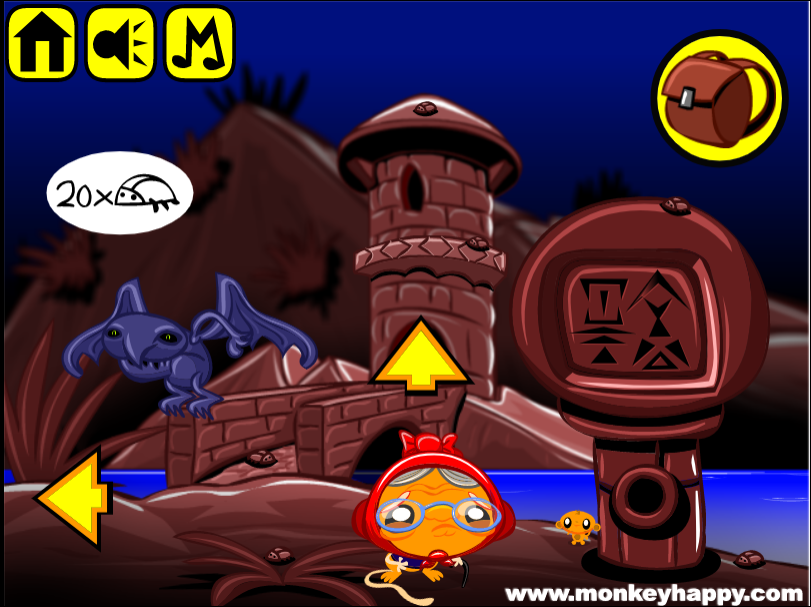
Stage 170: Shipwreck Tower
Exploration
This adventure starts off in a dark place… the seafloor? Are we all swimming monkeys now? The ship next to you has a lever slot and some sparking wires, any you can examine the sign behind which seems to have some letters on it. Click the leaves on the left to spread them, then pick up 6 bugs and 2 Mini Monkeys.
Turn right to find a blue winged creature in front of a bridge leading to a tower. Wait, the bridge crosses a river, so we can't be underwater! On the right, there's a large sphere on a post with a hole. Click the bush here, then pick up all 6 bugs and the Mini Monkey.
Enter the tower, where you get a creepy feeling of eyes watching you from both sides. But you can click on the eyes to make some of them blink. The puzzle in this room has a large circular dial which rotates when you click the two buttons above it. There are four larger buttons around the dial which display symbols when clicked. Pick up 3 bugs, the box with a hole, the lever and the Mini Monkey.
(Check that you have 15 bugs and 4 Mini Monkeys.)
Directions
Use the clue from the ship's sign to unlock the dial in the tower.
(Or you could figure the code out through trial-and-error.)
The letters on the sign read RLLLRLLL, so click those buttons. The dial opens up to reveal a bug and a roll of tape which hides a Mini Monkey.
Entry
Use the tape to repair the wires on the ship. Then place the lever in the lever slot and pull it to open the door.
The inside of the ship has a similar dial to the last one, but without the symbol buttons surrounding it. On the left wall, there's another panel with four digits around a hole, with two columns of four lights each on its left and right. Pick up a wheel, 2 bugs and 2 Mini Monkeys.
More directions
Use the clue from the tower to unlock the dial in the ship.
The markings on the tower form pairs of > and < symbols.
So push the RLRLRLRL buttons to open the dial up. Take the bug and Mini Monkey from inside.
Symbols
Place the wheel on the post beside the bridge, then use its clue to unlock it.
The pattern on the sphere breaks down into symbols that appear on the buttons.
So click the buttons
1 2

3 4
times to match the pattern, then turn the wheel to unlock it. Pick up the bug and Mini Monkey from inside.
Exchange
Give all 20 bugs to the winged creature, who leaves behind a marble as it flies away.
Place the marble in the box to get the lever inside.
Four digits
Place the lever in the panel in the ship, and use its digit clue to unlock it.
The digits are a hint to readjust the symbol buttons in the tower. So reset them to blank, then click them
4 1

2 3
You also need to set the lights around the four-digit panel. So click the 2nd and 4th lights from the top on the left side, and the 1st and 3rd lights from the top on the right side.
Push the lever down to open the panel. A robotic bird flies out, and you can pick up the last Mini Monkey from inside.
Bonus clue from this stage: II = 2.
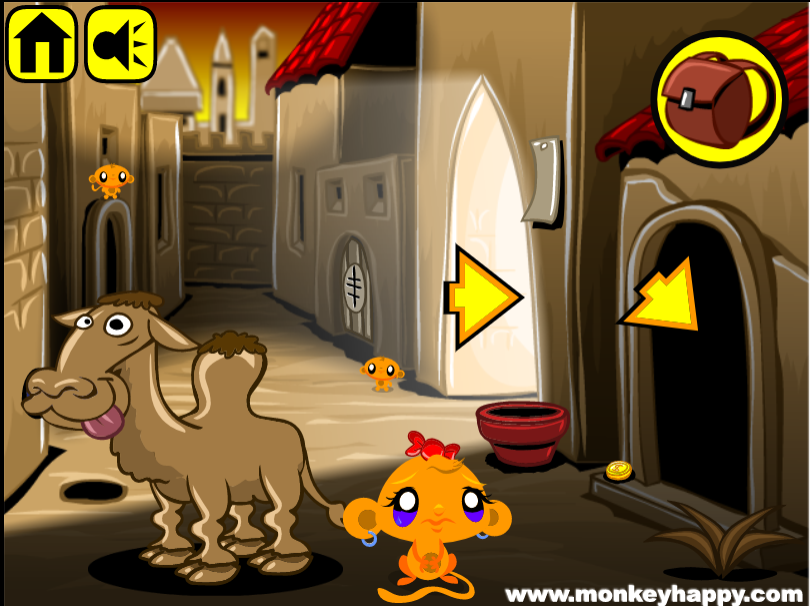
Stage 171: Poorly Received
Exploration
The small hut here is blocked off with barbed wire, with a Do Not Enter sign beside it. There's also a large mound of snow on the right side. Pick up the spade at the house entrance, as well as 2 Mini Monkeys.
Go left, where a hunter stands beside the fence. He wants a cup of water, and will shoot if you try to do anything with the fence. There's another large snow mound on the left. Pick up a mug half-buried at the hunter's feet, and the other 2 Mini Monkeys here.
Tools
Use the spade to dig up the mounds to find a half-buried crowbar on the left screen, and a crate on the right screen.
Use the crowbar to pry open the crate and find a pair of wire cutters.
Also use it to remove the Do Not Enter sign, revealing sets of horizontal markings.
Use the wire cutters to remove a section of the barbed wire blocking the hut. Now you can enter!
Exploration 2
The hut has clues on its left and back walls. The radio on the table only puts out static. The barrel beside the table dispenses water. Pick up the Mini Monkey from it.
There's something else unusual here. Keep looking around.
Use the crowbar to remove the triangular top plank of the back wall. Behind, there's a bottle of pills and a Mini Monkey.
Thirsty
If you just fill the mug and give it to the hunter, he'll toss the empty mug back and ask for more.
Instead, place the pills in the mug after filling it. The drugged mug sends him into a deep sleep, and you can take his rifle away.
You can also now use the wire cutters to cut through the fence and move on.
Exploration 3
You arrive at a base of a tall pillar with a ladder stuck inside, and four buttons on it display dot patterns when clicked. There's also a large snow mound like on the other screens. Pick up 2 Mini Monkeys from the trees.
Shovel
Use the spade on this snow mound to find a satellite dish.
Square
Use the clues from the hut to solve the puzzle with four dots.
Colorblind help:
The colored lines on the back of the hut are (clockwise from top) purple, red, white, yellow.
The colored circles on the note are (top row) yellow+purple / all four colors, and (bottom row) yellow / red.
As the colored lines on the back of the hut show, each color connects two corners of the square.
So each colored circle on the note represents two dots that must be lit on the corresponding button. As an example, the top-left pair (yellow+purple) covers three corners of the square, so the corresponding button should show 3 dots.
Click the buttons
3 4

2 2
times, and click the ladder to pull it up.
Exploration 4
The top of this tower has several antenna rods protruding from it, and a metal loop attached at the top. As you pick up the Mini Monkey on the tower, a red hot-air balloon in the background catches your attention.
Pop
Use the rifle to shoot down the balloon. The basket lands all the way back on the first screen, and you can remove the cords from it.
Countdown
Tie the cords to the satellite dish and attach it to the top of the tower.
Then use the clues from the signpost and the note to adjust it.
The markings on the signpost are in groups of 3, 2, 1. Matching that to the note, you find that this gives a sequence of seven numbers from top to bottom: 2, 4, 1, 3, 4, 2, 1.
The diagram tells you that 4 corresponds to the innermost position on each side, and that conveniently requires the same number of clicks. So click the rods (from top to bottom) 2, 4, 1, 3, 4, 2, 1 times.
Go back to the hut and tune in to the radio. You hear a welcome message, and the last Mini Monkey emerges from behind the barrel.
Bonus clue from this stage: X=1.
Stage 172: Tunnel Delve
Exploration
You start off next to a scarecrow wearing a torn hat. There's a black flag flying on the left which you don't have the means to lower. Pick up 2 Mini Monkeys.
Go down the hole. A guy here (that's what I'm calling all of them) is scared of the huge square hole leading deeper down with diamond-shaped sockets on the outside. Before you head down any of the four branching paths, read the note on the wall and pick up the Mini Monkey beside the hole.
The path on the right leads to a room with a grid of buttons. There's a tall display on the left which cycles through digits, and a locked shutter on the right marked with a single dot which has a hole in it. Pick up the stick and Mini Monkey.
Go back and down the lower-right path instead. This room has another digit display and shutter, but also some loose rocks in the ground and a guy with a runny nose.
Go back and down the lower-left path instead. This room also has a digit display, a shutter, and some loose rocks. Pick up a pickaxe head.
Go back and left. This room also has a digit display, a shutter and some loose rocks in the wall, but there's a guy here with a significant lack of hair. Pick up the Mini Monkey.
Dig
Attach the pickaxe head to the stick, and use it to clear out all the loose rocks.
You get a yellow ball from the left room, a red ball from the lower-left room, and a knife from the lower-right room.
Cut
Use the knife to cut open the scarecrow on the first screen, and take the lever from it.
Lower
Use the lever on the flagpole and spin it to lower the flag.
Cover
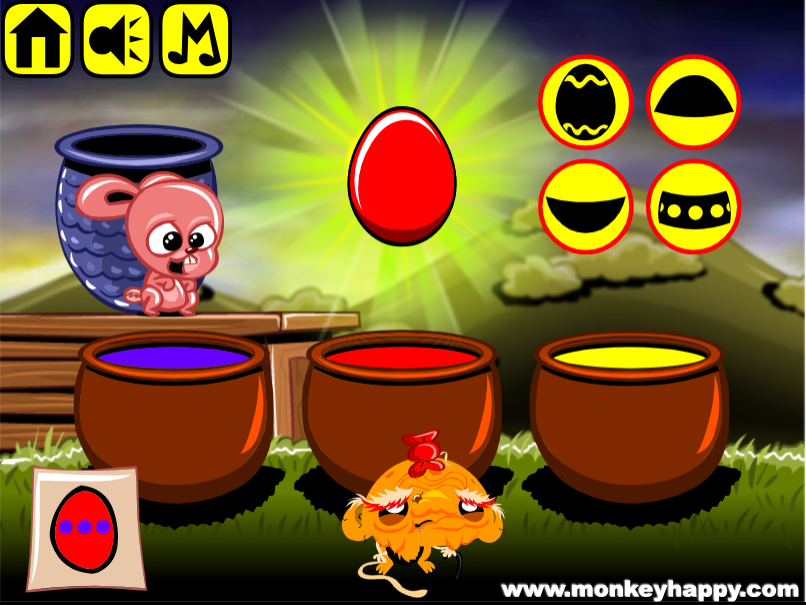
Give the hat to the balding guy, who gives you a blue ball.
Also give the flag to the runny nose guy, who gives you a green ball.
Shutters
Use a clue from the note to unlock each shutter.
(Colorblind help: the digits 1, 2, 3, 4 on the note are blue, red, yellow, green.)
The note tells you that the shutter with one dot fits the blue ball, and that there's a matching pattern that needs to be marked on the grid:
O-O-

OOO-

-O-O

-OOO
Set the grid and place the blue ball in the shutter in the right room, then push it to open the shutter. Take the gem and Mini Monkey from inside.
Now for the other shutters…
For the shutter in the left room (2 dots), the grid must be turned counter-clockwise:
--OO

OO-O

-OOO

OO--
Place the red ball in that shutter and push it to open it. Take the gem and Mini Monkey.
For the shutter in the lower-left room (3 dots), the grid must be turned clockwise instead:
--OO

OOO-

O-OO

OO--
Place the yellow ball in that shutter and push it to open it. Take the gem and Mini Monkey.
For the shutter in the lower-right room (4 dots), the grid must be turned upside-down:
OOO-

O-O-

-OOO

-O-O
Place the green ball in that shutter and push it to open it. Take the gem and Mini Monkey.
Slots
Place all four gems around the large hole in the ground, and a button emerges from it.
Use remaining clues from the note to solve its puzzle.
The formula on the note evaluates to 1984, so the displays in the left, lower-left, lower-right, right rooms (with 2, 3, 4, 1 dots) should show the digits 1, 4, 9, 8.
Set them accordingly and push the big button down, and it gets replaced with a large birthday cake with the last Mini Monkey on top.
Bonus clue from this stage: (II with underline) = 3. Click on for the bonus stage!
Bonus Stage 43
As you might be used to by now, this stage involves math. Work out the equations on the top row (4+4=8, 3+1+2=6), the middle row (8×6=48, 48÷4=12), and the bottom row (12÷3=4, 8−3=5, 3+2=5, 6−4=2).
Enter 4552 in the box to open it!
Hello, sorry my bad. It's fixed.
Update