
Monkey GO Happy Roundup 16
By Arceus
|
June 1, 2018
Comments (2) | Views (8,554)
 In this episode, a strange set of puzzles, a watchtower standing over the see, an underground maze with weird carvings, and a weird beanstalk-thing await you.
A strange puzzle holds the key to unlock doors and progress through rooms. Can you figure it out for our primate friend?
A watchtower stands over the sea, and that's only the beginning. Get inside and help someone in need.
You find yourself, along with your monkey friend, in a number of strange rooms. A bear-shaped creature with horns and a heart-shaped cavity are only some of the bizarre findings here.
Last but not least, aid the monkey in collecting jelly beans from some sort of beanstalk.


Monkey GO Happy Roundup 16 (Stage 185–188)
Stage 185: Cube Games
Exploration 1
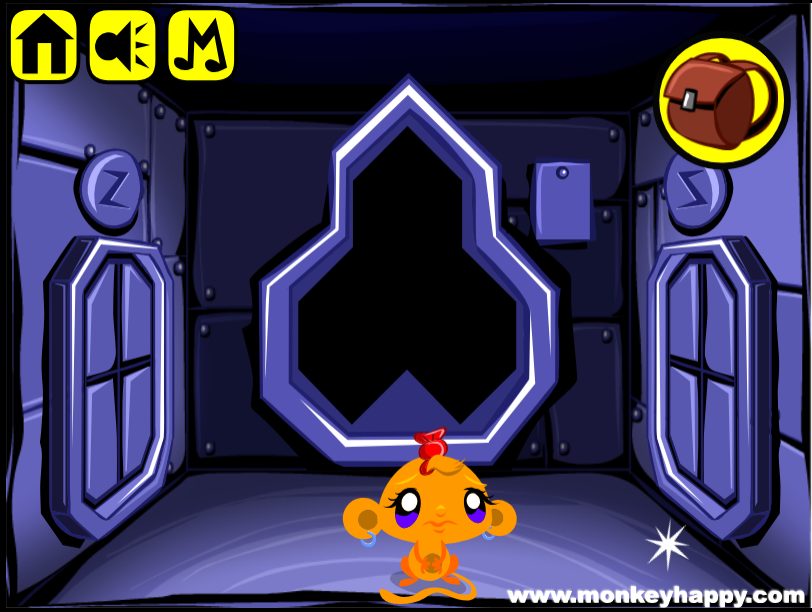
You're back in another one of those metal boxes, whose doors are marked with a Z and reversed Z. On the back wall, there's an area that looks like a giant hole but actually contains several color-changing buttons. Read the note beside it, and pick up the puzzle piece, robot body and 2 Mini Monkeys.
Zig zag
Use clues from the note to open both doors.
Note: I'll also divide the buttons into three identical "cubes" (top, bottom-left, bottom-right) and list the colors on each in the same order (top, bottom-left, bottom-right).
Also, the buttons cycle through the colors yellow, red, white in that order.
So the clue for Z tells you to make each cube white, yellow, red. After doing so, click the door on the left to open it.
The clue for (reversed Z) only specifies the color for the lower two buttons of each cube.
So make each cube black, white, white, and then click the right door to open it.
Exploration 2
Go left. This room has a huge dark hole in the wall and a marked square platform on the left. Pick up a box, a pair of wires and 2 Mini Monkeys.
Go right (twice). On the back wall, you find a panel with a hole in it (marked with an N). On the right wall, there's a smaller panel with a round hole marked with a reversed N. Pick up the bulb and battery from the floor, as well as 2 Mini Monkeys.
Connection
Using the Combine Items button in your inventory, attach the wires to the bulb and battery. The bulb lights up.
So place the lit bulb in the hole in the left room. Pick up the puzzle piece and Mini Monkey in front of a device that lights up from the bottom when you click it.
Power up
Combine the two puzzle pieces to form a square button that fits in the N panel.
Then use the corresponding clue from the note to unlock it.
The note tells you that the top cube needs to be black, yellow, yellow, the bottom-left cube needs to be red, red, black, and the bottom-right cube needs to be red, black, red.
The symbol beneath reminds you of the bars on the device in the left room, but how many bars do you need to light up?
The symbol is also a squarish number 8, so you need to light up 8 bars, which is all of them.
Push the square button to open the panel, and take the screwdriver and Mini Monkey from inside.
Unscrew
Use the screwdriver to open the box and get a ball.
Power down
Place the ball in the right wall panel, and use the remaining clue from the note to unlock it.
Turn every button black and click the bar device one more time to turn its lights off too.
Push the ball to open the panel, and take the robot head and Mini Monkey from it.
Showtime
Place the robot's head on its body, and place it on the platform in the left room to end the stage.
The last Mini Monkey appears at its feet.
For collecting all the Mini Monkeys, you get a bonus clue: (five dots) = 1.
Stage 186: Lakeside Tower
Exploration 1
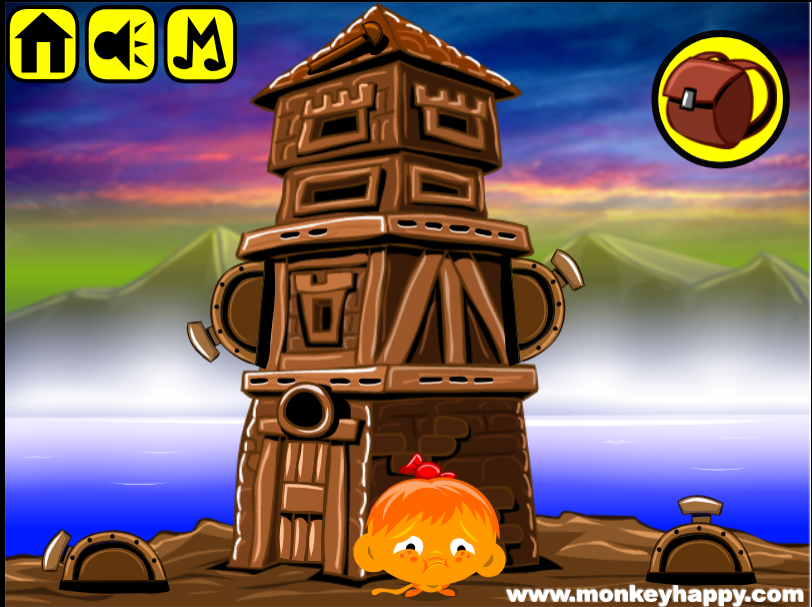
The tower's entrance is locked, and the four lever wheels on the sides seem important. The only thing you can do with the lake behind it is splash around in the water. Pick up a lever (on the roof), a round button and 2 Mini Monkeys.
Entrance
Place the button above the door, and use a clue from the tower to unlock it.
The patterns of horizontal dashes around the outside of the tower form groups of 2 and 5 (on top) and 4 and 3 (below).
So set the lever wheels on the tower to the 2nd and 5th positions (where the first position is the starting position on top) and those on the ground to the 4th and 3rd positions (where the first position is the starting position on the left).
Then push the button to open the door.
Exploration 2
As the word on the ceiling suggests, the inside of the tower looks more like a house. From left to right, you see a locked wall panel with a rectangular hole, an empty metal stove, a ladder leading up, and a pot. Pick up 2 Mini Monkeys.
Then pull out the loose wall tile just to the left of the ladder to find an octogonal gem.
Climb up the ladder to a smaller room with a guy in an empty bathtub. Notice the locked panel with hole on the back wall as well as the clues outside the walls to the left and right. Pick up the wood beside the bathtub and the 2 Mini Monkeys.
Remove the loose wall tile above the bath to find a Mini Monkey.
Quadruple
Place the gem in the diamond wall panel and the lever in the rectangular one, and use the clues you saw upstairs to open both of them.
The clue on the left is just four Hs in a row above a rectangle, and we know from the clue downstairs that H represents one dot, or the number 1.
So set each of the lever wheels to their initial position, and pull the lever to open that panel and find an empty matchbox and Mini Monkey.
Similarly, the other clue tells you to set each wheel to the fifth (last) position. So do that, then push the gem to open the panel and find an unlit match and a Mini Monkey.
Hot water
Place the wood in the stove, strike the match on the matchbox and use the lit match to set the wood on fire.
Fill the pot in the lake, and use it on the stove. It immediately heats up so you can retrieve the pot with warm water.
Pour the warm water into the bathtub, and you get the pot back. But the man's still unhappy.
So do it all over again: fill the pot, warm the water, fill the tub.
Now he's satisfied, and the rubber duck floats to the top, and you can pick up the last Mini Monkey.
Bonus clue from this stage: (four dots) = 3.
Stage 187: Missing Pieces
Exploration
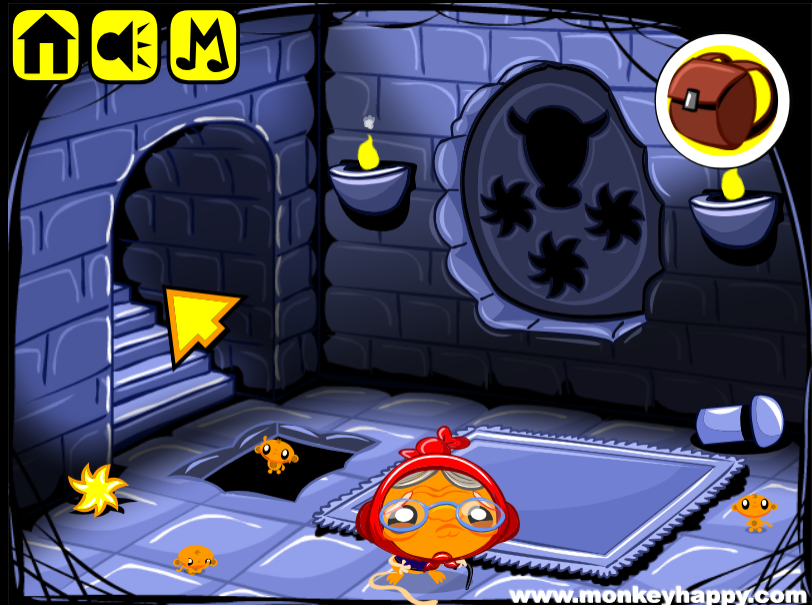
In between the two wall torches is a large wall panel with four shaped holes. Pick up a star piece, a peg and 2 Mini Monkeys, then push the rug aside to find a rectangular stone piece that hides another Mini Monkey.
Climb up the stairs. On this landing you find two clues on the walls, a locked panel with two identical holes, and a window with a star. Pick up 2 Mini Monkeys.
Climb up the stairs to find a grid of 12 buttons on the wall and a giant statue with horns in the corner. He seems to be missing a heart. There's also a clue under the buttons, and a hole in the ground. Pick up a star, a stone and 2 Mini Monkeys.
Waves
Place the peg in the hole, and both stones in the panel on the middle landing.
Then use the clue from the floor upstairs to unlock the panel.
The clue tells you that the buttons should be pointing up in the 1st and 3rd columns and down in the 2nd column.
So click the buttons in the middle column once and the others twice, then push the peg.
You hear the sound of the panel unlocking, and find a golden skull and Mini Monkey behind.
Golden
Place the skull and all three stars in the panel on the starting screen, then use a clue from the landing to unlock it.
The skull and stars appear under an up arrow/chevron, so make all the buttons point up.
Then push the peg again, and you hear the panel unlock. Pick up 2 broken bits and a Mini Monkey.
Repair
Combine the 2 broken bits to form a heart, and place it in the statue.
Then use the last clue to activate the heart.
The last clue shows a pair of horns followed by an up arrow, a down arrow, and an ellipsis, which means that you need to continue the pattern by alternating between up and down.
So make the top row Up Down Up, the second Down Up Down and so on, forming a checkerboard pattern.
Then push the peg again. The statue opens his mouth, revealing a pile of precious gold coins… and the last Mini Monkey!
Bonus clue from this stage: (three dots) = 2.
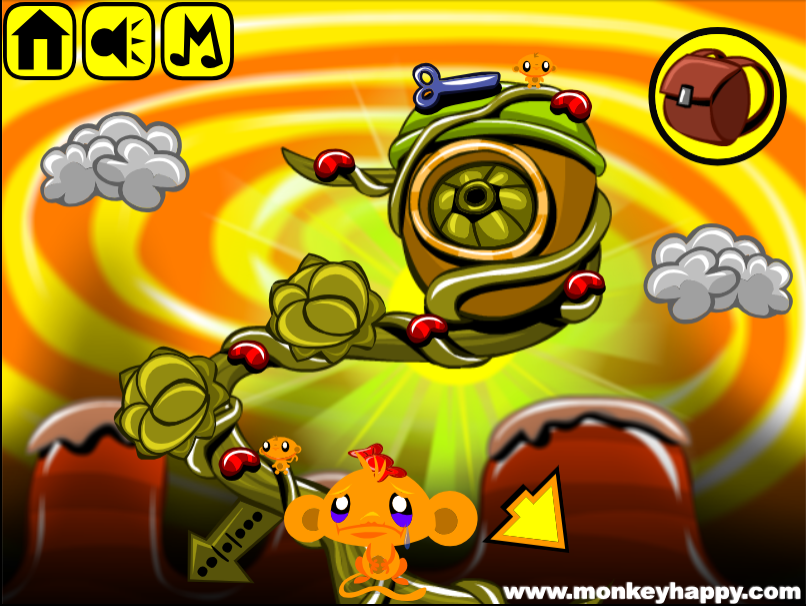
Stage 188: Jelly Beanstalk
Exploration
A bird perches on a mushroom house and a man with a top hat asks for 30 jellybeans in the middle of the road. There's also three color-changing devices along the side of the road, but of course what really catches your eye is the giant beanstalk with three buds that you can click to open. Do so, then pick up 10 jelly beans and 2 Mini Monkeys.
Climb up. The beanstalk has a mysterious sign with dots on it, and it ends in a giant acorn which has its own locked door. Click the clouds and the buds to open them, then take another 10 jelly beans and 2 Mini Monkeys, as well as the key at the top.
Signposted
Place the key in the house door, then use the clue from the house and the sign to unlock it.
The colors just beneath the roof of the house match those available on the devices.
The sign tells you that the unlock code is the 2nd, 1st, 3rd colors on the house, which are white, red, purple.
So click the devices 4, 2, 3 times, and push the key to unlock the door.
Exploration 2
A boy is alone and crying in this small house, which has two locked wall panels marked with different color tops, as well as a window with some digits above it. Pick up a slightly more golden key, a red piece of candy and a red horn, another 4 jellybeans which are red too, and 2 Mini Monkeys.
Recolor
Place the golden key in the acorn, and use the clue from the window to unlock it.
As before, you notice that the 4th, 3rd, 2nd colors on the roof are yellow, purple, white, so click the devices 2, 1, 1 more times, and push the key.
Inside the acorn, you find a purple gem in front of a red gem that hides a jellybean and Mini Monkey.
(You should now have 25 jellybeans.)
Alarm
Use the horn to drive the bird away, and pick up the jellybean it leaves behind.
Gems
Place the gems in the locked panels, and use the clue there to unlock them.
Simply set each device to purple, and push the gem to open the purple panel, and similarly for the red one.
Take 4 jellybeans and 2 Mini Monkeys.
Collection
Give all 30 jellybeans to the man, who leaves a stick behind as he walks away.
Treat
Place the candy on the stick to make a lollipop, and give it to the boy to end the stage. Pick up the last Mini Monkey from his feet.
Bonus clue from this stage: (2 dots) = 5.
Bonus Stage 47
Time for the only math in this roundup! The bonus clues from each stage give you the digits 1, 3, 2, 5, so work out the equations above the boxes (3+1=4, 5−2=3, 3+4=7) and then the equations in the boxes (4+1=5, 7−5=2, 3+2=5, 3÷3=1).
Enter 5251 in the box and open it!
Hi do check out this latest post with our new web post and I hope you would have enjoyed all our post windows 7 product key
Update