
Monkey GO Happy Roundup 17
By Arceus
|
June 27, 2018
Comments (1) | Views (6,710)
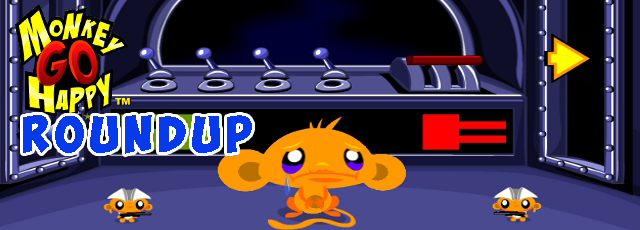
 You will see gears and gauges, hunters and faraway places, and maybe even some midsummer snow. Read on below for more!
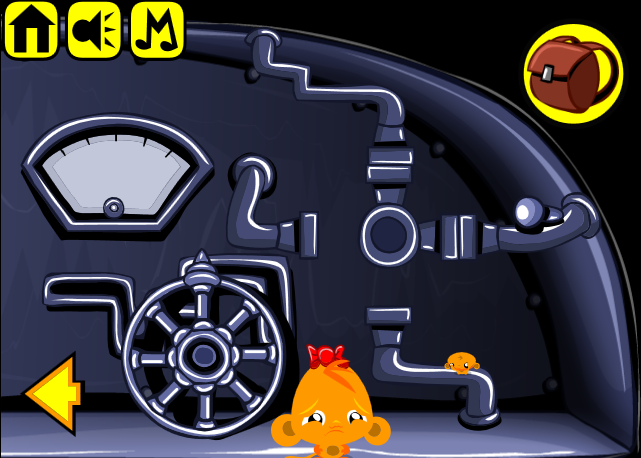
You're in a machine with strange gears and gauges. The poor monkey isn't too sure about what's going on in here, but what about you?
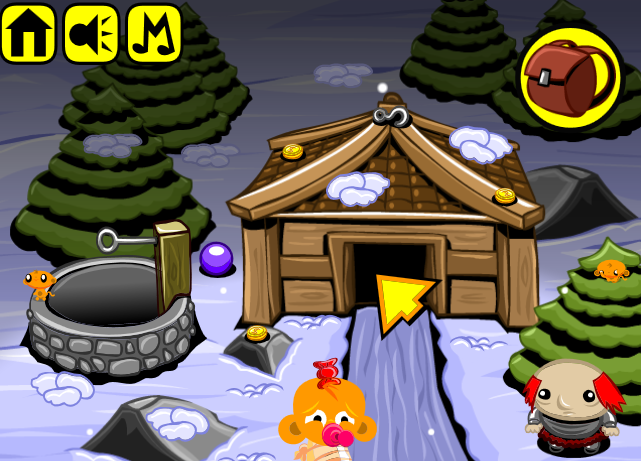
It might be June already, but there's still snow in this scene, and coins hiding everywhere for you to collect!
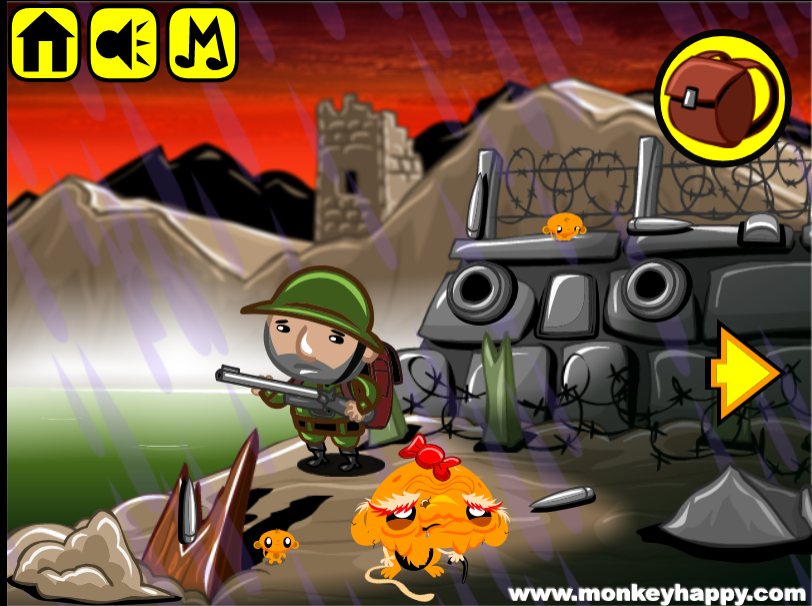
The rain is coming down hard, and monkey appears stuck at the border with none too friendly a hunter looking on! Investigate what's going on here.
On a planet far, far away, a monkey needs some assistance! Come help them out.


Monkey GO Happy Roundup 17 (Stage 189–192)
Stage 189: Engine Room
Exploration
You start off facing a wall with four pipes which meet at a L-shaped piece you can rotate, a dial missing its needle, and a bent lever slot that's missing a lever. Pick up the lever above the top pipe, as well as 2 Mini Monkeys.
Go right to find a daunting metal door surrounded by four knobs with letter labels and one unlabeled button, two holes of different shapes, and a metal plate with a clue. The door itself has a small hole in it. Pick up two dial needles, and 2 Mini Monkeys.
Go right. This wall here has pretty much the same things as on the first screen, except for the items you can pick up: a lever, wheel and Mini Monkey.
Alphanumeric
Place the needles on the dials, the levers in their slots and the wheel in the door.
Then use the clues above the door to unlock each of the four labeled panels.
Each row of the clue has 6 letters and 2 digits, indicating the required settings for each of the 6 controls.
So for instance, the code for A starts and ends with xz (pipes connected to top and right), and has 5s in the middle (dial needles moved all the way to the right) above two of the letter i (levers moved to first corner).
So adjust the pipes, dials, and levers accordingly, and turn the wheel so it points to A. Now you can click the button on panel A to find a circle bit and Mini Monkey.
Do the same for B, C, D. Those panels contain another circle bit, 2 square bits and 3 Mini Monkeys.
Round
Combine the circle and square bits (with the Combine Items button in your inventory) to get circle and square pieces, then put them in the holes above the door.
Then use the remaining clue to unlock the door.
Like the other clues, the last one also has 6 letters and 2 digits. Which of those are for the left wall, and which are for the right?
Of the first four letters, xz occurs to the left of uy, which means that xz is for the pipe on the left wall and uy for the right.
Similarly, 2 is to the left of 5, so the dial on the left wall must be set to 2 and that on the right set to 5.
Finally, K is to the left of O, so the lever on the left wall must be moved to position K and that on the right to position O.
After you set that all up, don't forget to turn the wheel to point to the button at the top.
Push the button to open the door and release a happy-looking alien and the last Mini Monkey.
Collecting all the Mini Monkeys gives you the bonus clue: (squarish b) = 5.
Stage 190: Snowy Coins
Exploration
The red-haired warrior standing outside the wooden house asks for a horned helmet. There's also a well which you can't do anything with yet. Pick up the hook (on the roof), the blue ball, 3 coins and 2 Mini Monkeys, then click each of the snow piles on screen to find 11 coins under them.
Enter the house, where a guy wearing a hood asks for 20 coins. There's also a weird spinner contraption on the back wall, a locked trapdoor in the floor, and rectangular light devices in the walls with clues above them. Pick up the rope, 4 coins and 2 Mini Monkeys.
Underground
Combine the rope with the hook and use it on the well to retrieve a key.
Use that key to unlock the trapdoor. You can't climb down because there's no ladder.
But you can attach the hook to the edge of the opening and then climb down the rope.
Exploration 2
The walls of this basement have locked panels with holes in them. Those on the sides are round, while the one at the back is door-shaped. After you pick up the helmet (without horns), another blue ball, and 2 Mini Monkeys, the basement is practically empty.
Trio
Place both blue balls in the basement wall panels, then use the clues from the walls upstairs to unlock them.
The top row of each clue has three Ms and a two-digit number that tells you how to position the spinner, and the bottom row has four digits that tell you how to set the wall lights.
So the clue for the left wall tells you to rotate the spinner until the three sectors marked with Ms show a total of 11 dots. There's only one position that works: the one where the lower-left M shows only one dot.
Click the wall lights until they show 3, 1, 3, 1 bars, then push the ball on the left wall downstairs to open the panel. Take the coin and Mini Monkey.
Similarly, adjust the spinner for the right wall (8 dots in the lower left), and click the wall lights to show 1, 2, 2, 3 bars, then open the right wall panel downstairs and take a coin and Mini Monkey.
Riches
Give all 20 coins to the man in the house.
After he walks away with them, pick up the diamond and Mini Monkey left behind on the ground, and look at the clue panel he revealed on the back wall.
Repeat
Place the diamond in the back wall of the basement, and use the new clue to unlock it.
As before, you need to rotate the spinner so that the three marked sectors show 16 dots. (So the lower-left one needs 7 dots.)
You also need to turn off each of the wall lights (no bars showing).
Push the diamond to open its panel and find the missing horns.
Horned
Combine the horns with the helmet, and give it to the man on the first screen to end the stage.
Pick up the last Mini Monkey who appears at his feet.
Bonus clue for this stage: U=4.
Stage 191: Rainy Fort
Exploration
Can't we get any good weather in summer? The rain pours down on a soldier who asks for 20 bullets, or shells as the game (accurately) calls them. The wall behind him is surrounded by barbed wire, but you can still reach the two round lights on it, each divided into three sectors. The mound of dirt on the left is too tough to move, but you can shift the rock on the right. Pick up 5 shells (two next to the fence), a button and 3 Mini Monkeys.
In between the wall lights, you'll find a loose brick that you can't remove.
Go right. The wall ends with another light, and then you see a cute dog outside a ruined building with a CUBA sign. There's another dirt mound in the right corner. Pick up another 5 shells, a button and 2 Mini Monkeys.
Enter the building. As you might expect, the left and right walls have locked panels with rectangular holes. There's a taller locked panel on the back wall next to the picture frame which cycles through image tiles when you click it, and the ceiling has a clue with three labeled circles divided into three colored sectors each. Pick up 3 shells, a spade and 2 Mini Monkeys.
(Check that you have 13 shells, as well as 7 Mini Monkeys.)
Dig
Use the spade on both of the dirt mounds, and take 2 shells from them.
Also use the spade to remove the loose brick on the first screen. Take the shell hidden behind.
ABC
Place the buttons on the left and right wall panels, then use the clues from the building to unlock them.
The letters A, B, C appear on the CUBA sign in the 4th, 3rd, 1st positions.
So the 431 clue on the right wall indicates that you should set the lights outside to match the ceiling pictures labeled A, B, C.
Click the left light on the first screen once and the right light twice, and the light on the second screen thrice, then open the right wall panel to find a knife, a shell and a Mini Monkey.
As for the left wall, the clue 143 indicates the 1st, 4th, 3rd letters of CUBA, which are CAB instead.
So click the lights until they show 3, 1, 2 sectors, then open the left wall panel to find a can, a shell and a Mini Monkey.
Opener
Use the knife to open the can, and then use the open can on the dog to feed it. Pick up the lever and shell where the dog was.
Portrait
Place the lever in the back wall panel, then solve the picture puzzle to unlock it.
In order to make the tiles connect, you need to click them
03 05 12

10 11 04

06 01 02

09 07 08
After you've assembled the picture, pull the lever and the panel opens to reveal the last shell.
Fire
Give all 20 shells to the soldier on the first screen, who begins firing them. Pick up the last Mini Monkey that appears at his feet.
Bonus clue for this stage: (U with bar through 廿) = 2.
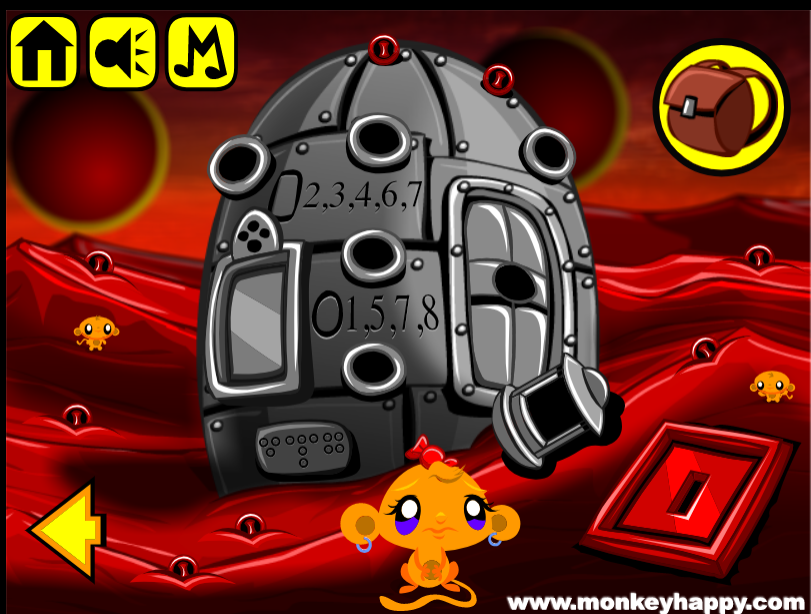
Stage 192: Martian Capsules
Exploration
A mysterious gray box has lights, a hole, and a locked door panel. The rocket (which has two identical holes in it) and astronaut next to it are a brighter shade of blue, and the astronaut asks for 25 round things, which turn out to be credits. Pick up 7 credits from the ground, as well as a rectangular key and 2 Mini Monkeys.
Go right to find a much larger metal egg with lights, a hole, a locked door panel, a number clue on the front and a clue plate at the bottom. On the right, there's a mysterious red trapdoor on a sand dune. Pick up the fuel cell in between, as well as 8 credits and 2 Mini Monkeys.
(Check that you have 15 credits and 4 Mini Monkeys.)
Unlock (red)
Use the key to unlock the trapdoor, and take 2 buttons, a Mini Monkey and a credit from inside.
Circle and Square
Place the buttons in the locked doors, and use the clues from the outside of the large capsule to unlock them.
On the clue plate, the circles labeled 1 to 3 match the arrangement of lights on the first screen, and those labeled 4 to 8 match those on the second screen.
So the circle clue (1, 5, 7, 8) tells you to turn on the top-left light on the first screen and all three lights in the middle column of the second screen.
After doing that, you can push the button on the first screen to open that capsule and find a single credit.
Similarly, follow the rectangle clue (2, 3, 4, 6, 7) by turning on the indicated lights (and turning off the others), then push the button on the second screen to open the large capsule. Now you can step inside.
Exploration 2
The inside of the capsule has four more lights, two more number clues in the corners, and a large device that sparks when you pull its lever. Pick up another 4 credits and 2 Mini Monkeys.
Two and Four
Use the two new number clues to open the remaining locked panels.
The new clues work the same way as the old ones. Looking at the circle plate again, you find that the numbers 9 and 12 indicate the top-left and bottom-right lights in the capsule.
After setting the lights according to each clue, all you have to do is click the corresponding panel to open it. Take a total of 4 credits and 2 Mini Monkeys from the panels.
Trade
Give all 25 credits to the astronaut, who lets you have his fuel cell.
Power
Both cells are empty right now, but you can charge them in the spark device.
Once charged, place both cells in the rocket, which takes off into space. Pick up the last Mini Monkey under it.
Bonus clue from this stage: (four squares) = 3.
Bonus Stage 48
Use the bonus clues from each stage (5, 4, 2, 3) to work out the equations (4×5=20, 3+2=5, 20+5=25) and get the final code (2525).
Enter that in the box and open it!
Update