JayisGames.com is now available ad-free!
Jay is Games recommends Cheat Happens with 8,000+ games and 35,000+ trainers!

Nelly


  • Currently 4.5/5
  • 1
  • 2
  • 3
  • 4
  • 5
Rating: 4.5/5 (324 votes)
Comments (18) | Views (19,490)

DoraNelly
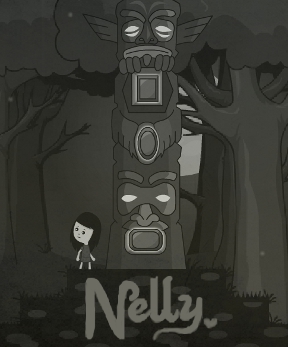
Black Square Studio's lovely but unsettling little platforming puzzle adventure game Nelly may look sweet and unassuming, but if you've spent any time around indie games at all in the last several years you should know to approach any title featuring an adorable child as a protagonist with the grim knowledge that things are about to get all dark and meaningful and depressing and whatnot. It's a law or something... but maybe this time will be different. Little Nelly can't sleep one night, and when she ends up following a glowing butterfly into the woods outside her house one night, she ends up stumbling into a whole other world. There, she finds that not every fairytale has a happy ending, and the forest has teeth. And spikes. And claws. And crushing blocks. Gretel would probably tell Nelly, "I know that feel, bro".

Use the [arrow] keys to move, the [spacebar] to interact, and the appropriate letter key (such as [A] or [S]) to trigger your special abilities as they become available. A single hit from an environmental hazard or particularly munchy forest beast will take Nelly out, but since the game is so liberal with its checkpoints you likely won't encounter any huge setbacks even if you do bite the dust. Which, like as not, will be more due to mistiming a jump. The environments are gorgeous, with the perfectly chosen soundtrack only adding to the fairy-tale-gone-wrong atmosphere, and it feels like it all lasts just long enough for you to give a satisfied sigh of completion when you're done. It's a little weird with its mildly inconsistent tone of d'awwww to WAUGH, but it's also a little lovely, and well worth the ten minutes or so it'll take you to see Nelly through the thick of it.

Play Nelly

Walkthrough Guide


(Please allow page to fully load for spoiler tags to be functional.)

Nelly Walkthrough

Achievements

  • Lovely Teddy Bear: Pick up the teddy bear at the lower left corner of the house in Chapter 1.

  • Check Mail: Open the mailbox in Chapter 1.

  • Wake Up Butterflies: Chase out the butterflies from the white flower in Chapter 2.

  • Execution: Fall into a spike pit (one is found in Chapter 2).

  • Mining: Get killed by a mole creature (one is found in Chapter 3).

  • Dismemberment: Step on a bear trap (one is found in Chapter 3).

  • My Mining: Pick up a dismembered mole creature head (one is found in Chapter 3).

  • Keen Eye: Use the Reveal ability (A) to find the hidden gem by the bottom of the steps at the end of Chapter 3.

  • Rock Climber: Jump over the key by hopping from the right side to the left side of the moving block in Chapter 4.

  • Griddle Cake: Get crushed by a moving block in Chapter 4.

  • Stalactite Death: Get impaled by a stalactite found in Chapter 4.

  • Builder: In chapter 5, use the Reveal ability (A) to show both of the hidden boxes. Push the box on the ground underneath the box in the tree. Use the Hide ability (S) to drop the crate from the branch so it stacks on top of the crate on the ground.

  • Dead Fly: Fall to your death in Chapter 6.

  • Clumsiness: Push a crate off a platform into the abyss in Chapter 6.

  • Feed For Fish: Sink into the water in Chapter 7.

Levels Guide

Chapter 1

  • Follow the butterfly all the way right to the edge of the forest.

Chapter 2

  • Move right until you reach the crate.

    • Push the crate to the right wall, then jump on top of the crate to reach the ledge.

  • Continue right to the mushroom.

    • Jump on the mushroom to bounce to the right tree branch.

    • Jump to the left tree branch to pick up the Key.

  • Drop down to the treasure chest and press spacebar to unlock it.

    • You will learn the Reveal ability (A key).

  • Use the Reveal ability (A) to show the bridge over the spikes.

    • Cross the bridge before it disappears.

  • Move right to the end of the level.

Chapter 3

  • Pick up the Bottom Square Gem on the ground to the left of the first skull.

  • Continue right until you get to the bottom step beside the patrolling mole creature.

    • Wait for the mole to move all the way to the right, then use the Reveal ability (A) to catch it in the trap.

  • Continue right to the treasure chest.

    • Use the Reveal ability (A) to show the Key at the top of the steps.

    • Pick up the Key, then return to the treasure chest to unlock it.

  • Take the Top Square Gem to the left of the opened chest.

  • Continue right until you reach the mushroom.

    • Jump on the mushroom to bounce to the tree branch.

  • Use the Reveal ability (A) to show the bridge.

    • Cross the bridge before it disappears to reach the tree on the other side.

    • Jump over to the left tree branch and pick up the Middle Round Gem.

  • Drop down and continue right to the totem pole.

    • If you've picked up all three gems, the pole will lower, clearing the path to the exit.

Chapter 4

  • Move right to the crushing blocks.

    • Drag the crate to the right wall, then jump on top of it to reach the right ledge.

  • Continue right to the stairs past the block holding the key.

    • Use the Reveal ability (A) to show the ledge on the side of the stairs.

    • Stand on the ledge then jump into the moving block to take the key.

  • Continue right with the key in hand to the wall, then press spacebar to unlock it.

  • Move right to the last step above the firing cannon balls.

    • Jump to the lever, then quickly use the Reveal ability (A) to show a barricade, which will temporarily block the incoming cannonballs.

    • Press spacebar before the barricade disappears to drop the crate.

    • Push the crate to the cannon, then jump on top of the crate and over the cannon.

  • Go right to the end of the level.

Chapter 5

  • Move right to the apple tree.

    • Press spacebar to eat the apple.

    • You will learn the Hide ability (S key).

  • Continue right to the spike pit.

    • Use the Hide ability (S) to remove the spikes, then cross the pit before they reappear.

  • Go right to the ledge above the patrolling mole creature.

    • Wait for him to move near the left wall, then jump over him and quickly hop up to the mushroom.

  • Hop on the smaller mushroom to reach the upper left branch.

  • Jump to the right branch, then push the crate off the tree and onto the trap on the ground below.

  • Use the Reveal ability (A) while standing beside the trap to show the crates.

    • Before it disappears, push the crate onto the left button.

  • Use the Hide ability (S) to make the tree branch disappear, dropping the second crate onto the ground.

    • Push the second crate onto the right button.

  • Continue right, past the spike mechanism, to the pit.

    • Use the Reveal ability (A) to show the crates again.

    • If both crates are positioned on the buttons, the bridge will raise and you can safely cross.

  • Move right to reach the end of the level.

Chapter 6

  • Go to the tree and stand next to the sign that reads "find".

    • Use the Hide ability (S) to hide the leaves of the tree.

    • Use the Reveal ability (A) to find the hidden symbols scratched onto the tree branch.

    • Count the number of scratch marks from left to right:

    • 1-3-2-3

  • Continue right to the lever in the next tree.

  • Stand on the edge of the platform to view the patrolling mole creature.

    • When the mole walks over the left branch, use the Hide ability (S) to make the it disappear.

  • Wait for the hidden branch to reappear, then use the Reveal ability (A) to show the right tree branch.

  • Jump to the next tree and continue right to the bridge.

    • Use the Reveal ability (A) to show the Key.

  • Pick up the Key, then return to the lever platform.

    • Use the Reveal ability (A) again to show the right tree branch.

    • Quickly use the lever to drop a crate, then drag the crate to the left.

  • Jump on top of the crate then jump left to return the tree with the "find" sign.

    • Use the key to open the treasure chest.

    • Take the Lever beside the opened chest.

  • Continue right, cross the bridge, then jump on the mushroom to reach the button platform.

    • Walk over the floor buttons to press them, which will lower or raise each bar.

    • The notches on the lowered bars need to match in number to the scratches seen earlier on the tree branch, so from left to right it would be:

      • 1 notch, 3 notches, 2 notches, 3 notches.

    • After you've matched the pattern, move right to place the Lever in the mechanism.

    • Use the completed mechanism to lift the wall.

  • Move right to the end of the level.

Chapter 7

  • Quickly use the Hide ability (S) to remove the spikes before you fall on them.

  • Move right then jump onto the cage.

    • Use the Reveal ability (A) to show the mushroom.

    • Use the Hide ability (S) to make the cage disappear, which will bounce you up to the tree.

  • Push the crate off the tree and into the water.

  • Jump onto the submerged crate, then continue right to the crate.

    • Push the box left towards the sliding magnet.

  • Use the lever to change the sliding magnet's polarity.

    • Quickly go to the crate and press spacebar to hold onto it.

    • When the magnet drags both you and the crate up, wait for it to slide to the treebranch, then release the crate to drop onto the branch.

  • Continue right, drop down past the spikes and move to the standing mirror.

Chapter 8

  • Move right to go into the building.

18 Comments

I'm having a problem in Chapter 6.

I have the lever for the locked door, but I don't know what to do with the buttons.

Reply

Ezra,

  • Go to the first tree at the start of the level with the sign on it that says "find".

  • Use your Hide ability (S) to remove the leaves at the top of the tree.

  • Use the Reveal ability (A) to find the hidden symbols scratched onto the tree branch. Count the number of scratch marks from left to right:

  • 1-3-2-3

  • When you reach the lever at the end of the level, press the floor buttons to lower or raise the bars.

  • The notches on the lowered bars need to match in number to the scratches on the branch, so from left to right it would be:

  • 1 notch, 3 notches, 2 notches, 3 notches.

  • After you've matched the pattern, click the lever to lift the wall.

Reply
Carny Asada March 1, 2012 12:30 AM

Love the artwork, love the puzzles, hate the sloppy controls and bad jumping. Got to the stage where Nelly is in the treetops, but an arboreal badger grabbed her and just kept gnawing and gnawing and gnawing without the scene resetting. Three stars, I guess?

Reply

I like the Limbo-ish atmosphere and cute graphics but the controls, ugh, the controls... it's unbearable.

Reply

Nice one.

Got stuck on level #6 and then took quite some time to final puzzle, but I still enjoyed it.

bio

Reply
Tobberian March 1, 2012 7:52 AM

End puzzle became TERRIBLE when I didn't realise that

you also can hang on flying object with space, not just push pull.

Resorted to adjusting walking speed on the metal crate to the differently paced magnet. It made for several annoying retries. (physically illogical, although it wasn't meant as gameplay I guess)

Also a repeatable bug (can't repeat it now though), player(game) got stuck

when I got attacked by the "bear" in the tree (lev 6). Thankfully there was bookmarks.


Otherwise ..OK, bit dark maybe.

Reply

Nelly Walkthrough

Achievements

  • Lovely Teddy Bear: Pick up the teddy bear at the lower left corner of the house in Chapter 1.

  • Check Mail: Open the mailbox in Chapter 1.

  • Wake Up Butterflies: Chase out the butterflies from the white flower in Chapter 2.

  • Execution: Fall into a spike pit (one is found in Chapter 2).

  • Mining: Get killed by a mole creature (one is found in Chapter 3).

  • Dismemberment: Step on a bear trap (one is found in Chapter 3).

  • My Mining: Pick up a dismembered mole creature head (one is found in Chapter 3).

  • Keen Eye: Use the Reveal ability (A) to find the hidden gem by the bottom of the steps at the end of Chapter 3.

  • Rock Climber: Jump over the key by hopping from the right side to the left side of the moving block in Chapter 4.

  • Griddle Cake: Get crushed by a moving block in Chapter 4.

  • Stalactite Death: Get impaled by a stalactite found in Chapter 4.

  • Builder: In chapter 5, use the Reveal ability (A) to show both of the hidden boxes. Push the box on the ground underneath the box in the tree. Use the Hide ability (S) to drop the crate from the branch so it stacks on top of the crate on the ground.

  • Dead Fly: Fall to your death in Chapter 6.

  • Clumsiness: Push a crate off a platform into the abyss in Chapter 6.

  • Feed For Fish: Sink into the water in Chapter 7.

Levels Guide

Chapter 1

  • Follow the butterfly all the way right to the edge of the forest.

Chapter 2

  • Move right until you reach the crate.

    • Push the crate to the right wall, then jump on top of the crate to reach the ledge.

  • Continue right to the mushroom.

    • Jump on the mushroom to bounce to the right tree branch.

    • Jump to the left tree branch to pick up the Key.

  • Drop down to the treasure chest and press spacebar to unlock it.

    • You will learn the Reveal ability (A key).

  • Use the Reveal ability (A) to show the bridge over the spikes.

    • Cross the bridge before it disappears.

  • Move right to the end of the level.

Chapter 3

  • Pick up the Bottom Square Gem on the ground to the left of the first skull.

  • Continue right until you get to the bottom step beside the patrolling mole creature.

    • Wait for the mole to move all the way to the right, then use the Reveal ability (A) to catch it in the trap.

  • Continue right to the treasure chest.

    • Use the Reveal ability (A) to show the Key at the top of the steps.

    • Pick up the Key, then return to the treasure chest to unlock it.

  • Take the Top Square Gem to the left of the opened chest.

  • Continue right until you reach the mushroom.

    • Jump on the mushroom to bounce to the tree branch.

  • Use the Reveal ability (A) to show the bridge.

    • Cross the bridge before it disappears to reach the tree on the other side.

    • Jump over to the left tree branch and pick up the Middle Round Gem.

  • Drop down and continue right to the totem pole.

    • If you've picked up all three gems, the pole will lower, clearing the path to the exit.

Chapter 4

  • Move right to the crushing blocks.

    • Drag the crate to the right wall, then jump on top of it to reach the right ledge.

  • Continue right to the stairs past the block holding the key.

    • Use the Reveal ability (A) to show the ledge on the side of the stairs.

    • Stand on the ledge then jump into the moving block to take the key.

  • Continue right with the key in hand to the wall, then press spacebar to unlock it.

  • Move right to the last step above the firing cannon balls.

    • Jump to the lever, then quickly use the Reveal ability (A) to show a barricade, which will temporarily block the incoming cannonballs.

    • Press spacebar before the barricade disappears to drop the crate.

    • Push the crate to the cannon, then jump on top of the crate and over the cannon.

  • Go right to the end of the level.

Chapter 5

  • Move right to the apple tree.

    • Press spacebar to eat the apple.

    • You will learn the Hide ability (S key).

  • Continue right to the spike pit.

    • Use the Hide ability (S) to remove the spikes, then cross the pit before they reappear.

  • Go right to the ledge above the patrolling mole creature.

    • Wait for him to move near the left wall, then jump over him and quickly hop up to the mushroom.

  • Hop on the smaller mushroom to reach the upper left branch.

  • Jump to the right branch, then push the crate off the tree and onto the trap on the ground below.

  • Use the Reveal ability (A) while standing beside the trap to show the crates.

    • Before it disappears, push the crate onto the left button.

  • Use the Hide ability (S) to make the tree branch disappear, dropping the second crate onto the ground.

    • Push the second crate onto the right button.

  • Continue right, past the spike mechanism, to the pit.

    • Use the Reveal ability (A) to show the crates again.

    • If both crates are positioned on the buttons, the bridge will raise and you can safely cross.

  • Move right to reach the end of the level.

Chapter 6

  • Go to the tree and stand next to the sign that reads "find".

    • Use the Hide ability (S) to hide the leaves of the tree.

    • Use the Reveal ability (A) to find the hidden symbols scratched onto the tree branch.

    • Count the number of scratch marks from left to right:

    • 1-3-2-3

  • Continue right to the lever in the next tree.

  • Stand on the edge of the platform to view the patrolling mole creature.

    • When the mole walks over the left branch, use the Hide ability (S) to make the it disappear.

  • Wait for the hidden branch to reappear, then use the Reveal ability (A) to show the right tree branch.

  • Jump to the next tree and continue right to the bridge.

    • Use the Reveal ability (A) to show the Key.

  • Pick up the Key, then return to the lever platform.

    • Use the Reveal ability (A) again to show the right tree branch.

    • Quickly use the lever to drop a crate, then drag the crate to the left.

  • Jump on top of the crate then jump left to return the tree with the "find" sign.

    • Use the key to open the treasure chest.

    • Take the Lever beside the opened chest.

  • Continue right, cross the bridge, then jump on the mushroom to reach the button platform.

    • Walk over the floor buttons to press them, which will lower or raise each bar.

    • The notches on the lowered bars need to match in number to the scratches seen earlier on the tree branch, so from left to right it would be:

      • 1 notch, 3 notches, 2 notches, 3 notches.

    • After you've matched the pattern, move right to place the Lever in the mechanism.

    • Use the completed mechanism to lift the wall.

  • Move right to the end of the level.

Chapter 7

  • Quickly use the Hide ability (S) to remove the spikes before you fall on them.

  • Move right then jump onto the cage.

    • Use the Reveal ability (A) to show the mushroom.

    • Use the Hide ability (S) to make the cage disappear, which will bounce you up to the tree.

  • Push the crate off the tree and into the water.

  • Jump onto the submerged crate, then continue right to the crate.

    • Push the box left towards the sliding magnet.

  • Use the lever to change the sliding magnet's polarity.

    • Quickly go to the crate and press spacebar to hold onto it.

    • When the magnet drags both you and the crate up, wait for it to slide to the treebranch, then release the crate to drop onto the branch.

  • Continue right, drop down past the spikes and move to the standing mirror.

Chapter 8

  • Move right to go into the building.

Reply
Username March 1, 2012 3:01 PM

Possible bug report, I only did this once and didn't try to replicate. In level 6, I pulled the lever to drop a box and then hit the "a" key to reveal the branch below it. The box dropped, but I had no more arrow controls to move the character, I had to go back to the book and start the chapter over.

Reply
SkylerF March 1, 2012 3:16 PM

Has anyone figured out the 4th from the end achievement?
I think it will be found in level 5, going by what I've seen in the walkthrough...
[The walkthrough has been edited to include all of the achievements, try refreshing the page to see the recent addition. - Trinn]

Reply

I really liked this creepy, macabre game, but I could not finish it. Alas, I am terrible at platforms! I got utterly and irrevocably stuck on stage 6 with the

mole creature (those are FREAKY LOOKING, eith their odd pivoting heads!) where you have to jump over him and over to the mushroom

. After wasting about ten minutes on that particular part, I decided to quit. I also found the soundtrack extraordinarily grating on my nerves; this from a music-lover! Overall, this game would be alright if not for the ill-conceived controls. Dora, and all other JIG reviewers, please, please, PLEASE don't say that a game will take only ten minutes. Thirty minutes after reading that I sit here, writing this... just a thought!

Reply

meg,

Were you trying to jump over it at ground level? If so, it would have been impossible. The key is to stand on the ledge above the enemy, wait for it to approach the wall and then jump down and over him. At that point, it's much more about timing than distance.

Reply
Daibhid C March 2, 2012 4:42 PM

Nice game, excellent puzzles, a bit buggy in places and with dodgy controls. And did anyone else quit, restart and not notice the chapter tabs, so they started again from the beginning? Opening the book to the most recent chapter, rather than the first one, might have been a good idea...

Reply

Found the same bug described above with the branch and box.

Reply

A sweet quirky cupcake of a game. A little weird and heres my theory:

in the beginning she has a troubled relationship with her father and is lonley etc. But at the adventures end its backwards in that she and her father are now very close. of course it could be that she goes on an adventure and is now back home. i dunno.

fun little game :)

Reply

That's an interesting thought, Blinky. My interpretation was that

Nelly has a close relationship with her father, but because they are so poor and live out alone in the forest with no toys or friends, she becomes very lonely.

After being lured into the woods by the beautiful butterfly, she finds a fairy tale world where she can have all the adventures she dreamed of.

I found several parallels in the story to Lewis Caroll's Alice in Wonderland, as the little girl follows a mysterious white animal into the forest and falls down a hole into a strange fantasy land. Her escape through the mirror is also a possible reference to Carroll's sequel Through the Looking Glass.

As for her return home, I saw it as a joyous reunion between a lost girl and her worried father.

Reply

Now that you mention that Trinn It makes a whole lot more sense.

I too sensed the similarities between the game and Alice's adventures and you just brought it to light. Thank you.

Reply

Mood is really where this game Excels. Everything fits together: the colors, styles, music, sound effects.

Reply

Am I the only one who thinks "Nelly" looks an awful lot like Young!Marceline? Like, freaking exactly? the only difference is the dress.

Reply

^ Scroll Up | Homepage >

Leave a comment [top of page]

Please consider creating a Casual Gameplay account if you're a regular visitor here, as it will allow us to create an even better experience for you. Sign-up here!
  • PLEASE UNDERSTAND SITE POLICIES BEFORE POSTING COMMENTS
  • You may use limited HTML tags for style:
    (a href, b, br/, strong, em, ul, ol, li, code, spoiler)
    HTML tags begin with a less-than sign: < and end with a greater-than sign: >. Always. No exceptions.
  • To post spoilers, please use spoiler tags: <spoiler> example </spoiler>
    If you need help understanding spoiler tags, read the spoiler help.
  • Please Preview your comment before posting, especially when using spoilers!
  • No link dropping, no domains as names; do not spam, and do not advertise! (rel="nofollow" in use)
5,937 Views
0 Comments
chrpa ..........Jayisgames needs your help to continue providing quality content. Click for details......... With a bit of a delay (not on Rinnogogo's side), here we have a game with the theme of the pink full moon that was on the sixth...  ...
jayisgames.com The Baltics are a region in Northern Europe that is home to some of the most popular and beloved games around the world. They have a long and rich history of creating some of the most popular titles in...  ...
jayisgames.com Contrary to popular belief, video games can be incredibly beneficial for developing important social skills. While it's true that some people tend to become overly immersed in gaming, the truth is that playing video games can also teach players...  ...
1,948 Views
0 Comments
chrpa Jayisgames needs your help to continue providing quality content. Click for details Hi! Weekday Escape is here! The first two games in WE are April Fools pranks - traditionally we got one from tomoLaSiDo and one from Colorbomb (Studio...  ...

HELP Jayisgames.com

Recent Comments


Display 5 more comments
Limit to the last 5 comments

Game of the week


Dark Romance: Vampire Origins Collector's Edition

Your Favorite Games edit

add
Save links to your favorite games here. Use the Favorites editor.

Monthly Archives