

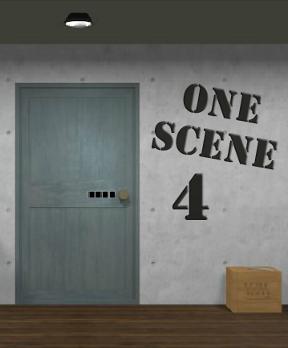
![]() It's a simple concept—a single setting sprinkled with a smattering of puzzles—yet it's one of the things that Robamimi does with singular perfection. So when Robamimi presents One Scene 4, another installment in this deceptively modest escape-the-room series, you know before you start that it's going to be splendid.
It's a simple concept—a single setting sprinkled with a smattering of puzzles—yet it's one of the things that Robamimi does with singular perfection. So when Robamimi presents One Scene 4, another installment in this deceptively modest escape-the-room series, you know before you start that it's going to be splendid.
 As is standard in every Robamimi escape, gameplay is smooth and precise: click on interesting spots, exploring all angles of this solo wall for clues, and breaking codes until your find your exit. A hint system nudges you when you're stuck, but if you're searching for a strenuous cerebral challenge, you won't find it here. Although, in one instance, a clever touch of misdirection might make you reconsider your conclusions and the multiple creative puzzles have enough thinking involved to stay interesting, it is perhaps too easy peasy overall.
Combined with a scenic design, classic jazz tunes and Robamimi's flair for quality, it all rounds out to be a very pleasant playing experience. When all you want is a gentle mental pick-me-up during a five-minute respite, One Scene 4 is an irresistible snapshot of relaxation and fun. It may be simple but it's often the simple things that bring the most enjoyment.
Not loading? Try the alternative link: One Scene 4.


Walkthrough Guide
(Please allow page to fully load for spoiler tags to be functional.)
One Scene 4 Walkthrough
Before beginning, be sure to select your language (English or Japanese) from the start screen.
Zoom in on the drawers under the table on the left:
Open the top drawer and take the (empty) TEAPOT.
Close and back out.
Examine the cup on the table center:
From inside the cup, get a NOTE.
Click to open the note: it's a clue.
Close and back up twice.
Zoom in on the crate next to the sink:
From this close-up angle, click the left side of the crate to look behind it:
Wedged between the crate and the wall is a ZIPPO LIGHTER. Take it.
Close and back out twice.
Now click on the sink. Click again to examine the faucet--the faucet handle is a puzzle:
Use the clue you found in the teacup to solve this.
Click the arrows on either side of the spiget left and right, in the correct pattern, to turn on the water.
SOLUTION:
Right-Right-Left-Left-Left
The Faucet Puzzle Explained:
Instead of viewing each picture clue individually...try connecting the dots...blue to blue and black to black to make one twisting line.
Recreate the twisting...or turning... with the faucet handle. That is why you need the answer you get:
right right left left left
Or, in other words: clockwise 2x and counterclockwise 3x.
The color change is meant to help you see where you first started and where you end up, point to point, as if you stopped at a gas station and asked me how to get somewhere, I'd say, "First drive to the blue dot. From there, continue to the black one, then make a hairpin turn to the next blue dot..." and so on.
With the water on, put the POT under the faucet to fill it with cold water.Close out of the POT (cold water) and back up.
Examine the tea warmer on the left side of the table:
Use the ZIPPO on the wick (red cover) to light it.
Then, place the POT of cold water on the tea warmer.
Immediately the water will heat up and reveal another clue.
Take the POT of HOT WATER and back up.
Click on the middle drawer to solve a the 3-button code:
The pot of hot water tells you which of the 3 buttons to push and in what order.
SOLUTION:
"A" (first button)
"N" (second button)
"S" (first button)
"W" (third button)
"E" (third button)
"R" (second button)
When you've pushed the buttons in the correct order, the drawer opens and you can get:
FLOWERING TEA.
Close and back out.
Examine the cup on top of the table again:
Put the FLOWERING TEA in the cup.
Fill the cup with hot water from the POT.
Now you have another clue.
Back up and zoom in on the calendar behind the cup to make use of this clue.
Now it's time to solve the door code (yes, already!)
Back up twice from the table and click on the door to view the 3-digit code box.
Put together the clues from the cup of flowering tea and the calendar to come up with a 3-digit number.
SOLUTION:
The first Monday (times) the fifth Saturday (plus) the second Friday =
128
Enter those numbers into the code box and click "OK".
The door will open to reveal yet another clue.
Take a look at the bottom drawer:
A hint just above the "OK" button tells you how to make sense of the clue behind the door.
Back up and look at the books on the right side of the table:
Pair the information from the books with the letters behind the door to create a 7-color button code.
SOLUTION EXPLAINED:
Number the letters behind the door from 1 to 9.
Each letter corresponds to a color; for example, R is red.
Now, order the colors based on the numbers on the books.
Start with the 8th letter, which is R, so the first button should be red.
Continue in that same vein for the others.
SOLUTION, DIRECT and TO THE POINT:
RED - GREEN - BLUE - YELLOW - WHITE
When you enter the correct color code, click "OK" to open the drawer:
Take the "BARL" (CROWBAR).
Close and back up twice.
Examine the crate again:
Use the CROWBAR on the top of the crate to get:
CLAMP (handle).
Put that away and click on the lid of the crate to open it:
Take the BEAR from inside the crate.
Close out of the bear and make a note of the design on the front of the crate.
Back up.
Examine the dark grey panel above the sink:
Use the CLAMP to open the panel.
If you're unsure what to do next, back up for a minute...
HINT:
Notice the words "HAND R" and "HAND L" on the wall?
SOLUTION:
View the BEAR from your inventory.
Move its left arm (the arm on your right) up into the air so it will be pointing at the "HAND L" written on the wall.
Close out of the close-up view of the bear.
Use the BEAR on the shelf (ya know, where it says "BEAR").
With the bear positioned properly, the controls drop down from the ceiling.
Ready to solve the drop-down 2-button control box?
Click the buttons in the correct order then click "OK."
The design on the front of the crate tells you how.
SOLUTION:
Push the buttons in this order:
top
bottom
top
top
bottom
bottom
top
bottom
top
bottom
"OK"
~*~ Congratulations, you're out! ~*~
Posted by: elle |
July 11, 2012 12:11 AM
|
July 11, 2012 12:11 AM