JayisGames.com is now available ad-free!
Jay is Games recommends Cheat Happens with 8,000+ games and 35,000+ trainers!

Quest in the Dark


  • Currently 3.9/5
  • 1
  • 2
  • 3
  • 4
  • 5
Rating: 3.9/5 (120 votes)
Comments (55) | Views (10,554)
GrimmrookQuest in the DarkRaise your hand if you think that six whole months is simply too long to wait until Halloween. Go on, don't be shy, I'm raising my hand too. Well for those of us who wait all year for Halloween to find us again, Quest in the Dark provides a good excuse for us to pause our scary movies and put our costume planning on hold.

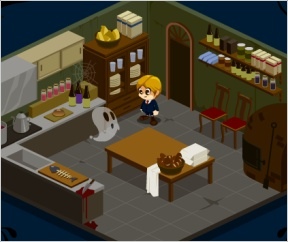
After picking an avatar and entering your name, you find out that you have somehow fallen down the "rabbit hole" and are trapped inside your own nightmare. An eerily cheerful host greets you and tells you that in order to escape, you must first find a magic potion. This is the only way out.

Using your mouse, navigate your avatar through the haunted mansion that looms before you, collecting items and solving puzzles as you go. Beware the various ghosts and skeletons that stand in your path (or don't. They aren't that bad, as it turns out), and above all else, don't forget to find that potion!

Quest in the DarkAnalysis: Perhaps the best way to describe Quest in the Dark would be Trapped for kids. There are many basic similarities: lots of items and puzzles, a dark motif, and an isometric layout with a point-and-click interface.

But Quest in the Dark is most definitely softened up for a younger crowd. The story line, for starters, is nowhere near as hardcore as Trapped's, and even the main bad guy is kind of cute and cuddly. The graphics are far more friendly and the puzzles are, for the most part, much simpler.

But don't be fooled. There are a few puzzles/tasks that can be elusive or tricky to get around. It's even more challenging because a majority of the items you collect are not actually employed in the game, but only add to your final score total.

Unfortunately the game does employ an isometric layout, which is very clunky and takes a while to get used to. Moreover, while the artistry is quite good and hits the mood it is going for perfectly, I think including hardly any sound at all was a missed opportunity. And finally, if I were to come up with any further gripes, it would have to be a kind of awkwardness in the dialogue, but I am forgiving on this front, given this is translated from an originally Japanese game.

But if you are willing to overcome the isometric design, Quest in the Dark is an exceptionally cute and surprisingly engaging point-and-click adventure. There's not nearly the depth you'll find in similar games, but the upside is that you can feel comfortable sharing this title with the little ones.

Play Quest in the Dark

Walkthrough Guide


(Please allow page to fully load for spoiler tags to be functional.)

Hooray! A hint-through. It works, too, since important items are not randomly located.


N E
.X
W S

Enter the house.

Check out the upstairs door and the east door here. Remember that the downstairs one needs a Cat Key.

Go through the double doors.

Check out everything in here.

You should have found one important item.

The battery.

Note the clock and head into the kitchen.

Check out everything in here, too.

You should have found one important item.

A gear.

Now, what could that gear be used for?

Something missing a part...

Like the clock!

"Something sound from above." So, go check it out.

Back out the double doors- Ooh, the upstairs is open. Lets go check it out!

Three pedestals and three more doors.

The north door is locked, so we'll come back to that. The east door needs a Dog Key. Remember that.

Go through the west door.

Go in the first door you come to.

Be sure to check everything in here.

You should have found two important objects.

The Dog Key and a Disk.

Okay, now, we could go and open the Dog Key room. But, not yet. Continue on down the hall and note that funny spot on the wall.

Huh, that's a weird looking door. Let's go in there first.

Oh, we need a light. Darn.

Now head south.

Check out those danger crates.

Maybe something dangerous fell out of them?

It would be nearby them.

The steps beside them have a bomb.

Now, what could we do with that? Oh! Right! That crack in the hallway!

For kicks, talk to the ghost before going in the hole you just made.

Check out everything in here, too.

Again, two important objects.

The ID card and a Triangle.

Okay, we're all done in this hallway for now. Head to the Dog Key room.

We've got two exits from here. Stairs going down and a metal door. Go in the metal door, first.

A library with LOTS of things to look at.

When you're done checking this room at, you should have two important items.

The flashlight and a memo A.

Oh! Wait! Now we have light! Head back to the dark room.

Oh...The batteries are out. Wait, don't we have some?

Really. We do. Put them in the flashlight, already.

Now we can see. Exploring here, you should find one important item.

The Cat Key!

Now, before we go in the cat key door, we have something else to do. Go down the stairs in the Dog Key room.

There's an elevator and a power switch. Flip the switch so you don't have to backtrack later, then go down the elevator.

In the basement you should find one important item.

The Square

Having trouble? Directions from the elevator:

N, N, W, S

Now, head back up the elevator into the Cat Key room.

In the far NE corner, there is a switch hidden behind the cabinet. Press it.

Aha! We're on the other side of those bars!

Head through the double doors...

And into a laboratory!

Exploring this room, you should find four important items!

Dark matters G, M, R, and V.

Now, use the big machine.

Puzzle time!

This one isn't hard. I promise.

Its an alphanumeric code. a=1, b=2...z=26. Put the letters in the right slots and you get...

The Miracle Potion!

Now, head back to the three pedestals.

A circle, triangle, and square...These look familiar...

Duh, put yours into the slots.

Head down the hallway

Check everything and be sure to find one important object.

The memo B.

Now, see that safe?

We need a passcode.

But we don't have one.

Do we?

We do.

Memos A and B.

Open it and get the Gold Key.

Now, head ALL the way out to the gate.N E
X
W S

Enter the house.

Check out the upstairs door and the east door here. Remember that the downstairs one needs a Cat Key.

Go through the double doors.

Get the battery from the broken vase.

Note the clock and the fireplace.

Head into the kitchen.

Check out the cabinets for the gear.

Put the gear in the clock.

"Something sound from above." So, go check it out.

Back out the double doors- Ooh, the upstairs is open. Lets go check it out!

Three pedestals and three more doors.

The north door is locked, so we'll come back to that. The east door needs a Dog Key. Remember that.

Go through the west door.

Go in the first door you come to.

Be sure to check everything in here.

You should have found two important objects.

The Dog Key and a Disk.

Okay, now, we could go and open the Dog Key room. But, not yet. Continue on down the hall and note that funny spot on the wall.

Huh, that's a weird looking door. Let's go in there first.

Oh, we need a light. Darn.

Now head south.

Check out those danger crates.

Maybe something dangerous fell out of them?

It would be nearby them.

The steps beside them have a bomb.

Now, what could we do with that? Oh! Right! That crack in the hallway!

For kicks, talk to the ghost before going in the hole you just made.

Check out everything in here, too.

Again, two important objects.

The ID card and a Triangle.

Okay, we're all done in this hallway for now. Head to the Dog Key room.

We've got two exits from here. Stairs going down and a metal door. Go in the metal door, first.

A library with LOTS of things to look at.

When you're done checking this room at, you should have two important items.

The flashlight and a memo A.

Oh! Wait! Now we have light! Head back to the dark room.

Oh...The batteries are out. Wait, don't we have some?

Really. We do. Put them in the flashlight, already.

Now we can see. Exploring here, you should find one important item.

The Cat Key!

Now, before we go in the cat key door, we have something else to do. Go down the stairs in the Dog Key room.

There's an elevator and a power switch. Flip the switch so you don't have to backtrack later, then go down the elevator.

In the basement you should find one important item.

The Square

Having trouble? Directions from the elevator:

N, N, W, S

Now, head back up the elevator into the Cat Key room.

In the far NE corner, there is a switch hidden behind the cabinet. Press it.

Aha! We're on the other side of those bars!

Head through the double doors...

And into a laboratory!

Exploring this room, you should find four important items!

Dark matters G, M, R, and V.

Now, use the big machine.

Puzzle time!

This one isn't hard. I promise.

Its an alphanumeric code. a=1, b=2...z=26. Put the letters in the right slots and you get...

The Miracle Potion!

Now, head back to the three pedestals.

A circle, triangle, and square...These look familiar...

Duh, put yours into the slots.

Head down the hallway

Check everything and be sure to find one important object.

The memo B.

Now, see that safe?

We need a passcode.

But we don't have one.

Do we?

We do.

Memos A and B.

Open it and get the Gold Key.

Now, head ALL the way out to the gate.

If there's anything at all you want to do in the house, do it now.

Go in the shed.

Check out that mirror.

Notice anything?

The stairs.

Go down where they should be.

Now, you're in a maze.

And, unfortunately, I can't help you too much here. The location of the exit is random.

Find and step into the blue portal and talk to the man to exit.

Quest in the Dark Walkthrough

Notes on the Walkthrough:

  • Learn from first screen that you need to find the "Miracle Potion" to wake up from the nightmare! It is possible to complete the game without making the potion, but you will be told that you have failed!

  • There are a handful of critical items to progress through the game and a huge number of items that are just worth points for your final score. The critical items are in the same place every time, so this walkthrough will help you with those (and I've noted them in bold). As for the rest, they may not be in the same places as listed here. However it is likely that some items will be in the places I've noted throughout this guide. Try clicking everywhere if you want to find the bonus items - often on tables, in vases, and on statues.

Courtyard and First Floor

  1. Notice you need a golden key to open the outside gate.

  2. Enter the house.

  3. Examine the stone knight to get the Iron Spear.

  4. Enter the double doors to the North - enter dining room.

  5. Examine the broken vase to get the Battery.

  6. Notice that the Old Clock is broken.

  7. Exit dining room by West doors - enter kitchen.

  8. Examine cabinet to get Gear.

  9. Examine counter on West wall twice to get Bread and Bread(10 year).

  10. Examine oven to get Blue Jewel.

  11. Return to Dining room and use Gear on Old Clock (use an item by clicking on the item in your inventory and selecting "Use"). You will hear a sound from upstairs...

  12. Return to main entryway and notice that the door to the East requires a Cat Key.

Second Floor

  1. Examine the mounted pot on the East wall to get the Penny.

  2. Enter the door at the top of the stairs - Red Rug room. Notice the square, triangle, and circle molds in the center of the room.

  3. Examine the vase on the table to obtain the Poison.

  4. Enter the doorway on the West wall and enter the hallway. Go into the first door on the North side - the bedroom.

  5. Examine the closet to get the Dog Key.

  6. Examine the bedside table to get the Disk.

  7. Leave the room and go further south down the hallway. On the North wall, notice and examine the large crack in the hallway. Continue on to the West doorway. This leads to another hallway.

  8. Try entering the North doorway with the metal frame - it will be too dark to enter.

  9. From the hallway, enter the South doorway - it will be a Maroon storage room.

  10. On the three shelves next to the door, click on the left of the bottom shelf to get the Old Cup. Examine the small stairs next to the boxes labeled DANGER to obtain the Bomb.

  11. While standing to the right of the pile of books on the ground, examine the bookshelves. Obtain the Nut.

  12. Return to the hallway and back to the crack in the wall.

  13. Use the bomb on the crack in the wall. A hidden room appears!

  14. In the hidden room, grab the ID Card and Triangle from the bedside table.

  15. Return to the Red Rug room to the East. You can now open the door to the East with the Dog Key.

  16. I'll call this room the Blue Rug room. Examine the table with the vase to get the Lime Crystal.

  17. Unlock the door on the East wall with the ID Card.

  18. Examine the pile of books on the floor in the East corner to get the Yen.

  19. Examine the table in the center of the room to get Memo A. Examine it again while standing next to the fallen chair to get the Flashlight.

  20. Leave the room and continue West until you return to the dark room at the end of the hallway.

  21. Enter the room, and select the flashlight from your inventory. The battery is empty. Luckily we have one - select the battery in your inventory and click Use. Now you can use the flashlight in the dark room.

  22. Move around the room until you find the bedside table (on the North wall). Examine to find the Cat Key.

  23. Go back upstairs to the Blue Rug room. Enter the North room with the chair next to it. Use the elevator on the North wall. It takes you to the Basement.

The Basement

  1. Click on the Knight statue to get Sushi B. Enter the doorway to the North. Take the door on the right, then left, the right again. You should be in a room with a Red Chest.

  2. Examine the chest to get the Gold Statue. Examine the knight statue to get the Red Crystal.

  3. Leave the room, go left, left then right. You should be in another room with a Red Chest. Examine this Chest to get the Square.

  4. Retrace your steps and return to the first floor using the elevator.

  5. While you're in the elevator room, use the lever on the East wall to turn on the Master Power Supply.

Back Upstairs

  1. Return to the Red Rug room and use the Disk, Square, and Triangle on the three pedestals. This will open the door in the back of the room.

  2. Follow the Hallway down to the doorway - it leads to a Bedroom.

  3. Examine the table on the SW wall to get matches. Get the Magical Mirror from the bedside table with the mirror. Get Memo B next to the Wardrobe.

  4. You now have two memos, A and B. Each should have two numbers. The numbers on the memos are the combination to the safe in the order A, B. Get the Golden Key from the safe.

  5. Return to the dining room and use the matches on the unlit Fireplace - you will receive a scroll showing a list of all the items that can be found in the game.

Making the Potion

  1. Return downstairs to the main entrance. You can now enter the room on the NE wall using the Cat Key.

  2. Examine the knight statue from the front to obtain the Silver Spear.

  3. Examine the shelf with the wine and vases to get the Dollar.

  4. Notice that the wall near the wardrobe is discolored. Stand in the corner behind the wardrobe and examine to open a secret room.

  5. You're on the other side of the bars in the elevator room. Examine the small crate to find a Crystal.

  6. Go through the double doors to find the laboratory.

  7. Examine the table to find Dark Matter R. Examine pile of books on table to find Cross. Examine shelves with vials twice to find Dark Matter M and Dark Matter G. Examine table with creatures in jars to find Dark Matter V.

  8. Go to the mysterious machine and turn it on. It should be functional if you turned on the main power in the elevator room earlier.

  9. To use the machine, match the potions to the number that corresponds to its letter's position in the alphabet. G = 7, M = 13, R = 18, V = 22.

  10. You will receive the Miracle Potion when you do this correctly.

Finish the Game

  1. Return to the front courtyard outside the house where you started the game. Unlock the gate with the Golden Key.

  2. You'll be in a yard with a small shack. Examine the gravestone to find the Toilet Paper.

  3. Enter the shack. You'll find a room with a large mirror. Notice the doorway in the Mirror...

  4. Move around the room until you are standing where the doorway should be in the room, according to the mirror. You will fall into an underground cavern.

  5. Examine the knight to get the rare stone.

  6. The map of the maze seems to change with every game. If you find a portal, don't walk over it yet. Explore until you find a ghost who says he can't see himself. Use the Magic Mirror on him, and he will give you a Diamond Ring in gratitude.

  7. Now explore until you find a room with a green portal in it. You will warp to a white room - talk to the man inside.
    He will tell you your score - it depends on whether you made the potion, and how many items you found.

55 Comments

I don't mean to burst your bubble, but it's six, not four, months until Halloween.

Reply

Wow, I never get to the page right when someone posts a new game. This is kinda a new experience for me.

1.

I got through all the rooms as far as I know, and I found the gold key. Per the skeleton's instructions, I opened the gate with said gold key, which lead to a little shed.

2.

Then I went into the shed and there's this huge mirror. I have no idea how to progress beyond the mirror.

3.

I got a scroll that lists all 84 possible objects to collect in the game, but alas, I can't find all 84 at this time. Is this a list of *possible* objects to find, or is it a *mandatory* list, i.e. you have to find everything on it before you can pull off an Alice with that looking glass?

Reply

A-HA!

I figured out my personal problem in the game listed earlier...

Walk into the shed. Walk in front of the mirror.

Look closely at the mirror.

Compare everything in the room you're in with everything in the mirror.

If you look hard there's a door in the mirror that isn't in the room. Walk to the place where the door is and walk through the wall.

Reply

Well, I finished it. Cute and charming but not all that great.

Re scroll - Unless the boxy/barrelled/chairful rooms have random spots to pick up items that I didn't notice on playing through twice, I'm reasonably certain that it's a list of all the potential items you can pick up (aside from all the puzzle items and a very few score items).

Re escape -

Once you fall down beneath the shack, there's no going back; there is an apparent warp that shows up once you find an item in the shack's basement, but that will end your game instead of taking you back to the house (which means that if you haven't figured out how you're supposed to get the solution for the miracle potion and explored in the shack's basement because that's how adventure games work, you will apparently be in an unwinnable situation).

I couldn't figure out how I was supposed to learn the secret to making the potion, so I just ran through all the combinations until I got it right. Anyone else have any ideas on what has to be found? ('cause if that's what you're supposed to do that is rather poor design)

Reply

Warning for people with miniature humans:

If you don't approve of your miniature humans playing games with foul language, you might want to re-consider the G-rating on this one. One object you pick up is a four-letter word that starts with "s." Ordinarily I wouldn't be so oblique about the word in question, but this game *is* rated kid-friendly.

Further warning (I dunno if this is a spoiler or not, but I'm not taking chances):

There's a scroll you can pick up in-game that lists all the objects that are available to pick up. Most of the objects are spelled out (toilet paper, knife, poison, etc.), but a few of them are listed n/a, and since the "s" word wasn't spelled out, one can assume that it's one of the n/a words on the list. Since there are several n/a objects on the list, one could assume that those items are also objectionable in some way, so you may want to think twice about letting smaller people play this game. Just a thought.

[Edit: Thanks for pointing that out. We've updated the rating based on this. -Jay]

Reply

BDR -

Well, I'm about to go to bed so I don't remember exactly where you get the potions, but they're in the room with the mixing machine. Each potion has a name like "Potion M" or something, and the mixing machine has four tubes that have different numbers. You match the letter to its corresponding number in the alphabet. Example - if you have "Potion A" or somesuch, then it's in the slot that says 1, or if you have "Potion R" it's in the 18 slot. ..."R" *is* the 18th letter of the alphabet, isn't it? Bah.

Reply

BDR

The solution for the miracle potion uses the code a=1, b=2 etc.

Reply

Weird game. Mostly fun, but the random layout and random location of things makes it difficult to enjoy. It even rearranges things if you reload your game. Oh, and the control mechanism and path-finding algorithm are bordering awful.

Also, it wasn't obvious that

boxes and barrels apparently don't contain stuff. This leads to a lot of unnecessary clicking.

Finally,

The magic disc under the shed apparently shows up after

you leave the room it is in and return to it. No object necessary.

Reply

Regarding the "s" word. The Japanese don't have curse words in the sense that English speakers do. The closest analogue to the "s" word is, "kuso." It is a slang term that, while not polite, is not particularly offensive or dirty either. Children use this word and it is also common to find in children's stories (even traditional stories). Culturally, the Japanese don't see much problem in scatological humor directed at children. You'll even find cutsey anthropomorphic talking scat in cartoons.

When they translated this game, they probably didn't take that cultural difference into account. :-)

Reply

I cannot find the triangle shape!

Reply
fuzzyface April 30, 2009 4:43 AM

Oh man do I *hate* animated flickering advertisments next to a game. Just makes ones eyes and ones whole self after a while tired...

Reply

One thing I don't get - if you make a game for kids, isn't ease of gameplay one of the most important things on a checklist?

I mean - graphics are nice, it all looks all cutesy and friendly, but moving your avatar is horrible. You must use the mouse and it only walks in straight directions which a kid would find frustrating in seconds. Secondly, your way of interacting with the world is "bumping" into stuff, noticing an exclamation mark above your head and THEN clicking on an object. What's wrong with just clicking an object, upon which the dude would walk up to it and perform an action? And don't even get me started on "monsters"... that frikkin ghost cornered me in the kitchen and refused to leave, just kept repeating over and over again how he's trying to repair the clock (by prancing around the kitchen, but I'll let it slide).

I am really amazed when so much effort goes into certain facets of the game yet other ones are horribly lazy. Instead of creating 20 different characters they should have made one which could actually be controlled by a kid...

Reply
fuzzyface April 30, 2009 7:43 AM

baba, I conside this whole "for kids" thing a wrong, an too early analysis. This game just isn't for kids.

My summary: I don't like this game.

First I was positively suprised, from the screenshot I expected something like a shallow "get the gold, evade the monsters" game. Than a few moments in the game, the skeleton says "we are no monsters", and I go ooohh maybe there is more into it, and maybe its more really an adventure. Quite happily I got a few rooms into the game, when the sheer mass of items got me stumped, later I get, there isn't much of real puzzles here, its just sheer overweight with red herrings. Some reallife happenings, later playing again, suddendly quite some item locations are mixed, owww. Then I see things in my inventory, no longer knowing what they was, and no way to identify, this what gets me, owww bad game. Okay, then I got so far as "falling into the shed", run around in the basement, and a fat guy telling me "you failed in your quest". owww. Again I thing the autor just missed the point what adventure games should any be like. I click on close window, and won't ever open that one again.

Reply

First impression:
+1 for including a character of color in the boys' section of the avatars.
+50 for even including girl avatars.
-100 for only white girls to choose from.

Well, ok, the ninja could be any ethnicity. A good try that quickly soured.

Reply
Schmorgluck April 30, 2009 9:25 AM

Yet another game that is unplayable under Linux, due to the everlasting bug in the Flash plugin that truncates texts. When a ghost tells me "I'm retrieving parts of the", I suppose I may have to give him something at a moment in the game, but what? And when a skeleton tells me "Do you have the", I'm quite certain I'll have to give it something, but what? And that's just two examples among several others.
When Adobe released Flash 10, I really hoped they would correct the most annoying bugs of the Linux version, but no, they didn't.

Reply

@fuzzyface: why don't you resize the window? The ads are indeed a problem, but you're smarter aren't you?

Reply

Hmm, I need a light...

Reply

... and a

cat key

Reply

I can't even figure out how to get started. I found two or three rooms and all the other doors are locked. Anyone want to give a hint? This is annoying.

Reply

ads next to game = absurdly annoying

Reply
wlangford April 30, 2009 12:44 PM

Hooray! A hint-through. It works, too, since important items are not randomly located.


N E
.X
W S

Enter the house.

Check out the upstairs door and the east door here. Remember that the downstairs one needs a Cat Key.

Go through the double doors.

Check out everything in here.

You should have found one important item.

The battery.

Note the clock and head into the kitchen.

Check out everything in here, too.

You should have found one important item.

A gear.

Now, what could that gear be used for?

Something missing a part...

Like the clock!

"Something sound from above." So, go check it out.

Back out the double doors- Ooh, the upstairs is open. Lets go check it out!

Three pedestals and three more doors.

The north door is locked, so we'll come back to that. The east door needs a Dog Key. Remember that.

Go through the west door.

Go in the first door you come to.

Be sure to check everything in here.

You should have found two important objects.

The Dog Key and a Disk.

Okay, now, we could go and open the Dog Key room. But, not yet. Continue on down the hall and note that funny spot on the wall.

Huh, that's a weird looking door. Let's go in there first.

Oh, we need a light. Darn.

Now head south.

Check out those danger crates.

Maybe something dangerous fell out of them?

It would be nearby them.

The steps beside them have a bomb.

Now, what could we do with that? Oh! Right! That crack in the hallway!

For kicks, talk to the ghost before going in the hole you just made.

Check out everything in here, too.

Again, two important objects.

The ID card and a Triangle.

Okay, we're all done in this hallway for now. Head to the Dog Key room.

We've got two exits from here. Stairs going down and a metal door. Go in the metal door, first.

A library with LOTS of things to look at.

When you're done checking this room at, you should have two important items.

The flashlight and a memo A.

Oh! Wait! Now we have light! Head back to the dark room.

Oh...The batteries are out. Wait, don't we have some?

Really. We do. Put them in the flashlight, already.

Now we can see. Exploring here, you should find one important item.

The Cat Key!

Now, before we go in the cat key door, we have something else to do. Go down the stairs in the Dog Key room.

There's an elevator and a power switch. Flip the switch so you don't have to backtrack later, then go down the elevator.

In the basement you should find one important item.

The Square

Having trouble? Directions from the elevator:

N, N, W, S

Now, head back up the elevator into the Cat Key room.

In the far NE corner, there is a switch hidden behind the cabinet. Press it.

Aha! We're on the other side of those bars!

Head through the double doors...

And into a laboratory!

Exploring this room, you should find four important items!

Dark matters G, M, R, and V.

Now, use the big machine.

Puzzle time!

This one isn't hard. I promise.

Its an alphanumeric code. a=1, b=2...z=26. Put the letters in the right slots and you get...

The Miracle Potion!

Now, head back to the three pedestals.

A circle, triangle, and square...These look familiar...

Duh, put yours into the slots.

Head down the hallway

Check everything and be sure to find one important object.

The memo B.

Now, see that safe?

We need a passcode.

But we don't have one.

Do we?

We do.

Memos A and B.

Open it and get the Gold Key.

Now, head ALL the way out to the gate.N E
X
W S

Enter the house.

Check out the upstairs door and the east door here. Remember that the downstairs one needs a Cat Key.

Go through the double doors.

Get the battery from the broken vase.

Note the clock and the fireplace.

Head into the kitchen.

Check out the cabinets for the gear.

Put the gear in the clock.

"Something sound from above." So, go check it out.

Back out the double doors- Ooh, the upstairs is open. Lets go check it out!

Three pedestals and three more doors.

The north door is locked, so we'll come back to that. The east door needs a Dog Key. Remember that.

Go through the west door.

Go in the first door you come to.

Be sure to check everything in here.

You should have found two important objects.

The Dog Key and a Disk.

Okay, now, we could go and open the Dog Key room. But, not yet. Continue on down the hall and note that funny spot on the wall.

Huh, that's a weird looking door. Let's go in there first.

Oh, we need a light. Darn.

Now head south.

Check out those danger crates.

Maybe something dangerous fell out of them?

It would be nearby them.

The steps beside them have a bomb.

Now, what could we do with that? Oh! Right! That crack in the hallway!

For kicks, talk to the ghost before going in the hole you just made.

Check out everything in here, too.

Again, two important objects.

The ID card and a Triangle.

Okay, we're all done in this hallway for now. Head to the Dog Key room.

We've got two exits from here. Stairs going down and a metal door. Go in the metal door, first.

A library with LOTS of things to look at.

When you're done checking this room at, you should have two important items.

The flashlight and a memo A.

Oh! Wait! Now we have light! Head back to the dark room.

Oh...The batteries are out. Wait, don't we have some?

Really. We do. Put them in the flashlight, already.

Now we can see. Exploring here, you should find one important item.

The Cat Key!

Now, before we go in the cat key door, we have something else to do. Go down the stairs in the Dog Key room.

There's an elevator and a power switch. Flip the switch so you don't have to backtrack later, then go down the elevator.

In the basement you should find one important item.

The Square

Having trouble? Directions from the elevator:

N, N, W, S

Now, head back up the elevator into the Cat Key room.

In the far NE corner, there is a switch hidden behind the cabinet. Press it.

Aha! We're on the other side of those bars!

Head through the double doors...

And into a laboratory!

Exploring this room, you should find four important items!

Dark matters G, M, R, and V.

Now, use the big machine.

Puzzle time!

This one isn't hard. I promise.

Its an alphanumeric code. a=1, b=2...z=26. Put the letters in the right slots and you get...

The Miracle Potion!

Now, head back to the three pedestals.

A circle, triangle, and square...These look familiar...

Duh, put yours into the slots.

Head down the hallway

Check everything and be sure to find one important object.

The memo B.

Now, see that safe?

We need a passcode.

But we don't have one.

Do we?

We do.

Memos A and B.

Open it and get the Gold Key.

Now, head ALL the way out to the gate.

If there's anything at all you want to do in the house, do it now.

Go in the shed.

Check out that mirror.

Notice anything?

The stairs.

Go down where they should be.

Now, you're in a maze.

And, unfortunately, I can't help you too much here. The location of the exit is random.

Find and step into the blue portal and talk to the man to exit.

If there's anything at all you want to do in the house, do it now.

Go in the shed.

Check out that mirror.

Notice anything?

The stairs.

Go down where they should be.

Now, you're in a maze.

And, unfortunately, I can't help you too much here. The location of the exit is random.

Find and step into the blue portal and talk to the man to exit.

Reply

Ugh, the combination of an awkward interface and cluttered rooms where you have to search every location is pretty toxic.

It took me forever to find the flashlight in the library, and I'm still looking for dark matter V in the lab. Any suggestions on how to do it?

There's very little visual indication of where you might find useful items, and the clunky navigation makes it very awkward to be sure you've searched every location. The developers should take a lesson from "Trapped": point and click works better than point, hold, and walk around awkwardly in random directions.

Reply

LOL @ Shudog. that was one of the things I was wondering personally as well. The ninja does seem to have the most ambiguous ethnicity which is probably why I chose it :P

-1 shroom for the unpractical way of movement as well. what a tiresome chore :(

Reply
fuzzyface April 30, 2009 6:49 PM

cab, actually I did that, but it didn't save me from being muffed. Oh, and one advertisement even got overlayed into the game while playing.

Reply

Cute game, the s word is not considered a bad word by some people in other countries, so it is unfortunate that the one occurrence prevents this game from being a kids' game for people who are taught otherwise.

Nice graphics, and it was fun, though of course the controls weren't that great and I really protest to being penalized for finding certain items. I really don't see the need for several characters and things being placed randomly when they could have just allowed to arrow key movement or something.

Reply

Okay, so I went to the creator's game to check out the Japanese version.

Oddly enough, the start screen has better English than the English version! "PLAY GAME" instead of "QUEST" and "HIGH SCORES" instead of "HISCORES."
The Japanese version even includes a How to Play! I wonder why it was taken out in place for advertising their meetnik website. Funny, though, that the Japanese version I found does NOT have the red exclamation mark feature!

Reply

Out with 294,749 points, which doesn't seem particularly good compared to other scores. But the score seems arbitrary and not within one's control, since many items are random. Depending upon chance, they are either available to be found or they aren't. Furthermore, some items penalize you with negative points. You can't decline it once you know what it is, and you can't know what it is until you've acquired it. And since they are randomly placed, even repeat players cannot avoid them.

At least one item I found twice:

The square for the pedestal. Worth 8000 points, too.

The isometric design was indeed clunky. But after a while, I was able to maneuver my character quite well and it really didn't bother me anymore. The ads were another matter. If someone knows how to avoid them, by all means please share.

While I enjoyed it during play, I found the end to be very unsatisfying. Too abrupt. So much so that I checked the hint-through afterward to make sure I didn't miss something important. BTW, it's messed up. It repeats huge sections. Maybe a mod can fix it.

All in all, I think the game would be much improved if one could find ALL the items. And that more actually be USED for something. For example:

The magic potion on a ghost, or the magical mirror with the wall mirror in the shed.

Finally, give the player more control over his/her score. That would encourage repeated plays as people try to better their score. As it is, I know I won't. Nevertheless, as I said before, I still enjoyed it while I played it.

Reply

I think we need a better walkthrough. I can't find half of the stuff using it.

Reply

the magical mirror can be used on

the ghost who whines that he cant see himself, afterwaeds he gives you a diamond ring or something

Reply

RE: The "s" word thing -

I know that in other countries words Americans consider bad aren't a problem, just as the word "bloody" is offensive in other countries but is acceptable in the US. I simply brought it up as a precaution, because some people *do* have a problem with their kids reading it. I'm perfectly fine with it, and enjoyed the game, but I wouldn't let my nephew play it, is all. I mentioned the language just as a precaution. It's better that people with minature humans know that there's language in it than have it sprung on them at an inopportune time.

Reply
wlangford April 30, 2009 11:02 PM

My apologies about the walkthrough, Paul. When I wrote it, I'd already been through once, so I didn't think to explain where each item was in greater detail. Unless you meant the non-essential stuff, because that stuff is in random spots every time.
Its late here, though, so I'm heading to bed. I'll try to improve on it tomorrow, if time permits.

Reply
glitter May 1, 2009 1:07 AM

cute game but...
wow the ending was

very disappointing

and what's up with the

creepy monopoly guy?

Reply

Thanks ngebe! That's cool. Maybe some other items have uses as well. It would still be even cooler if you could collect all the items, though.

Reply

Ha, top 20 the first time thru :-).

Bummer that there are collectibles that cause negative points.

And moving wasn't too bad...just hold down the left mouse button and move the cursor.

Reply

ok Will. Please do. basically just try to give directions,like forward,left,right,etc. and if possible,you or someone should make a map of the rooms,in case we still get confused.Thanks.

Reply

Well, I got as far as the walkthrough could take me. I never found

any scroll to tell me what I could collect, and now I'm aimlessly wandering the basement under the shed, lost, going in circles. I found one item by sheer random luck. How am I supposed to finish the game properly?

Reply
seaflower May 1, 2009 7:22 PM

I hardly dare to admit that I enjoyed playing the game...:) I found the clunky movement no problem... it's a bit nostalgic really... reminds me of many old games.
Didn't need the walkthrough and ended up with a bronze medal.. Yay! :)

Reply
brokenrecord May 1, 2009 7:45 PM

My little girl just found some coffee. She reeeeeeeally needed it.

Reply
ottoman May 1, 2009 9:35 PM

Matt W:

V Dark Matter is by the five weird tubes on the left.

Hope that helps!

Reply
Anonymous May 1, 2009 10:02 PM

To get the scroll

light the fireplace with matches

Reply

Your walkthrough repeats itself...

Reply
Anonymous May 2, 2009 11:25 AM

Some of those "random" objects can be used with no effect to the overall game. If you find the "magic mirror," you can give it to the ghost in the maze under the shed, and he will give you a diamond ring. The skeletons and ghosts sometimes give you a hint as to what object they want (the ghost says "I can't see myself" hence the magic mirror).

Reply

Does anyone have a proper walkthrough they can write for the board? Some of the instructions are confusing. No offense, but I want to try this game again, and would like something easier, as I am autistic and I get confused on directions unless they are told to me a certain way. Thanks.

Reply

JIGuest--

That thing you need to get the scroll, where is it?

Reply

Never mind:

The matches are in the room north of the room with the triangle, square, and disc molds. They're on the table in the first vase.

Reply
octochan May 4, 2009 6:57 PM

That was fun, but a little disappointing. Yes, there's a scroll that tells you everything that might be found in the game, but there's no way to find ALL the items at one go, since there are more items than there are places to find them. And I don't like the way it randomly generates items, because you can't avoid the negative point ones. With some better puzzles and some tweaking to the item system, this could be a really good game.

Reply

I could have been clearer:

They're in the room with the safe.

Reply

I was really hoping I could play this game, but the walkthrough is not specific enough. Like "in the pantry is this item" or "behind the bed is this item" etc. All it says is "you'll find this and this" and it takes a while to find them. Anyway.. :(

[Edit: I'm sorry, Paul. We're trying to get a more specific walkthrough posted. Hopefully soon. -Pam]

Reply

Ok. I hope I am not being annoying or anything. I only made it like 15% of the way and the rest I couldn't understand. I'll try to be patient. Sorry if I bugged anyone.

[Edit: It's no bother, Paul. Eileen just posted another walkthrough that will hopefully be more helpful to you. -Pam]

Reply

Quest in the Dark Walkthrough

Notes on the Walkthrough:

  • Learn from first screen that you need to find the "Miracle Potion" to wake up from the nightmare! It is possible to complete the game without making the potion, but you will be told that you have failed!

  • There are a handful of critical items to progress through the game and a huge number of items that are just worth points for your final score. The critical items are in the same place every time, so this walkthrough will help you with those (and I've noted them in bold). As for the rest, they may not be in the same places as listed here. However it is likely that some items will be in the places I've noted throughout this guide. Try clicking everywhere if you want to find the bonus items - often on tables, in vases, and on statues.

Courtyard and First Floor

  1. Notice you need a golden key to open the outside gate.

  2. Enter the house.

  3. Examine the stone knight to get the Iron Spear.

  4. Enter the double doors to the North - enter dining room.

  5. Examine the broken vase to get the Battery.

  6. Notice that the Old Clock is broken.

  7. Exit dining room by West doors - enter kitchen.

  8. Examine cabinet to get Gear.

  9. Examine counter on West wall twice to get Bread and Bread(10 year).

  10. Examine oven to get Blue Jewel.

  11. Return to Dining room and use Gear on Old Clock (use an item by clicking on the item in your inventory and selecting "Use"). You will hear a sound from upstairs...

  12. Return to main entryway and notice that the door to the East requires a Cat Key.

Second Floor

  1. Examine the mounted pot on the East wall to get the Penny.

  2. Enter the door at the top of the stairs - Red Rug room. Notice the square, triangle, and circle molds in the center of the room.

  3. Examine the vase on the table to obtain the Poison.

  4. Enter the doorway on the West wall and enter the hallway. Go into the first door on the North side - the bedroom.

  5. Examine the closet to get the Dog Key.

  6. Examine the bedside table to get the Disk.

  7. Leave the room and go further south down the hallway. On the North wall, notice and examine the large crack in the hallway. Continue on to the West doorway. This leads to another hallway.

  8. Try entering the North doorway with the metal frame - it will be too dark to enter.

  9. From the hallway, enter the South doorway - it will be a Maroon storage room.

  10. On the three shelves next to the door, click on the left of the bottom shelf to get the Old Cup. Examine the small stairs next to the boxes labeled DANGER to obtain the Bomb.

  11. While standing to the right of the pile of books on the ground, examine the bookshelves. Obtain the Nut.

  12. Return to the hallway and back to the crack in the wall.

  13. Use the bomb on the crack in the wall. A hidden room appears!

  14. In the hidden room, grab the ID Card and Triangle from the bedside table.

  15. Return to the Red Rug room to the East. You can now open the door to the East with the Dog Key.

  16. I'll call this room the Blue Rug room. Examine the table with the vase to get the Lime Crystal.

  17. Unlock the door on the East wall with the ID Card.

  18. Examine the pile of books on the floor in the East corner to get the Yen.

  19. Examine the table in the center of the room to get Memo A. Examine it again while standing next to the fallen chair to get the Flashlight.

  20. Leave the room and continue West until you return to the dark room at the end of the hallway.

  21. Enter the room, and select the flashlight from your inventory. The battery is empty. Luckily we have one - select the battery in your inventory and click Use. Now you can use the flashlight in the dark room.

  22. Move around the room until you find the bedside table (on the North wall). Examine to find the Cat Key.

  23. Go back upstairs to the Blue Rug room. Enter the North room with the chair next to it. Use the elevator on the North wall. It takes you to the Basement.

The Basement

  1. Click on the Knight statue to get Sushi B. Enter the doorway to the North. Take the door on the right, then left, the right again. You should be in a room with a Red Chest.

  2. Examine the chest to get the Gold Statue. Examine the knight statue to get the Red Crystal.

  3. Leave the room, go left, left then right. You should be in another room with a Red Chest. Examine this Chest to get the Square.

  4. Retrace your steps and return to the first floor using the elevator.

  5. While you're in the elevator room, use the lever on the East wall to turn on the Master Power Supply.

Back Upstairs

  1. Return to the Red Rug room and use the Disk, Square, and Triangle on the three pedestals. This will open the door in the back of the room.

  2. Follow the Hallway down to the doorway - it leads to a Bedroom.

  3. Examine the table on the SW wall to get matches. Get the Magical Mirror from the bedside table with the mirror. Get Memo B next to the Wardrobe.

  4. You now have two memos, A and B. Each should have two numbers. The numbers on the memos are the combination to the safe in the order A, B. Get the Golden Key from the safe.

  5. Return to the dining room and use the matches on the unlit Fireplace - you will receive a scroll showing a list of all the items that can be found in the game.

Making the Potion

  1. Return downstairs to the main entrance. You can now enter the room on the NE wall using the Cat Key.

  2. Examine the knight statue from the front to obtain the Silver Spear.

  3. Examine the shelf with the wine and vases to get the Dollar.

  4. Notice that the wall near the wardrobe is discolored. Stand in the corner behind the wardrobe and examine to open a secret room.

  5. You're on the other side of the bars in the elevator room. Examine the small crate to find a Crystal.

  6. Go through the double doors to find the laboratory.

  7. Examine the table to find Dark Matter R. Examine pile of books on table to find Cross. Examine shelves with vials twice to find Dark Matter M and Dark Matter G. Examine table with creatures in jars to find Dark Matter V.

  8. Go to the mysterious machine and turn it on. It should be functional if you turned on the main power in the elevator room earlier.

  9. To use the machine, match the potions to the number that corresponds to its letter's position in the alphabet. G = 7, M = 13, R = 18, V = 22.

  10. You will receive the Miracle Potion when you do this correctly.

Finish the Game

  1. Return to the front courtyard outside the house where you started the game. Unlock the gate with the Golden Key.

  2. You'll be in a yard with a small shack. Examine the gravestone to find the Toilet Paper.

  3. Enter the shack. You'll find a room with a large mirror. Notice the doorway in the Mirror...

  4. Move around the room until you are standing where the doorway should be in the room, according to the mirror. You will fall into an underground cavern.

  5. Examine the knight to get the rare stone.

  6. The map of the maze seems to change with every game. If you find a portal, don't walk over it yet. Explore until you find a ghost who says he can't see himself. Use the Magic Mirror on him, and he will give you a Diamond Ring in gratitude.

  7. Now explore until you find a room with a green portal in it. You will warp to a white room - talk to the man inside.
    He will tell you your score - it depends on whether you made the potion, and how many items you found.

Reply

Where do I examine to

get the blue jewel? I clicked everywhere on the bottom right corner where the oven is and no blue jewel appears.

Reply

Hi Paul,
As the walkthrough says, the game places non-essential items in different locations every time. Its unlikely that you have a blue jewel in the same location as the walkthrough, since its not a key item.

Reply

Well, I checked all over the room for it and I found nothing. I'll try again though.

Reply

^ Scroll Up | Homepage >

Leave a comment [top of page]

Please consider creating a Casual Gameplay account if you're a regular visitor here, as it will allow us to create an even better experience for you. Sign-up here!
  • PLEASE UNDERSTAND SITE POLICIES BEFORE POSTING COMMENTS
  • You may use limited HTML tags for style:
    (a href, b, br/, strong, em, ul, ol, li, code, spoiler)
    HTML tags begin with a less-than sign: < and end with a greater-than sign: >. Always. No exceptions.
  • To post spoilers, please use spoiler tags: <spoiler> example </spoiler>
    If you need help understanding spoiler tags, read the spoiler help.
  • Please Preview your comment before posting, especially when using spoilers!
  • No link dropping, no domains as names; do not spam, and do not advertise! (rel="nofollow" in use)
chrpa Jayisgames needs your help to continue providing quality content. Click for details Welcome to the Roundup 66 - Retro with four games! After you find the ten monkeys in the chapter, look in the inventory. You will find a...  ...
chrpa Jayisgames needs your help to continue providing quality content. Click for details Welcome to the Roundup 65 with three games! As mentioned in the previous roundups, only odd-numbered episodes are featured since even-numbered are for Robin Vencel's patrons (the...  ...
chrpa Jayisgames needs your help to continue providing quality content. Click for details Hi! Weekday Escape and Weekday Puzzle are here! First we have two new cans from tomoLaSiDo and then two small rooms from isotronic. That's all for this...  ...
6,365 Views
0 Comments
chrpa Jayisgames needs your help to continue providing quality content. Click for details Welcome to Mobile Monday! We have another beautiful game from Nicolet and it's a winter game as it should be. Tasuku Yahiro have released another of their...  ...

HELP Jayisgames.com

Recent Comments


Display 5 more comments
Limit to the last 5 comments

Game of the week


Dark Romance: Vampire Origins Collector's Edition

Your Favorite Games edit

add
Save links to your favorite games here. Use the Favorites editor.

Monthly Archives