
Return to Mysterious Island 2:
Mina's Fate
Platform: Windows
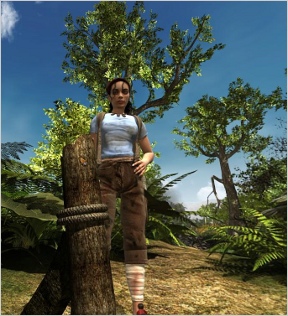
![]() In Kheops' new adventure, Return to Mysterious Island 2: Mina's Fate, you reprise the role of the resilient young castaway, Mina, and her adorable primate pal, Jep. When last we left the duo, we thought we had made our way safely off of Nemo's island, destined to live a luxurious life filled with all of the conveniences that civilization provides. Looking back, it seems as though we were more than a little naive.
In Kheops' new adventure, Return to Mysterious Island 2: Mina's Fate, you reprise the role of the resilient young castaway, Mina, and her adorable primate pal, Jep. When last we left the duo, we thought we had made our way safely off of Nemo's island, destined to live a luxurious life filled with all of the conveniences that civilization provides. Looking back, it seems as though we were more than a little naive.
 After a bizarre incident puts a sudden and violent halt to our exodus, we are, once again stranded on this booby-trapped isle. Welcome back to square one. Now you'll have to continue exploring this mysterious island in the hopes of finding another way home. Luckily you have Jep to help you out with your pointing and clicking endeavors as he proves to be quite useful. In fact, not to ruin any surprises, but without this plucky monkey this adventure might not even get off the ground.
As in most adventure games, the bulk of the gameplay involves collecting items and clues that help you understand how to use those items. You navigate along predetermined paths, moving from one hotspot to the next where you are afforded full global movement to take in your surroundings. Your cursor quite handily changes automatically to any of a number of icons when specific actions are necessary. Right-clicking brings up your inventory, and using items on other items in your inventory brings up a combination interface that allows you to assemble and disassemble basic items to get more complex items.
Where Mysterious Island 2 makes a huge left turn in gameplay is in the ability to fully utilize Jep as a separate character (compared to the original where Jep was used more like an item). In fact, you'll spend the beginning of the game playing as Jep. Mina's adopted simian may not be able to use certain items or combine items, but he can easily get to a lot of places Mina can't, and his ability to interact with the island's wildlife is unmatched.
So come, let's explore this island once more, foraging for food and surviving on the sharpness of our wits until someone else comes to rescue us. I'm positive the island won't do anything crazy, like, maybe explode in a fireball of doom whilst we wait... Nah. Can't happen.
 Analysis: I'm quickly developing a great deal of respect for the way developer Kheops builds its games. While one would expect there to be no shortage of similarities between Mysterious Island 2 and its predecessor, I've also found that putting plot and mood aside, this game is quite similar in many ways to Dracula 3: Path of the Dragon.
One of the ways in which Mysterious Island 2 is similar to Path of the Dragon is they are both considerably difficult games, even if for different reasons. What makes Mysterious Island 2 such a great challenge is in how decidedly non-linear it is. As you pick your way through the island, you will come across tons of items, often with multiple uses, few indicators on what you should do next. Puzzles can be approached from numerous angles, making creativity a prime commodity for those hoping to see their way to the end. In fact, it's worth noting that creativity is actually given something of a point score in this game.
The open-ended quality of Mysterious Island 2 not only impacts the game's difficulty but also its feel as well. Your explorations, and not, necessarily, predetermined plot points, govern your physical and plot-based progress through the game. The side effect of this is that it really helps to provide the feel of being stranded on a deserted island. That you don't spend most of your time reading or talking to other characters speaks directly to the isolation of your situation. This combines with the organic nature of many of the puzzles to fully sell the idea that you are alone with your pet monkey on an island.
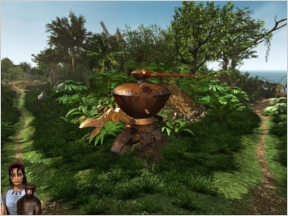
The sights and sounds finish off the effect. Mysterious Island 2 takes a minimalist approach to music, usually letting the roar of the ocean and the song of birds replace a composed soundtrack. Sure, there's a dramatic sting here and there, an ambient melody on occasion, but for the most part Mysterious Island 2 lets nature do what nature does. Meanwhile, the game looks great, capturing the beauty of an isolated island. The only problem here is the same problem many have in emulating nature: repetition. I'm not trying to say that once you've seen one beautifully rendered tree, you've seen them all. But, well, once you've seen one beautifully rendered tree, you really have seen them all.
 One of my favorite selling points of Mysterious Island 2 is the relationship on display between Mina and Jep. You'll get to see these two interacting quite a bit, and what really strikes me is how honest the chemistry feels. I couldn't help but feel a certain amount of affection each time Mina playfully calls Jep a scoundrel, or the way Jep dances eagerly at the prospect of another hug (fine, I admit it, I make sure they hug every time before I send Jep out on a mission on his lonesome). There is otherwise so little character interaction in the game, it seems altogether fitting that the one regular interaction is beautifully executed.
I still find Kheops' inventory system to be clumsy. Why do all the items I pick up have to go into that one special window? And why can't I just put items directly into the combine tray instead of using them on each other first. Further, on top of the high difficulty, the lack of direction may not be welcome too less experienced adventure gamers.
Outside of these few complaints, however, I find there is little to fault in Mysterious Island 2. Rarely do point-and-click adventure games succeed so well in immersing their audience into the exact setting and feel of the game. Indeed, Return to Mysterious Island 2: Mina's Fate has gone a long way to make being lost a very good time.
![]() Windows:
Windows:
Large file, no demo available
Get the full version
![]() Mac OS X:
Mac OS X:
Not available.
Try Boot Camp or Parallels or CrossOver Games.
Note: Return to Mysterious Island 2: Mina's Fate is a large file download, and, as such, our partners do not offer a demo. You can, however, download the demo from the game's official website.


Walkthrough Guide
(Please allow page to fully load for spoiler tags to be functional.)
Return to Mysterious Island 2
General Strategies and Tips
As you pick up items, sort them into categories on different tabs in the inventory
You can raise Jep and Mina's
health by hugging.
After you acquire items, sort them in the inventory
Save often and in different game titles
Any time you see the cursor turn into a hand, pick it up
After the helicopter crashes, you will be playing the part of Jep, the monkey.
Walkthrough
Rescue Mina
Look down and the seatbelt latch around Mina and click on it releasing the seatbelt.
Click on Mina's life jacket to inflate it
Look to above Mina to the latch on the helicopter and click on it
You and Mina will rise to the top of the water and onto land
Now you are on dry land but in bad shape
Take Care of Mina
Click on Mina to hear the conversation. Notice the cut on her leg.
She tells Jep what to do. Jep can hug her to help raise her health meter
Click on caress and Jep and Mina will hug raising her health meter
Send Jep up the trail toward the windmill. The arrow will bounce. At the cross roads, look to the left.
He will see a plant. Pick it up and it will go into your inventory
Click on inventory and then the plant. It will tell you that it is not good to eat but to chew
In the inventory, drag the plant to Jep. He will chew the plant and you will get a sponge you can use to bathe Jep.
You will need to clean the sponge in water before it can be used.
The Beach
Turn around and see the light green tree. Walk towards it.
Walk towards the smoke. Click on the smoke and discover that it is sulfurous water.
Turn around and see the tinder under the tree root. Take it.
Turn around and go up the hill. Turn right and see a branch hanging down from a tree.
Walk toward the hanging branch. Jep sees something. (The bubble over him) Look around.
Look under the big leaf and take the short branch.
In inventory, have Jep chew it to get a pointed stick
Turn left toward the sky and go down to the beach. Notice the turtle.
Once on the beach pick up the gas can, the broken jug, the seaweed, and the wheat and
sand.
Turn around and click on the turtle. You will see the gears spinning. Come back later to finish this task
Go Back up the hill to the main island
The Main Island
At the top of the hill go forward then right. See the monkey across the
ravine
Then monkey is pointing to her baby on the top of a high pole. Come back later to rescue it.
Turn around and see some flowers on the left. Try to take them and a snake appears
RUN! We can come back later to get the flowers.
From the sulfur water, turn left and go back to the main path.
Go towards the windmill and straight through the meadow. Look around and see a snake skin. Pick it up
Look to the left of the snake skin and pick up the oranges.
Walk down to path toward the water. Look down in to the water and pick up the stick
Pan right and take the eggs. Pan right again and take some clay. We can't reach the blue fruit from here.
Go back to the main path. Take time to organize the items you have picked up.
Look up and see the scarecrow and the hornets nest.
Turn left and walk up the path to the old building.
Click on the rock under the tin. Your cursor will change to the cogs turning.
Pick up the worms and Ocarina (flute). Pick up the wood to the right of the tin
Pan left and go towards the windmill.
Once in front of the windmill, pan left and click on the trunk. Take the hook and rag
Go down the stairs and see a monkey This is Slugger.
Take the large broken branch at the bottom of the steps. Pan right and take the pine nuts
Slugger is now mad. He wants the pine nuts. You can refuse or give them to him.
If you refuse, he will chase you off. Go back and give him the nuts. He's still angry
try to scare him with the snake skin
Take the blade of grass next to the dead animal. You will use it later.
At this point go back to Mina. She is by the red oak
Click on Mina and hear the conversation. Have Jep caress or hug Mina.
Right click for the inventory and click on the clean rag. Right click again to go back to the main screen
Click on the icon of Jep giving a present and Mina will take care of her wound
Fill up Jep's energy bar
Click out of the dialogue and have Jep hug Mina then send him back up the path
Go back to the kiln and see the monkey shelling nuts. Go to the monkey
Mini Game
Click on the new monkey and you will have the choice to groom the monkey,
scare the monkey or beg
You can groom the monkey or just beg. After begging, the monkey will hand you th stone
There are two different levels with this mini game. If it is too difficult for you, click on the icon on the lower right.
Raise Jep's arm to just above his head. Watch the green circle around the nut.
Quickly click to crack the nut. You will have to be fast as if you hit a little off target, the nut will hit the other monkey
Continue until there is no more fruit.
Go back to the clearing by the kiln and feed Jep by right clicking and dragging the food to Jep in the inventory menu
Keep feeding him until his bar is green then go back to Mina and click on her for
conversation.
Sound of Motor
X-out of the conversation and send Jep back up the path to the crossroad.
You will be steered to the right. Click to go right. When you stop, go right and down the path
Jep will see the monkey across the ravine. You can't do anything yet. Pan left and see the flowers and click on them
Suddenly a snake appears. Quickly go to your inventory and get the flute. Play it following the instructions on the screen.
Play for the snake and it will rear up. Grab the flowers now and go to your left. See the robot
Go back to Mina and fin that she is gone. Follow the blood towards the windmill
Hear Mina tell you to be careful. Pick up Mina's bloody bandage
Pan left and pick up the rifle. If the monkey is there, scare him off with the snake skin as a gift
Go back to the crossroads and turn right. When you stop, look up to the hornet's nest.
When the arrow bounces click on it and be taken to the nest. Be sure Jep still has the mud on him
If you had Jep wash off the mud, take him back to the mud to get dirty.
Right click to get the inventory and take the stick. Once you have the stick, click on the nest
DO NOT put the nest in inventory but take it directly to the windmill.
Click down to get back out of the tree. Click to go up by the kiln and then right to the windmill
Once at the windmill, the nest will automatically be thrown at the cat chasing it off.
Pick up the stick and click on the hornet's nest
Mina is saved, but her wound needs attention. Hear her conversation with Jep to find out what to do.
When Mina asks for an antiseptic, give her the flowers you picked by the snake
Mini Game Collect Ants
Go back down the stairs by the windmill.
Pan right to to the dead animal. Pick a blade of grass just to the right of the dead body. Click on the body.
The object is to click on the ants as they scurry around. If the ants are too fast, click on the slower mode in the lower right corner.
Collect ten ants then go back to Mina. Talk to her and she will ask if you are bringing her ants
Say yes and click on Mina and take an ant and place it on the wound. Quickly click on the ant you just placed to seal the wound.
Continue until the wound is sewn shut. Mina will then want a clean rag to bind the wound.
Send Jep either to the water trough by the kiln or to the water by the red oak to clean the rag.
Use the sponge and clean Jep then clean the sponge again.
Go back to the windmill and give the clean rag to Mina by right clicking to get inventory. Jep will give it to her as a gift.
Click on the hug monkey icon and Mina ask Jep to clean up. X-out of the conversation.
Go to the inventory and clean him up. Click on the clean sponge and drag it to Jep
Now hug and then click on the top icon so Mina and Jep will travel together.
Go out of the windmill. You will see a robot flying. Go and explore it.
Find the robot
Once you are out of the windmill, go down the stairs by the windmill.
Go toward the red oak, but at the crossroad go left and find the robot.
Click on the control panel and see the lights. You will need a code.
Look at the date on the control panel. This is your clue.
The date is 1860. 1=1, 8=2, 6=3, 0=4 All the rest of the numbers =0
Mina needs a screwdriver
Find a screwdriver
Go back to the red tree and click on the water. Jep will not want to go into the water
Click on play Mina and she will dive into the water and swim to the helicopter
Watch the blue gage on the top. This will tell you how much air Mina has left
Swim to the helicopter and pick up the mussels left of the helicopter and the frayed cable on the right
Go into the helicopter and click on the paper under the dead pilot's leg
Take the paper, ball of string, and knife. Collect as all the crawfish you can before your air runs out
Go back out of the helicopter and up
Pick up Jep
Fix the robot
Go back to the robot and unscrew the plate. Note the burnt circuits
They will have to be replaced. Go down to the beach to the other robot
Click on the sextant and the metal pipe
Click on the robot. Get the knife from your inventory and use it on all of the screws
Take all of the circuits by clicking just once on them. X-out look back out at the see and hear what Mina has to say
Note the turtle heading up the hill
When you get to the logs, you see the big cat is back.
Getting Past the Big Cat
Look back down towards the beach and see the lasers on the wall.
Click on the control box. Use the knife to unscrew the left hand screws to remove the panel
Click on the circuit board to remove the burnt out circuits. Put the knife back into inventory first
Look at the green dots that surround the now empty spots. Get the circuits from inventory
Match the green dots with the circuits you took from the robot
Once you find the matching circuit from inventory, click on it and place it on the circuit board
Once you have replace all of the circuits, close the panel and x-out
Move below the lasers and then click on the control box and move one of the arrows to
activate the lasers
The big cat will jump and then leave. Click on the control box and remove the circuits
Go back up the hill to the first robot
Fix the Robot Part 2
Once you are the top of the hill, continue straight to the robot
Click on the control panel and use the knife to remove the screws
Click on the panel to remove the burnt circuits. Remember to put the knife back into
inventory first
Get the new circuits from inventory and match them like you did on the laser control
panel
This time it's trickier as you will not have all the green dots. Save game here
Start in the lower left hand corner
and continue across the bottom
If you put the wrong circuit, it will
burn out
Next, start in the upper middle and
continue until all the circuits are
replaced
Listen to what the robot says and
take the paper it prints
It's a map of the island. The robot finally burns out Take the burnt paper
Crossing the Swamp
Walk back towards the windmill and see the volcanic bomb
Walk past the bomb and find that the bridge is out. You need to get across
Click on the mud and Mina will tell you that she can't go down there. Play Jep
Send Jep down to the water's edge. Get the stick from inventory
To find your way across the water, Click on the stick. If it sinks all the way down, it's not safe to walk there
Continue probing to find where the stick doesn't sink. Move the curse just a little bit forward to get the bouncing arrow. Advance
From this spot, pan left and probe for the next safe spot and advance
Pan right and probe again then advance. Jep has made it safely across the swamp
Get Mina Across
Send Jep to the right towards the broken bridge
Send Jep forward and then left. Pick up the charcoal.
Go forward and pick up the palm oil fruit and the Tihitian Gardenia
Go back to the main path and go straight to the building and look around.
Jep needs food, so fed him on the inventory menu. Go down the main path and see the lemurid
Get the stick from inventory and hit the lemeuide with it. Feed it to Jep in inventory
Look at the other side of the path at the water. Take the water spinach
Look up at the tree just left of the water. Take the honey comb and feed some to Jep
By now Jep's health meter should be green. Head back to the broken bridge.
See the tall pole just left of the bridge. Click about half way up and it will fall across the swamp
Jep goes back to Mina. Look back across the log and see blue fruit.
Send Jep down to the shore with the stick to knock the fruit down pick it up
Jep will give them to Mina as a gift. Have Mina pick up Jep. He may need a bath. Save game.
Explore the Other Side
Go across the fallen log and turn right to the small building
It's a kiln. Look around and see the tools. Take the hardy
Look to the stairs and try to climb them. Send Jep up the stairs.
Look around and see the hurt bird. Have Jep put it back into its nest
Send Jep back and have Mina pick him up.
Look at the base of the broken sign post. It says this is at a height of 325 feet
Remember what the robot said. We need to be at a height of 340 feet
Go back to the main path and right to the old lumber camp
Look at the still. In inventory, get the metal pipe and put it on the still
Look at the saw blade and take the nail and the blade
Look to the right of the saw mill and see the metal lid
At this point, a monkey comes and tries to steal from you. If you are quick, you will be able thwart his attempt
If he does take things, you can get them back later in the game.
Back to the lid. Move it and open the chest and take the contents
Take the grindstone from inventory and the nail. Put them where the saw blade was
Look towards the ground and click on the pedal to start the stone spinning
From inventory, take the saw blade hardy and axe and sharpen then on the spinning
stone
To stop the stone from spinning, step on the pedal. Remove the nail and grind stone and
replace it with the saw blade and nail
Turn around and go towards the cliff
See the trees. Use the axe to chop down some trees.
Use one of the trees to make a bridge over the thorns. Send Jep up the bridge.
Use one of the 21 foot poles so Jep can get the Truica or red berries
Send Jep up the cliff and encounter two monkeys
Scaring the Angry Monkey
In inventory, take the snake skin. Click on the angry monkey and have Jep
threaten him with the snake skin.
You are triumphant. Take the flower and blue vase from the hole.
Look down and see the bone. Use the hook or the nail to get the marrow.
Go back down the cliff to Mina. Have her pick up Jep
Cutting the logs
Go back to the saw mill and put one of the 21 foot logs on the saw
Step on the pedal and pull the handle to move the blade down to cut the log
You can slide the log back and forth to cut logs of different lengths
To see how long the pole is slide the pole then move the curser to the lever
Cut a log 15 feet in length, then cut the log into smaller lengths for wood.
340 Feet
Now that we have a 15 foot pole, go back to the kiln and place the pole into the sign base
To figure out what to do next, look at the documents you have picked up
Look on page 6 and see how to make a mason level to help you find heights
In the inventory combine the knife and the string to cut some string
Combine the string and weight.
Now we need a site. Add the sextant
Go back up to the main path and site the 15 foot pole using the mason level
Pan to the left until you see the pole with the bird roosting on it. This is your next marker.
Now go back to the lumber mill and site on the bird on the pole. Pan right just past the pine trees at the cliff
Pan just a little to the right and see the tree move. This is the spot.
Click to go up to the tunnel and Mina says she needs energy.
Making containers
Go back across your makeshift bridge to the old kiln
Once you are at the old kiln, you will need to build a fire
In the inventory, combine the sextant, twigs, and one of the logs.
Put the fire into the kiln
Go to your left into the building and look right at the potter's wheel.
Put one lump of clay onto the wheel. When you click on the wheel the clay will be on your right.
Dip your hands into the water on the left then grab some of the clay on the right
Then next screen will show a block of clay on the wheel. Click on the wheel to make it spin.
As the wheel is spinning, put your hand either at the top, middle, or bottom of the clay.
When the wheel stops spinning, pick up your vase. Continue making vases by placing your hands in different areas and combining them
Top and bottom; Top and middle; Middle and bottom
Once you have made the vases, fire them one at a time in the kiln
Set the unfired vase in the kiln and pull the rope on the bellows once.
Remove the pot and repeat until all are fired.
Collect Food For Mina
Now that you have containers, go back to the red tree and fill three up with water
Look at the maple tree and fill up a 2 containers with syrup
Go back to the windmill. Take one of the jars of water and combine it with the wheat with sand.
Take the wheat into the mill and put it in the top of the mill. Take a container and get the ground wheat.
Grind the rest of the wheat and put it into a container.
While you are at the mill, go ahead and put the palm oil kernels in to the top of the mill
Collect the oil in a container
Combine the flour, egg, water, and either honey or syrup to make a cake
Bake the cake in the kiln. You can also cook the mussel in the kiln to open it
Put one of the containers of Maple syrup on the fire to get sugar
Check the documents for more recipes
Using the Still
Go back across your makeshift bridge to the lumber mill
Before you cross the the bridge, send Jep down to the landing and using the stick get the blue fruit.
Pick up the fruit
Wash Jep and then Mina will pick him up. Continue across the bridge
Consult the documents on how to use the still and what you can make in it.
Build a fire and put it under the still. Fill the cooling barrel with water
To make alcohol put the sugar,or the honey, or any of the fruit in the still. Open the still door first.
Collect the alcohol with a vase.
If you want to make perfume put either the thyme or gardenia in the still and collect with a vase.
Fishing Pole
To make a fishing pole you first need a bobber
In inventory combine the knife and broken bottle to get the cork.
The cork needs to be red so combine the alcohol and red pigments to get the paint
Paint the cork red.
In the inventory combine either the stick or a 6 foot pole with the string, hook, bobber
Then add the worms
Go back to the red tree and throw the line into the water. Watch the gage on the right
Hold the mouse button while the gage is green. If it turns red, let off the mouse
Keep doing this until the fish is in the basket. Cook the fish in the kiln
Explore the passage and beyond
Climb up and through the passage. Once through, look left and here is the monkey thief.
Careful, he is going to try to rob you
Go down to the beach and look around and see something buried in the sand
It has empty slots in it. Look up at the cliff side and see the face on the cliff
Walk down the beach towards the rocks. Pick up the green paint behind the rocks
Walk left towards the cliff. Note the pot and pick up the coconut shell the monkey threw at you
Look to the right of the coconut and see the green glow. Click on it and see the green
crystal
On close up you see it is a mold. Take one of the lumps of clay from inventory and put it on the green mold
You now have six unfired tokens. You need to find the other mold
Go towards the beach to the palm tree. Pick up the shells on the beach and then have Jep climb the palm tree.
Once on top of the palm tree have Jep jump to the face. Watch the gage at the top
Click when it the arrow is in the green to be successful. If you miss, press the space bar and try again
Once on the ledge, look up and see the other mold. Hear the strange sound coming out of the mouth
Click on the green mold for a close up. Place the last lump of clay in inventory onto the mold
You now have 9 token to be fired. Have Jep jump back to the tree and climb down
Mina hugs then picks up Jep
Fire the Tokens
Right click to the inventory page and click on shortcuts. Jump to the
workshop
Place the unfired tokens into the kiln and fire them then jump back to the intlet.
Go down to the beach to the plaque and place the tokens
To place the tokens, first get the six and nine tokens from inventory
Look at the token already on the plaque. The object is to place the tokens to show all the lines in the tile already in place.
Each token placed should have components of the token next to it and above it
Look at the row of six token first numbering them from left to right. Place the 6th token in the slot in the top row 2nd position
Place the 3rd token in the next slot. Place the 2nd token in the last slot, top row
In the 2nd row, place the 4th token in the 1st slot. Now look at the row of nine tokens
Again number them left to right. Place the 2nd token in the 2nd row, 2nd slot.
Place the 9th token in the 2nd row 3rd slot. Place the 7th token in the 2nd row 4th slot
Place from the 6 token row the 6th token in the 1st slot in row 3. Place the last token of the 6 in row 4, 1st slot
Place the 8th token in row 3, 2nd slot. Place the 3rd token in the 3rd slot. Place the 5th
Place the 4th token in the 4th row, 2nd slot. Place the token on the right in the 3rd slot and the last token in the 4th slot
X-out and hear the strange voice again. Pick up the sprout and take it back to the planter by the cliff
In inventory, get a vase and water the plant. Watch it grow. Use a vase to collect the turquoise paint
Leonardo the Painting Monkey
As you head back to the cliff where you came in, pick the reed next to the termite hill and the peas growing on the bush
Go up the cliff face to the landing. Send Jep along the cliff to Leonardo the painting
monkey
Have Jep groom Leonardo. You can groom him several times to get his anger meter a
boost.
Give Leonardo the turquoise paint. X-out and when he turns to paint, go left and use your pointed stick get the lizard
jump to the palm tree and quickly recover what you can. If the monkey didn't take anything of value, he will just chase you off
You can also give Leonardo the red paint to help his anger meter.
Watch what Leonardo draws. Go back to Mina and hug then join her and go back to the
plant by the cliff.
Once you are by the plant you planted, in the inventory get the reed and the knife and
combine them in inventory.
Dip the paint brush into the turquoise paint and paint the symbol that the monkey painted.
Be patient and a button comes out of the cliff wall. Click on that button and you enter a new tunnel. Save game
The Temple and Monkeys
Enter the tunnel. It's a temple! The monkey guards stop you. Notice that one monkey guard is missing.
Think to where we have seen alone monkey that won't leave where it is.
Go down the steps and the monkeys throw
things at you. In inventory combine the peas and the reed stalk
Quickly shoot the peas at the monkey on the left and at Slugger on the far right.
They keep throwing things at you. It's time to move back and hold a council
Push the button and go back to the beach. Listen to Mina talking
Right click for short cuts and go to Lakeside. Turn around and go to the crossroads
Turn right and go toward the light green tree. Go right and see the desperate mother
monkey
Her baby needs to be rescued. In inventory, combine the knife and ball of string.
Keep cutting the string until you can cut no more. In inventory, combine 3 pieces of string to form a rope.
Send Jep over the ravine. Climb up on to the remaining part of the building.
Send the rope over to the baby monkey and he climbs to Jep. Go down to the Mother
monkey.
Give the mother her baby and cross back to Mina and have her pick you up.
Slugger and Amber
In inventory and shortcuts, jump to the sawmill. Go to the cliff wall
Send Jep over the pole and up the cliff to where Slugger and Amber are
Get the can of green paint in inventory then click on Slugger and chase him off
Reach into the niche and get the flower and blue vase. You now know what Amber likes
Go back to Mina and have her pick Jep up.
Court Amber
Now that you know that Amber likes blue vases, we need to make some
more vases.
In shortcuts, jump back to the workshop and make 12 more vases.
Once the vases are made, fire them and then combine the in inventory with the turquoise paint brush.
Fire the painted vase once again. Do this until you have six blue vase of different design
Jump to the sawmill and take the nail from the saw blade
Take the shells from inventory and combine them with the nail to make a hole in the shells
Take the shells with the holes and combine them with the cord in inventory
Send Jep back up to Amber and present her with each of the blue vases and the shell
necklace
Groom Amber and give her food. Then play the flute for her. Repeat what she hums
Give her one of both flowers and raise her meter to green
Go back to Mina and jump to the large kiln
Making Paint
If you remember, Leonardo had some empty paint receptacles that need to
be filled
Check your documents on how to make white paint. See page 8.
Send Jep up to the top of the kiln. Have him put the sea shells into the top of the kiln
Go back down to Mina and have her pick Jep up.
Build a fire in the kiln and gather the lime from the shells into a vase.
You now have quick lime. Again consult the documents to make the white paint.
Ad the lime to water then ad the palm oil and chalk to make the white paint
Mix the green paint bucket with the gas can to make green paint.
Since we are at the kiln, place the rifle into the fire to burn the wood from the metal
Use the tongs to pick up the metal. Place the hardy in the hole in the rock
Using the tongs, place the red hot pipe on the hardy. Pick up the mallet and hammer the pipe. It will turn and hammer again
Right click to pick up the tongs and place the red hot pipe into the water on the ground behind the rock
Jump to the inlet.
Leonardo Again
Send Jep back to Leonardo and give him the white and green paint
Watch him paint. Play the flute for him. Listen to the melody he hums and repeat it back to him. You will do this twice.
Feed Leonard and groom him until his meter is green. He is now your friend
The Temple Part 2
Go back and join Mina and go down the vine and to the opening to the
temple
Look at the monkeys and see that you now have three friends. Note their locations
Use the pea shooter on the two who aren't friends trying to get both of them red at the
same time.
Once you do, they will run off. You can now go down the steps to the cemetery/
Don't touch the blue vase. Look at the lines on each of the grave stones. They correspond to the blue vases.
Use the vase that is already in place for clues. Where the line are farther apart, represents where the vase is narrow
Once all the vase are place correctly, you will hear the strange voice.
A vase with something in it is seen to the right. Listen to the music and play it back on the ocarina
The note sequence is blow with all fingers down, lift the 2nd finger in the right, 1st finger on the left, 2nd finger on the left, and 2nd finger on the right.
The vase will bubble and the stone above it will come out. Press this stone.
You will hear that strange voice again. The wall opens up. Go down the stairs.
Look on the wall to your left and you will see globe and pipe with blue cones on them.
You place a blue cone on the pipes to produce a word. This one is trial and error.
Look in the upper right and it will tell you how many cone are correctly places
To get the sound started, push the blue button between the cone racks.
You will need a cone starting on the top row left 3 cones placed in the 1st, 3rd, and 4th pipes
2nd row is empty. 3rd row 3 cones one in the 5th pipe, 7th and 8th pipe
4th row is empty. 5th row 1 cone in the 2nd pipe. Last row one in the 3rd pipe and last pipe
As you place the cones watch in the upper right corner to see if you placed the cone
correctly
Click on the globes or ovoids above and see if you can understand what they are saying
It's a history of the island. The ones on the left are recent, be sure you listen to these.
Once you have heard all the ovoids, continue down the hall and the door slams shut
Go back to ovoids and look for one with a green center instead of pink. You have to leave both Mina and Jep's id print.
Mina's will automatically fill. You must use Jep's on him in inventory then return it to its place
The gate now opens
The Geothermal Motor
Go down and look at the geothermal motor. look right and take note of the door.
Pan right and see a cable. Do not touch it! It's touching the water and will kill you. Press the space bar if you just had to touch the cable
Walk left and see a glowing crystal. Cross over the middle to the other side.
There are two crystals but one is burnt out. The door here has the alien symbol on it.
Walk to the left and see the control panel. This looks familiar. Look at the map the robot gave you.
Notice the the water does not go beyond the valve grate. Compare where the grate must
be and discover it's in the lake where the helicopter crashed.
Press the button on the bottom of the panel. It's a game. Listen and look at the word number. Press the corresponding button on the control panel.
Press the green button again starting the motor and see what should happen.
We have to unblock the valve gate. Go back across the middle to the door you saw earlier
Unblock the Valve Gate
Try to open Nemo's door. It's stuck. Pan right and see the cable in the
water
Look to the left and pick up the crystal holder to repair. Go back across to the alien's door
It's stuck. Go over to the control panel and be sure both levers on the bottom are at the bottom. Push the green button
Go back to the alien's door and push the button. It will open. Go through and to the right
Once you are on the ledge, turn right and go down the stairs. Look at the wall and you will see a crystal
You will need a tool to get it. From inventory get the axe and use it on the crystal.
Now we need to examine the crystal holder. In inventory, use the short cut to jump to the big kiln
Place the crystal holder in the fire, use the tongs to pick it up and place it on the big rock
Use the mallet to straighten out the crystal holder. Put the mallet back and right click and put the holder into the water.
Put the tongs back and pick up the holder. Jump back to the motor room
Go back down by Nemo's room. In inventory, combine the holder and the crystal.
Use the insulator or the holder and crystal to pick up the cable in the water. Place the holder and crystal and cable in the empty space on the wall
Try Nemo's door again. It opens. Go forward and to the left or right and look at everything
Find the shield control on the left but don't touch anything. On the right side see the sick plant. Take the avoid
Take the ovoid back to the translator and replace the metal ovoid with Nemo's and listen to what he has to say
Go back to Nemo's room and go all the way to the end to the office. Look around and read
everything you can find.
Pick up the diving helmet. You need to unblock the valve but you don't have air. Consult your journal
On page 1 is the map. We are in the white bubble under the lake right now. Read pages 8
and 9
In inventory, combine the lime and the diving mask. Open the hatch. It's stuck. Use the palm oil on it.
Open the hatch and leave Jep behind. Go down the air lock. In inventory, put on your
mask.
Turn the red wheel letting water in the airlock. Once under go forward to the helicopter
Go towards the yellow part of the wreck and see the rocks on the grate. You have to get them off somehow
Look at your journal and see that the helicopter has a wench. Find the parts for it.
Look just a little to the left and below to move the wheel and pick up the hook.
Swim back to the helicopter. Go into the helicopter and look at the right corner of the
passenger seat. Take the handle
Go out of the helicopter and place the
handle on the wench on the side of the
helicopter
Place the hook under the wench. Try to
open the cargo hatch. It's stuck. Click on the
hook and it will attach to the cargo hatch.
Turn the wench to open the hatch. Swim
in and grab the net, float, and bottle of
nitrogen
Swim back over to the rock on the grate.
Put the net on the rock, the float on the net
on the rock.
Put the nitrogen bottle onto the float and turn the valve then stand back
Swim back to Nemo's office
Open the Air Lock
Your in the air lock and see something that looks like a combination lock. You can't get out of the lock
Jep can't get the hatch open. Look at the hatch and see what is lying on it.
Click on Jep and then on the item on the hatch. Look at them. Notice the picture of Nemo's family
Look at the pattern around the frame. It repeats every 2 sets. Look at the lock. Starting at the top of the frame, make the pattern on the lock.
Starting from the left click the button under each symbol until it matches the picture
frame.
You may have to look back at the frame a few time until you get all the symbols.
When the sequence is completed, the hatch opens. Go up and straighten up Nemo's
office
Pick up Jep and go back to the geothermal motor control room and see that there is now
power.
Push the green button and push the left lever up. Water is now flowing freely but the path of the gas needs to be cleared
Pull both levers down and push the button. Go to the alien door and push the button on the door
Go in and to the right to the volcano vent. On the ledge turn right and go down the stairs
Look and the wall and down a little to see a star shaped opening. Send Jep into it to see if he can fix it.
There is a hole in the end. Look through your inventory for something to plug the hole
Use the empty coconut shell to plug the hole. Send Jep back up to Mina and have her pick him up
Go back up to the control panel and press the green button to start the motor. Balance th motor with the levers
Move the right level all the way to the top. Move the left lever into the green. Look at the middle between the two levers
The trick is to get the blue line into the green and all the green lights lit. Slowly slide the left lever up or down until all the lights are lit.
Slugger vs Jep
Go back through the motor room and past the translator to the face of the alien on the side of the mountain
Look out and see the green fog is killing the island. Go up the path and push the button
with alien symbol
Slugger runs in the the gate slams shut. Go to the translator and look for an empty ovoid.
Search the path for blood from Slugger. Get the ovoid from inventory and put it on the
blood stain.
Click on it and find out the Slugger is out to get Jep for stealing his girlfriend
Go back to the motor room to the control panel. Find out that Slugger is in the turbine.
Go back through the door by the control panel and go right to the volcano tube. Go right down the path again
You will have to send Jep to get Slugger. Check Jep's energy level. It it is not green feed him and hug him until it is
Send Jep in the same hole he went into to examne the gas. Watch out! Slugger is throwing
things at you.
You need to catch at least 5 of them. Don't worry if you don't make it, just press the space bar to start again.
Once you have caught all 5, Slugger collaspes. Send Jep down to get him and pull Slugger out
Once back in the control room, click on the control panel and hear the voice again.
Click on the number it says to open the panel. Push the green button to start the motor
Slugger dies and Jep gets sick. You carry him back to Nemo's office.
Save Jep
Go to the mixer and see that Slugger has broken things. Hear Nemo again.
Take the blown fuse. Look in you inventory and see if you have anything that could repair electrical things
In inventory, take the frayed cable and drag it to the wrench to take it apart. Combine the burnt fuse with one of the cable parts
Place the fuse and the bulbs Jep caught from Slugger into the holder
Look left and see the broken violet glass. Pick it up. We have to make a new one.
Consult your documents and see how to blow glass. Page 4. Walk to the large kiln so you can see the damage to the island
The Island
You could use the diving helmet and swim up to the shore, but remember the big cat was there the last time.
Go out the way you came in and look at the devastation of the island. When you get to the inlet look up.
Go up the shelf and out the passage. Look up at the shelf where you meet Slugger and
Amber.
Walk up to the sawmill and go right to the large kiln. On your way, pick up the eye piece and coconut.
Look at the pool that is now a geyser. If you have already made the pipe from the rifle
continue on to the workshop.
If you have not made the pipe, go to the large kiln and put the rifle into the fire.
Put the hardy in the hole in the large stone. Use the tongs to get the pipe from the fire.
Put the pipe on the hardy and get the mallet to hit it. Turn the pipe and hit it again.
Put the mallet back and right click to put the hot pipe into the water at the base of the rock.
Put the tongs back and pick up the pipe. Now go to the workshop.
Make Glass
Once you are at the workshop. click on the crucible on the ground.
Put the violet glass shards into the crucible and put it into the kiln to melt. Pull the rope on the bellows.
From inventory, get the metal pipe and put it into the melted glass and watch the glass be blown.
Check your documents and see how to make glass. Put the vase of hydrated lime into the
kiln to get quick lime.
Combine the quick lime, sand, charcoal, and soda ash in the inventory.
Put the crucible into the kiln and add the vitrifiable mixture to it. Pull the bellows rope.
Put the metal pipe into the melted mixture and watch while the glass is blown.
Jump to Nemo's base.
Fixing the Mixer
Look at the mixer and see that two bulbs are missing. We have a purple bulb but we also need a pink one.
Look around the motor room and go down the hall to where the ovoids are. Look at the face on the left
See the pink fog under the green fog. Go back to the mixer and put the pink bulb on the end of the mixer.
Place the violet bulb on the bottom of the mixer. Place the eye piece on the top holder.
Look through the eye piece and see the decomposed tissue. Press the red button.
The mixer is now sterilized or neutralized. We now need to get a sample from Jep.
Turn the wheel on the yellow, then blue gasses to make green gas.
Turn the wheel on the pink gas and see that it neutralizes the green gas. Mmmm
Take the sampler from the glass bulb and go to Jep and get a sample. Hug him, he needs it.
Take Jep's sample back to the mixer and put in the machine. Turn the wheel on the pink or magenta bulb.
Click on the eye piece and turn the wheel. See the cells die.
Listen to Nemo. Mina has to make a choice. The alarm signals the helicopter.
Save game here. Choose one of the endings and see what happens. Go back and choose the other ending
Thanks to boopbug for this walkthrough \o/
Posted by: Kero |
August 20, 2009 6:03 PM
|
August 20, 2009 6:03 PM