
![]()
 Sometimes Haretoki is cloudy. Sometimes Haretoki is sunny. But always Haretoki is full of cleverly amusing puzzles that make playing an escape-the-room game from this author a true delight. Welcome, then, to Sometimes Sunny Reverse, a new creation from Haretoki that will shine a ray of sunshine on your puzzle-loving self even as it may cloud your brain with some tricky situations.
Here you are, locked up without a story or a cause, in a room brimming with boxes and devices. Start poking around  and examining everything you can see, drawing conclusions from the clues offered to you until you can decipher the first code and gain the key to the next puzzle. You'll experience the standard escape game user interface features such as an intuitive inventory and navigation by arrow, and everything is so well laid out you will rarely grumble over the lack of changing cursor and textual hints. As you progress, though, you reap the reward of more content: additional puzzles and goodies to play with are presented like wrappings falling off a Christmas gift.
Some might call this one of the best escape games this year in terms of brain busting scenarios and enjoyable gameplay, but that's up to you to decide for yourself. And while Sometimes Sunny Reverse isn't the prettiest room we've spent time in nor is it the most affable, if you can stick it out through some head-desk-thump moments, the logic will lead you through on your own efforts. It's sure to reverse those escaping tummy growls into a plump full feeling of satisfaction.
Thank you to Aroz and Cyberjar88 for suggesting this game!


Walkthrough Guide
(Please allow page to fully load for spoiler tags to be functional.)
Sometimes Sunny Reverse Walkthrough
Room 1: Exploration
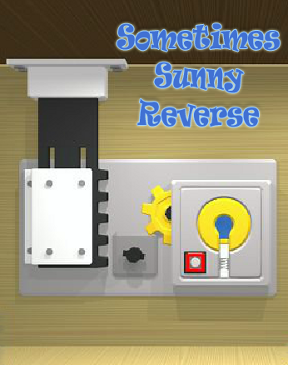
You begin facing a machine with a button, a red keyhole and a big yellow gear:
When you push the button, nothing happens. But why?
Grab the BIG YELLOW GEAR.
Hmm, now when you push the button, the black bolt where the gear used to be will turn. But no real results.
Back up and take a look inside the waste basket:
get white VALVE WHEEL.
Turn right. Here is another machine and it looks like a gear is missing. There is also a very large keyhole like shape and a button on it.
Look up and you can see a SILVER KEY suspended from a crack between the wall and ceiling.
Below that on the floor is a button, two square slots and a panel. Lift up the panel to look inside:
Get the BATTERY.
Turn right. Now you see a picture with partial purple shapes in each of the four quandrants...
Below that picture is a PURPLE CLUB TILE.
Pick up the tile and take a look at its back: a clue.
Here is also a wooden cabinet (the left side is screwed closed, the right side has a sliding buttons on it), on top of which is a device with four buttons on each corner.
Take a closer look at the four-corners device:
As you push each corner, certain combinations of white/black corners will produce a number in the center.
Turn right again. Now you see a faucet (no water), a viewfinder in the wall (just a big + inside), and a wooden chest.
The Chest's Four Digit Code
The chest next to the faucet needs a 4-digit number code.
The clues for this are:
On the back of the purple club tile in your inventory
and the four corners device on top of the cabinet.
Using the two clues, you can work out the four numbers that are needed.
ANSWER:
Put the BATTERY in the device.
Look at the design on the back of the purple club tile.
Reproduce those same patterns on the device
As indicated by the arrow, go in a clockwise direction starting with the top left corner and you'll get this code:
7 0 6 3
Enter that code into the chest and push the rectangular button. The frame will turn blue indicating its unlocked.
Back up and open the chest:
Get the YELLOW KEY END.
Gear Machines
From the chest, right. If you haven't done so already, take the BIG YELLOW GEAR off this floor mounted machine.
Turn right again and examine the other machine, the one with the black bolt going up into the ceiling.
Put the BIG YELLOW GEAR on the machine.
Use the YELLOW KEY END in the blue keyslot to keep the white spring pushed down.
When it's prepared properly, push the button.
Now the gears turn, lowering the black bolt. Inside you can see something white...
a NOTE. Take it and open it up to see a clue.
Take back the BIG YELLOW GEAR.
Back up. Hmmm. Something seems different. Turn left and go back over to the other machine.
What happens, now that the big black bolt isn't going up into the ceiling, if we try this machine again?
Put the BIG YELLOW GEAR back on the floor-mounted machine.
Push the button.
Now the gear can move the black bolt on the floor, causing the room to widen.
Back up and turn right to survey the results: the ceiling has opened.
The Basement
Since the ceiling has pulled apart from the wall, what happened to the key that was hanging up there under the spotlight?
Look on the floor below the spotlight and there it is--get the SILVER KEY.
Back up and turn around to face the faucet.
Use the SILVER KEY in the keyhole on the brick backboard.
Now the faucet slides to the right and a ladder is revealed.
Go down the ladder into the basement.
Let's explore the basement now before doing anything else. Here, on a black shelf next to the ladder is a box. It looks like it can hold four tiles. You have only one, though.
Back up and turn left. Here is a tube in the wall and some more boxes...
Inside the tube is a screwdriver. But there is no way to reach it!
The box on the left seems to need a star-shaped something to open it.
Back up from the tube/boxes and turn right twice. Here is a large oblong box with a cable connected under its base, running toward a smaller box with an + shaped hole in the top.
There is a gap in the cable, though.
You may or may not have the thing that fits in the box, depending on how observent you were upstairs. Nevermind that for now since no connecty means no worky.
Back up and turn right. Here's cabinet with three doors:
The top left needs a 4-number digital code.
The bottom right has a 3x3 pad of buttons.
The bottom left has two colored buttons: green and orange.
The 3x3 Button Grid
All the clues to open the bottom right cabinet door are in the 3x3 pad itself.
Press start and see what happens...
ANSWER:
This is a game of follow the leader. Each time you press a button, the sequence of the next buttons appear...but you'll need to remember what you see so you don't leave out any parts of the sequence as you complete this.
The order in which you push the buttons is this:
Imagine a number pad on your phone...
7 4 5 8 9 6 3 2 1
When you press the buttons in the correct order, the door unlocks. Open it up...
Get the STAR SHAPED PLUG.
Green/Orange Buttons
To open the bottom left door of the cabinet in the basement, use the clue you picked up from the ceiling bolt machine.
ANSWER:
The left button is green, the right button is orange. On the clue, a skinny green line means the left button once, but a fat green line means the left button twice. It's the same with the orange: skinny means once, fat means twice.
So the order in which you click the buttons is this:
LEFT-RIGHT-LEFT-LEFT-RIGHT-RIGHT-LEFT-RIGHT-RIGHT
When you push the buttons in the correct sequence, the cabinet door will unlock.
Back up to open in and look inside:
Get the CONNECTOR CABLE.
Opening the Big Oblong Box
Now that you have the connector cable (from the lower left door of the cabinet), you might still need the lever, something with a plus-shaped end to fit in the little box.
The lever is upstairs in a door we haven't opened yet.
Go back up the ladder. As soon as you get up, if you didn't before, you might notice that the viewfinder above the chest looks different.
Look through the viewfinder. Now you have an important clue.
Back up and turn left to face the big cabinet, the one with the four corners device on top of it.
Zoom in on the right side of the cabinet.
Use the clue you just saw to open this lock.
ANSWER:
Click the buttons to slide them into LOW, MIDDLE or HIGH positions...
LOW-HIGH-MID-MID-LOW-HIGH-MID
When the sliders are in the correct places, click the retangular button and the door will unlock.
Back up and open the right side of the cabinet to get:
Get the PLUS-SHAPED LEVER.
Back up and turn right. Go back down the ladder to the basement.
Turn left and examine the small box and cable:
Put the CONNECTOR CABLE into the gap in the cable.
Insert the plus-shaped LEVER into the top of the small box.
Push the lever and you'll hear an sound.
Back up and now the oblong box is open. Look inside:
Here you will see a clue. Red and blue lines in a digital number pattern.
You can also get the SPADE TILE!
Digital 4-Numbers Code
To unlock the top left door of the cabinet in the basement, use the clue you found inside the large oblong box down here as well.
ANSWER:
Use the lines, red or blue, to infer which number can be formed.
A blue line is an empty space in the number while a red line is a line that must be there. With this information, you can determine that the code is....
6 1 2 4
When you have the correct number entered, press the rectangular button and the door will unlock.
Back up and see what's behind the top left cabinet door:
Get the HEART TILE.
Getting the Wrench, the Diamond and the Tiles Puzzle
Turn right from the cabinet to face the wall with the tube and the box needed a star-shaped something.
Examine the box to the left of the tube:
Insert the STAR-SHAPED PLUG into the front of the box.
Now you can put the white VALVE WHEEL into that hole.
Turn the valve wheel to open the top of the box:
Get the WRENCH
and get the fourth tile, the DIAMOND TILE.
Back up, turn right, and examine the puzzle base on top of the black shelf next to the ladder:
Use the clue from the picture upstairs to arrange these tiles in the correct position.
When you hover your pointer over a tile, you can click the yellow turn arrows to spin the tile into the correct position.
ANSWER:
Top Left = CLUB (turn 3x)
Top Right = SPADE (turn 2x)
Bottom Left = DIAMOND (don't turn)
Bottom Right = HEART (turn 3x)
When you the tiles arranged properly, a little drawer opens up out of the puzzle base and you can get...
The GOLD KEY.
Go back up the ladder to the first room.
Using the Gold Key and the 4-Letter Code
Back upstairs with a gold key and a wrench in your possession, turn right to face the smaller machine:
Use the GOLD KEY in the keyhole next to the big yellow gear.This causes a second button to appear.
Press the new button.
Now you have two new puzzles to solve.
First, look at the Four Letter Code on the left side.
Those numbers above the code box must be a clue. What would they mean, though?
Turn around and see what else has happened to the room...
If you try to climb down the ladder, instead you see the top of the ceiling below...
Use this clue and the numbers above the letter code to solve it.
Now you can turn back to the 4-letter code to solve it:
ANSWER:
Follow the numbers to find letters on the grid by the ladder to get this code...
L E T S
Use the buttons above and below the letters to change them. Then click the long rectangular button when they're correct.
Back up and open the panel to get...
a YELLOW BOX with a button and two tubes on it.
The Last 4-digit Code, a Screwdriver and Getting Out
Now that you have the YELLOW BOX, turn around to face the wall with the purple-shapes picture.
Zoom in on the area near the floor where you can see two round slots...Attach the yellow box to those slots in the wall.
Once connected to the wall (outlet?), push the button on the box.
A drill comes out, drills into the floor, then flies off the base to land across the room (whew! near miss!).
You can look down the hole to see the screwdriver in the tube, but you still can't reach it.
Take a look at where the drill was...
Looks like something can attach here.
There's also four colors: black, red, green and blue.
Let's go find the top of the drill.
Back up and turn around twice. Next to the wastebasket you can see where the drill landed in the wall. Take a closer look at it...
Now you have four numbers. Combine this information with the colors you saw on the yellow box and you know what to do next.
Examine the last panel, the one needing a 4-digit code:
Enter the correct number to get it unlocked.
ANSWER:
The color squares on the yellow box tell you the order to use the numbers on the drill bit...
9 1 8 3
Lift up the panel and get the MECHANICAL ARM.
Turn around twice again, and zoom in on the yellow box.
Attach the MECHANICAL ARM to the top of the yellow box and push the button--the screwdriver is fetched for you.
Take the SCREWDRIVER from the mechanical arm.
Back up and use the SCREWDRIVER on the left side of the large cabinet. Open it up:
Get the FOLDED LADDER.
Back up, turn left, and examine the base on the floor under the open ceiling:
To make the ladder fit, use the WRENCH on it.
Then put the LADDER into the square slots.
Push the button and the ladder will raise up.
Now you can escape! Weeeeeeee!
Posted by: elle |
December 13, 2012 7:01 PM
|
December 13, 2012 7:01 PM