
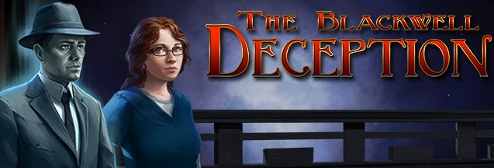
![]() If you're dead and you have a problem (aside from the whole "dead" thing, that is), you might run into Rosangela Blackwell and her otherworldly partner, Joey, if you're lucky. Not that Rosa's had much luck herself these days; despite being extremely psychic, as well as extremely awkward, she's been struggling to catch a break with her writing. A phone call from an old friend might help get her foot in the door at a respected local paper, but it turns out that where Rosa goes, the dead never lie quietly... and in The Blackwell Deception, a point-and-click adventure from Wadjet Eye Games, quite a few people are turning up dead these days. Coincidence? Not when Rosangela's around. Poor kid. She really needs a better hobby, something less stressful. Bomb squad, maybe?
If you're dead and you have a problem (aside from the whole "dead" thing, that is), you might run into Rosangela Blackwell and her otherworldly partner, Joey, if you're lucky. Not that Rosa's had much luck herself these days; despite being extremely psychic, as well as extremely awkward, she's been struggling to catch a break with her writing. A phone call from an old friend might help get her foot in the door at a respected local paper, but it turns out that where Rosa goes, the dead never lie quietly... and in The Blackwell Deception, a point-and-click adventure from Wadjet Eye Games, quite a few people are turning up dead these days. Coincidence? Not when Rosangela's around. Poor kid. She really needs a better hobby, something less stressful. Bomb squad, maybe?
 To play, just click around. If an object can be used, its name will pop up when you mouse over it; right click to look at something or someone, and left click to interact. Moving the mouse to the top of the screen will cause your inventory to drop down, as well as let you access the options menu to save your game and such. Both Rosa and Joey are playable characters, and you'll want to swap between them often by hitting [tab] since there are things one can do that the other can't. Joey, for instance, in addition to messing with electronic frequencies, can pass by obstacles Rosa can't, though the only physical way he can interact with objects is by a puff of cold breath. While Rosa can do all the boring usual flesh-bag stuff like physically touch things and talk to people, she's also got her MyPhone, which lets you check her e-mail, call people, or even search for clues online. Make sure you have Our Heroes talk to everyone (including each other); exhausting every conversation object and consulting your notebook frequently is the key to advancement. (You can click on one topic and then another to combine subjects in your notebook and potentially open up new avenues of discussion.) Well... that and having Joey blow on things. He's such a special guy.
 Analysis: Classic point-and-click adventure games are something of a dying breed these days, but the Blackwell series has continued to prove that the genre isn't dead and buried yet, and could very well end up being considered a classic one day. The game looks great in a way we've come to expect from Wadjet Eye titles, full of expressive character art, detailed environments, and wonderfully animated sprites courtesy of Ben Chandler. It should also come as no surprise that the game sounds wonderful too, with all the actors delivering solid performances and a light touch with sound that serves to enhance the atmosphere.
Most of the puzzles in the game typically revolve around figuring out how to use your characters to get past an obstacle, and while occasionally this leads to some really creative moments, it can also be intensely frustrating. When you're stuck, the old adventure game failsafe of "try everything on everything else" is annoying without having to do it again with a different character, and some of the solutions can be more than a little overcomplicated for relatively mundane tasks. Fortunately, the story is more than strong enough to keep you going, and almost from the beginning Deception sets out to make it feel more personal. Moments of genuine tenderness or sadness make the storyline this time feel altogether more mature, with Jamie's arc being perhaps the best in all the games, and you start to get the sense that the story throughout the series as a whole is really shaping up to be something big.
The Blackwell Deception isn't an end to the series; you'll get more hints about Joey's past, and a big, satisfying showdown with a villain, but ultimately the game raises more questions than it answers. It lays the groundwork for a very big confrontation in the next installment, and if you've followed the series this far, you'll be eagerly awaiting it when it arrives with the rest of us. Packed full of mystery, character, charm and suspense, it's a delight from start to finish. The Blackwell Deception is around four hours for your average player, and fans of the series will love every minute of it.
![]() Windows:
Windows:
Download the demo
Get the full version
![]() Mac OS X:
Mac OS X:
Not available.
Try Boot Camp or Parallels or CrossOver Games.


Walkthrough Guide
(Please allow page to fully load for spoiler tags to be functional.)
Blackwell Deception walkthrough, complete
General
Navigation
The screen is divided between the main game scene and the menu bar. The menu bar is usually hidden: To access it, move the mouse to the top of the screen.
The game requires you to switch control between Rosangela Blackwell, medium and paranormal investigator; and Joey Falcone, her Prohibition-era spirit guide. To do so, press [TAB], or reveal the menu bar and click "J" or "R" to select Joey or Rosa.
Left-click to move. Left-clicking will also interact with named characters and objects. Hover the mouse over an object to see if it has a name: This is how you know you can interact with it.
Right-click to examine a character or object, either in the scene or in your inventory.
Talking to characters will open a conversation tree at the bottom of the screen. You can also often open your notes for additional topics, which is particularly important when interviewing suspects and witnesses.
To access your inventory, reveal the menu bar. Click on an object to select it, and use it with a character or item in the scene or your inventory to use it. Dismiss the item with a right-click.
The menu bar also lets you use Rosa's phone (see "Controlling Rosa below") and Joey's ghostly powers. You can also access the options menu, where you can save or load a game, quit the game, and control game settings.
Controlling Rosa
Rosa is usually the only character that can interact with the living world. She is usually the only one who can talk to non-ghostly characters and pick up objects. You also need to control Rosa to use inventory items.
Rosa can also use her "MyPhone" to check email, search the Internet for clues, check her notes, and make phone calls.
The icon on the left lets you check email. Click a subject line on the left to read an email. Click the "x" in the upper right to close the email application.
The icon in the middle lets you perform "Oogle" searches. Just type what you want to investigate in the search bar and hit "Search."
The icon on the right lets you access your notes. Clues will be added here as you play the game. Occasionally you need to combine clues to gain new clues: Click on one and then the other to do so, to show if there is any connection between them.
You will collect phone numbers throughout the game. Click on a phone number to call it.
Hit the power button on the right to exit Rosa's phone.
Controlling Joey
Joey's a ghost and can't usually pick up objects or talk to the living (with a few exceptions!).
He can pass through matter, which is useful for infiltrating locked rooms, cabinets, and the like. Left-click to do this.
Like Rosa, Joey can talk to ghosts.
Joey has a couple of powers that let him interact with the material world in a limited way. You access and use these powers as though they were inventory items.
Joey's breath can move light or precariously balanced objects a short distance.
Joey's tie is usually used to transport ghosts to the spirt realm, but it also has a few other uses throughout the game.
Joey's spectral presence has also been known to interfere with electronic signals.
Tips
When in doubt, talk to everyone about everything you can. Be especially sure to exhaust all conversation trees.
Usually, when you are finished discussing something, that option will disappear. If it doesn't, that's the game's way of telling you that the topic contains an important clue, or that you need to finish the conversation in the proper way.
Compared to other adventure games, The Blackwell Deception has relatively little object collecting. Be sure to collect what objects you can, as they will all be useful.
Also, be sure to examine the objects you start the game with, as you might learn something about their use.
Joey can't talk to most living characters, but there a few with whom he can.
A locked door is your cue to switch to Joey. So is a locked safe, closet, drawer, and so on.
This game is all about story, so if you are at a loss for what to do next, think of it narratively. If you learn something important, who would be the logical person with whom to share or use that information?
Prologue: Ryan and June
Lower Cabin
Switch to Joey and look at the carving on the side of the yacht. Note the names.
Switch to Rosa and open the door next to the ladder.
Flick the lightswitch near the door (marked "??"). The boat starts moving.
Switch to Joey and enter the upstairs cabin.
Talk to the ghost and Joey gets shot, though it isn't terminal. Go back to the room and examine the diagram near the door. Go outside.
Switch to Rosa and go into the lower room.
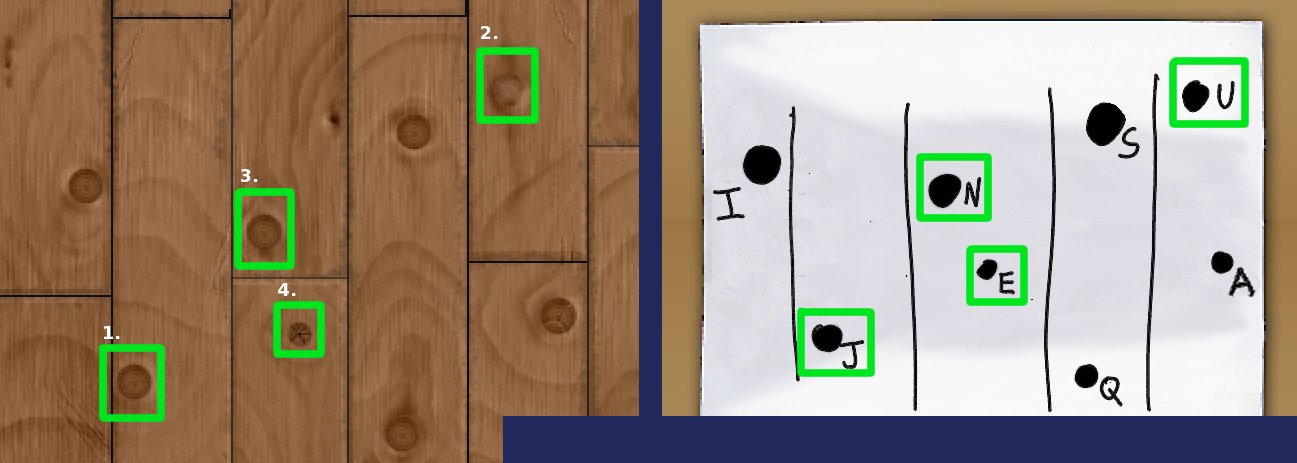
Keep moving to the left until you get to the "knotty pine" wall. Examine it.
The knots on the wood match the diagram. Maybe the letters on the diagram spell something significant.
Punch the knots so they spell the name "June."
Solution
Examine the money in the cache that opens up. Note the letters GCT.
Getting the Key
Switch to Joey and enter the upper cabin.
Blow on the key hanging near the door. Blow on it again so it winds up near the vent.
Switch to Rosa and enter the lower cabin. Use her dime on the vent above the bed.
Use the vent, then grab the key.
Go outside and use the key with the door to the upper cabin. Enter.
Upper Cabin
Talk to the ghost. Learn about the bank robbery.
Use your phone to search for "GCT bank." You learn about the Grant City Trust.
Search for "Grant City Trust Ryan" ("Ryan" being the other name on the boat).
Talk to the ghost (Ryan) about the bank robbery. Keep talking to learn that he wants to get to Boston.
Switch to Joey. Move near the navigation device in the center of the cabin until it shows an image of Boston Harbor.
Boston Harbor
Switch to Rosa. Ask Ryan how far the boat is from Boston. He checks, then leave the cabin.
Go outside and talk to Ryan.
Go back inside. Switch to Joey and use the tie with Ryan.
Have Rosa talk with Ryan.
Back on Earth, quickly leave the cabin and use the gap to the right to jump overboard.
Chapter 1: Jeremy
Jeremy's Apartment
After the phone call, head out the door to the right, then to Jeremy's.
Jeremy wants you to go to the City Post for him. Agree to do so.
Examine the photos on the table to the left of the bookcase.
Exit left and go to the City Post.
City Post
Talk to the receptionist. It doesn't go well.
Switch to Joey. Move left and read the plaque near the upstairs door. Enter the door.
Read the note on the computer in the middle cubicle.
Exit the office and the City Post building, then head to High Line Park.
Detective Durkin
Switch to Rosa and talk to the detective. He doesn't believe you can identify the body.
Go back to Jeremy's and take the photo. Go back to High Line Park.
Show the detective the photo.
Exit, then head to the City Post.
City Post
The receptionist now lets you in. Take the elevator and enter the reporters' office.
Take the notebook leaning against Jeremy's computer. Examine each entry and exit.
Take the reporter's pass on the table to the left.
Exit the office, leave the building, and go to Jeremy's.
Madison Haines
Show Jeremy the notebook. Ask him especially about Penelope Haines.
Exit, then head to the Haines residence.
Talk to the woman (Madison Haines), who isn't too interested in helping. Leave and send Joey in.
Enter the door on the right, near the thermostat.
Look at the brochure on the nightstand. Leave the apartment and go to Seagram Assisted Living Center.
Penelope Haines
Talk to the nurse about Penelope.
Take a brochure from the rack in the center of the room.
Take the elevator to the Common Room.
Talk to Penelope.
Take the ball of yarn on the table Penelope is sitting at.
Head out the door to leave. Note the interesting conversation with the old man.
Getting the Key
Go to the Haines residence. Talk with Madison to learn about Gavin, and about the key to the apartment.
Go to Seagram. Have Joey read the chart in front of the nurse.
Go up the elevator to the Common Room. Talk to Penelope, especially about Gavin, her "peridot," and proving your sincerity.
Take the elevator to the 12th floor. Examine the door to ascertain that it's Penelope's room.
Switch to Rosa. Combine the brochure from the lobby with the yarn from the Common Room. Use the combined item with the door.
Switch to Joey and go inside. Note the key hanging from the chair.
Use Joey's wind power on the brochure, then on the key.
Switch to Rosa. Use the yarn to pull it back and get the key.
Exit to the left and take the elevator to the lobby. Leave and go to the Haines residence.
Getting the Peridot
Take the option to use the key to enter the apartment.
Have Rosa enter the door near the thermostat. Take the green stone hanging from the corner of the bed.
Uh-oh, the Haines came home early. Have Joey go out to check things out.
Blow on the thermostat. Madison will open the left door to the hallway.
Examine the baby to note that he can see Joey. Talk to the baby, and he will start to follow you around.
Go through the now-open door: The baby will follow you, and Madison will follow the baby out of the main room.
Switch to Rosa and quickly leave the bedroom and the apartment.
Go back to Seagram, to the Common Room. Give Penelope the green stone, her peridot.
Ask about Gavin to learn about Lisa Tenzin. Leave Seagram and head to her office.
Jeremy's Phone
Ring the buzzer and go inside. Talk to Lisa to learn more about her operation. Leave.
You can send Joey inside to look around, but there isn't anything to see yet.
With everyone outside, give Jeremy's phone a call. The trash can to the left starts ringing. Go through it to get the phone.
Exit to the right and go to Jeremy's.
Show the phone to Jeremy. He leaves for High Line Park. Leave and do the same.
Talk to Jeremy. Switch to Joey and use the tie on him.
Go back to Lisa's and ring the buzzer. Talk to her to confront her.
Chapter 2: Tiffany and Jamie
Lisa's
You're back at Rosa's apartment. Go to Lisa's.
If you ring the buzzer, Lisa won't see you. Instead, send Joey inside.
Head to the room to the right. Look at the photograph that Lisa is looking at, for a shocking revelation.
Leave Lisa's building, exit right, and go to Seagram.
Talk to the nurse about Danny. What you learn upsets Joey.
Go to Lisa's and buzz her again. Mention Danny.
When Lisa balks, ask Joey to help. Have Joey tell her that he had "slick black hair and a pencil thin mustache."
Continue to talk to Lisa until you get two names to investigate. You can look into their cases in either order.
Jamie
Jamie's dorm
Go to Jamie's dorm. Have Joey enter the room and read the note on the door. "Waterloo."
Switch to Rosa. Look up "Waterloo" on the phone, in case you aren't a history buff.
Use the door and enter the date of the Battle of Waterloo on the number pad.
Enter the room. Check out the poster above the desk and note the name of the band.
Read the big schedule on the back wall to learn about Elaine Appleton.
Look up Elaine Appleton on the phone to get a phone number. Call it.
Talk to Elaine about Jamie to learn about her, her death, and of Munray's. Take note of Jamie's particular interest in history.
Look up Munray's on your phone and head over there when you get the address.
Munray's, gathering clues
Switch to Joey and head up to the VIP lounge. Talk to the ghost; it's Jamie.
As she gives you a hard time, say "Oh come on…". Note what she says.
Leave and go back to Jamie's room.
Have Rosa use the laptop. You just heard Jamie say the password, and if you've been to Tiffany's apartment building, you can get another clue from the bulletin board in the lobby.
It's "Benji," the name of Jamie's dog.
Read all the emails. Important things to note include where she's from, and her ex-boyfriend, who has been hanging out at Munray's.
You've reached a dead-end on your own, but you have contacts. Call Detective Durkin.
Ask about Jamie. Head to the cafe he says to meet him at (It's the Cup of Clay, which you may already know about if you've been investigating Tiffany's death).
Talk to Detective Durkin to get the coroner's report sent to your phone. Leave, then go to Munray's.
Seb
Look for Seb, Jamie's ex, who has been hanging around at the club. He's the out-of-place looking guy standing by himself at the left end of the club.
Talk to him and ask him if he's Seb. Talk about Jamie, mentioning that you saw his email. Find out that she apparently used Ecstasy.
End the conversation and use the clue tracker on your phone. Read the coroner's report carefully.
Combine the clues "coroner's report" and "drug addict" to get a new clue: "Did Seb lie?"
Confront Seb, who believes Jamie lied to him about being a drug user. He also lets slip the name of her favorite author, Ashbless, before storming out of the club.
Do a search for Ashbless on your phone to learn more about him.
Talking to Jamie
Send Joey upstairs. Ask Jamie to dance: She doesn't like the music.
Switch to Rosa. Use the console to the left of the VIP rope. Remember what kind of music Jamie likes?
It's "Epileptic Fish," the band on the poster in her dorm.
Type the name of the band to switch the music.
Exit and switch back to Joey. Ask her to dance again.
Ask Jamie about herself. What you say to her affects how much she'll want to talk to you. By now you know everything you need to do so.
Ask about her studies. You learned this from Rosa's phone conversation with Elaine Appleton, her old professor.
Answer: History, Middle Eastern.
Ask about her spare time. You learned this from talking to Seb and following up with your own research.
Answer: Books?, Ashbless, Anubis at the Gate
Ask about her hometown. You learned this from reading Jamie's email.
Answer: The midwest, Illinois, Mattoon
That went well! Head downstairs, then go to Jamie's dorm.
Send Joey in and talk to Jamie. Watch the scene.
Tiffany
Tiffany's apartment
Go to Tiffany's apartment building.
Look at the buzzers to find Tiffany's apartment and mailbox number.
Hover over the mailboxes until you find Mailbox 2--it's to the right of the bottom left corner. Use one of Rosa's cool glow-in-the-dark business cards with it.
Switch to Joey and have him look inside Mailbox 2. With the card he can make out a name and address: R. Abu.
Have Joey enter the door to the left, to Tiffany's apartment.
Look at the picture on the bookcase and the papers on the table. Note the name Rachel and the initials STP.
Talk to Tiffany's ghost. She's just a little standoffish. Exit the apartment.
Switch to Rosa. You have enough info to make a search on Rosa's phone. Just put the clues together.
Search for Rachel Abu. Note the Cup of Clay cafe.
The name of that cafe might be familiar if you've been working on Jamie's case: It's the one where Durkin hangs out. Otherwise, you get a new location. Go to the Cup of Clay cafe.
Cafe, Sterling
Talk to the barista. Ask if she's Rachel. Consult your notes and be sure to ask about Ken.
In the notes page on your phone, combine "STP" and "Temp agency" to get an address.
Head over to the Sterling Temp Placement agency.
Talk to the guy at the desk about Tiffany and Ken. He's not helpful.
Go back to Tiffany's. Have Joey talk to her about Ken, and about Sterling.
Go back to Sterling. Talk to the guy about Tiffany's contract. Note his concern about the agency's reputation.
Show him the reporter pass, from the office at the City Post. Then talk to him and "resort to blackmail." Note the name.
Do a search for either "Ken Sharpe" or "Sharpe Sound." You'll have to leave the locations screen first, so just click on any location before making the search. Then go to Sharpe Sound.
Sharpe Sound
Enter the door on the left. Talk to Ken about Tiffany and Sterling (check your notes). He doesn't seem to remember anything about her. Leave him.
Look at the door on the right. Read the note on the door and the plaque nearby. Sharpe's neighbors are Gal Friday Publishing.
Do a search on Gal Friday Publishing for a new phone number. Now if we can only find that phone.
Send Joey into Sharpe's studio. Look in the drawer to Ken's left.
Note the "black thing" on the left of the screen, then exit.
Switch to Rosa. Have her call Gal Friday, then switch to Joey.
Look in the drawer again and read the note. Switch back to Rosa and hang up, then enter Sharpe Sound.
Talk to Ken about the letter in his desk. Interview him about his affair with Tiffany. Make sure he mentions the name "Turtledove."
Exit the studio, take the elevator, and go back to Tiffany's.
Tiffany's
Send Joey back in and consult your notes to talk to Tiffany about Ken. Leave your notes and tell her about "Turtledove."
Go back to Sharpe Studio. Enter the door and "Confirm It's Over." Tiffany doesn't take it well.
After you leave the studio, talk to Tiffany. Switch to Joey and give her the tie.
Take the elevator out and go to Lisa's.
Lisa's
Hit the buzzer. Talk about both Jamie and Tiffany, and their connection to Gavin, if you haven't yet.
Finish the conversation with Lisa inside, and with the stranger outside.
Chapter 3: Gavin and Lisa
Escape
Send Joey outside and downstairs.
Gavin is on the phone. Click on him to eavesdrop.
Go back upstairs to the storage room. Switch to Rosa.
Use the door to talk to Lisa outside. Say that Gavin plans on killing her. She tells you how to escape before abandoning you.
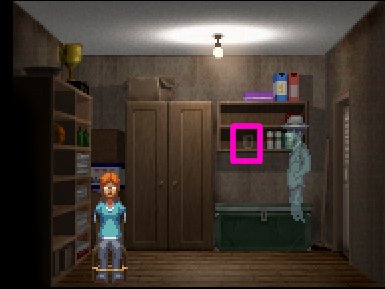
Switch to Joey. Blow on the glass on the shelf above the trunk to break it.
Screenshot
Use Joey's tie on Rosa. Pull her back once and to the right twice. Let go.
Switch to Rosa and grab the piece of glass on the trunk to her left. Use the glass on Rosa to loose yourself.
Screenshot
Exit the room. Talk to Gavin. End the conversation.
Take Joey downstairs. Blow on the photograph until it moves under the door. Follow it into the room.
Talk to Lisa. Talk to her about Danny. Then mention the photograph. Finish the scene.
Go back into the living room and watch the scene.
Freeing Rosa
Move to the right and talk to Madeline (from The Blackwell Legacy). Make sure to talk about "The Link." Sound familiar?
It's your tie. Show it to Madeline, who will show you how to use it to get back, if you agree to take her with you.
Watch the scene. Finish talking to Lisa, then dismiss her.
Talk to Rosa to free her from Gavin's clutches. The secret is reverse psychology.
Talk about Jeremy, then say, "Yeah, good riddance."
Talk about Jamie, then say, "You're nobody."
Talk about Penelope, then say, "Not a damn thing."
Talk about Tiffany, then say, "You are no better."
Get out of my head! Watch the scene, then use Joey's tie on Gavin.
Watch the scene and finish the conversation with Lisa.
Watch the final scene and enjoy THE END!
Watch the credits for a teaser for the next chapter in the Blackwell Saga.
Posted by: Mike |
October 17, 2011 6:32 PM
|
October 17, 2011 6:32 PM