
 Waiting for the new Kotorinosu is over, let me introduce The Treasure!
In March 2018, we got E.X.I.T. II and it was fantastic. This new game is much longer and even better and I'm missing an adjective here - superfantastic, maybe. It's huge. It's smart. It's stylish and good looking, complex and sophisticated. It's epic!
You find yourself locked in a lovely room without any window or door, and all you can hear are your footsteps clattering on wooden floor. Around the walls are few pieces of furniture, their drawers and cupboard departments are not surprisingly either locked or empty, and you need to examine everything closely to find some useful item or hint. Pay attention to details and click everywhere to find all active areas, and notice, that items in your inventory may be hiding something important too. There are many puzzles to be solved, locks to be opened and secrets to be revealed, because this room is a beginning only - prepare for few hours of gameplay and don't despair, if stuck, take a short break from playing. It helps to rearrange your thoughts. The game isn't hard, but it does take a while to figure out solution or how to continue as clues are sometimes a bit vague.
The cursor doesn't change over active areas and the game has autosave.
Have a good time with another great escape game!
P.S. You don't have enough? Really? Well, Elements or Lights by Neutral are classic, Gatamari Escape 12 - Gate 7 was posted only a year ago in WE-RE N°9, but what about beautiful Room Bath or Room Marine by Akarika, Place of Light? Or mysterious The Doors? Enjoy!
![]() The TREASURE (Android, Android Tablet)
The TREASURE (Android, Android Tablet)
![]() The TREASURE (iPhone, iPod Touch, iPad)
The TREASURE (iPhone, iPod Touch, iPad)


Soo good!!!
This is definitely a Best of 2018 game (or 2019, if it qualifies there). It's enough superbly polished content for you to enjoy an entire afternoon or two, so do actually try every puzzle before using the walkthrough! Take your time, take some breaks, and take it easy.
The TREASURE
Are you ready for the ultimate treasure hunt? It's not just a quest for riches, it's an epic odyssey of ingenious escape!
Before you start: note that while the game autosaves, it actually has two save slots so you can keep track of two different playthroughs.
Part 1
You're trapped in a small room with no doors.
Exploration
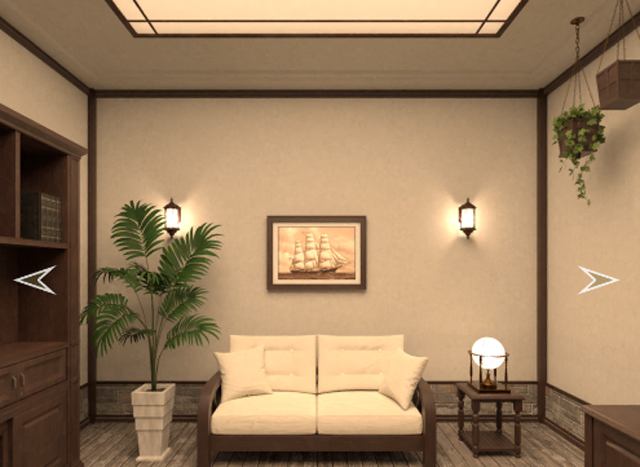
You start off facing a couch with nothing under its cushions. The wall behind has a picture of a boat facing right. There's a potted plant on the left with a copper coin in its soil, and there's a round lamp on the right.
Look under the lamp to find that it's bolted to the side table.
Turn left to face a bookshelf. There are a few books there, each with a different cover. Only one of them (the third one) has a bookmark in it, and the bookmarked page shows you an exchange rate for coins. The lower shelf has an box with an unusual golden surface on its top. Further down there's two small doors locked with a keyhole, and then there's two larger doors which slide sideways. Behind the right door, you see an unusual symbol (also visible through one of the door frames), and behind the left you see some sort of metallic grid that you can only lift up by a tiny amount. To the left of the bookshelf, you find a picture frame that shows a compass rose, neatly divided into four by the two faint diagonal lines across it, and the frame shifts when you click its edges.
Turn left to get a better look at those crates. After moving the top one, you find a handle hidden in the bottom one. Looking at the table, you can lift the flower vase and coaster to find a compass rose and coin, and you can also shift the chairs around to find a small box on the left one, with two triangular buttons and a circular socket. Above the table, you see another boat picture.
Turn left to find some things suspended from the ceiling: two flower pots and what looks like a moai head in a locked cage. On the wall, you see a framed portrait with tiny digit dials on its corners, a picture of a boat with a small peephole(?) at its top left, and something that looks like a clock that you can turn over to find a locked back panel.
On the cupboard, you find a pirate in a barrel with an extra slot at the bottom, a ship in a bottle that you can lift up and put down in the other direction, and a crown with a small hole in its top. The cupboard itself has an empty left compartment, a locked right compartment, two empty drawers and one (bottom) drawer with a symbol combination lock.
Looking closer at the cage, you find that the chain connected to its top is secured with a screw.
Squared
There's only one thing you can start with, and it's the matching compass roses on the table and picture frame. You already know how to work the shifty frame, so how do you find its clue from the table?
The clues are on the backs of the chairs, which spell out the roman numerals (top:) Ⅳ Ⅰ (left and right:) Ⅱ Ⅲ (bottom:) Ⅴ, which are just 1 to 5 in a different order.
Since the compass rose on the table points towards the right from our point of view, the sides you actually need to click on the frame are the LDULR sides. Once done, you hear a click and can remove the frame to find a magnifying glass.
The back of the removed picture is also covered in cork which is tied to the frame.
Look closer
Examine the magnifying glass to find that its handle comes off to become a key. Where does it fit?
Use the magnifying glass key to unlock the cage, and take the stone head figurine from it. This reveals a bolt on the bottom of the cage.
Turning the head over, you find a small line-and-circle engraving under its ear, as well as more elaborate carvings on the base.
Big head
The engravings on the head match the markings on the bookshelf device, which have extra clockwise arrows.
So place it there and rotate as marked, which opens the box so you can find a coin.
Once you're done, turn the head back and pick it up.
Coins
You now have three copper coins, which is enough for an exchange. How do you do that?
Insert the coins into the miniature barrel and push down on the pirate's head. The barrel dispenses a silver coin with a face on its front.
The coin also has a face on its back, but there are also some symbols over that.
Reverse
Use the clue on the back of the coin to unlock the framed portrait.
The digits on the coin appear to be mirrored, and the head on that side faces the other way.
So you need to input the mirror image of the clue into the corner dials:
6 3

9 2
Then pull the portrait open to find a spanner and a wooden cover with holes.
Cover
Go back to the bookshelf, and fit the wooden cover in the left door at the bottom.
Slide that door to the right, then slide the front door to the left. Now you can view the symbol through the holes on the cover. What does it mean?
It's the same spade symbol that appears on the second book, whose cover matches what you saw except for the star in the bottom right corner.
Use the magnifying glass to look at that spot on the book cover, and you see three symbols.
Three symbols
Use the clue you found on the book cover to unlock the bottom drawer.
Just click the buttons 7, 5, 3 times to show the hourglass, triangle and cross. Open the drawer to find a sketchbook.
And what a nice sketchbook it is! There's all sorts of named constellations and curly swastikas, which I'll just call swirls.
Unbolt
Use the spanner to remove the lamp on the first screen from the table. After flipping it over, hit the button on its bottom to turn it off, and then put it back.
It's a celestial globe! You can spin it to find three familiar-looking constellations and a blank spot.
Also remove the bolt from the cage- whoa! The cage flies up off the screen and leaves a small button behind.
Oh well, I guess it's not a daring adventure if you don't risk losing a few of your fingers.
On the left, a box has dropped from the ceiling, and you realize it's not a plant pot. The box is locked and has a keyhole.
You also notice something hanging from its chain: some sort of round key with flat extensions.
Up and down
Place the button you found on the box you picked up, which activates the triangular buttons on that box.
Those swirls on the button look familiar, so look for the clue where you saw them earlier.
Their appearance in the sketchbook suggests that the constellations should represent either the up or down buttons.
Which ones are up and which are down?
Looking at the globe, you find that the Phoenix and Chimera constellations appear in the top hemisphere while the Leviathan appears in the bottom hemisphere.
So push the UCUCCDC buttons on the box, then open it to find a silver key. Now where does this one fit?
Unlock (A)
Use the silver key to unlock the smaller doors of the bookshelf. There's a weird frame with twelve round slots arranged in a circle, and there's a small toy dagger on the left.
Looking closer, you also see two small rectangles directly above the large doors. They're actually wooden flaps that you can open to find screws.
Pop!
Insert the dagger into the barrel, which makes the pirate head fly out. Pick it up from the floor beneath the cage, and examine it to find another key sticking out of it.
Unlock (B)
Use this key to unlock the right cabinet door and find a sturdy-looking switch handle.
Lockjaw
The key on the chain fits the hole in the side of the stone head.
Since the key is fixed, you'll have to use the head on it. This opens its jaws and you find a screwdriver head within.
Unscrew 1
You now have both the screwdriver head and its handle, so assemble the screwdriver and use it to remove the hidden screws on the bookshelf.
Click the large doors again, and they both come out! You can now pull the large luggage trunk out of there to reveal a lever slot (actually a pair of parallel grooves).
Looking at the trunk again, you find that it's a little cracked on the top surface.
Switch
Insert the lever handle in the slots and pull. The entire bookshelf slides aside!
Light shines through the narrow doorway, so walk through it to exit the room.
Let's call this the end of part 1. I'll start another part each time you unlock a major area.
Part 2
Ah, refreshing sea breeze. You just can't wait to hop on a boat and ride off… wait, where's the boat?
Exploration 2
You face a fence with a hole in it, and can look over the edge to find a straight drop into the sea. Let's not do that.
Turn left to face two planters with beautiful flowers. Is there something else you should be looking at?
Turn left to face the way back, as well as a wall panel with a four-digit lock and three planters which are just filled with green leaves. You can pull the second planter out to find a tiny hole behind. Tapping the wall, you find that it's hollow, and a few taps later you manage to knock the hidden passage open.
Turn left to face a small metal locker, as well as two more flower planters with a coin beside.
Look in the corner to the right of the locker to find some vines hiding a small box that's tied shut.
Shuffle
Now that you have a different exit, we don't need that huge blinding doorway of light. Put the bookshelf back by pulling the lever again.
Hmm, the shelf moved a little too far, and now you can see some sort of small metallic lock in the wall.
Leave the room through the tunnel and look at the doorway from the outside (i.e. the back of the bookshelf) to find another sketchbook which includes a coin and a clue about how to use the stone head.
Four digits
Use the clue from the fence outside to unlock the wall panel.
Just above the flower planters on the left of the gap, the curlicue design forms the digits 3098.
So enter that in the panel and open it to find a handle you can pull and a key on the inside. Unfortunately, the handle retracts when you back away.
Unlock (C)
Use the key to unlock the panel on the back of the clock.
You see a screw, so remove that with the screwdriver.
Twelve points
You can now rotate the clock frame (and its face) over the numbered dial beneath, so use that clue to unlock the twelve-slot frame in the bookshelf.
By rotating the frame, you find that one of the positions is not like the others: if you put the window in the 8 o'clock position, there's no number there!
Instead, the diamond shape forms a fifth arrow. It looks like you'll need five coins for the frame, but you're only holding on to three.
Replace the pirate head on the barrel and remove the dagger, which ends up on the side. Now you can put the silver coin back in and push the head down to exchange it for 3 copper coins.
Place the five copper coins in the locations indicated on the rotated clock face. On a normal analog clock, these would be labelled 8, 9, 11, 2 and 4.
Once you're done, push the middle button to dispense yet another key.
(You can retrieve your coins if you want.)
Unlock (D)
Use this key to unlock the hanging box, and open it to find a heavy iron ball with a hook, which you pick up after you let go of the box and it flies up.
This means the cage is back in its original position, where you can unscrew its chain.
For the final time, the chain flies up offscreen and lands together with the box on the floor. Pick up the box and chain.
Chomp
It's time to follow the instructions you saw in the second sketchbook!
Like before, place the stone head on the bookshelf device and rotate it to face the front. Then use the box and chain on the head to attach the key on the chain to it.
The head pops open, so the remaining step is to push it shut. This causes the box to dispense yet another key.
Unlock (E)
Use this key to unlock the metal locker outside. It only contains a pair of pliers/wire cutters/shears.
Weighted
While you're outside, hang the iron ball on the handle in the wall panel to keep it open. When you return to the room, you find that a new and mysterious panel has appeared on the other side of the wall, to the left of the bookshelf.
Snip
Use the shears on the back of the compass picture frame, and remove the cover to find a tattered map.
Unfolding the map, you find that it's blank except for a single spot- no, that's a silver coin!
Also use the shears to unwrap the box you're holding, which contains a small handle.
Click the inside of that box to remove the padding and reveal the coin hidden beneath.
Twist
Place the handle in the slot (near the floor) just beside the bookcase, and rotate it. The whole room goes dark!
You can still look around, but the only other thing you can see is a bright blue arrow running across the walls. So turn the handle back to restore the light.
Slot
You'll notice that the newest wall panel has a cross-shaped socket in a vertical slot, as well as a smaller vertical slot on the right.
As you might expect, the cross socket perfectly fits the screwdriver you have, and the vertical slot fits the coins. After inserting the screwdriver, you can pull it down to retrieve any coins you inserted.
Is this an innovative vending machine, or just another one-armed bandit? You have all the clues you need to find out.
The blue arrow you saw in the dark runs across five picture frames, and the pictures in those frames match those on your coins. Do you have the right number and amount?
Yes! You need two silver and three copper coins, and the coins you have so far are:
3 exchanged for a silver coin, and then exchanged back for 3 copper coins:
In plant pot
Under vase
From stone head
+2 extra copper coins used to unlock the bookshelf frame:
Beside planter
In second sketchbook
+1 copper and 1 silver coin:
In small box
On folded map
After reclaiming the coins from the bookshelf, you should have a total of 6 copper coins and 1 silver coin, so you can put 3 of the copper coins in the barrel and exchange them for 1 silver like before.
Time to enter the code! If the screwdriver is still there, pick it up and replace it to reset the puzzle, then insert the five coins you have in the order Copper, Silver, Copper, Copper, Silver.
After pulling the screwdriver down, you hear a thud. What changed?
The crates at the left corner have toppled over! Move them aside to find a hole leading down to the basement.
(Both your screwdriver and the coins seem to be stuck in the panel. I guess that's the price you pay for progress.)
Part 3
Instead of fading to white, the screen fades to black and then you find yourself on the ladder.
Exploration 3
Climb down from the ladder into the dark basement. As you turn around, you don't manage to find anything except for a handle on your left, barely visible in the light from above.
So take the handle and pull it. You hear a crash, and now the room is truly dark!
Or is it? Looking around again, you find another handle in a wall just like the light switch you saw upstairs. And it works the same way: turning this handle restores light to the room.
As you back out from the handle (that you can no longer turn), you see that it's set into a pillar. The vent above ends directly above a framed panel on the wall and a pedestal displaying a bluish pointy wing. Pushing the button on the pedestal doesn't seem to do anything. On the right side, you find a high shelf with a pair of reddish feathers in a beautiful case, and you can lift that case to find a similar button beneath.
The cupboard below that has some wine bottles and glasses, but you find the rightmost wineglass slightly unusual so you pick it up… but only the top part, which turns out to be some sort of glass bulb with a metallic contact at its tip. The two drawers seem to be locked, or maybe that's not actually the case? You can open the door on the right to find a lantern though.
Turn left to face the handle that you pulled, which appears to be connected to a giant clockwork mechanism. Without the central gear, the button does nothing.
Turn left. You see a power box where the door is unlocked but only opens a little, a shelf with two horns in a frame (and of course there's a button under the frame), a desk with another glass bulb but more reddish and something that looks like an ashtray, and a framed picture of hot-air balloons.
Turn left to find a huge footprint in a frame (and a button) as well as a crumbly rock on the floor with an arrow behind it.
Hexagonal
The handle of the top "drawer" is actually a bolt that you can remove with the spanner. After doing that, take the wooden panel off to reveal what's actually happening.
The bottom "drawer" is also fake! It's just a wooden panel that slides up so you can take a torn note.
Lit
The lantern has a space for a light bulb, but the one you're holding won't fit.
That's because you're not holding a light bulb! An empty glass bulb can't emit light.
Attach the bulb from your inventory on top of the bulb on the table, then click it again to turn the whole thing over.
The red sand drains from one bulb to the other bulb , revealing an actual smaller lightbulb encased within. (Extra science points for noticing that the inner lightbulb is isolated from air and that this second bulb is slightly bigger to accomodate the extra volume.)
Place this bulb in the lantern, and pull the cord on the outside of the lantern to turn it on. Now, where do you need to use it?
After partially opening the power box, use the lit lantern to illuminate the inside. There's something there but you can't reach it.
Use the arrow to pull the other half of the torn note to you.
Twelve clicks
Piecing together the halves of the torn note tells you what to do and how many times to do it.
Pushing the rock 12 times makes a compartment open over the table. Take the leather notebook there, and open it.
Notice the folded sketch of the Titan constellation in the top left corner, and the burn marks at the bottom right of the notebook page. Flipping over to the next page, you see that its bottom right corner has been torn out.
Fix
Place the torn note in the back page of the notebook (if for some reason you haven't actually combined the halves, you can still put them in separately), and then read the letters that appear in the burnt holes of the front page.
There's only one puzzle left to use that code on.
The letters in the book are the initials of the constellations on the sketches. Since the sketches also come with drawings of what the constellations represent, you see that the wing, feathers, horns and big footprint belong to the leviathan, phoenix, chimera and titan.
Click the buttons beside/under the feathers, footprint, horns, footprint, wing, footprint. When you're done, the footprint frame slides aside to reveal a lever.
Pull that lever down, and a ladder drops through the vent above the table! As you climb onto the ladder, you finally see sunlight again.
Part 4
Do not adjust your screen, it's really this bright outside. (Okay, maybe adjust it a little if you really have trouble seeing.)
Exploration 4
Back out from the ladder to face a house. Unfortunately, the front door is locked. Instead of pixel hunting for stuff, you get the unusual idea to
close the cover on the ladder and take the stone piece from behind.
Turn left to find a white pillar emerging from the water, and click the top half of it to look up and find that it's a windmill. There are also some palm trees and a circular stone structure that we'll get to right away, but first
look behind the middle palm tree to find another stone piece.
Turn left to face the stone disk in the ground, which seems to have most of it missing. There's a statue behind (actually a bust on a plinth) that appears to be wearing a ruby pendant.
Turn left to find a sailboat in poor condition. Walking closer to the dock, you get a view of the boat, a barrel with a sword stuck in it, and a rock islet with a cross in it. Backing out to the main area, you also see a flagpole, the white flag on top marked with familiar swirls.
You can view the sword in the barrel from three screens, but they're not all equal. If you're standing on the dock and click the left side of the boat, you get a closer view which includes the boat's anchor chain.
Raise the anchor and remove it from the chain.
Dense
Examining the anchor and turn it over. In this orientation it looks a little like a sword hilt, but it also looks a little like something else.
It's a pickaxe! Climb back down the ladder into the basement and use it to smash the cracked rock. Turns out there was a key inside.
Unlock (F)
This key unlocks the front door of the house! However, you only see a small corridor inside, ending in a wall with a peephole. You can look through it to get a view of the original room.
Just beside the door, you find a lighter on the floor.
(But is it really the same room? Something seems a little off about it.)
Char
Open the lighter and use it on the blank map. The outline of the island becomes visible, along with a boat drawing, fainter outlines of the house and stone disk, and an X.
It should be pretty obvious what to do next.
The X on the map represents the ground between the ladder and the dock path. Clicking on the correct spot will zoom in on it, and then you can use the anchor/pickaxe to dig… and find a cogwheel!
Gears
Go back into the basement again, place the cog into the giant wall mechanism, and push the button.
It grinds for a long while, you hear a distant thud, and the handle next to the clockwork retracts to its original position.
The ladder is back! You can now return to the original room, but what would you need to do there?
Cache
Use the pickaxe on the cracked trunk to smash it open and find a stone piece.
Whole
Make your way back to the stone disk, and fill it in with all three stone pieces you picked up.
The disk pops out of the ground and extends handles in six directions. It's now a wheel you can turn by clicking the handles!
Solar
If you turn the wheel and then look around, you'll find that the only thing it controls is where the statue is facing. In particular, he always faces the same direction as the sun marking on the wheel.
You should probably make that sun marking face the sun.
How do you know where the sun is? You look at shadows!
The spokes on the wheel allow you to judge that the shadow of the wheel falls between the 3 o'clock and 5 o'clock positions, which means the sun symbol needs to be in the 10 o'clock position.
Click the wheel 4 times to make it so, and then check back on the statue. If you have it correct, you'll be able to click the statue again to look at his pendant.
The ruby pendant is now shining with a sun symbol, and also shining a bright beam of light out into the sea. Not for long, as you pick it right up!
Weird, it still shines even in your inventory.
Beam
Return to the basement and place the pendant in the empty frame above the wing.
The light beam shines across the room and makes a tiny crack in a brick.
Help it out by smashing the wall with the pickaxe. You find something to the left of the beam: an actual treasure chest!
It's unlocked and contains a cross on top of all the coins you'd ever want.
Miniature
If you can figure out what the cross fits into, maybe it will become clear what else you have to do.
The cross fits on the crown in the first room.
The pirate in a barrel, ship in a bottle and crown with cross roughly match up with the floating barrel, boat wreck and cross on rock.
To make this match more exact, you also need to have the dagger in the barrel and the bottle pointing right (so the right end of the boat is submerged).
Once you've replaced the dagger, flipped the bottle and inserted the cross, the entire cupboard slides aside and becomes inaccessible (and the pirate head completely vanishes from wherever you left it). This uncovers a wheel in the ground.
Turning the wheel makes the wall with the peephole sink away into the floor, but you can turn it in the other direction to bring the wall back.
Cycle
If you've paid attention to the view through the peephole earlier, you should know what to do next. Or you could just guess.
When you first unlocked the front door and looked through the peephole, there was a ladder visible on the left side, but if you try to restore the peephole now and look through it, you'll see that the ladder is gone.
The difference between those two situations is that the way back into the house was blocked the first time round.
The ladder you saw and the ladder to the basement are the exact same ladder! This means that you need to:
Keep the peephole wall removed so you can reenter the house from the front.
Go into the basement, and pull the handle next to the ladder to raise it into the house.
Climb up to the front of the house, and reenter through the front door.
Ta-dah! You now have a ladder leading upstairs.
Part 5
The ladder leads up to the attic. Good thing the lights are already on!
Exploration 5
However much you look at this screen, it's a blank wall.
Turn around (left or right) to face a huge machine chained to a ring in the ground with part of a ladder leading to it. You can climb onto the fabric top of the machine to find a rope, and also walk around the machine to the left and right. On both sides, tubes run into the machine from identical tanks, but the left one has a photo hidden behind it.
Hideout
Looking at the photo, you realize that it shows yet another area that's underground at the back of the house. (Also turn the photo over to see the Leviathan drawing against a starry background.)
Let's go there!
Leave the house through the back (i.e. the bookshelf side, or north) and look over the edge into the water.
In this view, use the rope on the water to tie it to the railing. Now you can climb down.
Exploration 6
This room is full of complicated tanks and pipes that you don't understand! Much easier is the lever on the right wall which has a vertical slot next to it.
While looking at the large tank, pick up the round capsule at its base. On closer examination, you find that twisting it releases a purple beam.
The vertical slot panel looks a lot like the coin slot in the first room.
So let's get some coins out first. Reach into the treasure chest and pull out 9 copper coins and 9 silver coins.
Playing around with the panel, you find that the stars along the left light up as you insert coins, and the coins are returned automatically when all of them are lit. This means the lever is useless right now, and in fact you can't pull the lever at all regardless of whether you've inserted coins.
Violet
Actually, it's ultraviolet. Either way, that purple color matches the stars on the back of the photo.
So open the sketchbook to the Leviathan page and use the capsule/blacklight on it to reveal a clue with a ship, an arrow, and three numbers.
(You might want to copy the clue down if you're working out the puzzle by yourself.)
Twelve stars
There are twelve stars on the panel, and you know what else has twelve stars? The Leviathan constellation.
So the sketchbook clue must tell you which twelve coins to insert, but how?
Hint (sort of): the numbers 11, 16, 24 appear on the 5th, 8th, 12th stars on the constellation, counting in the direction of the arrow. Is it just a coincidence that 11, 16 and 24 are almost twice of 5, 8, 12?
Remember from the first coin slot panel that the boat represents copper coins on which it appears, so the numbers on the clue actually represent 11, 16 and 24 copper coins.
Since you only have room to deposit 12 coins, some of those coins need to be silver to reach a total value of 24.
You need to insert coins in such a way that the first 5 coins have a total value of 11, the first 8 have a total value of 16, and all 12 have a value of 24.
To put this another way, the first five coins must have a total value of 11, the next three a value of 5, and the last four a value of 8.
Since there are no other constraints, you can create loads of solutions by just permuting the coins in each group, even though it's also mathematically true that the exact number of each type of coin can't be changed.
Let's skip the nerd talk and just say I'm presenting the solution in the easiest format to use:
11=1+1+3+3+3

5=3+1+1

8=1+1+3+3
Insert 2 copper coins, then 4 silver coins, then 4 copper coins, then 2 silver coins.
Once you have it correct, the coin slot is blocked off, the top right corner lights up, and you can now pull the lever.
Exploration 7
You put your coins away as the entire room begins to rumble. You're not being transported anywhere, it's just that opening up the roof is a noisy process.
Climb back up the rope, reenter the house and climb to the attic. The plain wall is still plain.
Turn around. The balloon has detached and is now floating at the full length of its chains. In the middle of the ring, you see a puzzle laid out in the shape of a compass rose, with a screen flashing between two clues in the middle and four three-digit panels around the outside.
Climb the rope ladder onto the balloon. All the chains meet at a cover in the middle marked with a pentagram. The side of the cover facing you has a keyhole.
Last but definitely not least, pick up the binoculars just under the cover at its furthest edge and slightly to the right.
Glow
Let's make sense of the display beneath the balloon. The screen with the four constellations is actually controlled by the panels on the sides: each panel controls the horizontal position, vertical position and orientation of one of the constellations.
The other screen with the crosses also has a compass rose on it, which means it's half of a map. Place the map from your inventory over it to complete the clue.
Hunt
The clue you just found points to four locations on (and off) the island, so use your binoculars to look at those four points.
The three offshore points are easy to figure out:
Look at the top of the windmill to find the clue
P=5-6-5.Look at the flag to find the clue
C=5-5-7.Look at the cross to find the clue
L=4-5-9.Since you're using binoculars, it doesn't make sense for the last point to be indoors. Therefore, it must be on top of the house.
While standing on the front/south side of the house, look up at the balloon which is directly above, and zoom in on the middle of the symbol to find the clue
T=4-4-2.Grid
The letters that appear beside the coordinates look familiar: they're the initials of the constellations that you used earlier.
The constellations on the display are helpfully placed next to the three-digit panels that control them. Clockwise from top, the panels control the Phoenix, Leviathan, Chimera, Titan constellations.
So enter the four codes accordingly: 565, 459, 557, 442.
Looking at the display again, you see that the four constellations overlap to form a pentagram! (There's no actual overlap: of the 15 short segments required to form the star, each constellation contributed 4 segments except for Titan which contributed 3.)
Another compass rose appears on this screen, and the other screen doesn't even show up anymore.
Treasure
Place your map on the display again to figure out what location it indicates.
Go back outside to the front/south of the house, turn to face the windmill/west, and click the ground directly in front of the windmill.
Now that you've zoomed in on this rocky piece of land, use the anchor/pickaxe to dig in it and find a key.
Unlock (G)
Say one last goodbye to the island, and bring the key up to the balloon to unlock the cover there.
Opening the cover reveals a handle that you can turn to remove. The chains fall off and the balloon rises away!
Enjoy the dramatic music and credits roll. Thank you for playing!
I had been waiting for this one to be posted here. I noticed it was coming up a few months ago, and played it twice since it was released last month.
I'm sorry that we are late with this post. Things didn't go as planned.
kk or anyone, having a small issue with the game
just before the 5th chapter it says to make the peephole come back in the front door by turning the handle, so i did. then it says in the basement pull the switch. It was already pulled. now it tells me part 5 goes to the attic. there is no known way that i can see that leads to the attic so i'm stuck. Did i do something wrong?
The Gear device with the handle in the basement raises and lowers the ladder from the starting room into the basement. When the handle is pulled, the ladder is not accessible from the basement, only from the room to the roof.
The ladder leads up to the attic. Good thing the lights are already on!
this s what KK posted. i don't even know if you can turn the cogwheel mechanism off or on. I'm just going by what the walkthrough says.
Read this Brf.
Halfway through Part-4 you found a gear and went into the basement and put the gear on the wall with the rest of the gears. You then pushed the button and the ladder to the room came back down. If you pull the handle next to the gears, the ladder goes back up.
yes but after i make syre the peephole is there and if i pull the lever then go to the front door of the house, there is no attic. just the main room. and i can access the basement. something is not right here and confusing.
I am not sure where you are getting confused.
There are two ladders going to the basement. One leading up to the first room, and the one leading up to the lawn. When you pull the handle in the basement, the ladder leading from the basement to the room is gone, leaving only the one leading to the lawn. If you go up to the lawn and through the front door, you see the ladder that is no-longer going to the basement, leads now to the roof.
what i'm saying is i go outside and i go in the main room and i go in the basement but no access to the attic.
If you can go down the ladder from the room, then you have not pulled the handle next to the gears in the basement.
well where the gears are it shows it has been pulled. that;s why i'm confused.
ok i figured it out but now:
i says something anout entering codes on the Constellations but i don;y see how to enter such codes. Please help.
anyone? i can't finish the game without that info.
Anyone?
Have you found the thing on the floor that's described as
In the middle of the ring, you see a puzzle laid out in the shape of a compass rose, with a screen flashing between two clues in the middle and four three-digit panels around the outside.
Those four panels get the codes which I've listed clockwise from the top.
KK,
If you are talking about afe the roof opens up to the big thing at the top, where there is a round circle and it shoews the 4 symbols and i put the map on it, i see the 4 x's but i'm not sure where on the map they are. If these things mean i have to re-open up the basement where i pushed the button's in that order so i can now type a code, i can't access that anymore to my knowledge. it's just confusing.
i think i figured it out as i have now finished the game. man that was one long game but it was cool.
So there's not one single browser on a Windows 7 PC that supports Unity WebGL, right? Firefox, Chrome, IE, they all either fail to load the game or won't even attempt to. How can this game engine purport to be browser compatible?
Firefox and Chrome have official support for WebGL, which certainly makes it browser compatible. (I believe this is WebGL 2, so using IE would not work.) As I mentioned the last time this came up, Unity claims the same support for Firefox and Chrome, so any incompatibility can only be blamed on your OS setup or hardware.
So tl;dr I really can't help much to solve your problem, because this stuff gets really specific and complicated.
Without going too far into tech support:
A quick search suggests that WebGL on Windows 7 is usually provided via the ANGLE backend which ends up using DirectX 11 for rendering.
You can check on the game loading by opening up the developer tools with F12, where Unity writes some stuff in the Console tab.
You can also use WebGL Report or the
chrome://gpupage in Chrome to check for those things I named, and hopefully it will identify the specific issue.If all else fails, you can try the mobile versions, which (I think) only show video ads when you use their hint system.
Thank you kk, I did finally get it working on Chrome (though my Firefox on the same machine is also up-to-date, but won't permit WebGL for some reason).
Excellent game! It is free, but it's a long game with visuals and gameplay so strong that I would gladly have paid for it, as for Rusty Lake and Fireproof ('The Room' series). It's not up to that cinematic level of course, but it's pretty equal to Neutral's awesome games.
Fantastic game, thanks so much for sharing Jay. Takes me back to 2009, 10, and 11 when I first starting coming here and there were so many games like this to really get sunk into. Have people just stopped making them?
I feel like this game was way too similar to Neutral's escape games, especially "Elements" which came out in 2015. On its own, I believe that The Treasure is an excellent game in the escape genre, but as I played through it, I felt like I was seeing a bunch of recycled ideas from Neutral. For example,
using an arrow to retrieve a scrap of paper from a container that can't be opened all the way
.
I had a problem where the game would not load in Firefox.
Then I set the option "webgl.force-enabled" to "true", and that fixed the problem.
The game actually feels too uninspired and unrefined to me.
Uninspired is subjective, so I can't justify it, but it feels like "Neutral made a large game so I have to make one too".
Unrefined is objective, though. The first thing is the obtuseness of the puzzles. For example, it never occurs to me that I can put the panel
with the nine holes onto the sliding pane
because the panel have two hinges on its side, so it doesn't seem to fit in. And that piece of paper
which should be scorched by the lighter doesn't look like it can be scorched. Meanwhile, that piece of paper definitely looks like it can be burned in Elements because it's charred,
so you see that Kotorinosu didn't put enough visual cues there.
Another major complaint is the backtracking. While the playing space in Treasure looks smaller than in Elements, it actually takes more time to backtrack here than to backtrack in Elements. In Elements, all rooms except one area form a straight line and you can just click click click in one direction to backtrack. Here you need to change direction and endure the transition animations. There's a reason why you can teleport in Gargoyles.
Style inconsistency is another issue. You have a pirate ship, a brass cog mechanism, a generator made of steel, a wind turbine. Do I need to go on?
This game is no match for Elements. Not only that, but it's even worse than Gargoyles. Also, it's 2019 now, why are we still playing with a viewport smaller than 800x600?
I might agree that the game feels "inspired" by Elements (at least I believe many of us see similarities), but just making a large game doesn't mean it's unoriginal. In particular, both developers have always been well-known for long, challenging games with quality graphics. (This one's more long than challenging, but I prefer fun gimmicks over complicated puzzles.)
For the panel with holes:
The "hinges" are tabs/clips that keep the panel attached to the cupboard door. Shaping the panel analogously to a battery cover implies that it fits exactly into a square-shaped hole!
The other half of the puzzle is the pattern on the door, which has a grid of aligned and evenly spaced vertical and horizontal cuts, so it's natural to view the clue through square holes.
For the parchment:
Am I missing something? The parchment with the hidden map already appears to have charred edges when you first pick it up (folded).
By the way, I find it a bit weird that charring is how escape games tell you to heat a piece of paper, since making an invisible ink message doesn't require a flame at all.
I didn't find backtracking too much of a hassle, partly because I spent most of the time struggling to pixel-hunt items (and thus overthinking the puzzles), which required systematic traversal of the entire map anyway. If you only consider the bare minimum of navigation, the transition time doesn't add up to a lot.
Style inconsistency: Almost every item you mentioned appears in a different part of the game, and is coherent with its surrounding room/area. Having both a steam generator and a windmill just means that different settings have been glued together. At least it adds mystery.
The small viewport is almost certainly trying to get you to download the mobile app. I'm reminded of the Submachine business model, but something seems a little off about the execution.
I have seen before how Kotorinosu borrows elements (pun intended) from Neutral, like the main puzzle in Sphinx is from Neutral's Vision. That doesn't make me any less of a fan. I had been waiting for this one for months, and it pleased me to play it.
What a fantastic game! Well done!
I may have missed it but I dont see where it says to find the 3 pieces of stone for part 4. I found the one behind the tree and the one in the trunk but I csnt find the third.
(As you expand spoiler tags, look out for stone piece in bold.)
2 of the 3 are found in "Exploration 4", and because I consider them to be pixel hunts they're within deeper spoiler tags there.
To save you the trouble of rereading it, the one you're missing is
behind the cover of the ladder you enter from.
Update