
![]()
 On the sushi menu of your favorite Japanese restaurant, you know unagi as a savory, slightly sweet freshwater eel that's better tasted than ogled. So it's the same in Ninjadoodle's hors d'oeuvre portion of sixteen puzzles, Unagi 16.
Gameplay in this case is like the "find the code and enter it below" puzzles in Ninjadoodle's Binga series. If you can point, if you can click, you are well on your way. In each level, manipulate the images in the clues given until you can decipher the code by calculating, doing some computing, and applying a bit of logic. At times you'll need a good memory or a notepad and pencil nearby, occasionally you'll have to do some dexterous clicking and, in the end, there's a little arcade-like challenge to sum it all up. There's not much else to it but it's strangely compelling and oodles of fun.


Walkthrough Guide
(Please allow page to fully load for spoiler tags to be functional.)
Unagi16 Walkthrough
General Information
This walkthrough will be constructed with three levels: hints, then more pointed hints, then complete instructions on how to solve a particular puzzle.
Some of the levels are color based, so there will be directions for the colorblind when possible.
Some of the solutions change from play to play, so instructions on how to find the solution will be given.
Levels names are my own, not the official ones.
Watch the changing cursor, a hand indicates clickable areas.
The top part of the split screen is for the puzzles, the bottom part is for the four digit number each puzzle will lead to. You cannot click on the four digit code and enter a number until you have seen all of the clues.
Warning: Using the hint button in the game takes you to a page of solutions, not hints.
Good luck!
Level 1 (Purple Haze)
Perhaps try clicking on each part of the grid to see what it does?
You could try clicking on some areas more than others.
Each column has three cells, and each cell is part of a number. Clicking on a cell brings up part of that number.
The top row of cells is the top of the numbers, you don't need to click on them.
The middle row of cells should be the middle of the numbers, click each one once.
The bottom row of cells is the bottom of the numbers. Click each cell in this row twice.
Once the numbers are assembled you can see the code: 5417.
Level 2 (Ahoy, Mateys!)
Maybe the hint has something to do with the pirates' most distinguising feature?
I'm talking about the eyepatches. Maybe they give a clue? Along with that purple eye floating above the pirates?
Click on each eyepatch. Underneath you will see either another eye or an "X" indicating a missing eye.
Note the little logo above the pirates, the eye with the x2 in it.
You simply need to multiply the number of eyes a pirate has by 2.
The first pirate has 1 eye, so multiply that by 2 to get 2.
The second pirate has two eyes, so multiply that by 2 to get 4.
The third pirate has two eyes, so multiply that by 2 to get 4.
The fourth pirate has 1 eye, so multiply that by 2 to get 2.
The solution is 2442.
Level 3 (Blue Light Special on Aisle 3!)
Hey, maybe clicking on the lights will turn them on?
Maybe clicking them in a particular order will keep all of them on at the same time?
This is a progression puzzle. Click the first light and it will turn yellow and show the number 8.
Click until you find the second in the sequence that will allow both lights to stay on. In this case it's the third bulb, which shows a 9.
Then click the second bulb, which is a 6.
Then the last bulb, which is a 5.
The order of the numbers is the order you clicked, so the code is 8965.
Level 4 (You Spin Me Right Round, Baby, Right Round!)
This clue will go spinningly if you click on the right place.
Maybe if you combine the spinning wheel with the numbers at the points of the compass beside it?
Click on the wheel to spin it. Watch the open box on the wheel closely, and try to find the numbers that correspond to the cardinal points on the symbol to the right.
The symbol to the right has numbers at different positions, the 1 at the bottom, the 2 on the left, the 3 at the top, and the 4 to the right.
The number you see when the box is at the bottom (1) is 6.
The number you see when the box is to the left (the 9 o'clock position) is 2. This corresponds to the number 2 on the symbol.
The number you see when the box is at the top is 3, which corresponds to the 3 on the symbol.
The number you see when the box is on the right (3 o'clock) position is 7.
Therefore the code is 6237.
Level 5 (For Whom the Bell Tolls)
The solution is as simple as ringing a bell!
And, maybe, seeing how many rings it takes to destroy a good thing?
Ring each bell and see how many clicks it takes to make the bell fall off.
The number of rings it takes to make the bell fall is the clue. The first bell takes 2 clicks, the second takes 3, the third takes 1, and the fourth takes 4.
Therefore the solution is 2314.
Level 6 (A Wink is as Good as a Nod!)
"One of these things is not like the others, one of these things just doesn't belong..."
Most of these little guys are blinking, but a few are being more cheeky!
In each row of little faces, look for the one that is winking, i.e. blinking just one eye.
When you identify that one, click on it to see the number underneath.
In the first column, it's the middle creature, which shows a 7.
In the second column, it's the top creature, which reveals a 3.
In the third column, it's the bottom creature, which reveals a 1.
In the last column, it's the middle creature, which revealse a 5.
Therefore the answer is 7315.
Level 7 (Travel is Enlightening!)
How many suitcases can you take on your round the world journey?
The trick will be figuring out the best itinerary.
Click on the first suitcase, the name of a city will appear (Prague).
Drag the suitcase to the left, then click on the blank suitcase left behind. Another city will appear (Amsterdam).
Drag Amsterdam to the left, then click on the blank suitcase. Yet another city name will appear (Rome).
Click and drag Rome just to the right of the blank suitcase, then click on the blank suitcase to see the last city (London).
Drag London to the far right.
The suitcases should be in the order they appeared, from left to right: Prague, Amsterdam, Rome, then London.
The numbers you are looking for are the number of letters in each city name. Prague = 6, Amsterdam = 9, Rome = 4, and London = 6.
Therefore the code is 6946.
Level 8 ("I Fall to Pieces...")
Some assembly required?
Something from the left, something from the right?
Match two pieces together, one from the left batch, one from the right, to make a complete number.
Match the pieces from the upper left of both groups to get an 8.
Match the pieces from the upper right to get a 7.
The two lower left pieces make a 0.
The lower right pieces make a 4.
Now four grids will appear, each with one section highlighted in red.
The first grid highlights the upper left square, the second the upper right, the third the lower right, and the fourth the lower left.
That would make the code 8740.
Level 9 (Bullseye!)
Pattern recognition?
Do those things at the top and the bottom of the screen mean anything?
Click on the small protruding things above and below each target. Each one will mimic one of the targets.
Cound how many of each pattern appears. There are 2 of the first one, 3 of the second, 2 of the third, and 1 of the fourth.
Therefore the code is 2321.
Level 10 (Counting Blue Cars! Or Yellow, whatever...)
Are these cars hiding something?
They didn't all arrive at the same time...
Watch closely to see the order the cars arrive.
Then click on each car to send them away, they reveal an 8, a 3, a 1, and a 7.
The upper right car, the one concealing the 8, arrived first.
Then came the car in the lower right, the one that hid the 7.
Then came the car in the lower left, the one hiding the 1.
Last came the car in the upper right, the one concealing the 3.
Therefore the code is 8713.
Level 11 (Oh, My, Octopi!)
Cool flashing colored headbands!
Even cooler when you can get them to stay one color...
When you click on a headband, the color will stop flashing and stay one color, then the octopus will fly away and reveal part of a code.
The first octopus will turn yellow, then reveal R = 8.
The second octopus turns blue, and reveals that G = 6.
The third octopus turns green, and shows B = 9.
the fourth octopus turns red, and shows Y = 7.
The colors were yellow, blue, green, and red, which makes the code 7968.
Level 12 (Rolling, Rolling, Rolling...)
Clicking anywhere makes things move...
Clicking more makes things move faster...
Click rapidly to make the ball roll to the right, fast enough to jump the areas where spikes will shoot up.
Note the number of spikes in each area and the ball jumps, 3 spikes, 5 spikes, 4 spikes, and 6 spikes.
Therefore the code is 3546.
Level 13 (Sudoku! Well, Sort of. Okay, not really...)
It's just simple math!
Well, simple math, and simple substitution...
Compare the two charts, the left one with the symbols and the right one with the numbers.
Note each row and column adds up to the same thing, and the squares with the number 6 corresponds to the squares with the square shapes.
It's all simple math from here. On the bottom row, 6 + 6 = 12, so the blank space must be a 7 to make the row add up to 19.
That means the circle symbol = 7. Put 7s in the number chart in the boxes that correspond to the ones on the left with circles.
In the top row, 6 + 7 = 13, so the empty square must be 5, which corresponds to the triange. Put a 5 in each square that corresponds to a triangle.
That leaves one empty square that corresponds to the asterisk. Simple math will show that it needs the number 8. Place the number 8 in the empty square.
Once the number grid is complete, a chain of symbols will appear in the upper right, triangle, square, circle, asterisk.
That makes the code 5678.
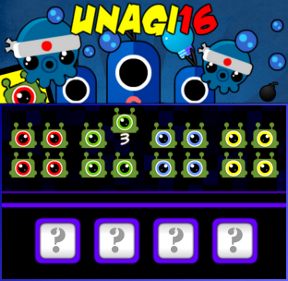
Level 14 (The Eyes Have it!)
Again, one of these things is not like the other...
The devil is in the details...
Look closely at each cluster of four aliens. Each cluster has the same eye color, but in each cluster of 4 one alien stands out for a slightly different eye.
In the first cluster (red), the odd one is in the upper left. Click on it to reveal the number 0.
The second cluster (green eyes), the odd one is the lower right. Click it to reveal the number 7.
In the third cluster (blue eyes), the odd one is the lower left, click it to see the number 6.
In the fourth cluster (yellow eyes), the odd one is the upper right. Click it to see the number 5.
Now colored dots will appear in the upper right, green, red, yellow, and blue.
That's the order of the numbers, so the code is 7056.
Level 15 (Advanced Tinker Toys)
Cool, the pieces rotate on an axis!
Now if we could just rotate each bit so that they connect and maybe make a shape?
Clicking on each "arm" will rotate it around an axis. Click the first bunch and you will eventually form the number 5.
The second arms will form the number 4.
The third arms will make the number 3.
The fourth set will make the number 7.
When you've made the numbers, another set of numbers will appear, 4, 1, 3, and 2.
This is the order to put the numbers you made. The code is 4735.
Level 16 (Pac-Man!)
Cool, blue bubbles that you can pop with an arrow!
But are those bombs hidden in there?
This is basically an arcade puzzle.
Click anywhere in the upper area, the arrow will start to move.
You can make the arrow change direction with a click.
You want to pop all of the blue balls, without hitting a bomb. If you hit a bomb, the game resets.
The answer to this screen is random, and will only show up when you've popped all of the blue balls.
Posted by: grinnyp |
November 2, 2012 2:07 AM
|
November 2, 2012 2:07 AM