
 The first spring full moon is behind us, so is Easter. Now back to normal, new Weekday Escape is here!
It's too early for strawberries (greenhouse-grown don't count), but both Maymay and Amajeto delivered games about them - maybe because they are red and fotogenic - and it sounds much better to tell 'find strawberries' than 'find cucumbers'!
With Neat Escape you get to a popular restaurant, but you are left on your own - how will you cope? Can you escape it, and if yes, with full or empty stomach? The last, and the only Easter game by Esklavos is a bit surreal and so cute!
Have a good time and enjoy!
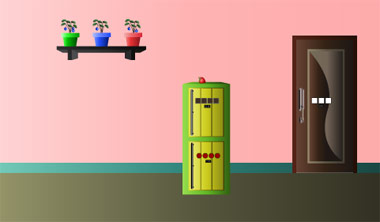
Maymay wants you to find ten strawberries this time (not Funkyland - four years ago, you were looking for seven strawberries in their Fruit Kitchens No. 1: Strawberry Red in WE N°17). Otherwise this is their typical game scheme, few scenes separated by coded doors, plus here and there lying strawberry - but it's not simple harvest, of course - some of them are hidden or locked in cabinets, and you have to solve some puzzles to get them.
The cursor is not changing, no save button, one ending.
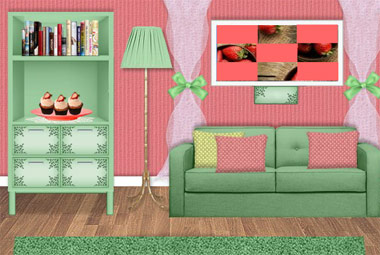
Amajeto doesn't expect you to look for strawberries; you only have to find five tiles and complete the picture above greenish couch to get the key from garden gate. Pleasant living room is decorated in strawberry pink and green, but you don't spend much time there, as the game isn't very long. Outside is a garden for exploration, apparently in early summer time - huge red ripe strawberries everywhere.
The cursos is changing (its color), no save button, one ending.
Here is beautiful Easter Joy by Tomatea - no strawberries, but many eggs!
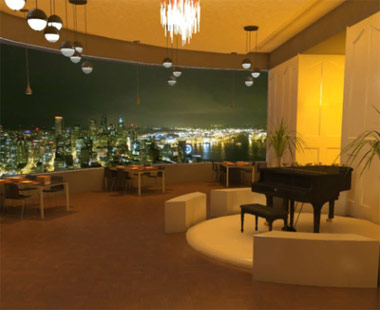
With Neat Escape, you find yourself locked in absolutely empty restaurant.The view is amazing (it seems that you are at the top of TV tower), and the food surely would be great too...if there was any waiter around. Instead of enjoying dinner in such a nice place you have to find out how to escape it, so you'd rather start now to get home before midnight! Piano music plays, but no one sits on the stool by grand piano, they just forgot to turn off the music - you can do it if you don't like it (in the menu). One key which you find later in the game can be used in two locks and the game forks here - in the second ending you get into VIP room, where they serve dinner, so you won't leave hungry after all! Unless you are vegan or vegetarian...it's a steak...
The cursor is not changing, save button, two endings.
The game is available Android too.
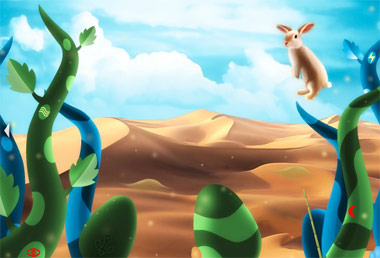
We didn't get any special Easter game this year - so here is one old from Esklavos, very adorable with flying bunnies. They don't have any wings, they are probably using their ears like rotor blades and flying like helicopters do! Also, you'll learn interesting facts about weight-bearing capabilities of flying Easter bunnies! Plus, it's beautiful game.
The cursor is not changing, no save button, one ending.
P.S. Here some more Easter games from reliable Monkey GO Happy: Monkey GO Happy Easter and Monkey GO Happy Eggs
We love escape games, and our readers love talking about them and sharing hints! How about you? Let us know what you think, ask for clues, or help out other players in the comments below.


I want to stay in the Strawberry world forever.
Find 10 Strawberries
Exploration 1
This is going to be easy! There's one strawberry on the cupboard which has a four-letter locked door and a four-digit locked door. Examine the colored plant pots, where the plants appear to have fake blueberries hanging from their branches. The door to this room is locked with a three-color lock.
Three colors
Use the clue from the plant pots to unlock the door.
The plants with 1, 2, 3 blueberries are planted in the blue, red, green pots.
So click the buttons on the door 5, 4, 1 times to unlock it, and proceed to the next room.
Exploration 2
This room has a nice orange-colored couch with watermelon cushions. Take the strawberry on the safe with four colored shape buttons that show letters. The door to this room has three buttons that display various decorative patterns.
Four digits
Use the clue from the couch in the second room to unlock the four-digit cupboard door in the first.
The watermelon cushions have 5, 3, 6, 7 seeds drawn on them.
So open that door to find a tightly-shut jar with a single strawberry inside and several letters in colored shapes on its label.
Letter shapes
Use the clue from the jar label to unlock the four-letter safe in the second room.
Colorblind help:
The colors on the jar label are (left column) yellow, blue, yellow, (middle column) green, green, (right column) blue, red, red.
The colors on the safe buttons are blue, yellow, green, red.
The blue square, yellow triangle, green circle, red heart shapes have the letters SOUR written on them, so enter that in the safe to unlock it.
Inside, there's a drawer with a three-digit lock, the buttons labeled with the letter V S H. There's a strawberry between two lemons, and there's also three partially melted candles with unusually shaped wicks.
Fluctuating lines
Use the clue from the candles to unlock the door of the second room.
The wicks of the candles have sawtooth, square wave and sine wave shapes. If those terms are unfamiliar to you, just click the door buttons 5, 3, 1 times to match.
Unlock the door and proceed to the next room.
Exploration 3
The furniture in this room are painted in fruity colors, like the lime three-digit safe on the left. There's a strawberry on a similarly-colored cupboard with two doors whose locks have colored shape buttons and mathematical symbol buttons, and also an unlocked drawer containing a checkered package with a bright yellow dashed line on it. The door to this room shows five strawberries over four digits forming a decimal number.
Mail
Use the address on the package to unlock the drawer in the safe in the second room.
The numbers of the Village, Street, House are 3, 9, 6.
So enter 396 in the safe to unlock it and find a strawberry and a transparent bottle of hot chocolate.
Brown
Use the clue from the bottle to unlock the four-letter cupboard door in the first room.
The letters on the bottle label that are covered by the chocolate spell COAT.
So enter that in the safe to unlock it and find a strawberry and a box cutter.
Unwrap
Use the box cutter to open up the box and find a strawberry and a receipt from Maymay Strawberry Store.
Highlight
Use the clue from the receipt to unlock the left cupboard door in the third room.
The circled word on the receipt is JAMS, and the matching letters occur in the yellow heart, green heart, red triangle, blue square.
So click the buttons on the cupboard door 3, 2, 4, 1 times to unlock it. There's a strawberry next to a rather large kitchen scale with some unusual functions.
Symbols
Use the clue from the kitchen scale buttons to unlock the right cupboard door.
The red symbols on the top row read % and ÷, and those on the bottom row read Ω and √.
So click the buttons
1 3

5 2
times to unlock the door and find a strawberry and a note showing three kinds of fruit.
Three digit
Use the clue from the note to unlock the small safe in the third room.
There are a total of 6 blueberries, 4 watermelon cushions and 2 lemons in the rooms.
So enter 642 in the safe to unlock it. Take the jar opener from inside.
Open
Use the jar opener to open up the jar and get the strawberry inside.
Ten strawberries
You now have all ten strawberries, but you still need to work out a number in order to escape.
Use all the strawberries in the scale, which reads 100.5 g.
That won't fit in the last door!
But the door only shows five strawberries instead of ten, so halve the weight to get 50.25 g.
Enter 5025 in the last door to unlock it and escape. You get a strawberry party with strawberry on everything!
The link text for "Magic Easter Escape" has the wrong title. ;-)
In "Amajeto Strawberries", the clue for the lower-right bookcase door can be tricky:
The strawberries growing along the garden fence are the right clue, but you have to be mindful of both the position of the strawberries and the number of leaves on each stem.
Did Amajeto throw a red herring or unfinished puzzle at us?
The strawberries and plates above the jam jars were just begging to be a clue for something.
@jF,
The plates and strawberries were a hint for
the up-down buttons on the first screen.
Hint for Amajeto Strawberries
For the coloured squares with the coloured centres:
The outer and inner squares can be clicked separately.
Oh, duh. Now why did I forget that? LOL…
Yeah—if not for an accidental click, I might not have noticed that!
Did I miss something with the scales in "Magic Easter Escape"?
I guessed right that the eggs needed to be arranged to match the maximum capacities each rabbit spoke of. But what determines the order? I assumed the left (blue) rabbit's weights on the left, and the right (pink) rabbit's on the right. But that's backwards from the solution.
@jF: That part had me confused for ages, until I noticed one detail:
The left rabbit starts his sentence with an ellipsis, and the right rabbit ends his with one.
Amajeto Strawberries
While the mint green and pink make a nice color combination, one has to wonder if Amajeto gathered all this furniture for St. Patrick's and hasn't changed it out.
Exploration
The main puzzle in this room is the strawberry picture which is jumbled up and missing some tiles. You can flip it over to find an unusual picture of a square grid with a strawberry in it. The shelves on the left have a book with another square grid, a plate with cupcakes on it, and four locked cupboard doors: one with two buttons, one with four colored digits, one with four colored letters and one with four red bars.
Turn around. The left side of this cluttered screen has a locked door. In the middle, plates and strawberries are arranged on a shelf over a counter with a cupcake on a plate and four jam jars with interesting labels. The cupboards beneath the counter have two locked doors, the left having a grid puzzle and the right having four buttons with pairs of concentric squares. Under the open window on the right, five more cupcakes sit on another plate.
Outer and inner
Use the clue from the jam jars to unlock the right cupboard door beneath them.
The outer squares on the puzzle should be purple, orange, yellow, red (3, 0, 2, 1 clicks) and the inner ones should be orange, red, purple, yellow (2, 3, 1, 0 clicks).
Once you have set all the squares correctly, open the door to find a square tile and a grid clue.
Four letters
Use the other clue from the jam jars to unlock the lower-left cupboard door on the first screen.
The capitalized letters on the yellow, purple, red, orange labels (not jars) spell out ALOE.
So enter that in the cupboard door to unlock it. Take the square tile from inside.
Upper and Lower
Use the clue from the shelf above the jam jars to unlock the upper-left cupboard door on the first screen.
From left to right, the strawberries appear on the UDUDD shelves.
So click those buttons to unlock the door. Take the key from inside.
Use the key to unlock the door to the room. Now you're in a garden!
Exploration 2
The gate to this garden is also locked. On the left, four strawberry plants have grown at different rates. On the right, there's another grid clue, and a plate of cupcakes on the picnic bench.
Big grid
Use the grid clues you've found to unlock the left cupboard door below the jam jars.
The small grids on each grid combine to form a large grid, with the thicker edges on the outside:
S---

--S-

-S--

---S
So click those four squares to unlock the door. Take the square tile from inside.
Four digits
The button on the upper-right cupboard door is marked with a silhouette of a cupcake, so use the clues from the cupcakes to unlock it.
The blue, green, red, yellow plates have 2, 1, 3, 5 cupcakes on them.
So enter that in the door to unlock it. Pick up the square tile from inside.
Four bars
Use the clue from the strawberries in the garden to unlock the lower-right cupboard door.
The plants with 1, 2, 3, 4 leaves are the 1st, 2nd, 4th, 3rd tallest plants.
So click the bars on the door 0, 1, 3, 2 times to represent this. Unlock it and take the last square tile from inside.
Nine squares
Place all five tiles in the picture, and unscramble it (this part is randomized).
Once done, the compartment under the picture opens up and you can take the golden key. Use it on the garden gate to escape!
@kktkkr: That makes sense, albeit rather obscure for a clue. Excellent observation!
Watch out for where the game forks, indeed.
Night View Restaurant
I can see why this restaurant is popular, but why would it then be empty? Hmm…
Exploration
The soothing music draws you to the piano, but there's no one there. The piano itself is locked. Look at the potted plants on the left to find that the leftmost one hides a glowing number 5, then look at the potted plants on the right to find that the leftmost one there hides a screwdriver.
Back out to the first screen, where a light coming from the right wall draws you into the corridor. The staff door at the end is blocked by a trolley with a screwed-shut box on its lower tray. There's another trolley on the left which has a teapot hiding a glowing 7 and also a wine glass you can take.
Back out to the first screen. The tables seem unusual, so examine each one. On the right one, there's a box with two buttons shaped like wine bottles. On the middle one, there's a box fastened shut by screws, and also a menu next to it with lunch and dinner options. On the left one, there's a box with nine buttons that glow red when clicked.
(Back out again, and) turn around to face the other three tables. The right one has a three-digit box with > signs. The middle one has a box with a stopped clock and three colored buttons, but you can also pick up the wine glass next to the coffee cup there. The left one has a four-digit box which seems to ask for a price in yen.
Click the left side of the screen to go to the entrance corridor, which ends in a locked door. On the left side, there's an unusual cabinet with a locked door on top and some wine glasses beneath, with room for three more. On the right side, the reception counter has a monitor which you can click to find an exchange rate. Walking behind the desk, you find a wine glass beside a computer which only displays the digit 4, and a suspicious panel on the right that needs a key to unlock. Beside the reception counter, there's an impressive rack of wine bottles. Look in the grid of bottles on the bottom to find an empty bottle hidden among them.
A price
Use the information you found in the room to figure out the price to enter in the box on the leftmost table.
The price you need is the A course for dinner (because it's night), which is $20.
Using the exchange rate displayed at the reception, that would be 2240 yen.
Enter that in the box, then open it to find a can opener.
Three digits
Use the clue from the glowing green digits to unlock the box on the third table from the left.
The signs on the box tell you to arrange the digits in descending order, which gives 7>5>4.
Enter 754 in the box, then open it to find a clock inside, helpfully backlit with a 5 marked on it.
Clock
Use the clue from the clock you just found to unlock the box on the second table from the left.
The 5 marked on the clock tells you that it's rotated, with 9 at the top and 12 at the right. This means the white, blue, pink hands point to 10, 2, 7.
Click the corresponding buttons that many times to set the clock box accordingly, then open it to find a funnel.
Bottles
Use the clue from the bottle rack to unlock the box on the rightmost table.
The rack forms an arrow forming up. In that order, the bottles in it point RRLLRL, matching the UUDDUD buttons on the box.
So push those buttons to open the box, and it opens to give you a cork screw.
Message
Use the corkscrew on the empty bottle to find a photo of piano keys.
Unscrew
Use the screwdriver on the box in front of the staff door to find a wine bottle.
Then use it on the box from the second table from the right to find a yellow key.
Pour
Place all three wineglasses in the cabinet at the left of the entrance corridor. Now all the glasses have tubes leading down to them.
This unlocks the door above, revealing a tiny opening at the bottom of that compartment.
So place the funnel on the tiny opening, then uncork your bottle with the corkscrew and pour the wine into the funnel.
The wine flows down into only four of the glasses.
Grid of nine
Use the clue from the filled wineglasses to unlock the box on the third table from the right.
The white line on the box corresponds to the left edge of the tray holding the glasses, which is lighter than the other edges. So you need to mentally rotate the tray clockwise.
Click the
O-O

O--

--O
buttons on the box to turn them red, then open the box to find a can.
Tin
Open the can with the can opener. Inside, there's a transparent sheet with circled numbers.
Play
The yellow key fits in the piano to unlock it.
The sheet fits over the piano photo to tell you which keys to play, but for some reason you have to read both upside down.
Zoom in on the piano keys and push the 2nd, 5th, 3rd, 4th, 1st, 2nd white keys from the left.
The fourth key pops off so you can take a blue key from it. Save your game.
Night End
Use the blue key on the main doors to unlock them and leave.
You enjoy a fantastic night view from street level.
Food End
Load your save, and use the key to unlock the panel behind the reception desk, then push the big red button there.
The piano rises up from the ground with stairs leading down to a door whose lock has some unusual rectangular buttons with white squares on them.
So use the clues from the tables to unlock this last door.
As seen from the inside, the tables have different layouts of empty plates:
3 plates, all but LR
2 plates, LL and UR
3 plates, all but UR
3 plates, all but LR
4 plates
4 plates
So click the buttons 6, 4, 3, 6, 8, 8 times, then push the button to unlock the door. Leave through it, and enjoy your dinner in the VIP room!
Here's the last walkthrough.
Magic Easter Escape
Exploration
The magic in this game begins with this flying bunny who tells you how many (kilograms of) eggs it, and somebunny else, can carry. The trees are pretty magical too, with painted patterns and colored symbols on their twisty trunks. Of the two giant easter eggs in front, one of them has an anchor marking on it, and the other has an egg beside it on the left. There are two sand mounds in the background, and a stick on the right that you can't get. Pick up pair of eggs beside the right tree.
(Each single egg or pair of eggs in this walkthrough counts as 2/12. This means you should now have 4/12.)
Go left to another screen with similar trees, sand mound, giant egg and flying bunny. There's a magic portal here with four colored keyholes on it, a row of four weighing scales on the ground to the left of it (with the eggs you have placed there when you zoom in) and a magical sign with a symbol puzzle on the right. Pick up the shovel leaning against the portal, the machete between the two leftmost trees, the egg on top of the left green tree and the string with hook tied to the tree on the right of it, and the pair of eggs on the opposite side of the lake behind the portal.
Dig
Use the shovel on the sand mounds on both screens to find 2 pairs of eggs and a small anchor.
Chop
Use the machete to get the stick from the first screen.
Rod
Combine the stick with the string to form a fishing rod. Now, where to use it?
Use the fishing rod on the water beyond the sign to get a large anchor from it.
Anchors
Place both anchors in the eggs where they fit to get yellow and blue keys.
Color pairs
Use the clue from the colored symbols on both screens to solve the puzzle on the sign.
The pairs of dots at the top left of the sign are (from top to bottom) red, blue, yellow, green.
The corresponding symbols on the trees are:
Red: eye, moon
Blue: triangle, sun
Yellow: wave, lightning
Green: flame, leaf (the leaf clue is a tree leaf rather than on the trunk)
So move each pair to connect the symbols of that color:
GBY

R G

BRY
A red key falls out of the sign.
Egg weighing
You have just the correct weight of eggs to make each of the numbers the bunnies mention on the weighing scales. But which scale should hold which weight?
The bunny on the first (right) screen ends his sentence with an ellipsis ("…") and the bunny on the second (left) screen starts his sentence with one. So the first bunny's clue comes first, and the correct order for the numbers is 4.5, 4.5, 8, 4.
The eggs appear on the screen in increasing size, and they also have increasing weights from 0.5 to 3.
This means that you can move the eggs to the scales as follows:
1 1 1 4 3 3

1 1 2 4 3 2
to make each scale hold the correct amount. When done, a white key falls out beside the scales.
Escape
Place all four keys in the portal to escape!
Update