
 The year is over. Merry Christmas to all of you with Christmas Special 2!
Whether you like it or not, this time of the year is here again, and the Weekday Escape brings several Christmas-themed games, peaceful and relaxing. Amajeto locks you in their typical living room, fully decorated in red and green. Nekonote takes you outside to dreamy snowy land to help to deliver presents. Rinnogogo wants your help too, and it's urgent - Christmas would be ruined without it! Esklavos lets you on your own in deep forest, and you need to make some presents to get out. Bart Bonte doesn't want you to escape from anywhere, you just need to get through forty puzzle levels.
Have a good time and enjoy!
Cosy room with decorated Christmas tree and burning fireplace by Amajeto is full of locked drawers, and you need to figure out all the codes, as usual, and collect eight tiles to complete the final jigsaw picture puzzle and get the key from exit door.
The cursor is changing (its color), no save button, one ending.
The title of the game may not be very inventive, but it's definitely fitting. Nekonote takes you to the mild lanscape covered by soft snow, where are huge snowflakes slowly falling from the sky and cows in the barn peacefully chewing their cud. Small lake is frozen, the igloo nearby closed and the friendly-looking house too. Can you get inside and warm up a bit? Will the child living there get his presents this year? Will you find out whose tracks lead to the igloo? Let's see!
The cursor is not changing, no save button, one ending.

Charming and atmospheric game by Rinnogogo takes you to Santa's house, and it's very stylish and modern (other devs have different visions - see Escape from Santa's Room or Santa in the Southern Islands by Tesshi-e). Safety features here are quite unusual - no alarm or beam system, no safety door, but only puzzles. Hints and clues are here to, so start right now and hurry, there is a lot of work to be done this night and Santa still sleeps hard - can you wake him up?
The cursor is not changing, autosave, one ending.
You find yourself back in Esklavos' bluish magical forest in winter night. The portal in huge tree trunk is closed, and to open it, you need to fill four opened boxes with presents - somewhere around is a list of them. What you find, though, are only unfinished toys or parts of them, and you need many tools to make desirable things from not very interesting items in your inventory. Good luck!
The cursor is changing, no save button, one ending.

Few years ago we played through sixteen red and green levels of Bart Bonte's Christmassy puzzle fun A Blocky Christmas. This is bigger and better sequel, with clean and classy design (like all Bart's games), and clever puzzles. You are the star and you are magnetic, remember - can you place green bars to their places, complete all forty levels and get congratulations from Santa and his reindeer?
The game is available for Android and iPhone.
Here are more games for holiday season (from JiG archives ):
Don't miss poetic Charger Escape by Barbara Jarosik (Pastel Games) about magical winter night in stables, and playful Christmas Toy Room by Yonashi.
Deliver right ornaments in beautiful A Bonte Christmas by Bart Bonte. Remember Tesshi-e with The Happy Escape.
Try to decorate the tree correctly in Grow Ornament by Eyezmaze.
For more try tag Christmas or Xmas or Holiday or Seasonal!
We love escape games, and our readers love talking about them and sharing hints! How about you? Let us know what you think, ask for clues, or help out other players in the comments below.


Am I the only one who gets completely lost halfway into Blocky Xmas? It seems like no amount of logical or lateral thinking will help you to figure out which particular corner of which block has to be a pivot for which other corners of which other blocks.
Almost as if you don't so much play the game as you mash buttons, stare at your hands, and resign to the despair of watching reindeer smoke and handing out empty high-fives.
*tries to flip a table in rage but it's magnetically stuck to the ground*
I played Blocky Christmas through twice and it seemed to me to be alot about luck. If I guessed the right combinations, certain later ones were simple while trying to think it through made it harder.
Would someone explain the grid puzzle in Bells and Bows?
I guess cross-linking the mittens and tree or reindeer or gingerbread means something but I don't get it.
Thanks
You're on the right track.
The five drawers with the two images in each drawer (On the starting screen) is half of the clue. The other half is behind the wobbly picture.
If you take the two images as co-ordinates, and match them to the "grid" formed by the back of the wobbly picture, you'll get a set of five points on a 4x4 grid. Light those points on the button grid to unlock.
Sorry for not understanding, could you give a few examples?
I don't see how intersecting 4 across with 4 up would fill in 5 squares.
Thanks
Bells and Bows
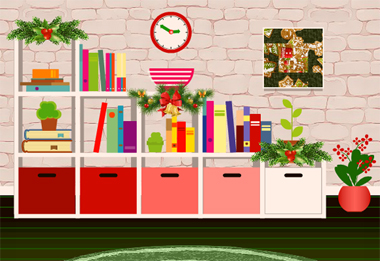
Welcome the holiday season with a new room design!
Exploration
(Though I'll describe some of the more interesting decorations, you can use the changing cursor to figure out what's important.)
You see several books strewn loosely around square shelves, which have five reddish compartments at the bottom. The middle compartment is locked and has three red buttons on the lock, while the other four compartments are unlocked. Opening those, you see two green square tiles as well as some gingerbread decorations. Also on the wall, there's a working clock and a scrambled picture.
Turn right. A couch is flanked by side tables, the left one having a drawer with a four-letter lock and the right one having a grid device. You can turn each lamp on, and when both lamps are lit the red stars above flash on and off.
Turn right. Some colored lightbulbs hang in front of the window, and below that is a digital clock on a small shelf that flashes some colored 0s (or rectangles) when you press its button. To the right of the tree, you see some letter blocks on a shelf, four cups with flower outlines, and the locked exit door.
Turn right. Above the fireplace, a picture of gingerbread mittens tilts when you click its corners. The desk has a computer (monitor) with a rectangular socket in front. The top desk drawer lock has four colored bars, the middle one has a grid of buttons that light up in orange, and the bottom one has four dials you can rotate. Also, you can lift the flowerpot on the shelf above and click it again to view a clue with four colored triangles in a square.
Unscramble
As usual, let's start with the (randomized) image puzzle on the first screen, which you can solve by rotating the pieces until they align.
Once done, the picture lowers and you can take a square tile from the hidden compartment behind.
Left Center Right
Use the clue from the couch screen to unlock the shelf compartment on the first screen.
With both the side table lamps turned on, the stars above flash in the LCRCL order. Push those buttons, then open the compartment to find a square tile.
Four corners
Use the clues from the flowerpot and digital clock to remove the tilty corner picture.
The aqua, pink, aqua, orange, gray, orange digits/rectangles that appear on the clock are the same color as the ⌝⌟⌝ ⌜⌞⌜ triangles on the flowerpot.
So push those corners of the picture, which comes loose. Flip it over to find a square tile and a clue with gingerbread decorations.
Gingerbread
Use the clues from the flipped picture and shelf compartments to unlock the middle desk drawer.
Each shelf compartment contains a pair of gingerbread decorations. Matching them up to the picture clue, you find that the left decoration of each pair appears along the left edge, and the right decoration appears across the top.
Reading across from the left edge and down from the top edge produces a 4x4 grid in which each pair of decorations corresponds to a square:
O---

-O--

--O-

-O-O
Turn those five buttons orange, then open the drawer to find a square tile.
Four colors
Use the clue from the dangling lightbulbs to unlock the top desk drawer.
The red, blue, yellow, green bulbs are 1st, 3rd, 4th, 2nd from the bottom, so click those bars 0, 2, 3, 1 times and then unlock the drawer to find a USB stick.
Memory
Plug the USB stick into the computer, which displays a path of white lines marked with arrows between red dots.
Trace
Use the clues from the computer and letter blocks to unlock the left drawer beside the couch.
Matching the dot pattern up with the blocks, you find that the path passes through dots corresponding to the letters NEST, so enter that in the drawer and open it to find a square tile.
Directions
Use the clue from the flower cups to unlock the bottom desk drawer.
One petal on each cup is lighter than the others, and those petals occur in the bottom-right, top, top-right, bottom-left positions.
So click the dials 3, 0, 1, 5 times to point in those directions, then open the drawer to find the last square tile.
Complete
Place all eight square tiles in the grid device beside the couch, which displays a (randomized) scrambled image puzzle which you need to solve by swapping the tiles into place.
Do so, and the compartment beneath opens up to give you a golden key, which you can use to unlock the door and end the game!
If it's still unclear, there's an dual/alternative way to interpret the grid puzzle where Scaper is stuck:
Original: There are a total of five pairs of gingerbread figures in the drawers. Each drawer contains one pair, and each pair indicates a square to light up, so a total of five squares get lit up in the end.
Alternative: Each grid square corresponds to a pair of gingerbread figures, and you only light up the squares when the figures appear together in a drawer. Since there are only five drawers, only five squares should be lit up.
Examples would be as follows:
Original: the left drawer contains a house and tree. Looking at the back of the picture, the house appears at the bottom of its column and the tree at the second position in its row. So you need to light up the second square in the bottom row. (Repeat this logic for all five drawers.)
Alternative: Consider the top left corner square, i.e. the left square in the top row. This corresponds to the gingerbread man and woman, who appear together in the second drawer. So you need to light that square up. (Repeat this logic for all sixteen squares.)
White Christmas
This is possibly the whitest Christmas escape ever.
Exploration
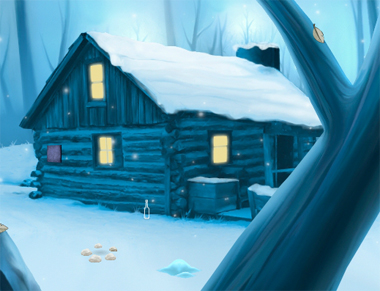
There's so much snow covering everything around, even the snow is covered in snow! There's a house in the distance, but we're not going there yet.
Definitely not without taking the fishing pole leaning against the tree on the right.
Turn right. The small road forks into two, and the left path leads past a row of trees…
but there's also something hidden at the fork: a small box beside the closest tree with six cute picture buttons.
…to a frozen pond, where you can take a blue bucket from beside a stool. There doesn't seem to be anything hidden on this screen, but
you can examine and turn over the bucket to find a number written on the bottom.
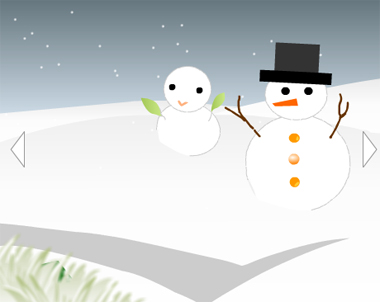
Back out and turn right to see where the right path ends: next to two snowmen. Clicking around on the snowmen, you find that you can lift the head on the left one to find a hidden number, as well as lift the hat on the right one (but there's nothing hidden beneath) and also take his middle button which turns out to be an orange key. Also, something green pokes out from the bushes on the left, which turns out to be a sketchbook with some interesting clues.
Turn right to find some sort of igloo with its entrance blocked up and animal tracks in front of it. Something seems unusual about this, but let's leave it alone for now.
Turn right. You're back on the starting screen now, so let's move onward to the house. The front door is locked, so let's look around first. The barn door is open, and inside you see two cows standing around some grass/hay. The back of the barn is too dark because the lamp is missing a lightbulb, so even the door handle that you can see doesn't help much. For now, let's not leave the cows hungry — click the one on the right until it eats as much as it can, then pick up the power cord hidden beneath.
One more screen! Go back to the front door of the house, and click the left side. Just as you pull the shovel out of the snow mound on the left, you get a feeling of being watched… is that a bear on the roof?
Unlock (orange)/ Exploration 2
Use the orange key to unlock the house door.
A sign in French greets you as you enter, and a wire runs from it down the side of the fireplace. So follow it by clicking the right edge of the fireplace to find that its wire is too short.
Turn right to find three miniature snowmen on a cupboard with an unlocked empty drawer, a locked drawer requiring a key, and a cupboard door with a four-digit lock. Lifting the snowman hats, you find that the middle one has a number written on it.
Turn right to face the way out. Next to the door, there's a switch you can use to turn off the lights.
Turn right to face a door labelled with a bear outline. You can tilt the picture on the wall, but there's no puzzle there. Instead, a folded paper note falls to the ground.
Math
Now that you've seen all three number clues and both colored circle clues, you have all the information needed to unlock the cupboard door.
Colorblind help:
The circles on the sketchbook are (top row) red, white, pink and (bottom row) red, blue, purple.
The four circles on the dropped note, from left to right, are red, pink, purple, blue.
To work out the formula on the dropped note, you need to figure out what numbers the red, pink, purple, blue circles represent.
The sketchbook beside the large snowmen tells you that you can obtain pink by adding white to red, and purple by adding blue to red.
So work out the numbers accordingly, and then the final formula:
The numbers are kind of randomized, but you should see one of these three combinations:
Blue=36, White=18, Red=24

Pink=24+18=42, Purple=24+36=60

Code=126×36=4536
Blue=40, White=23, Red=37

Pink=37+23=60, Purple=37+40=77

Code=174×40=6960
Blue=12, White=26, Red=31

Pink=31+26=57, Purple=31+12=43

Code=131×12=1572
After you enter the code, backing out will silently unlock the door. (If you have the wrong code, it will reset the lock instead.) So open it to find a battery.
Signal
Use the wire you picked up on the cable end of the greeting sign to plug it in. Nothing seems to happen.
But when you turn off the lights, you realize that the sign is actually projecting a circle of symbols.
So use that clue to unlock the six-button box hidden outside.
Following the projected clue, push the rabbit, star, snowman, star, star, tree, bear, star, reindeer buttons on the box. (The star will pop back up when pushed again, so eventually it will be in its original position.)
The box opens, and you can find a fishing line attached to a hook.
Dig
Use the shovel on the smaller mound beside the igloo, which reveals an alarm clock.
Beep
The alarm clock is missing a battery, but thankfully you have one from earlier.
After inserting the battery in the clock, it immediately rings. Nothing seems to happen, but as soon as you switch screens and come back, you find a fresher set of animal tracks next to the old one.
Fishing
Those footprints belong to a bird! More specifically, it's the chick from the sketchbook that likes to go fishing.
So follow them up the path to the pond, where the chick is waiting patiently.
You can assemble the fishing rod by attaching the line to it. But if you try to give it to the chick, it points out that there's one more thing to do before it can fish.
Break the surface of the ice with the shovel.
Then give the rod to the chick, who fishes up a drawstring pouch containing a brown key.
Unlock (brown)
Use the brown key to unlock the bottom drawer, which contains a lightbulb.
Bright
Attach the lightbulb to the lamp in the barn. Now you can see that the cows from earlier are nice and warm.
Water
You can't seem to fill the bucket with snow (or milk), which means it has to be used for water.
In this land of snow, there's only one way you can get that water: from the fishing hole you just made.
After filling the bucket in the pond, use it on the fireplace to put the fire out, revealing a blackened key.
Unlock (black)
Use this key to unlock the door at the back of the barn. It's a storage room containing a single ladder.
Perched
Use the ladder on the (left) side of the house so you can reach the bear key on the roof.
Finally, use that key to unlock the bear door and end the game.
Thank you, kktkkr.
I understand it now. I appreciate the explanation.
kk,i can't get White Christmas to load. it just sits there with Edge, and when i do it in Chrome, it puts links on the right and every one of the links takes me to a dead page.
Paul, do you have an ad-blocker? I couldn't get it to load until I disabled my ad-blocker.
nelliel, no i do not. And i tried on my cellphone last night and it does the same thing.
i tried one more time and i guess it works now. must have been a server issue or something.
Holy Night
Christmas is in danger once again! Well that's an exaggeration, but it will come true if you don't wake that sleepyhead up!
Exploration
I'll be ignoring most decorations in the game. Since arrows on the sides of the screen aren't immediately visible, you should check those edges often.
Your starting position at an end of a corridor gives you a good view of almost everything in it. Other than the picture of colored snowglobes on the right, the close-up views of those things are distributed across several screens, so let's go through them from left to right.
On the left, you find a display shelf/alcove. Looking in there, you find a key encased in glass with a panel over it that has red and white dominos and letters and an input box for you to type. There's also what looks like a blue paint palette but it has six colored buttons.
The shelf continues over to the right, where you see a rectangular panel with green and red markings as well as four buttons that light up in yellow. Directly under that, you spot part of the shelf that looks different, which turns out to be a wooden plank you can take. Turning over the plank, you find a clue with some digits, each split into two colored parts.
Click the door to the left of the Christmas tree. It's locked but on this view you can see a grid of letters on a piece of paper stuck in the tree.
Click the empty space to the right of the tree. It's not completely empty, as you can click the power socket at the lower left to find an unplugged wire and a matchbox. After turning right from the empty wall, you find red doors secured with a padlock.
That's it for the starting view, but we're not quite done! Turn around by clicking the bottom of the screen, and you find a colorful door with a red box to it that has a horizontal slot.
Adjacent
Use the letter clue to solve the grid domino puzzle on the left of the shelf.
In order to fill in the red ends of the dominos, you need to find the letters under Y, to the left of A, under X, above O and to the right of F.
Referring to the grid, you find that those letters spell out NIGHT, so type that in the panel (all lowercase or all uppercase) to unlock the case and get a key.
Unlock / Exploration 2
Use the key to unlock the red door, which opens into a much larger room.
You immediately face a locked green door on the opposite wall of the room. On the tree, some sort of bug covered in leaves is asking for a beautiful dress. There's also a small tree and oil lamp on the bench, but you can't seem to do anything with them.
Turn right. Heavy snow falls outside the window, and you can open the window and look at the outer windowsill to find another password box with a snowman marking. Inside, you spot an unusual pink dome beside the lamp, as well as a picture of a girl, tree and Christmas stocking. The picture has colored corners and tilts when you click them. (There's a small twist: you can just keep clicking the same corner to rotate the picture indefinitely.)
Look under the bench to find a panel with a three-digit lock. The rectangular outline of each digit button is a different color.
Turn right to face the doorway back. You also see a poster with a photogenic snowman, a locker which isn't locked but rather secured with a single screw, and a greenish crate you can't open. While looking at the crate you give the chair a little nudge and notice a switch on its left side. Flipping the switch, you find that the crate is now unlocked and contains some ice with a key inside.
Turn right to face the fireplace, which just holds a pot filled with water. The table in front has a blue tray with food that gets more unusual towards the right side. There are many pots and pans in the background, but the green vine looks weird there, so lift it to find a tiny green dress. You can also pick up the tongs under it.
Dress up
Give the dress to the bug. After thanking you for the dress, it vanishes and drops what it was wearing in a pile on the floor.
In other words, it leaves and leaves the leaves.
Spread
Use the clue from the food tray to unlock the matching panel on the shelf in the corridor.
You notice that each food seems to occur in different amounts, which in turn means that each color occurs a different number of times.
Since the colors which appear 1, 2, 3, 4, 5, 6 times are purple, yellow, red, green, white, black, you need to click the buttons in the
2 1 6

5 4 3
order. This opens up the panel beneath, which contains a pair of pliers.
Plan
Use the clue from the layout of the second room to unlock the last panel on the corridor shelf.
Clockwise from the green door, you find that the lamps are off, on, off, on.
So click the top left and bottom right buttons, then open the panel to find a screwdriver.
Unscrew
Use the screwdriver to remove the screw on the red locker in the second room.
Opening it, you see a dazzle of colors that's actually a rack of wine bottles with white and yellow labels.
Snowman
The snowman clue on the outside windowsill reminds you of two other places you've seen snowmen: on the poster and on the snowglobe picture in the first room.
So use the clues in the last two places to find the correct code for the first.
The globes in the picture are tinted red, green, yellow, yellow, and the letters with those colors on the poster spell out Bell.
So enter that in the windowsill panel, then open it to find a small snowman figurine.
Trees
Plug the Christmas tree in the corridor into its power socket. Clicking the tree now makes the lights on it flash.
Use that clue to unlock the square tilty picture in the second room.
The red, yellow, green, yellow, red, yellow corners of the picture are the ⌜⌝ ⌞⌝ ⌜⌝ corners.
So click those corners of the picture, and a winding key appears on the chain!
Cut the chain with the pliers to get the winding key.
Split
Use the clue from the plank you picked up in the corridor to unlock the three-digit lock hidden on the window screen.
The green, blue, red parts of the digits recombine to form the code 508. (For instance, stacking the green parts on top of each other produces 5.)
Enter that code in the lock and open it to find an axe.
Warm
Use the axe to chop up the plank. Place it in the fireplace, add the leaves and then light the fire with the matches.
Now the water is hot, so you can just add the ice and wait.
You don't actually have to wait. By the next time you look in the pot, the ice has already melted.
The water is now too hot to touch, so use the tongs to retrieve the key from it.
Unlock 2 / Exploration 3
Use this greenish key to unlock the green door.
At first glance, this appears to be a bathroom, although it just has a sink and a red locker with two triangular buttons.
Turn left to see a bed. Looking inside, you see Santa sleeping there! He must have drunk too much. There's an alarm clock next to him which you don't know how to activate, as well as a keypad and a snowy picture on the wall above his head. On the right, you see a chest of drawers with a bear drummer on top. The Start button doesn't seem to do anything, so you turn the bear over to find a hole in the back.
Rhythm
Use the winding key on the back of the bear, then turn it back over and hit Start to make it perform a short piece.
Use that clue to make the alarm clock ring.
Click the white, black, black, white, black bells on the alarm clock. Wow, that's noisy!
Sadly, Santa's still snoring. What next?
Pointed
Use the clues from the wine rack (red locker in the second room) to unlock the red locker in Santa's room.
Since the buttons are yellow, you should only look at the bottles with yellow labels.
From top to bottom, those bottles point towards the LLRRL directions, so push those buttons on the locker to open it and find an empty spray bottle!
Spritz
Fill the spray bottle in the sink and use it on Santa's face.
That doesn't seem to work either, but if you check again you'll find a note under the pillow.
Compress
Use the clues from the note you picked up and the picture above the bed to unlock the keypad above Santa.
If you imagine folding pleats as indicated, the entire section between the two solid lines disappears, the arrows end up touching, and the remaining symbols connect to form the four-digit code 7198.
Enter that in the keypad, and a boxing glove springs out and hits Santa right in the frontal lobe.
Don't worry! It just knocked off his blindfold and now he's awake.
As Santa leaves with his coat, you find a wreath left over on the rack.
Ring
Place the wreath in the dome-shaped device under the window, which opens up so you can take another key.
Unlock 3
Use this key to unlock the red cupboard in the corridor.
Surprise! It's a door leading to a room where Santa is waiting. There's a large sack on the floor behind him. (How'd he get through the locked door? Must be magic.)
Present
Give the sack to Santa, who steps aside to reveal a large snowglobe on the seat.
Opening up the snowglobe, you find a pink spot next to the snowman and tree.
Place the snowman from your inventory on the empty spot. Out of the base, a tray swivels out holding a magnetic card.
In the corridor, use the card on the red box beside the colorful door to unlock it and end the game.
Magic Christmas Escape 2
You might be starting to get the impression that Esklavos' idea of a festive celebration is teleporting you to a middle of a forest and leaving you there. That's probably correct, but at least it's not as unsettling as last year!
Exploration
Remember to pick up objects with an empty hand. Also note that it's relatively easy to exceed 11 items in the inventory, at which point scroll arrows will appear in the corner.
The house in front of you is covered in snow, and there's a panel on the left wall which shows a 8x8 grid of squares that you can turn black. Next to a circle of stones on the ground, you see a small snow mound. Pick up an empty bottle and 2 leaves (from the left rock and the tree), and then click on the tree, which asks you for help with a termite problem.
Go right to find a larger, oddly familiar tree which you recognize as an ancient portal. It has four clear gift boxes at its base and six bells hanging from the top. There's a sturdy bamboo shoot on the right, and amongst all the other greenery you manage to find a red flower, small branch and leaf.
Return to the first screen and enter the house. It's kind of messy but also kind of empty, and you resolve this apparent contradiction by moving all the mess into your inventory: the hand drill and hand saw hanging dangerously over the table, the empty sprayer on the window behind, the firestones on the barrel, and don't forget the unpainted doll upstairs and the remaining 2 leaves. All that remains is the mortar and pestle on the table, the clue on the barrel, the locked crate next to that, and the wishlist posted beside the door.
Arrival
Use the clue from the barrel to ring the bells correctly.
If you watch out for the numbers in the song, you find that they give you the order to ring the bells: 4561236543.
As you're ringing the bells, sparkles appear in the background to confirm that you've got it correct. At the end, a black key falls out of the tree.
Unlock
Use the key to unlock the crate, which contains a colorful doll and a green pesticide bottle.
Expulsion
The pesticide is just what you need to deal with that termite problem, but you can't just pour it over the tree.
First combine the sprayer with the pesticide bottle.
Once you spray the pesticide on the tree, it rewards you with a Doctor Ku mask.
Woodwind
Use the handsaw to remove the bamboo cane.
Then combine it with the hand drill to make a flute.
Figure
Use the clue from the wishlist to unlock the grid panel on the outside wall.
Just copy the marking at the bottom right of the list:
---OO---

--O--O--

-O----O-

O------O

O------O

OOOOOOOO

---OO---

---OO---
When you're done, a paintbrush falls out of the panel.
Light
Place the leaves and branch in the fire ring and then light it with the firestones.
Something compels you to reach into the flame and pull out a nice and warm torch.
Water
Looking at the items you need, you realize that you need to make paint, and that paint requires water.
In this land of snow, there's only one way you can get that water: by melting some of the snow outside.
Use the torch on the snow mound to create a puddle on the ground, and then fill the empty bottle with the water in it.
Paint
Add the pigment (flower) and then the water to the mortar and pestle.
After it's done grinding, dip the paintbrush in it to pick up the bright red paint.
Combine the brush with the unpainted doll to finish it off.
Gifts
Looking at the wishlist, you find that you have all the gifts: a flute, two dolls, and a mask (although it looks different from the picture).
Place them in the gift boxes, and the portal appears on the tree for you to escape!
Here it is, the definitive, comprehensive, non-alliterative guide to
Blocky XMAS
And that's why they call it Boxing Day.
Before you start:
There's no undo function, so be careful while moving. (This can get really frustrating if Flash is lagging.)
It's possible to trap yourself in many of the puzzles, in which case you can press R to restart.
The hint button appears almost immediately after you start the level, which is what I'm copying the solutions from. Note that it will reset your puzzle when you use it!
The options (erase progress and mute music) are available from the title screen.
When levels are similar to the original (a blocky Christmas), I'll indicate them next to the level number, like so:
1 (abC #1)
You are the star! Just maneuver your way to the outlined square.
Repeated moves will be represented with numbers. So for instance, the following line tells you to move right once and then up five times. For ease of reading, I'll omit 1s but leave spaces between directions.
R U5.
Click Santa's hand to give a high five and move on. (If you prefer keyboard, you can press the Space or Enter key.)
2
You can push blocks.
D6.
3 (abC #2)
You are magnetic! Even when you aren't pushing an adjacent block, it will move with you.
D3 U2 L5.
4 (abC #3)
If a block can't follow you, it won't. So let's pick up the block and pull it against the inner corner.
U2 L2 D4
Now you're free to move around again! To get on top of the block, you need to avoid its right edge.
R3 U3 L3
Notice how you used the wall to center the star. Now that you've got the right shape, you can move it into place.
R2 D3.
5 (abC #4)
You can pull a block to the left or right even if you're attached to the top or bottom. In fact, this is the only way to start.
R D R2 D
By adjusting your position, you can keep pulling the block without having to detach and reattach.
L2 D L2 D
R2 D R2 D
You can't pull down any further because you need to end on top of the block.
L4 U2 R4
Once the block is in the correct place, centering the star is easy.
L2 D L.
With five levels done, it's time for a little cutscene reminding you to deck the halls.
6
Bart (i.e. the in-game solution) forms the required stack at the first opportunity. All you need to do is separate from the block and leave yourself some space to go around its left edge.
L D2 L D2
L2 U3 R4
L3 D4 R3 D2.
7 (abC #6)
There's more than one block now! From here on, I'll use [3] and [5] to indicate the short and long blocks.
All the blocks are already in the correct order, and while picking them up you find that blocks you're attached to are magnetized too.
R3 D L6 D R5
Notice that we've already centered the star on the [3] block. Now center the first two blocks on the [5] block and move everything into place.
D L3 R D3.
8 (abC #5 and #11)
More tricky then the original! You still have to swap the two blocks vertically, but if you try to pass the peg on the left side and leave [5] on top of it, you find that there's no space to move [3] around.
Instead, you can leave [5] to the left of the peg, and slide the remaining blocks off it to the right.
L2 D4 R5
Stack [3] on top of [5], then detach the star from it and put it on top.
U2 R L2
D R2 U3 L7
Form the tree and move it into place.
R D4 R2.
8, another solution:
Pass the peg on the right!
R3 D4
Because [5] is now all the way to the right, there's space for [3] to go around.
L6 U3 R2
Form the tree and move it into place.
D L3 U3
R7 L5 D5 R2.
9
More practice with pulling blocks! Unlike #5, there's almost no choice in how to move the block around.
L D L D R D
R2 D L2 D R2 D
Due to the narrow tunnel, you'll have to leave the block here and reattach to it from the right.
D R U2
R D2 R5
U3 L
Back on familiar ground!
R2 U L2 U L2 U R2 U R2 U
Bart wastes a pair of moves at the very end.
L2 U R L2. (Simplified: L U L2.)
10 (abC #10, exactly rotated.)
You can choose to wedge either [3] or [5] in the notch and slide the other around it. Bart uses [5]:
U3 R2 U L4 D3
[3] needs to be moved right twice so the star can get around its left side.
L R2 U
L2 D3 R5
Move the tree into place.
L2 U3.
Ten levels done, and you get another intermission wishing you a merry Christmas.
11 (abC #9)
The thin channels force you to move one block over at a time. Get the [5] block out of the way by transferring it first:
L3 D3 U5 R4
D2 R4 U2 L4 D R D
Moving on to the [3] block:
L7 U R4
D R3 U3 L R2
D6 L R.
12 (abC #8)
Let's do Bart's solution first, which focuses on placing the [3] and [5] blocks on the opposite ledges.
To detach the [5] block, you have to attach the star to the right of the [3] block.
U L4 D5 R2 U2
R6 D2
(Shortened: R2 U2 L4 R6 D6.)
There's just enough room to move the [3] around.
L5 U2 L1
And there's just enough room to squeeze the star in between after detaching.
D R U2
Pick up the blocks in the right order to form the tree!
L3 U R7
L3 D2.
12, another solution:
This roughly matches the one in the abC walkthrough, where [3] is hooked onto [5] instead of on a ledge.
R2 U2 L3 D6
R5 U3 L4
D2 R
Placing the star in the center first saves you a bit of fiddling.
U4 L3 D L
R3 D2.
13
Diagonal outlines are difficult! Thankfully, the small level doesn't give you any options to mess up.
The solution consists of two parts. First, you need to get the star off-center.
D3 L2
This lets you wedge the block in the middle line and still have room to move up away from it.
R2 U R U
Form the inverted tree and finish!
L D3 R2 L2 D2.
14
It's easy to get yourself trapped in this level. How does that happen, and how do you avoid it?
Remember level 11? It helps a lot if you move [5] down first.
U4 R8 U3 D4
L D R U3 L R D
You can only get into place if you pull [3] through the tunnel. This means you need to pick it up by the right side, so you can't ever let it touch the right wall of the left chamber!
L6 U4 D4 R4
U2 L2 D R2 D3.
15 (abC #11)
(I've simplified the later half of this solution to not move blocks around that much.)
Oh no, there's more blocks and less space! To make full use of the space, you're going to want to squeeze [7] to the left of the peg.
L4 U4 R7 D2
You can't slide [5] over far enough in one go, so you need to reattach multiple times. You can minimize this by starting at the right edge.
R2 L2 U R2 D L2
Do the same for [3], and then place the star at the bottom.
U R2 D4 L3
U2 R2 D4 L3 U
Center [3] on [5], then [5] on [7], then move the tree into position.
L6 R U4 R4.
Fifteen levels completed! Have you planned out your twelve days of Christmas?
16 (#10)
You can safely ignore the [7] block, meaning that this is the same arena as #10 with slightly different dimensions.
Looking at the order of blocks provided (5, 1, 3, 7) and the required order (1, 3, 5, 7) makes it clear that [5] and [1]+[3] need to swap positions, so you should wedge [5] in the notch.
U D2 L2
D R4 U4
L4 R2 D7.
17
You can also easily trap yourself in this one, but that's a hint that you're overthinking.
Your starting position effectively confines the star to the left three columns, and there's only two places you can detach it. Leave yourself space by breaking on the second column.
L D5 L U3
Separate [3] from [5] by pushing it down, then reform the tree to finish the level.
R8 D2 R U3
L5 D R4 D.
18
Let's do some retrograde analysis (i.e. working backward). The only interior wall here protrudes down, so you need to separate [3] from [5] by pushing it up.
However, in order to make enough space for [3] to move around, you need to attach the star to its bottom edge, and also careful not to pull [5] away from the left edge! What configuration do you need for this?
Bart's solution: place [3] on the right side of the protrusion, then slide [5] under it until it hits the left edge.
Start by sliding the star off of [3] and towards its left.
L2 U4 R U L D2
Push [3] all the way to the right edge, so that you can manipulate it using [5]:
R5 L4 U L D R
Move [5] to make your way out, then get into position on the right of it.
U2 L D2 R
U L D3 R7 U2
Push [5] to the left edge, then carry out the rest of the solution as described.
U R3 D3 L7 R5 U2 L.
18, simplified
Start by sliding the star off of [3] and towards its left.
L2 U4 R U L D2
Instead of sliding [3] all the way, just free yourself and move directly to the right of [5].
R U L D4 R7 U2
Drag [3] into place, push [5] to the left edge, and continue as before.
R U L3
U R3 D3 L7 R5 U2 L.
18, another solution
Start by pulling the star up off of [3] and reattaching it on the right side, and use that to pull [3] off of [5].
R U5 R2 D2
R U2
Produce the overhang, which lets you free yourself at the bottom and reattach, then get the blocks into position and finish like before.
R2 D7 L3
U6 R3 D3 L7 R5 U2 L.
19 (#11)
Following the same strategy as #11, insert [5] in the top path and pull from the right.
D2 R D R3 U3
R U L R4 D4
Do the same for [3].
L10 U2 R4 D2 R3
U4 L R2 D4 L R.
20 (#16, #10)
You've basically seen this idea three times now. But if you try to directly copy Bart's solution from #10, you'll see a small issue: after sliding [5] in the notch, there isn't enough space to separate the [3]+[1] stack from it.
So plan ahead by keeping the star next to [3]:
R2 U3 D7 L2 D
Now that [5] is fixed vertically, use it to recreate the stack in the correct shape:
R2 U2 L D
R2 U3 L5
R2 D2.
'Tis the season! (Yes, the songs will repeat from here out.)
21
Make full use of the tunnel in the right wall by filling it with [5]:
L D L D2 R
D L2 U R2
(Simplified: L3 D L D2 R3)
Then just stack the rest of the tree on top…
D L2 U L U2 R2
D L2 U2 R
D L U2 R3
(Simplified:
D L2 U3 L2 R3
D L2 U3 R3)
and adjust into place.
L3 D2 R3 D R.
22 (abC #13)
From earlier levels, you know that both blocks have to be pulled through the left tunnel. With a little more thought/experimentation, it should also become clear that [3] has to be pushed through the right tunnel.
Well, one thing at a time. In order to pull [5], you need to shift it just a little to the right.
D2 R4 D3 U4
R U L D2
L5 U R L2 D
Now to pick up [3]:
R14 D3 U4
L2 U R D2
L5
Remember, we need to swap from the right side of [3] to the left so we can pull it.
U2 L2 D R4 U L2 D2
L6 U2 R2 D
L2 D3.
23
[5] turns out to be too big to shuffle around safely, so it needs to fit in the left notch. As you've seen before, you need 2 squares of overhang to detach from it:
U3 R2 D L3 D
The extra space in the bottom right is just enough for you to move a stack of [3] and [1] around.
R3 U4
There's not much room to hold on to [3] while sliding it to the left, but it's still simple.
L D R U
L D R U2
L D2 R U3 L4 R2 U2.
24
You can only swap the blocks when there's enough horizontal space. In other words, you need to arrange them in the tunnel somehow.
The obvious first step is to store [3] in that hole at the bottom.
D3 R7 D2 R2 U2 R D4 L
Go back for [5], which needs to be on the bottom of the tunnel.
U5 L7 D R5 D2
[3] has to be on the top of the tunnel, which means you need to hold it by its right side, which means [5] needs to be one square further to the left so that [3] can go around. This is now easy to set up:
R U2 L
D2 R2 D2
R2 U5 L9
This is far enough for us to store [5] at the bottom. Then we can detach from [3] and get on top of it.
R9 D4 L
U3 L D R U2 L2
Center the star and end the level.
L9 R9 D3 R.
(Simplified: R D3 L R.)
25
Considering the path of [5], you realize that [1] and [3] have to be squashed into a single row to let it past, and then unsquashed later.
You'll find it much easier to put the star on the left of [3]. Simply stop [3] before the tunnel.
U4 R3 U L4 D2
Move [5] over, then free the star and put it on top.
U2 R6 D L3
D L U2 R6 L D5.
Twenty-five done… and a happy new year!
26 (abC #14)
Just like #17, it's really easy to get trapped. This one is slightly different though.
Let's begin with Bart's solution, which has you stacking [1] on top of [3] on top of [5] on top of the protrusion on the floor.
Detach from [3] in such a way that you can reattach to it on the bottom.
R 5D L
Align [3] and [5] as much as possible by going to the left edge, which gives yourself enough room to move around them after separating.
U L4 R2 D
L2 U4 R3
D R5 D L2.
26, another solution
You might remember from abC that there's a different way to solve this, by fitting [3] in the bottom left corner. Let's do it!
The first step is to detach [3] on the bump and then move [5] around to stack it on top. While you're at it, leave yourself enough room to carefully move back to the right.
D5 R U3 L5 D
R D2 L U4 R7 D2
Use [5] as a handle to put [3] in the gap, before moving it to its final position on the other side.
L2 D2 R U2 L6 R4 D
Slide over to [3] and use it to complete the tree.
L3 U2 R5 D.
27
It's like #6 but much more challenging! You've already seen all the required tricks though.
Bart cleverly makes stacking [3] on [5] part of the process of moving [5] through the bend.
D3 R8 D L5 U2 L
D R D2 R U2 R4
(But I prefer this method:
D3 R3 D R D2
R2 U3 L2 R4)
Slide the blocks through, then reattach to [3] to complete the tree.
D2 L2 D L3 U D
R2 U3 L2 D2 L3 D3.
28 (abC #12)
As you've seen from #14, you need to move each block away from the left wall in order to pull them into the right chamber.
Using the corner at the top left, it's easy to pull [3] to the left and then detach from it. (See abC #7.) But [5] has to go first, and the corner is blocked by [3], or is it?
Left-align both blocks against the corner!
D3 L8 U2 L3
D7 R4 U8 D L
(This path brings [5] up to [3], which is slightly shorter than bringing [3] down to [5].)
Now you can just pull [5] through.
U R2 D3 R8
(From the comments on the original: you can also get into the tunnel and push [3] back out to the left, bringing [5] with it; you'd then have to follow up with D6 U6 R8.)
Then go back and do it all over again with [3].
U2 L4 D R D
L5 U2 L5
D R4 U2 D3 R7
U2 L2 D R2 D5.
29 (abC #15)
Clearly, [3] has to go before [5], which means it has to be stowed away in either the bottom left or bottom right alcove.
Bart's solution chooses to bring it to the bottom right.
L U4 D R2 D5 L
D R2 U3 L3
R2 D4 R3 U
Whew! Let's pick up [5] and start bringing it down.
L2 U8 L D3 L D3 L
We've made a brief stop here so that the star can get on top of [5]. Once it's there, move [5] into the bottom left spot.
D R3 U5 L2
D2 R D R D2 L2 D L
Form the tree and adjust it into place.
U R4 D2 L U2 L3
R4 D L4 R.
30 (abC #16)
Start by leaving [7] on a ledge. That doesn't leave enough space for [5] to sneak by, but it will get some help when [7] is stopped by the top right corner.
D L4 R6 D6
L4 U L U7 R
(Simplified: D R3 D5 L6 U7 R)
After bringing [7] back to the ledge, it's business as usual, sliding [5] to the right, stacking the rest of the tree on top, and finishing the level.
D5 L2 U R2 D L2 U2 R2
D2 L U3 R2
D3 L3 U5 R3 D
R5 L7 R3 D5. (Simplified: L3 D5 L.)
Getting closer. A partridge in a pear tree.
31 (#12)
Getting déjà vu? This level is just a bit smaller than last time.
But let's set it up the same way, connecting to [3] on the left and then leaving [5] on the left ledge.
L2 U2 R3 L4 D6
R3 U2
We're already starting to feel the pinch, but you can put [3] on the right ledge and slide [5] under it.
R D2 R2
Detach from [5] by hanging it on the other ledge, then complete the tree.
U L3 D
R3 U5 L3 D
L2 R2 D2.
32
Even though it looks like #5, you quickly find that these wider obstacles make a big difference.
Get on top of the block and push it down, then slide it to the left.
L5 R U L R2 D2 L2
Move around to the bottom and pull it down, then to the same to the right and down again.
U R2 D2 R D2 L4 U L D L D2
D R3 U2 R D L R2 D
Switch from pulling to pushing down, and then continue pulling left and down.
R3 U2 L3 D L2
U L3 D3 R L D
Switch to pushing down again, then finish the tree.
R6 U2 L4 D L2 R2 D R2 L.
33
This tree isn't going to right itself if you don't use the right chamber, and the only block that can really enter there at first is [5].
So push it into the top tunnel, pull it to the right, finish pushing it with [3], then pull it down.
R2 D3 R2 U5 R4 D5 L9
U4 R3 D4 R2 U4 D4
(Shortened:
R D L2 U R2 D L2 U2 R3
D4 R2 U4 D4)
Unblock the top tunnel to access the top of [5] so you can push it down.
L4 U5 L D5 R U5 R5 D5 L
That's far enough that we can finally pull it into the left chamber and stack [3] on top.
U4 L5 D5 L U R
The rest is just good old tree assembly.
D L U2 R4 L2
U R2 D L U R D L3
R U R D L.
(Simplified:
D L U2 R3
L2 U R2 D L U R D L.)
34
It's clear that the block moves counter-clockwise around the edge of the board, and you can even deduce what moves are needed: push left, slide and pull down, slide right, pull right.
L D U2 L5
D6 L2 U5 L D5
R3 U6 L3 D5 R
U5 R2 D6 R5 U2 L2 D R.
35
It's rather easy to get all the blocks to the bottom in the correct order, so the only thing to worry about is centering.
Separate the blocks in the correct order, leaving lots of vertical space.
R6 D2 L4 U R D2
L4 D L3 D2 R4 D2
Move [7] to the bottom, leaving exactly one square covered on its top edge.
R5 U3 L2 R3 D2 L U
Move [5] onto [7], then hide its leftmost square under the shelf.
L10 U4 R2 L2 D3 R8 L2 D2 L
Center the star on [3] before you move it onto [5].
U2 L U3 R3 U3 L2 R2 D L
D2 L3 D3 R3 D R2.
You're almost there, fa la la la la!
36
After a little experimentation and possibly trapping yourself in just three moves, you quickly figure out that getting [3] into the correct spot is the hard part.
Let's disarm that trap by moving [5] out of the way first.
U2 R3 D2 L3
Slowly slide and pull [3] into place.
U L2 R2 U L2 D2 R2 U2 R3 D R2 U
Now you can safely push [5] into position and then return the star to the top of the tree.
L5 D2 R D L U3 R4.
37
Notice that [5] never gets into the left or right chambers. If you need to get around it, it has to go through the bottom.
Bart's ridiculously epic solution starts by moving [3] into the top tunnel and leaving it there. Even this is a puzzle in itself, requiring [5] to be shifted away from the inner corner in the bottom left.
R3 U R7 D3 L4 R7 U L R U2
L13 D2 R2 U L D2 L U3 R D3
Now put [5] back, then pull [3] over and use the other corner to detach from it, then reattach to move it properly into the right chamber.
R6 D R2 L4 D R3 U L3 D R4 U2 R
U3 L5 R8 D3 L U2 L2 D R U2
Push [5] to the right chamber, then go back around to complete the tree.
L10 D3 R7 D L4 U L U3 R9 L D.
37, another solution
This one starts the same way, though I prefer to keep the star on the left side.
R U L D R U L D
R U L D R U L D2
R2 U L D2 L U3
Push [3] all the way through the top, then separate from it at the bottom and move [5] all the way right.
R10 D3 L2 D2
L4 U R3 D L3 U2 L
Assemble the tree in the right chamber.
U3 R9 D2 U L
R U L D R U L D R U L D.
38
Almost paradoxically, your first task is to leave [5] in the bottom left, so that you can detach from [3].
R7 L4 U3
Now move [5] to the right and squeeze [3] to its left…
R2 D4 L3 R5
U2 L U L3 D L2 D2
…so that [3] ends up in the bottom left and [5] in the hole on the right!
U2 R2 D2 L3
Place [3] under [5] and complete the tree.
U L D R4 U2
L2 D L D2 R6.
39
It's #11 turned up to 11!
Move [7] through the top channel and push it down. You'll have to bring something else through the top while pushing, and [3] is slightly easier to handle.
D R D R4 U4 R6 D L R D3 L14
U3 R6 D L U2 R3 D4 L2
(At this point, you can follow the alternate strategy from #37, pushing [5] all the way into the lower tunnel next to [3] and then assembling the tree on the right. But anyway.)
Make your way back to the right chamber and leave [3] in the top left corner of it.
U4 R4 D4 R U4 L D L R U L10
This leaves a nice gap for [5] to go in between.
D R6 D L U2 R3
Free yourself through the bottom tunnel, then finish assembling the tree.
D4 L2 U4 R5 D2
U2 L2 R D2.
40
It's #25 turned up to- wait that doesn't work. Just like that one, you realize that [3] and [5] have to get squashed into one row.
Let's start by squashing the star down into the [3] row, then moving [5] to the left.
L3 U2 L U R4 D2
U2 L6 D
Now that [5] has been separated from [7], we can pick them both up together into the same row! Since we want [5] to be on the top row, we hang it against the wall and slide [3] down to its right.
R4 U R3 D
If you try moving [7] to the left side, you'll see that right-aligning the top row is not enough. That top row needs to extend past the right edge of [7], which you can achieve by first pulling it to the left.
L5 U R8 D U L8 D
Unpack the tree and put it up.
R4 D R U2
L3 D2 R U2
L10 R4 L2 R D3.
There it is, all 40 levels! Santa and his helpful reindeer come out to congratulate you, jingling all the way.
(No guarantees that I typed the solutions correctly, but you're here for the hints right?)
Update