
A Grain of Truth
Platform: Javascript/HTML5
![]()
 The Endless Plains may seem unremarkable from the distance, with nigh nothing but grass for as far as the eye can see. Yet look into the clouds and you might find great wisdom, as some say you'll see the thoughts of gods. Myosotis, the witty heroine of the Rudowski brothers' (Marek and Marcin) A Grain of Truth, isn't too sure of that, but as she journeys onward to meet with the Wiseman and hear his stories, she encounters the Cloud Catchers and begins to see the grain of truth in the fairytales of old. You are invited to join her journey, embarking on a marvelous adventure filled with fantastic creatures, breathtaking scenery, and, of course, captivating stories.
Continuing along the same vein as Bell's Heart, the first in the Big Old Tree that Dreams series, point and click your way through the landscape, solving small puzzles and gathering objects that will aid your passage. Watch your cursor; the leaf turns from green to orange when hovering over interactive areas. Clicking will then provide options that vary according to context, including "go to," "examine," "take," and "talk." To be sure you haven't missed one of these areas, click on the eyeball icon to spot more. Reading and paying attention to the dialogue is necessary; not only should you click on blue-highlighted words to delve deeper in the conversations, each word you click on is collected to gain more stories.
 At the center of A Grain of Truth is a lyrical and entertaining narrative just as you would expect from this series. Departing from the affability of Bell's Heart, though, A Grain of Truth's puzzles have been ramped up in challenge. You'll explore, gather and make sense of items plus enjoy a mind-boggling game of mahjong or arrange a complex tile puzzle. There's little assistance given in game for completing these tasks, calling on you to do the mental footwork in the true spirit of adventuring. That also makes A Grain of Truth longer and more involved than its predecessor. Even so, after completing the map making mini-game, you'll have a smart map to travel by, adding greatly to the ease of navigation; just click where you want to go, provided you've been there already.
This installment is created in HTML5 and makes extensive use of Javascript and jQuery for smooth transitions and effects. You won't be caught up with intrusive mechanics, even the inventory takes you to the back of Myosotis' wagon rather than jar you out of the moment. It's a remarkable implementation for a truly lovely game.
Play all the Big Old Tree that Dreams games:
While you may find yourself stumped and baffled at times, it's well worth pushing through as the quest for answers has never been known to be easy. A Grain of Truth is an overall amazing creation that merges the talent of the storyteller with the art of good gaming. Whether you'll find wisdom or god-like dreams from the experience will depend much on your perspective; either way, the journey is anything but unremarkable.


Walkthrough Guide
(Please allow page to fully load for spoiler tags to be functional.)
A Grain of Truth Walkthrough
Controls
Use the mouse to click items in the environment.
Select an action from the list after clicking an item to perform that action, such as walk to/pick up/examine.
The toolbar at the top contains acorn-shaped buttons with all of the important functions for the game.
The yellow acorn with the wrench icon is the Menu button.
Click the Menu button to pause the game, turn the music on or off, export a saved game, or quit to the main menu.
The acorn with the eye icon is the "Spot" tool.
Click the Spot tool to view any active areas in the game that you can click to interact with, indicated by a white circle.
The acorn with the map icon is, of course, the Map button.
Click the map button to view your current location, indicated by a black spot, and a map of all other previously discovered locations.
You can also click a discovered location on the map to travel there automatically.
The acorn with the swirl acorn is the Mind button.
This is where you can collect tiles representing your Thoughts and organize them into a complete image.
The further you progress through the game, the more Thoughts you will collect by completing important actions.
The acorn with the bag icon is the Inventory button.
Click the Inventory button to view all items you are currently carrying.
Necessary Words Locations
Sentence 1
Family - Located on the Ship's Bow. Talk to the man operating the crane mechanism.
Tradition - Located on the Ship's Stern. Talk to the man with the red hair putting clouds in a barrel.
Bedding - Located on the Ship's Stern. Talk to the man sitting at the table wearing a hat.
Sentence 2
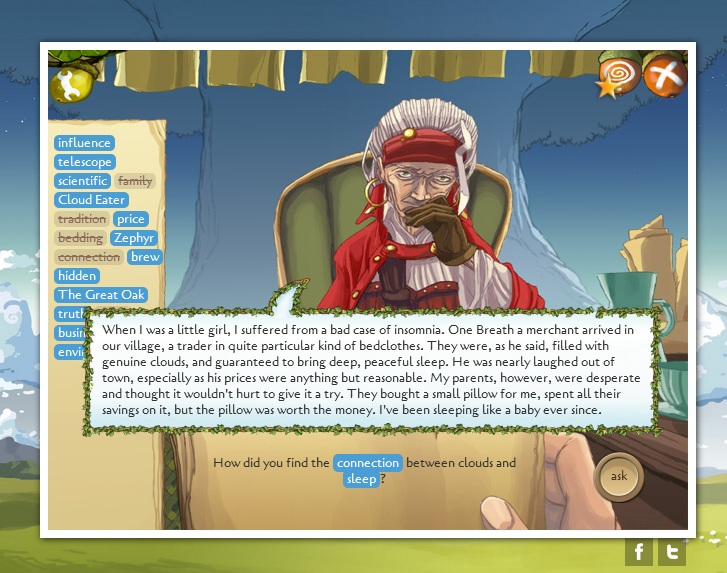
Connection - Located at the Cliff. Examine the point where the bottoms of the two walls of the ravine meet.
Sleep - Located on the Ship's Bow. Touch the cloud floating above the bow to speak to the man with the net.
Sentence 3
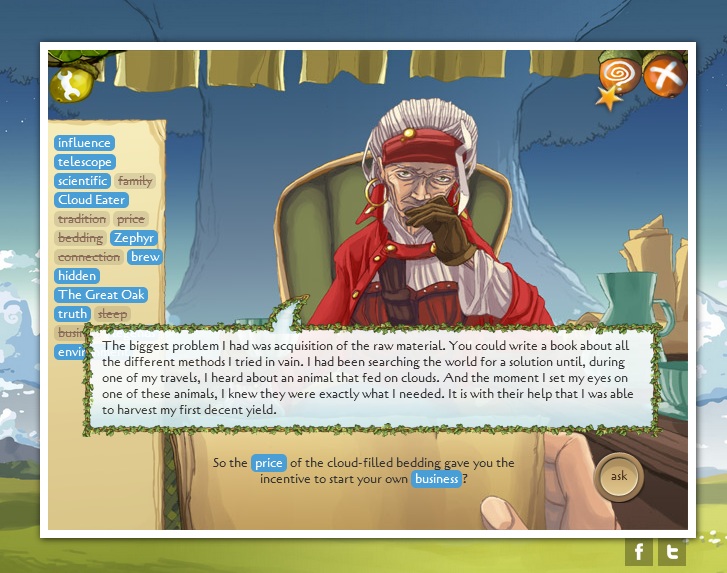
Price - Located on the Ship's Stern. Talk to the young man carrying a basket of clouds.
Business - Located at the Dig Site. Examine the area between the hole in the ground and the yellow canopy.
Sentence 4
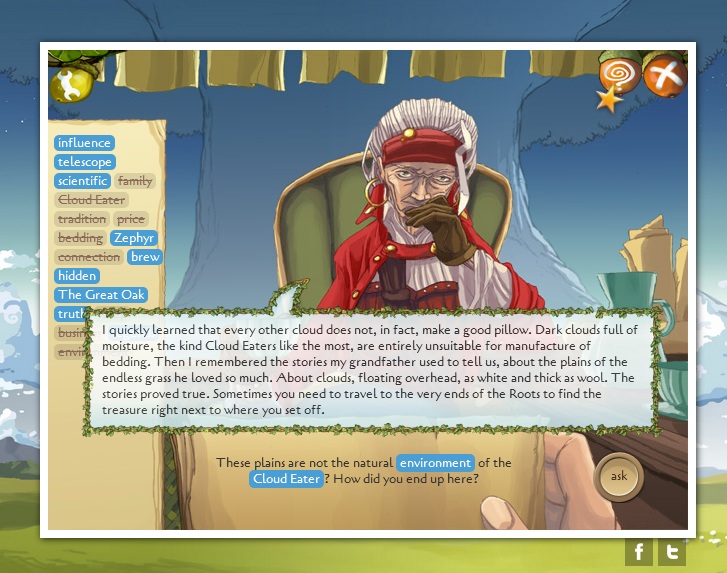
Environment - Located at the Floating Rock Peak. Examine the nest on top of the platform.
Cloud Eater - Located at the Ship's Bow. Talk to the woman steering with the cloud eater's reins.
Sentence 5
Scientific - Located at the Ship's Deck. Talk to the seated woman sorting the clouds.
Influence - Located at the Ship's Deck. Talk to the man with the mop scrubbing the deck.
Sentence 6
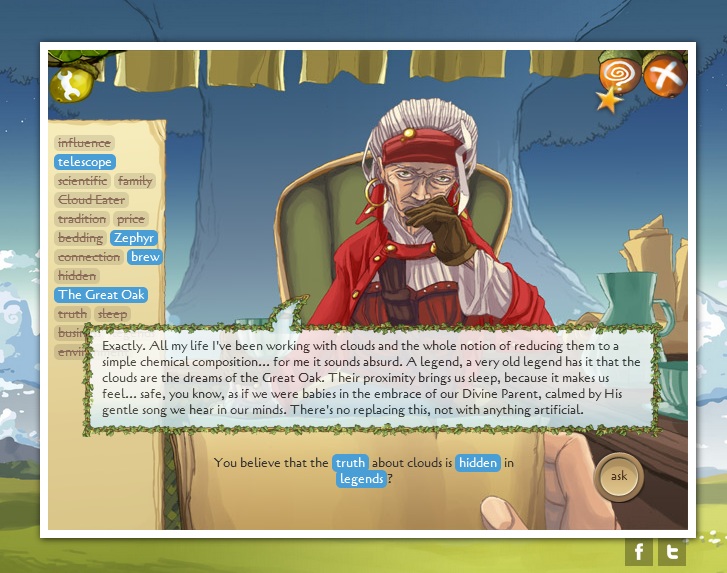
Truth - Located at the Hidden Room. Examine the glowing swirl design on the floor.
Hidden - Located at the Bedroom. Examine the chest at the lower right corner of the room.
Legends - Located at the Wiseman Peak. Examine the Wiseman meditating on the platform.
Thoughts Location
Thought 1/18 is found by picking up the Embroidered Cloth 1/5 on the Ship's Deck.
Thought 2/18 is found by taking a close look at the framed picture on the floor of the Captain's Quarters.
Thought 3/18 is found by approaching the excavated area at the Dig Site.
Thought 4/18 is found by picking up the Embroidered Cloth 2/5 at the Four Large Stones.
Thought 5/18 is found by reading the mineralogy book on the table at the Wiseman's Cave.
Thought 6/18 is found by reading the label on the hat in the chest at the Bedroom.
Thought 7/18 is found by picking up the Embroidered Cloth 3/5 at the Bedroom.
Thought 8/18 is found by talking to the Wiseman at Wiseman Peak.
Thought 9/18 is found by picking up the Embroidered Cloth 4/5 at the Cliff.
Thought 10/18 is found by picking up the Embroidered Cloth 5/5 at the Hidden Room.
Thought 11/18 is found by watching the movie from the projector at the Workshop.
Thoughts 12-17/18 are found by completing all of the sentences in the captain's story at the Captain's Quarters.
Thought 18/18 is found by measuring the stone at the Four Large Stones.
Part 1
Grassy Hills
Take the Floating Rock 1/4 hovering over the grass.
Walk to the tree in the distance to travel to the next location.
Lone Tree
Note that there is a second floating rock in the air, beyond your reach.
Travel towards the tall shadow in the distance to the left to reach the Cloud Eater, then climb up the ladder on its side to reach the Deck of the Cloud Collector's Ship.
Ship's Deck
Talk to the man with the mop scrubbing the deck.
Select the blue highlighted section in the sentence to learn the word "Influence".
Talk to the large pirate under the crane.
Select the blue highlighted section in the sentence to learn the word "Telescope".
Talk to the seated woman sorting the clouds.
Select the blue highlighted section in the sentence to learn the word "Scientific".
Go up the rope ladder to travel to the Ship's Bow.
Ship's Bow
Take the cloud-catching Net sticking straight up at the side of the bow.
Use the Net from your inventory on the cloud floating above the bow to gather a bag of Raw Cloud.
Touch the cloud to speak with the man with the net.
Select the blue highlighted section in the sentence to learn the word "Sleep".
Take the piece of Embroidered Cloth 1/5 hanging above the head of the woman steering the creature.
You will also receive a new Thought 1/18 in your Mind.
Speak with the woman at the reins.
Select the blue highlighted section in the sentence to learn the words "Cloud Eater".
Talk to the man operating the crane.
Select the blue highlighted section in the sentence to learn the word "Family".
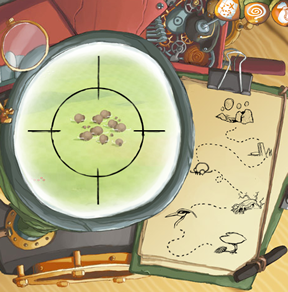
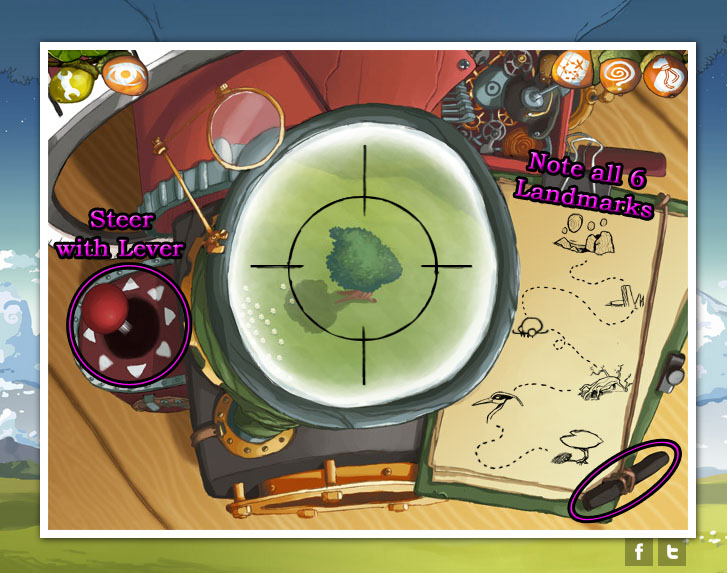
Look inside the telescope to get a view of the landscape.
Operate the telescope by clicking and dragging the lever in the direction you want to move the scope.
There are 6 necessary landmarks you need to spot with the telescope.
Each time you find a landmark, use the piece of charcoal attached to the clipboard to jot it down.
Start by moving the telescope all the way to the lower left corner to find your cart: you'll also earn the achievement "Caught Red Handed".
The first important landmark is the area of floating rocks near the upper left corner.
Move the telescope right and then down to find the next landmark, the tall rocks.
Move the telescope left and down to find the next landmark, a herd of buffalo.
Move the telescope right and down to find the next landmark, the dead tree.
Move the telescope left and down to find the next landmark, a flock of birds.
Move the telescope to the lower right corner to find the final landmark, the lone tree.
Solution.
After you've completed surveying the landscape, go back down to the Ship's Deck.
Ship's Bow
Give the Raw Cloud from your inventory to the woman sorting clouds to start the puzzle.
This puzzle is exactly like a game of Mahjong: to solve it, you must match pairs of identical tiles, which will then go into one of the four baskets.
Only free tiles can be removed from the board, meaning it cannot be blocked by other tiles at its sides, nor can it be directly underneath another tile.
Click one free tile to select it (it will be highlighted under your cursor) then click another free tile to make a matching pair.
Solution Part 1.
Solution Part 2.
After the puzzle is solved, the Raw Cloud in your inventory will become Sorted Cloud.
Go down to travel to the Ship's Stern.
Ship's Stern
Talk to the red haired man putting clouds in the barrels.
Select the blue highlighted section in the sentence to learn the word "Tradition".
Talk to the young man in front of you holding a basket of clouds.
Select the blue highlighted section in the sentence to learn the word "Price".
Talk to the man at the table wearing a hat.
Select the blue highlighted section in the sentence to learn the word "Bedding".
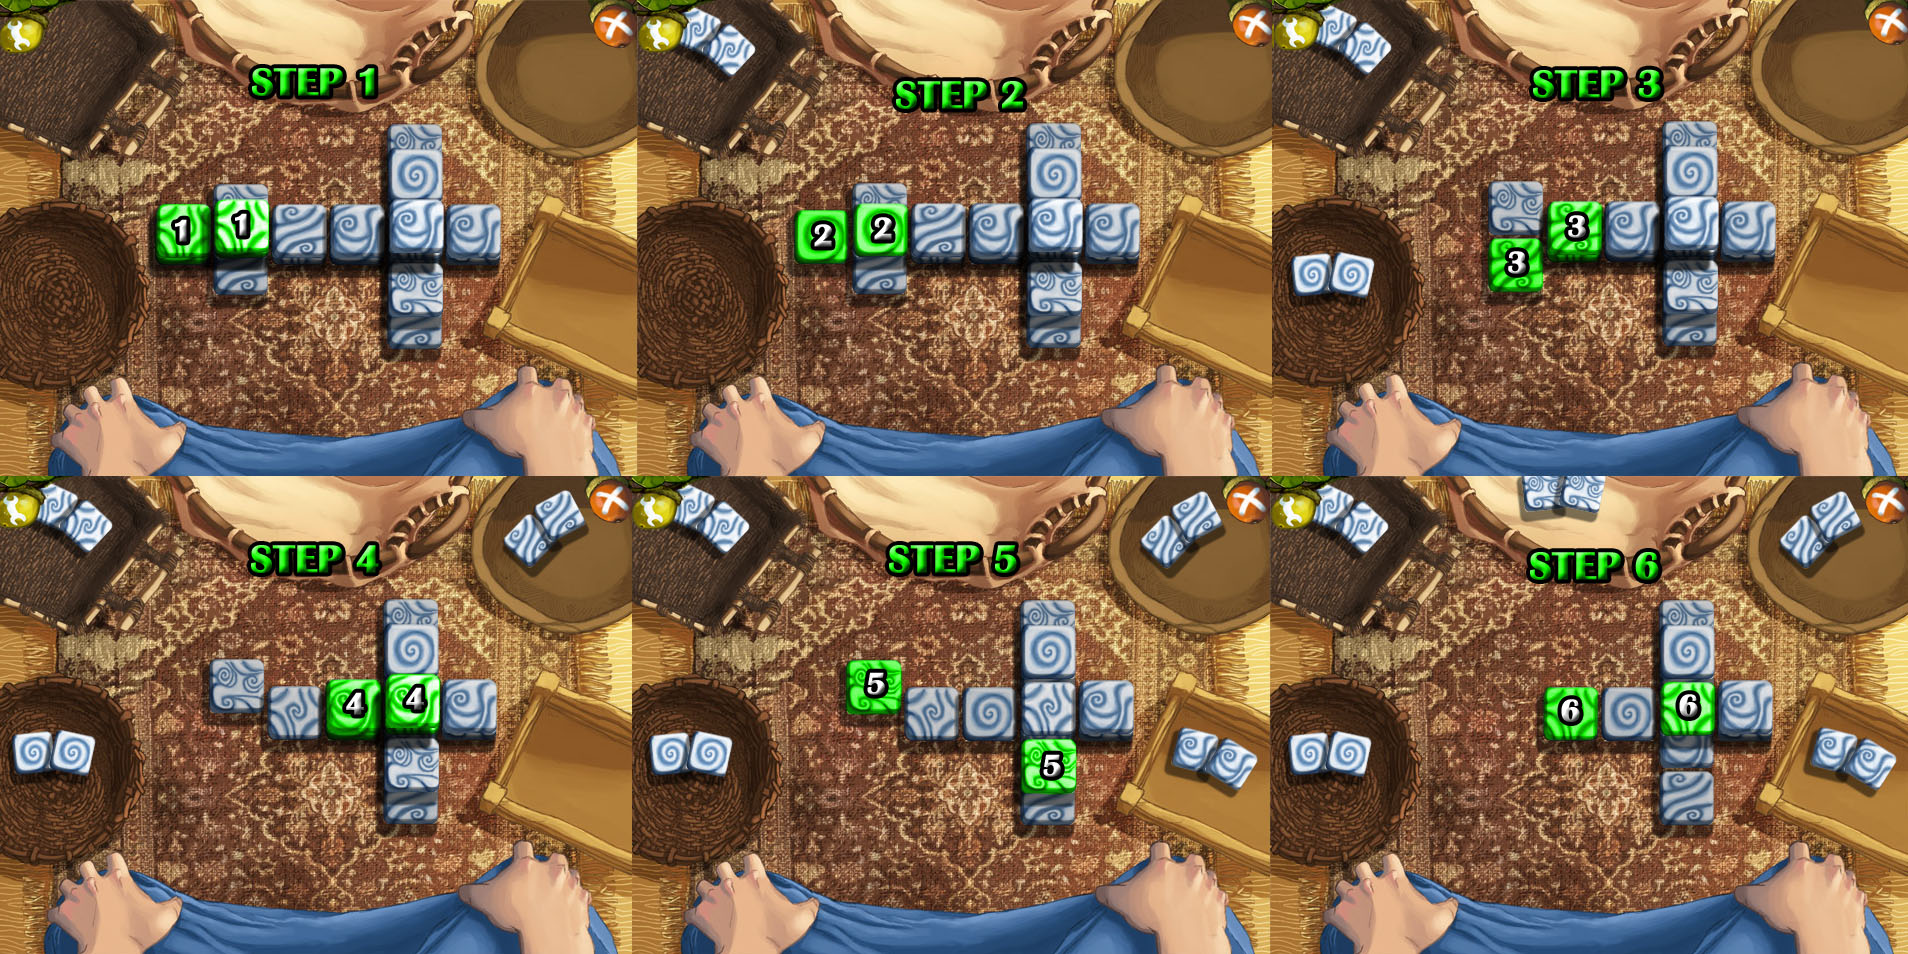
Give the man at the table the Sorted Cloud from your inventory to start the puzzle.
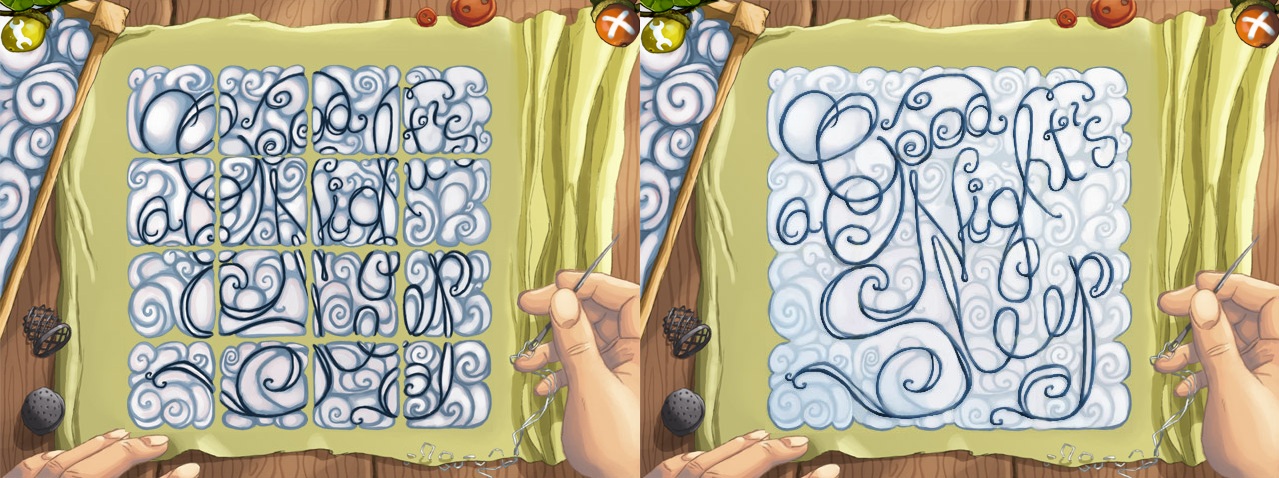
Rotate the tiles to complete the stitched message.
Click a square to rotate it 90 degrees clockwise.
Note the connecting lines and swirls of the pattern of the lettering inside the square and the shape of the clouds around the square's border to find each tile's proper position.
Solution.
The Pillow will be added to your inventory after the puzzle is solved.
Go up the steps to the Captain's Quarters.
Captain's Quarters
Take the Empty Lamp on top of the table.
Look closely at the framed image on the floor.
You will receive a new Thought 2/18 in your Mind.
Leave the ship and go back to the Lone Tree.
Part 2
Lone Tree
Use the Net from your inventory to catch the Floating Rock 2/4 hovering in the air.
Click the giant floating rocks in the distance to the right to reach the Empty Field.
Empty Field
Click your cart in the middle of the field and select "Walk to".
If you've completed the telescope puzzle, it will take you to the Floating Stones.
Floating Stones
Take the small Floating Rock 3/4 hovering near the lower right corner of the area.
Click the yellow canopy in the distance to travel to the Dig Site.
Dig Site
Push over the pile of sticks leaning against the side of the rock.
Take the revealed Hatchet between the sticks.
Take the small Floating Rock 4/4 hovering in the upper left area.
Examine the area between the excavated area and the yellow canopy.
Select the blue highlighted section in the sentence to learn the word "Business".
Click the excavated area in the ground beside the giant stone to approach it.
You will receive a new Thought 3/18 in your Mind.
Take the Stethoscope lying in the dirt.
Read the piece of paper lying on the ground, then pick it up to add Torn Page V to your inventory.
Go back to the main area of the dig, then continue right to the Four Large Stones.
Four Large Stones
Take the piece of Embroidered Cloth 2/5 lying on the ground near the lower right corner.
You will also receive a new Thought 4/18 in your Mind.
Go back to the Floating Stones, then click the giant stone split in half to travel to the Clefted Rock.
Clefted Rock
Examine your cart at the end of the path.
Select the blue highlighted section in the sentence to learn the word "Zephyr".
Click the single floating rock at the bottom of the rock and select "Use Item" to add the four Floating Rocks from your inventory.
Climb up the steps of floating rocks to reach the Cliff.
Cliff
Read the piece of paper sitting on the outcrop in the middle of the ravine, then take it to add Torn Page II to your inventory.
Examine the touching walls at the bottom of the ravine.
Select the blue highlighted section in the sentence to learn the word "Connection".
Go through the yellow curtain on the left to enter the Wiseman's Cave.
Wiseman's Cave
Read the piece of paper over the journal on the ground, then take it to add Torn Page VI to your inventory.
Examine the scrolls inside the alcove in the wall.
Select the blue highlighted section in the sentence to learn the word "Brew".
Take the jar of Oil lying at the bottom of the steps.
Combine the Oil with the Empty Lamp in your inventory to complete the Lit Lamp.
Look closely at the open mineralogy book on top of the table.
You will receive a new Thought 5/18 in your Mind.
Go up the stairs to the Bedroom.
Bedroom
Read the piece of paper lying on the ground, then pick it up to add the Torn Page IV to your inventory.
Examine the chest in the lower right corner of the room.
Select the blue highlighted section in the sentence to learn the word "Hidden".
Open the chest, then take a closer look.
Read the label on the side of the pointed hat.
You will receive a new Thought 6/18 in your Mind.
Take the piece of Embroidered Cloth 3/5 covering the window.
You will also receive a new Thought 7/18 in your Mind.
Click the window to look outside.
Climb up the rope hanging above the window to reach the Clefted Rock Peak.
Clefted Rock Peak
Use the Hatchet from your inventory on the tangled coil of rope.
The rope will fall to the ground and the hatchet will break off the handle, leaving the Axe Blade in your inventory.
Cross the rope bridge to travel to the Floating Rock Peak.
Floating Rock Peak
Examine the nest on the platform.
Select the blue highlighted section in the sentence to learn the word "Environment".
Now click the nest to take a closer look.
Take the Knotted String entwined with the branches in the nest.
Examine the trunk of The Great Oak in the distance.
Select the blue highlighted section in the sentence to learn the words "The Great Oak".
Cross the next rope bridge to travel to the Wiseman Peak.
Wiseman Peak
Examine the Wiseman meditating on the platform.
Select the blue highlighted section in the sentence to learn the word "Legends".
Try to talk to the sleeping Wiseman.
You will receive a new Thought 8/18 in your Mind.
Go back to the base of the Clefted Rock.
Clefted Rock
Pick up the piece of Rope on the ground that fell from the peak.
Combine the Rope with the Axe Blade in your inventory to complete the makeshift Grappling Hook.
Climb up to the Cliff.
Cliff
Use the Grappling Hook from your inventory on the red cloth covering the right cave entrance to create a path over the ravine.
Take the piece of Embroidered Cloth 4/5 hanging over the edge of the right cliff.
You will also receive a new Thought 9/18 in your Mind.
Enter the right cave to reach the Workshop.
Part 3
Workshop
Take the Graduated Cylinder on the floor.
Read the piece of paper in the middle of the ground, then pick it up to add Torn Page I to your inventory.
Open the small drawer in the work table, then click the drawer to look inside.
Take the colored Glass Panes from the opened drawer.
Go back to the Bedroom inside the left cave.
Bedroom
Use the Graduated Cylinder from your inventory on the small spring at the back of the cave to receive a Cylinder with Water.
Return to the Workshop.
Workshop
Use the Cylinder with Water from your inventory on the liquid mechanism over the trap door to start the puzzle.
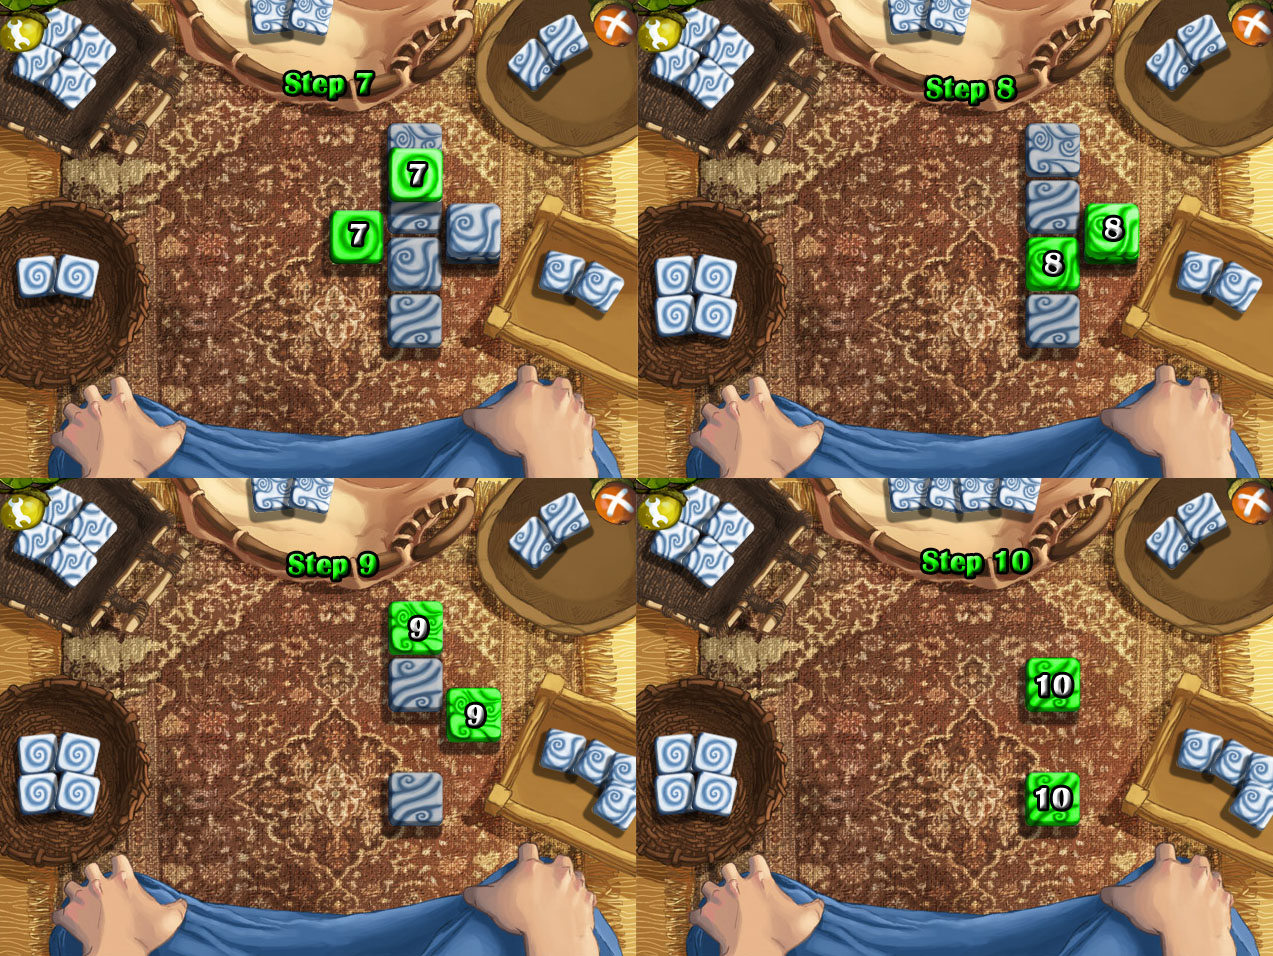
Using the clues written on the wall, correctly divide the 10 parts of water in the graduated cylinder into the four cups hanging from the mechanism.
Click a cup to select it, then choose "Pour In" to add water or "Pour Out" to remove water.
The message on the wall says: "The first (on the left) should be twice as heavy as the last (on the right) which should weigh more than the second."
Since the sum of the parts must equal 10, the only possible solution is:
First Cup = 4
Second Cup = 1
Third Cup = 3
Fourth Cup = 2
Solution.
After the puzzle is solved, go down the revealed stairs into the Hidden Room.
Hidden Room
Pick up the piece of Embroidered Cloth 5/5 lying on top of the steps.
You will also receive a new Thought 10/18 in your Mind.
Examine the lit swirl design on the floor.
Select the blue highlighted section in the sentence to learn the word "Truth".
Go back to the Workshop.
Workshop
Replace the broken lantern on the stand of the projector at the lower left corner with the Lit Lantern from your inventory.
Add all five Embroidered Cloth triangles from your inventory to the rack at the end of the projector.
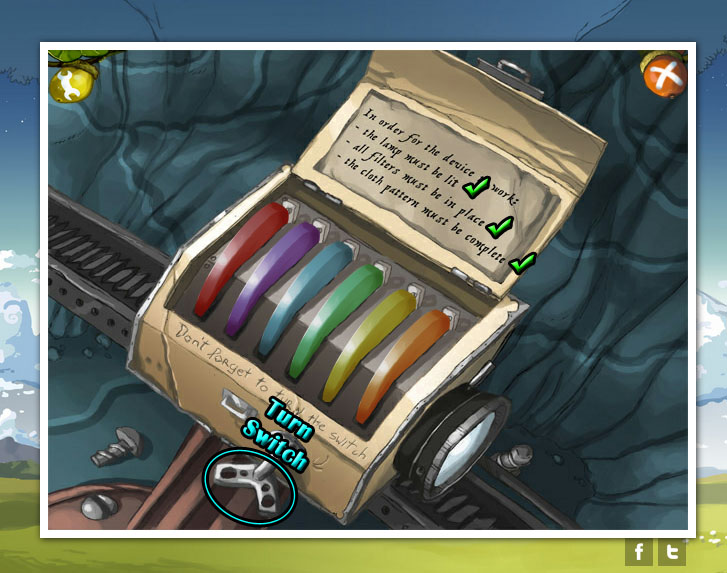
Use the Glass Panes from your inventory on the filter box.
Place the glass panes from your inventory into the slots in the correct order.
Use the clues from the Torn Pages in your inventory to find the answer.
Note the first letter of every word on each torn page is in bold lettering.
Read each bold letter from top to bottom to find the hidden word.
Combine the hidden word with the Roman numeral at the bottom of the page to put the words in order.
Page 1 - Red
Page 2 - Purple
Page 3 is missing, but the last remaining color is Blue.
Page 4 - Green
Page 5 - Yellow
Page 6 - Orange
Insert the glass panes from left to right in that order, then flip the switch to start the machine.
If the machine doesn't start, check the list at the top of the filter box to make sure you've completed all three steps correctly.
Solution.
If the machine is correctly assembled, the projector will display a movie on the cave wall.
You will also receive a new Thought 11/18 in your Mind.
Use the Map to travel to the Captain's Quarters.
Captain's Quarters
Ask the captain for a story to start the conversation.
Use the words you've found throughout your journey to fill in the blanks of the sentences.
Click a blank space to select it, then click a word from the list to insert it into the space.
Sentence 1.
Sentence 2.
Sentence 3.
Sentence 4.
Sentence 5.
Sentence 6.
For each of the six questions, you will receive a new Thought 17/18 in your Mind.
Use the Map to travel to the Four Large Stones.
Four Large Stones
Use the Knotted String from your inventory to measure the second floating stone from the right.
You will receive a new Thought 18/18 in your Mind.
Now that you've collected all of the thoughts, click the Mind button to start the puzzle.
Arrange each tile representing one of the 18 thoughts in the three rings of the circle to complete the image.
Click a space in a ring to select it, then choose a tile from the list to place it on the ring.
Solution.
Once the puzzle is solved, use the Map to return to the Hidden Room inside the right cave.
Hidden Room
Place the Pillow from your inventory on top of the glowing swirl pattern on the ground.
Use the Stethoscope from your inventory with the pillow on the ground.
Go to the Bedroom inside the left cave.
Bedroom
Click the Wiseman to speak with him (Talk like Yoda, he does.)
You can also choose to ask the Wiseman a question.
Type in a word in the blank space to ask him about a number of topics.
Although it isn't necessary to complete the game, you can learn more about the story.
Words that the Wiseman will respond to include (but may not be limited to):
Me/Myosotis
Past/Truth
Girl/Vision/Future
Egg/Nest
Bird
Game
Music
Oak/Creator
Captain/Catchers
Granddad/Grandpa
Cloud
Floating/Flying/Falling
Stone/Rock
Force
Sleep/Connection/Trance
Cloth
Design/Spiral/Circle
Notes/Journal/Pages/Notebook
Rudowski/Rudowscy/Authors/Brothers
Thanks, Swami and coolsonh, for some of the suggestions!
If you try to use the Map to travel to the Cloud Eater's Ship, you will find that they are long gone.
You can also choose to go back to the Four Large Stones to remeasure the floating stone with the Knotted String.
If you choose to reach the end of the game, travel to the Lone Tree.
Lone Tree
Walk towards the large object in the distance to the left to find Zephyr.
Click Zephyr to travel away.
Posted by: Trinn |
May 31, 2012 7:41 PM
|
May 31, 2012 7:41 PM