JayisGames.com is now available ad-free!
Jay is Games recommends Cheat Happens with 8,000+ games and 35,000+ trainers!

Dibbles: For the Greater Good


  • Currently 4.5/5
  • 1
  • 2
  • 3
  • 4
  • 5
Rating: 4.5/5 (371 votes)
Comments (9) | Views (10,016)

MikeDibbles: For the Greater GoodFor the Greater Good! By which I mean my good. For I am Greater; greater than you, my fellow (though inferior) bipedal arthropods. You can tell because I'm the one sporting the jeweled crown and the purple-and-ermine cloak. Seriously, do you know how hard it is to find ermine in my size? Clearly the one who can wrangle such sartorial finery is the one who must survive the trek from one perilously located toadstool hut to the other, even if that means that all of you lesser creatures must smash, break, and contort yourselves to provide the means for my safe arrival. I recommend you play Dibbles: For the Greater Good, a puzzle arcade game from The Podge Studios, to accustom yourselves to the idea of your noble sacrifice on my behalf.

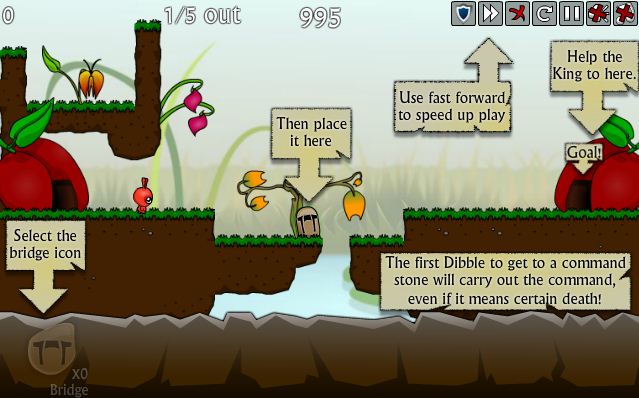
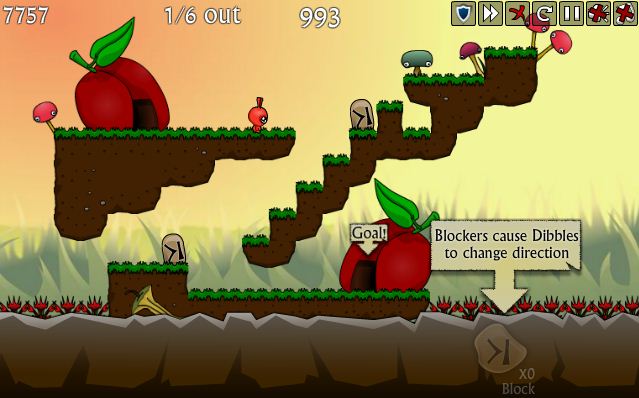
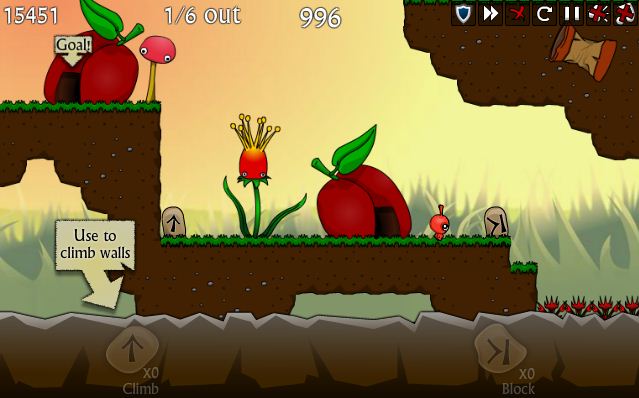
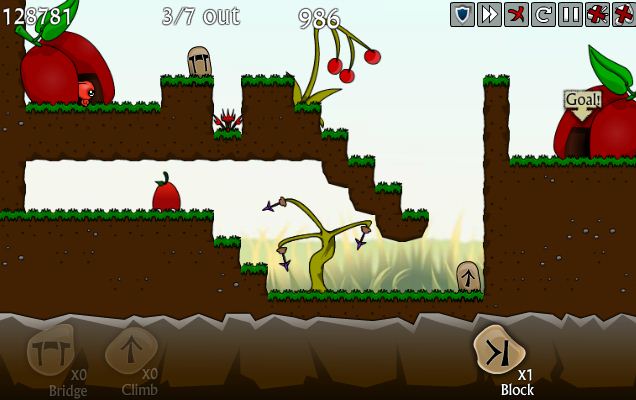
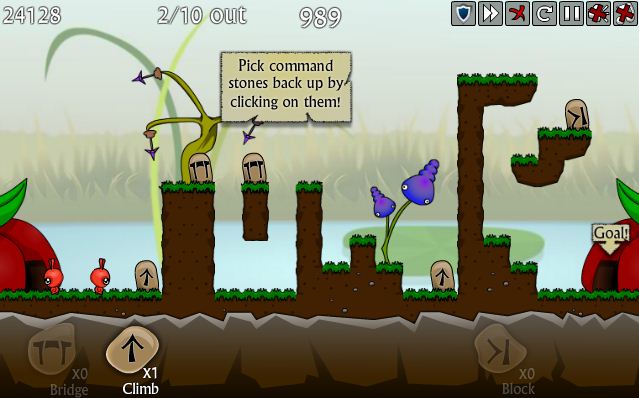
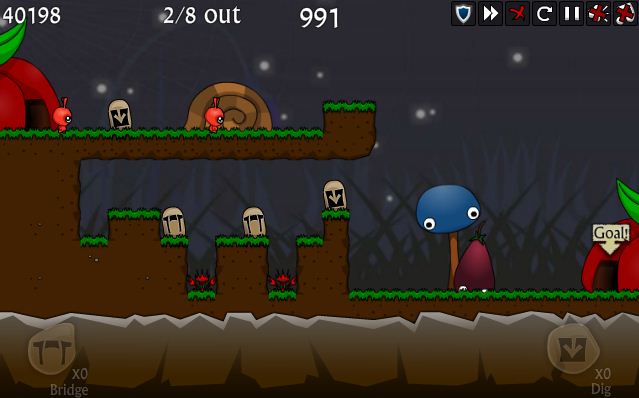
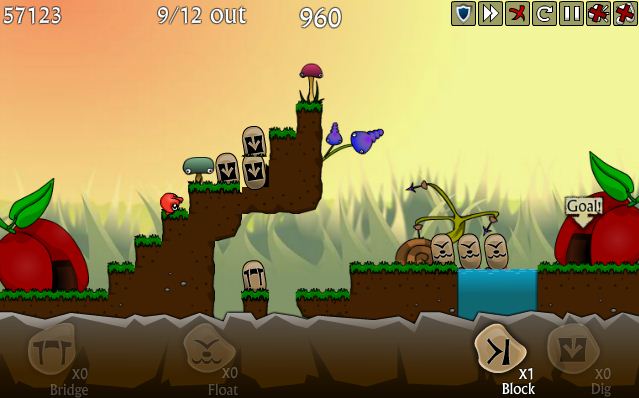
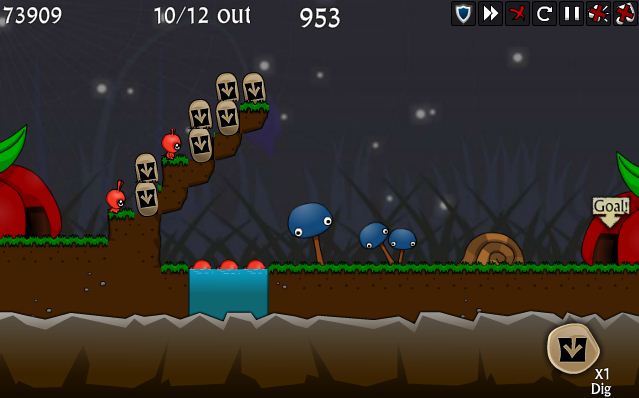
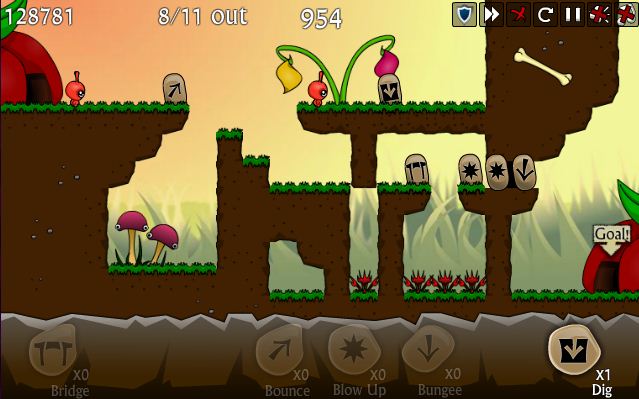
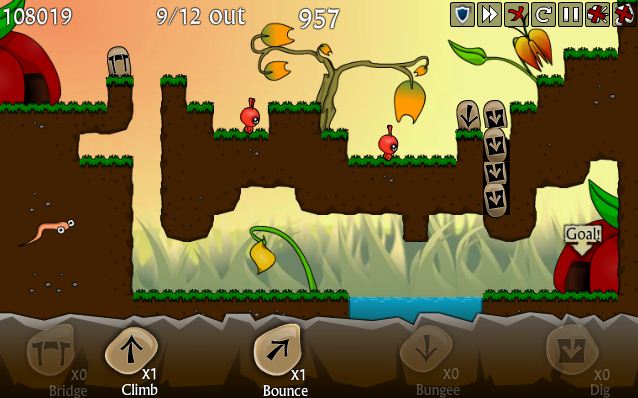
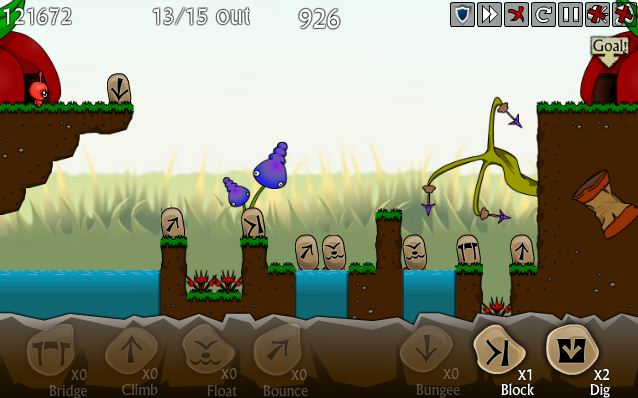
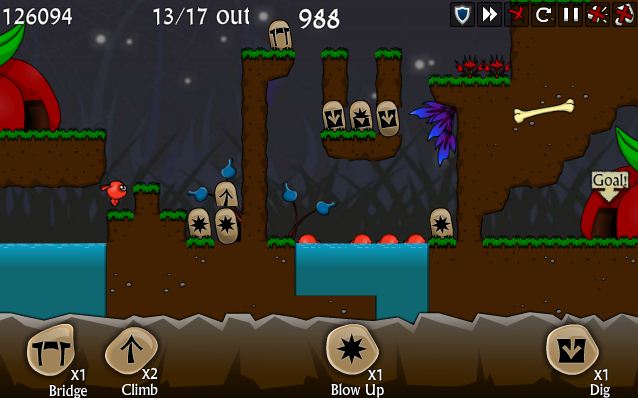
Anyone who has ever played the classic PC game Lemmings will recognize the gameplay in Dibbles. In each level, a troop of marching ant-like critters (who I suppose are the eponymous Dibbles) must be ferried to the exit point with as little loss of life as possible, taking special care to spare the life of the chief monarch Dibble, who always enters the game last. To do this, select one of a limited number of commands available each level. This will tell one Dibble to perform one of several tasks; to turn into a bridge, springboard, or bungee chord, or to dig through terrain or block the path of other Dibbles. This sacrifices the Dibble in question, but allows for the survival of others. So far this is almost exactly like Lemmings, but there is one difference: While you issue commands to Lemmings by clicking on them, you order Dibbles about by placing the command where it should be executed on the screen. When any Dibble comes across a command marker, they carry out the command. To me this is a great improvement over the standard Lemmings formula, as my frustration was always with the unnecessary difficulty in clicking on the fast-moving Lemmings at the proper time. The Dibbles method seems so obviously better that I'm surprised it wasn't used originally.

The presentation in Dibbles is merely fair. Music and sound effects are rote, though they are easily muted. The artwork is cute and whimsical, but it's also a little crude. That said, I did enjoy the animation, particularly the various twisted ways your Dibbles off themselves as they carry out your orders. For most levels, the difficulty is mild, though there are a few challenges; and you can fast-forward through levels once you have all your command markers set, making each level pretty quick. The fun in Dibbles is in breezing through the levels and seeing what other gruesome tasks you can set your Dibbles to executing. All For The Greater Good, of course.

Play Dibbles: For the Greater Good

Walkthrough Guide


(Please allow page to fully load for spoiler tags to be functional.)

Dibbles Walkthrough
Hints

  • The objective is to save the king. Don't worry about saving Dibbles, but use them smartly. You only get a limited number.

  • Dibbles that bounce or fall into water will float.

  • You can place totems on a floating Dibble.

  • You can assign a task with a totem on the ground or clicking the totem directly on a Dibble.

  • Not all the items need to be used.

  • Some levels require you to place a totem beyond the landing zone of a bounce pad.

Levels

Level 1

A simple tutorial. Place the bridge totem where the game indicates.
Solution

Level 2

Place three bridge totems next to each of the thorny gaps.
Solution

Level 3

Use a block totem across the gap.
Solution

Level 4

Use two block totems to redirect the Dibbles, then two bridge totems to cross the gaps.
Solution

Level 5

Use a block totem to redirect the Dibbles, then a climb totem to get them up the cliff.
Solution

Level 6

Place a bridge totem by the gap. Place a climb totem at the bottom of the cliff.
Solution

Level 7

Use a climb totem to get up the cliff, then two bridge totems to cross the gaps. Use another climb totem to get up the second cliff, and a block totem to redirect the Dibbles.
Solution

Level 8

Use two bridge totems to get over the gap, then one bounce totem to get across the big gap.
Solution

Level 9

Use two climb totems to get up the cliffs, then a bounce totem at the top of the cliff. Place a block totem at the far end to redirect the Dibbles.
Solution

Level 10

Place a dig totem next to the first low cliff, then place another dig totem at the end of the gap in the lower level. Place a climb totem to get up the high cliff.
Solution

Level 11

Place a dig totem just after the lower area starts. Place two bridge totems to cross the gaps, then another dig totem at the edge past the gaps.
Solution

Level 12

Use three dig totems to dig steps down to the lower level. Then use two bounce totems and a bridge totem to cross the gaps.
Solution

Level 13

Use three dig totems to create steps down, then use two bridge totems to cross the gaps. Use a climb totem to get up the cliff.
Solution

Level 14

Use three float totems and a bounce totem to cross the gap. Place the new totem on top of the floating Dibbles.
Solution

Level 15

Use a bounce totem to cross the first pool and two float totems to cross the second. Please once bounce and one block totems at the bottom edge of the cliff. Place a climb totem at the bottom edge of the higher cliff. Use five bridge totems to cross the gaps at the top.
Solution

Level 16

Use three dig totems to carve steps. Place a bridge totem next to the bottom gap and use three float totems to cross the water. Place the new totem on top of the floating Dibbles.
Solution

Level 17

Use a climb totem to get up the first cliff, then a bungee totem to go down the other side. Place a bounce totem next to the water.
Solution

Level 18

Use a bungee totem at the edge of the cliff, then a bounce totem. Place a second bounce totem on the floating Dibble (after it uses the bounce pad). Place a third bounce pad on the edge of the small piece of land.
Solution

Level 19

Use a climb totem to get up the cliff, then place a bounce totem in the corner, not next to the edge. Place another jump pad on the edge of the higher cliff. Place a third bounce totem at the right edge of the tall cliff and use a block totem on the third cliff to redirect Dibbles.
Solution

Level 20

This is all about timing. You objective is to fill the bottom lake with three floating Dibbles. Use dig totems to cut away the dirt to allow a Dibble to fall in the right spot. Then use two dig totems to cut steps at the bottom of the incline.
Solution

Level 21

Use a bungee totem to reach the bottom, then place five float totems at the water to cross it. Place the new totem on top of the floating Dibbles. Place a bounce totem on the final floating Dibble.
Solution

Level 22

Use a bounce totem to reach the higher area, then a bungee totem to reach down to the water. Use a float totem on the third Dibble to complete the floating bridge over the water. Use two bounce totems to cross the gaps.
Solution

Level 23

Place a climb totem by the first cliff. At the top, place a dig totem. At the next cliff, place a blow-up totem, then use two dig totems. Use a blow-up totem on the last cliff.
Solution

Level 24

Place a bounce totem at the edge of the cliff. Place a dig totem on the next cliff and a bridge totem next to the gap below. Use two blow-up totems on the far wall, then a bungee totem.
Solution

Level 25

Place two dig totems on the highest area, then use a bungee totem.
Solution

Level 26

Place a bounce totem at the edge of the cliff and a dig totem on the distant outcropping. Use two dig totems before the bounce totem and then place a bounce totem on the lower outcropping.
Solution

Level 27

Place a dig totem at the far end of the top landing. Place a second dig totem against the edge of the gap on the second landing. Use blow-up totems on the two bottom cliffs.
Solution

Level 28

Place a bridge totem by the first gap. Use three dig totems at the bottom of the stairway on the far right, then place a bungee totem.
Solution

Level 29

Use a dig totem on the top landing, then a block totem on the lower landing. Place another block totem at the far left of the lower landing, then use two blow-up totems to tunnel through. Use three float totems at the water and a bridge totem on the final gap.
Solution

Level 30

Use bridge totems to cross the first two gaps. At the third gap place a dig totem. After a Dibble falls into the water, place a blow-up totem. Place a float totem in the new gap and then a climb totem on the floating Dibble. Use a bridge totem at the top gap.
Solution

Level 31

Let a Dibble drop through the top gap, then place a bridge totem there. Place a blow-up totem in the far right top gap. Let a Dibble fall through that gap to float, then place a dig totem at the end of the first landing. After a dibble drops down the right of the lower landing, place a block totem there. Let a Dibble drop down the left of the lower landing, then place a bridge totem. Place three float totems next to the water.
Solution

Level 32

Place a bungee totem at the edge of the first landing. Place a bounce totem on the first pillar of the lower landing. Place a float totem on the floating Dibble and a block totem on the second pillar. Place a bounce totem on the new floating Dibble. Place another float totem on the third floating Dibble. Use a bridge totem to cross the gap and a climb totem next to the cliff.
Solution

Level 33

Place a climb totem next to the cliff. Place a bridge totem next to the gap. Allow a Dibble to drop down the left of the landing below the chute, then place a dig totem on the left edge. After a Dibble drops down again, place a blow-up totem on the left edge. Allow a Dibble to drop off the gap on the right of this landing, then place a dig totem on the right edge. After another Dibble drops down, use a dig totem on the final piece of the landing. Place a blow-up totem on the lower area next to the climb totem. Use another blow-up totem to open the gap to the water. Use a third blow-up totem to open up the final pillar.
Solution

9 Comments

mr1black June 13, 2011 4:22 PM

I'm very conflicted about this game. I loved the idea behind The Lemmings, and this modern rendition looks good and puzzle solving has that old-school charm I remember.
But as Mike said, sounds and music are sub par for a modern flash game and good call on age rating for animations. They're a bit disturbing imo - looking at tiny-pokemon-like creature smash itself into a fine paste to allow others to climb up a hill using it's goo as adhesive begs to ask a question why is everything else so totally cartoon-like.
Most of levels were a breeze, then L 26 got me thoroughly stuck.

Reply
mr1black June 13, 2011 4:37 PM

For those of you also stuck, here's some hints, if you don't want an answer in your face:

1. There's no way to make two consecutive jumps.
2. So

only logical thing is to make the jump over the smallest distance available

3. But

you can't make the jump from the lower left tile without some adaptation of the travel path

4. Which leads to only solution,

first you should make the jump from the rightmost upper tile, then dig down after jump, then dig two tiles before the first jump, and set the jump rune on the lower left tile, so dibbles can go to other side without problem and up the stairs to the home.

Reply

While it's fun, it really just makes me miss Lemmings all the more. Ah well.

Reply
chipmunk June 13, 2011 5:35 PM

Why do I have to press space bar to start the level, when everything else is done with the mouse? That's just irritating!

Reply
Rose West June 13, 2011 6:36 PM

I thought the artwork and music were great. The only slight quibble I have with it is that there aren't enough levels for my liking.

More of the same, please!

Reply

The ending was disturbing, for all the wrong reasons.

The whole game was the kings trip home from visiting his mom.

Reply

Dibbles Walkthrough
Hints

  • The objective is to save the king. Don't worry about saving Dibbles, but use them smartly. You only get a limited number.

  • Dibbles that bounce or fall into water will float.

  • You can place totems on a floating Dibble.

  • You can assign a task with a totem on the ground or clicking the totem directly on a Dibble.

  • Not all the items need to be used.

  • Some levels require you to place a totem beyond the landing zone of a bounce pad.

Levels

Level 1

A simple tutorial. Place the bridge totem where the game indicates.
Solution

Level 2

Place three bridge totems next to each of the thorny gaps.
Solution

Level 3

Use a block totem across the gap.
Solution

Level 4

Use two block totems to redirect the Dibbles, then two bridge totems to cross the gaps.
Solution

Level 5

Use a block totem to redirect the Dibbles, then a climb totem to get them up the cliff.
Solution

Level 6

Place a bridge totem by the gap. Place a climb totem at the bottom of the cliff.
Solution

Level 7

Use a climb totem to get up the cliff, then two bridge totems to cross the gaps. Use another climb totem to get up the second cliff, and a block totem to redirect the Dibbles.
Solution

Level 8

Use two bridge totems to get over the gap, then one bounce totem to get across the big gap.
Solution

Level 9

Use two climb totems to get up the cliffs, then a bounce totem at the top of the cliff. Place a block totem at the far end to redirect the Dibbles.
Solution

Level 10

Place a dig totem next to the first low cliff, then place another dig totem at the end of the gap in the lower level. Place a climb totem to get up the high cliff.
Solution

Level 11

Place a dig totem just after the lower area starts. Place two bridge totems to cross the gaps, then another dig totem at the edge past the gaps.
Solution

Level 12

Use three dig totems to dig steps down to the lower level. Then use two bounce totems and a bridge totem to cross the gaps.
Solution

Level 13

Use three dig totems to create steps down, then use two bridge totems to cross the gaps. Use a climb totem to get up the cliff.
Solution

Level 14

Use three float totems and a bounce totem to cross the gap. Place the new totem on top of the floating Dibbles.
Solution

Level 15

Use a bounce totem to cross the first pool and two float totems to cross the second. Please once bounce and one block totems at the bottom edge of the cliff. Place a climb totem at the bottom edge of the higher cliff. Use five bridge totems to cross the gaps at the top.
Solution

Level 16

Use three dig totems to carve steps. Place a bridge totem next to the bottom gap and use three float totems to cross the water. Place the new totem on top of the floating Dibbles.
Solution

Level 17

Use a climb totem to get up the first cliff, then a bungee totem to go down the other side. Place a bounce totem next to the water.
Solution

Level 18

Use a bungee totem at the edge of the cliff, then a bounce totem. Place a second bounce totem on the floating Dibble (after it uses the bounce pad). Place a third bounce pad on the edge of the small piece of land.
Solution

Level 19

Use a climb totem to get up the cliff, then place a bounce totem in the corner, not next to the edge. Place another jump pad on the edge of the higher cliff. Place a third bounce totem at the right edge of the tall cliff and use a block totem on the third cliff to redirect Dibbles.
Solution

Level 20

This is all about timing. You objective is to fill the bottom lake with three floating Dibbles. Use dig totems to cut away the dirt to allow a Dibble to fall in the right spot. Then use two dig totems to cut steps at the bottom of the incline.
Solution

Level 21

Use a bungee totem to reach the bottom, then place five float totems at the water to cross it. Place the new totem on top of the floating Dibbles. Place a bounce totem on the final floating Dibble.
Solution

Level 22

Use a bounce totem to reach the higher area, then a bungee totem to reach down to the water. Use a float totem on the third Dibble to complete the floating bridge over the water. Use two bounce totems to cross the gaps.
Solution

Level 23

Place a climb totem by the first cliff. At the top, place a dig totem. At the next cliff, place a blow-up totem, then use two dig totems. Use a blow-up totem on the last cliff.
Solution

Level 24

Place a bounce totem at the edge of the cliff. Place a dig totem on the next cliff and a bridge totem next to the gap below. Use two blow-up totems on the far wall, then a bungee totem.
Solution

Level 25

Place two dig totems on the highest area, then use a bungee totem.
Solution

Level 26

Place a bounce totem at the edge of the cliff and a dig totem on the distant outcropping. Use two dig totems before the bounce totem and then place a bounce totem on the lower outcropping.
Solution

Level 27

Place a dig totem at the far end of the top landing. Place a second dig totem against the edge of the gap on the second landing. Use blow-up totems on the two bottom cliffs.
Solution

Level 28

Place a bridge totem by the first gap. Use three dig totems at the bottom of the stairway on the far right, then place a bungee totem.
Solution

Level 29

Use a dig totem on the top landing, then a block totem on the lower landing. Place another block totem at the far left of the lower landing, then use two blow-up totems to tunnel through. Use three float totems at the water and a bridge totem on the final gap.
Solution

Level 30

Use bridge totems to cross the first two gaps. At the third gap place a dig totem. After a Dibble falls into the water, place a blow-up totem. Place a float totem in the new gap and then a climb totem on the floating Dibble. Use a bridge totem at the top gap.
Solution

Level 31

Let a Dibble drop through the top gap, then place a bridge totem there. Place a blow-up totem in the far right top gap. Let a Dibble fall through that gap to float, then place a dig totem at the end of the first landing. After a dibble drops down the right of the lower landing, place a block totem there. Let a Dibble drop down the left of the lower landing, then place a bridge totem. Place three float totems next to the water.
Solution

Level 32

Place a bungee totem at the edge of the first landing. Place a bounce totem on the first pillar of the lower landing. Place a float totem on the floating Dibble and a block totem on the second pillar. Place a bounce totem on the new floating Dibble. Place another float totem on the third floating Dibble. Use a bridge totem to cross the gap and a climb totem next to the cliff.
Solution

Level 33

Place a climb totem next to the cliff. Place a bridge totem next to the gap. Allow a Dibble to drop down the left of the landing below the chute, then place a dig totem on the left edge. After a Dibble drops down again, place a blow-up totem on the left edge. Allow a Dibble to drop off the gap on the right of this landing, then place a dig totem on the right edge. After another Dibble drops down, use a dig totem on the final piece of the landing. Place a blow-up totem on the lower area next to the climb totem. Use another blow-up totem to open the gap to the water. Use a third blow-up totem to open up the final pillar.
Solution

Reply

Thanks to mr1black for the hints on Level 26! That was the only level that gave me real trouble.

Level 28 I found a different solution to the one listed in the walkthrough. It's possible to

bounce across the bottom water hazard, but only if you've first used three Dig totems to get rid of the stalactite hanging down from the area above.

I also found different solutions for Level 23 and probably several others. In some cases it feels like I've (or the walkthrough-writer's) found a flaw in the puzzle, but in most cases it's just fun that there are different ways to solve it.

Graphics didn't bother me - well, at least, not in quality. The somewhat creepy way the Dibbles all sacrifice themselves was just as disturbing as it was intended to be, as was the closing message :) I play most flash games without sound so I can't comment on that either.

A fun little Lemmings-alike. It'd be nicer if they'd followed through with the principle more completely, so that you could place totems where currently can't be walked but shortly will be walkable.

Reply

Level 32 has a very short and easy solution.

Bounce on top of the cliff. Place a block on the landing point. After 1 step place a bounce. Climb the wall and you're done.

Reply

^ Scroll Up | Homepage >

Leave a comment [top of page]

Please consider creating a Casual Gameplay account if you're a regular visitor here, as it will allow us to create an even better experience for you. Sign-up here!
  • PLEASE UNDERSTAND SITE POLICIES BEFORE POSTING COMMENTS
  • You may use limited HTML tags for style:
    (a href, b, br/, strong, em, ul, ol, li, code, spoiler)
    HTML tags begin with a less-than sign: < and end with a greater-than sign: >. Always. No exceptions.
  • To post spoilers, please use spoiler tags: <spoiler> example </spoiler>
    If you need help understanding spoiler tags, read the spoiler help.
  • Please Preview your comment before posting, especially when using spoilers!
  • No link dropping, no domains as names; do not spam, and do not advertise! (rel="nofollow" in use)
chrpa Jayisgames needs your help to continue providing quality content. Click for details Welcome to the Roundup 66 - Retro with four games! After you find the ten monkeys in the chapter, look in the inventory. You will find a...  ...
chrpa Jayisgames needs your help to continue providing quality content. Click for details Welcome to the Roundup 65 with three games! As mentioned in the previous roundups, only odd-numbered episodes are featured since even-numbered are for Robin Vencel's patrons (the...  ...
chrpa Jayisgames needs your help to continue providing quality content. Click for details Hi! Weekday Escape and Weekday Puzzle are here! First we have two new cans from tomoLaSiDo and then two small rooms from isotronic. That's all for this...  ...
6,365 Views
0 Comments
chrpa Jayisgames needs your help to continue providing quality content. Click for details Welcome to Mobile Monday! We have another beautiful game from Nicolet and it's a winter game as it should be. Tasuku Yahiro have released another of their...  ...

HELP Jayisgames.com

Recent Comments


Display 5 more comments
Limit to the last 5 comments

Game of the week


Dark Romance: Vampire Origins Collector's Edition

Your Favorite Games edit

add
Save links to your favorite games here. Use the Favorites editor.

Monthly Archives